Data sources
Office 365 Outlook
The Office 365 Outlook data source lets you read the e-mails of a mailbox folder that is hosted on Microsoft 365. Sign-in uses modern Microsoft authentication (Microsoft Entra ID, OAuth) with a choice between a multi-tenant and a single-tenant application.
Setting up the data source
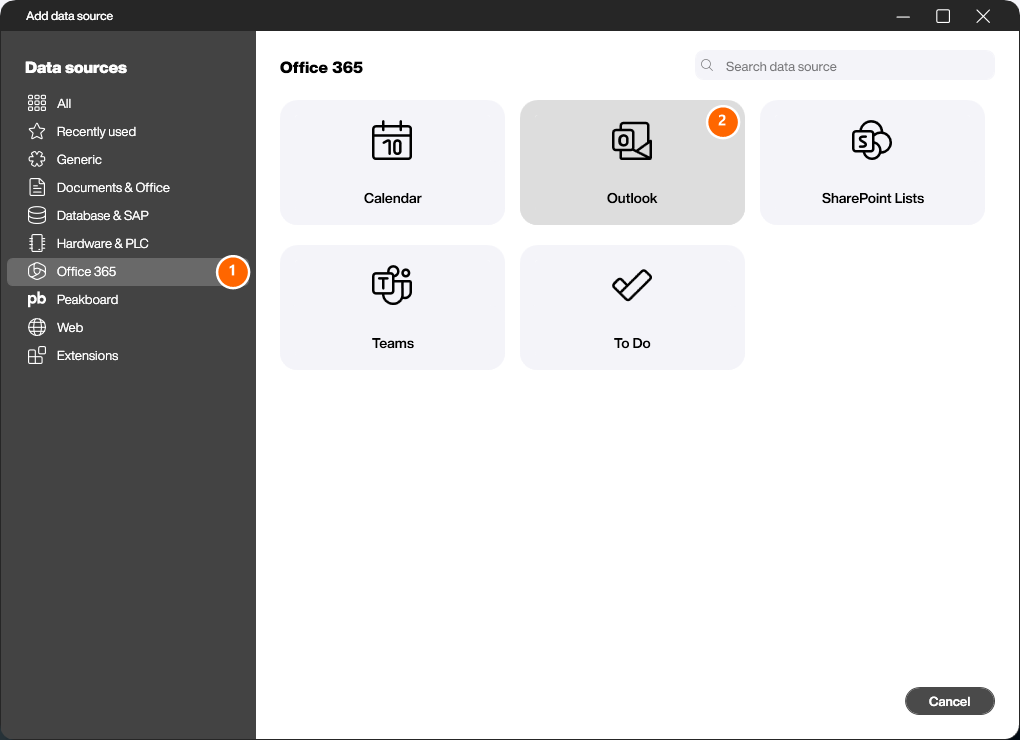
Right-click [Data] or click the […] button and choose [Add data source]. Switch to the [Office 365] category (1) and select the [Outlook] data source (2).
Configure the connection
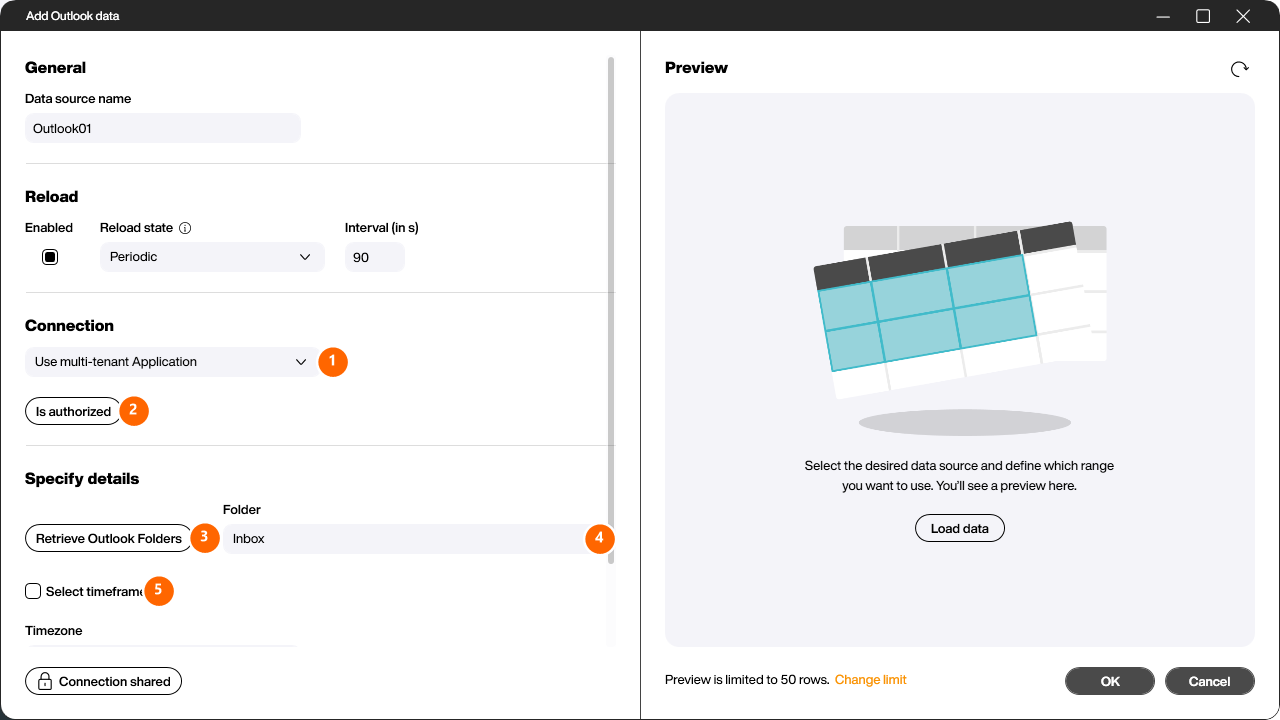
Give the data source a name, then set up the [Connection]. Picking the authorization method, signing in with [Authorize] and reusing an existing connection work the same for all Office 365 data sources and are described once here: Office 365 connection.
Specify details
Click [Retrieve Outlook Folders] (3) to load the folders of the mailbox, then choose the desired folder under [Folder] (4) – for example [Inbox], [Sent Items] or [Drafts]. Enable [Select timeframe] (5) to restrict the e-mails to a date range; otherwise a default range is used. With [Timezone] you set the time zone the received times are converted to. If you want to process the body of the e-mails as HTML formatting instead of plain text, enable the [Content as HTML] checkbox.
Load data
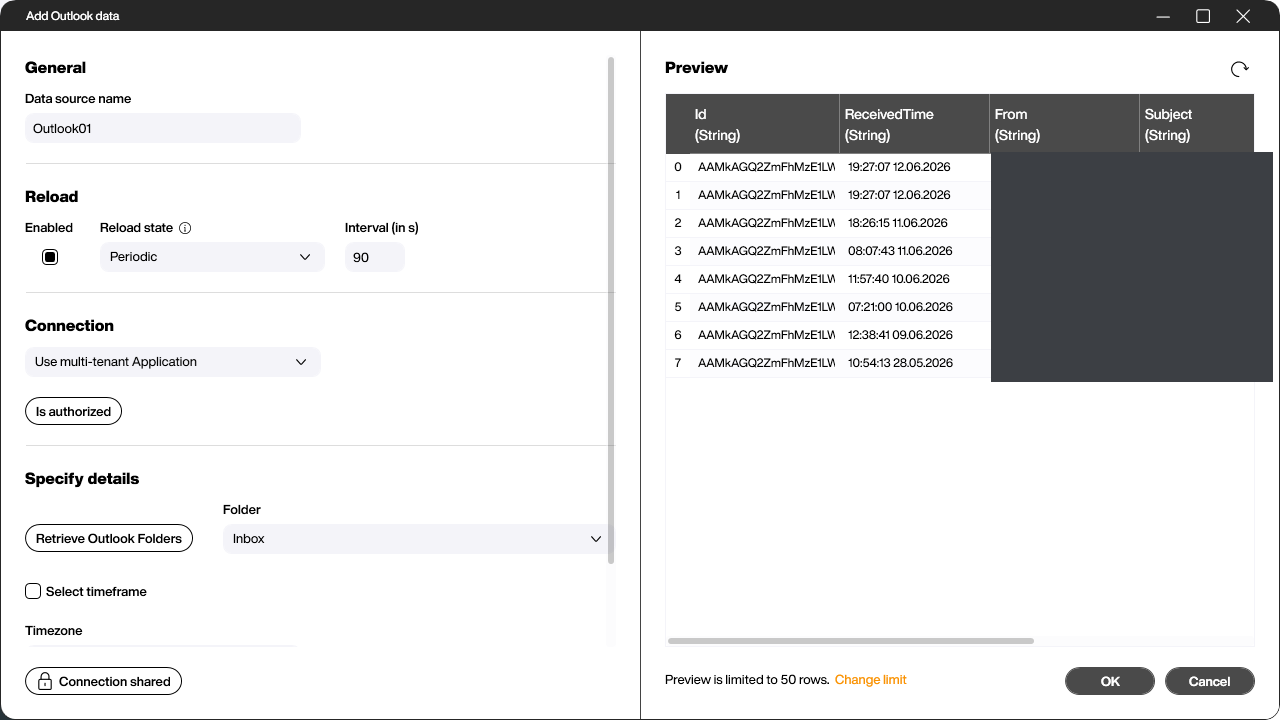
Click [Load data] to display the preview. The result is a list containing one line per e-mail, with columns such as [Id], [ReceivedTime], [From], [Subject], [To] and [Body] (the sender addresses and subjects are blanked out in this screenshot).
Click [OK] to create the data source. It then appears in the Explorer under [Data] and can be linked to controls like any other data source.