Scripting
Script Editor
For complex Lua scripts, the Peakboard Designer provides its own script editor. The figure below shows it with a timer script, but the layout is the same for every Peakboard script type.
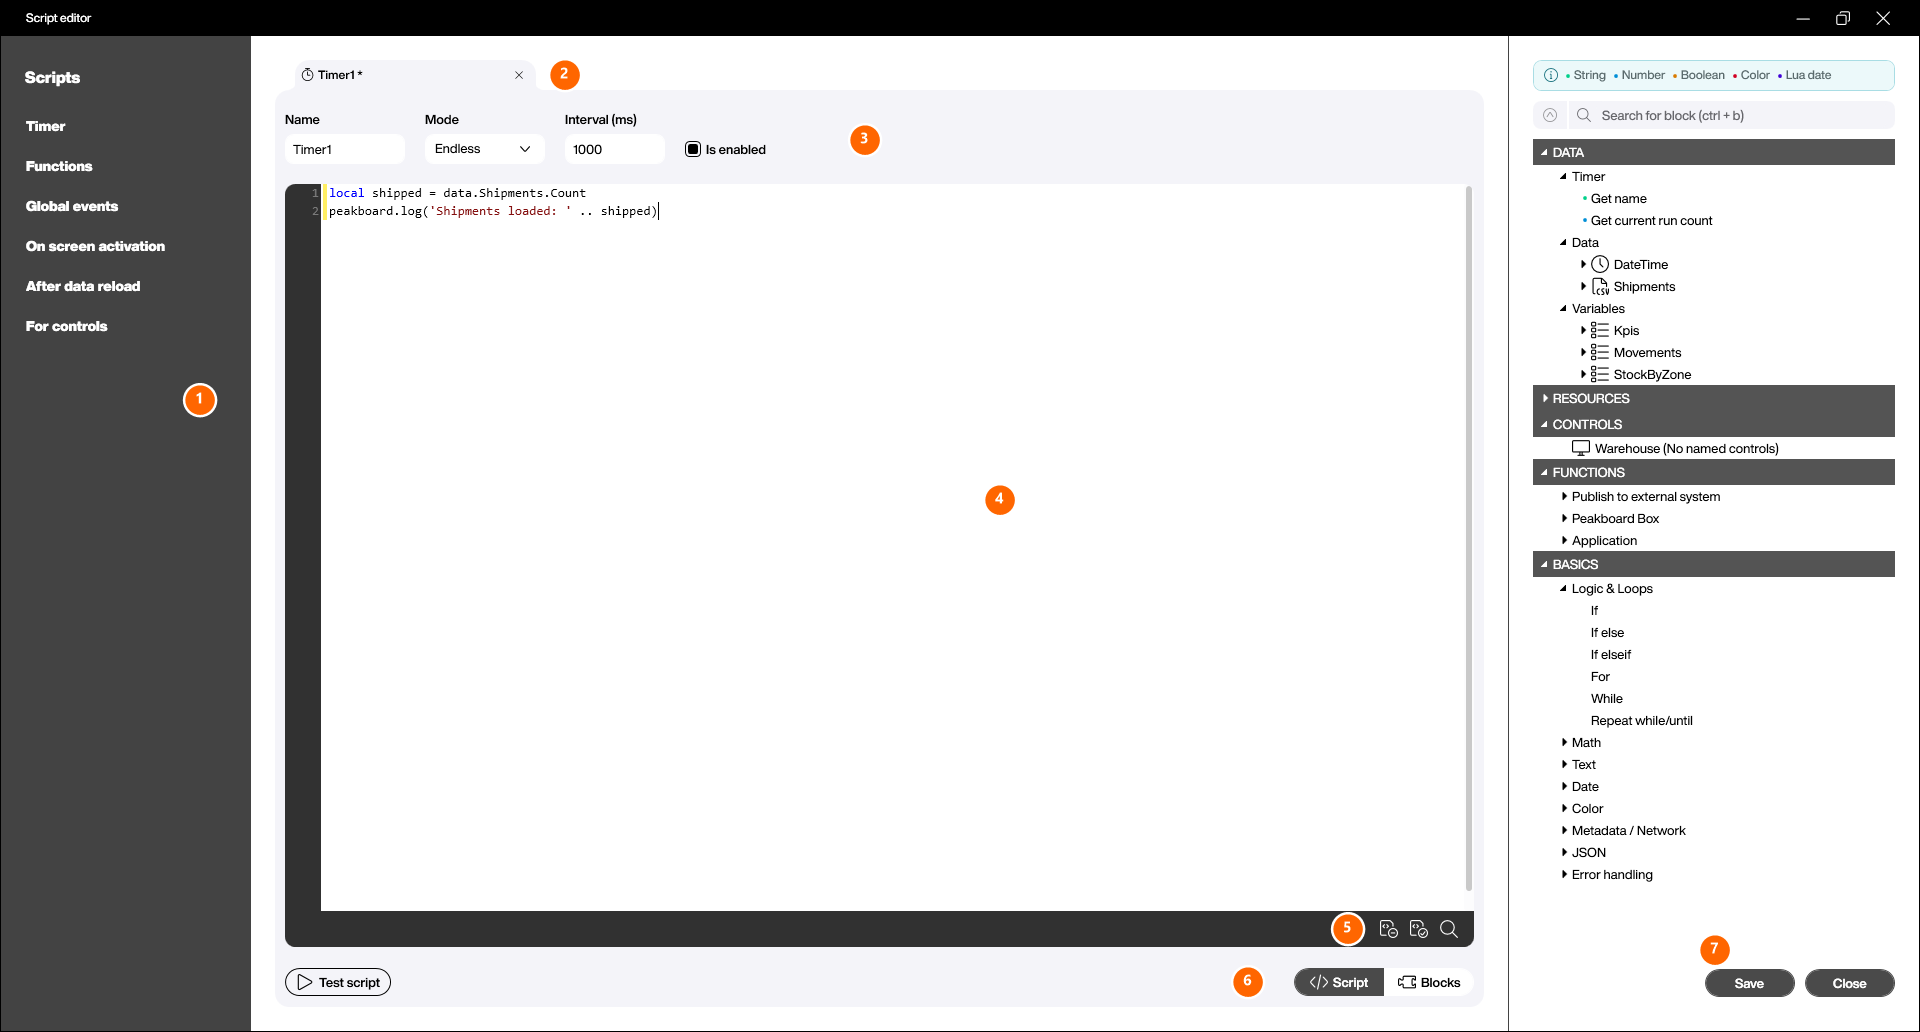
All scripts of the project (1). The bar on the left lists the script types of the current project — [Timer], [Functions], [Global events], [On screen activation], [After data reload] and [For controls]. You switch between your scripts here without leaving the editor. Scripts belonging to dataflows are not listed.
Several scripts at once (2). Scripts open as tabs, so you can have more than one in front of you and jump between them. An asterisk after the name means the script has unsaved changes; the x closes the tab.
The settings of the script (3). Above the workspace you find the properties of the script currently open. Which ones these are depends on the script type — a timer, as in the figure, has a name, a mode, an interval in milliseconds and a checkbox for whether it is enabled at all.
The workspace (4). This is where the script is written. Lua syntax is highlighted, and errors are reported directly underneath the workspace, naming the line — a script that does not parse tells you so before you ever run it.
Comment and search (5). [Comment Lines] and [Uncomment Lines] apply to the selected lines. The magnifying glass, or [Ctrl+F], opens search and replace.
Two ways to write (6). Use the toggle to switch between [Script] — the text-based editor shown here — and [Blocks], the visual Building Blocks editor. The same script can be viewed either way.
Everything you can insert (7). The panel on the right holds what your script can address: the data sources, dataflows and variables of the project under [DATA], the controls of your screens under [CONTROLS], ready-made functions under [FUNCTIONS] — including all connections of the project under [Publish to external system] — and the language basics under [BASICS], from [Logic & Loops] through [Math], [Text], [Date] and [JSON] to [Error handling]. A double-click inserts an element at the cursor position. Instead of scrolling, you can search the panel with [Ctrl+B].
Once your script is written, [Test script] runs it against the preview data. Anything you log with peakboard.log('...') appears there, along with other return values.
Hint:
For more helpful keyboard shortcuts, see the end of this article.
Helpful keyboard shortcuts
| CTRL + B | Searches the element panel |
| CTRL + F | Opens the search dialog window |
| CTRL + space | Opens the Intellisense |
| CTRL + arrow keys | Jumps through the text |
| CTRL + shift + arrow keys | Selects complete text sections |
| CTRL + pos1/end | Jumps to the beginning/end of the text |
| CTRL +Shift + pos1/end | Selects the text to the beginning/end |
| ALT + Up/Down | Move a line of text |
| ALT + Mouse selection | Selecting the cursor in multiple lines |
| Tab | Autocomplete |