Dataflows
Edit Columns
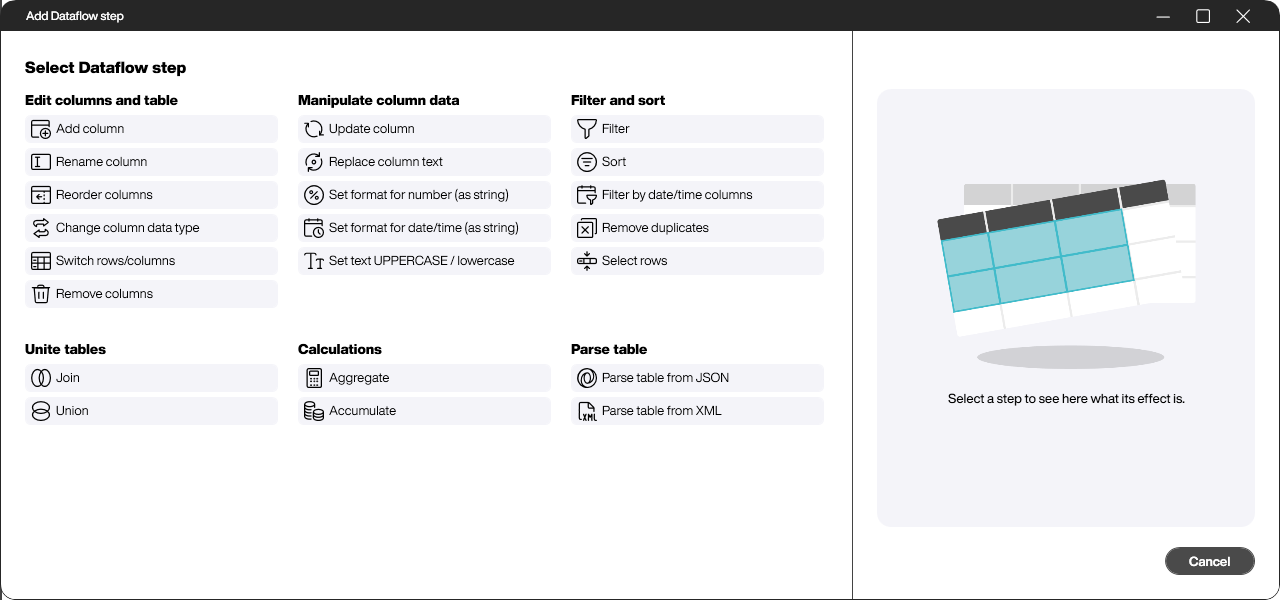
The category Edit columns and table in the dataflow step selection holds every step that changes the structure of your table: add, rename and reorder columns, change a column’s data type, switch rows and columns or remove columns. To learn how to create a dataflow and add steps in general, see the first steps with dataflows.
Add column
With this step you add a new column to the table, whose values / data / contents are created by a logic defined in a script. Enter a column name in the [Name] field (1) and pick the matching [Data type] (2). In the script editor (3) you define the logic – use item.ColumnName to reference the values of the other columns in the same row. With the [Test script] button (4) you can check the validity of the script. The new column is immediately visible in the preview. The logic to create it is also executed directly.

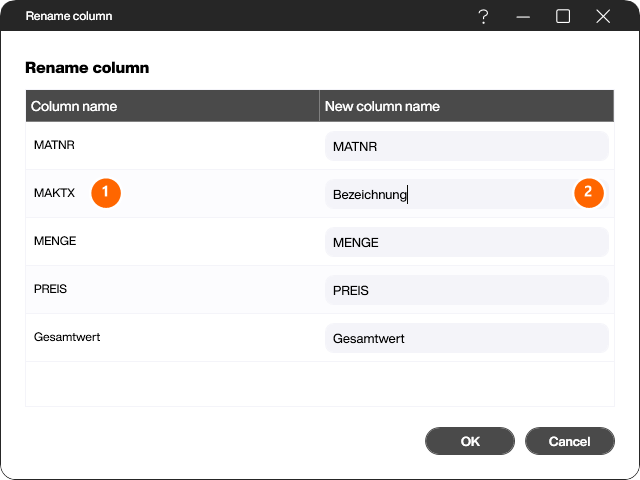
Rename column
With this step you rename columns. Find the column you want in the [Column name] list (1) and type the new name next to it under [New column name] (2). Use this step to describe the content of the columns as precisely as possible. Often the columns come poorly named from the data source (e.g. from SAP). Do not use underscores. Instead, prefer to use a classic case-sensitive camel case notation, e.g. MaxCustomerRevenue, MinCustomerRevenue, etc.
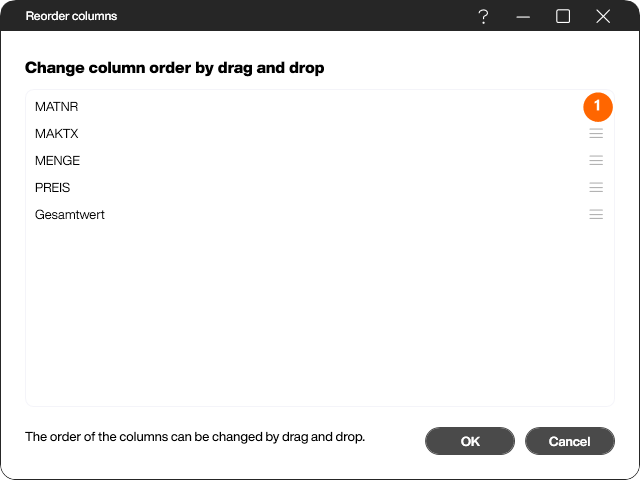
Reorder columns
With this step you change the order of the columns to better keep track of them. Drag a column by its handle (1) to the desired position. Use this step to separate what is important from what is not.
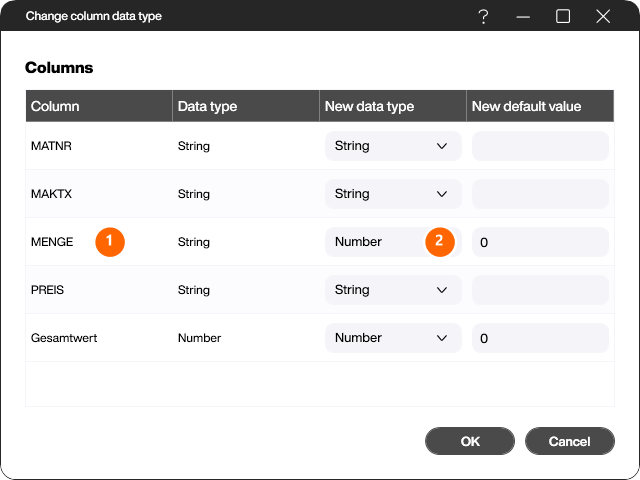
Change column data type
With this step you change the data type of individual columns. In the row of the column you want (1), pick the new data type under [New data type] (2). Typical scenarios for this step are numbers that are imported as strings but are converted to real numeric types so that they can be used for example in aggregations or in charts.
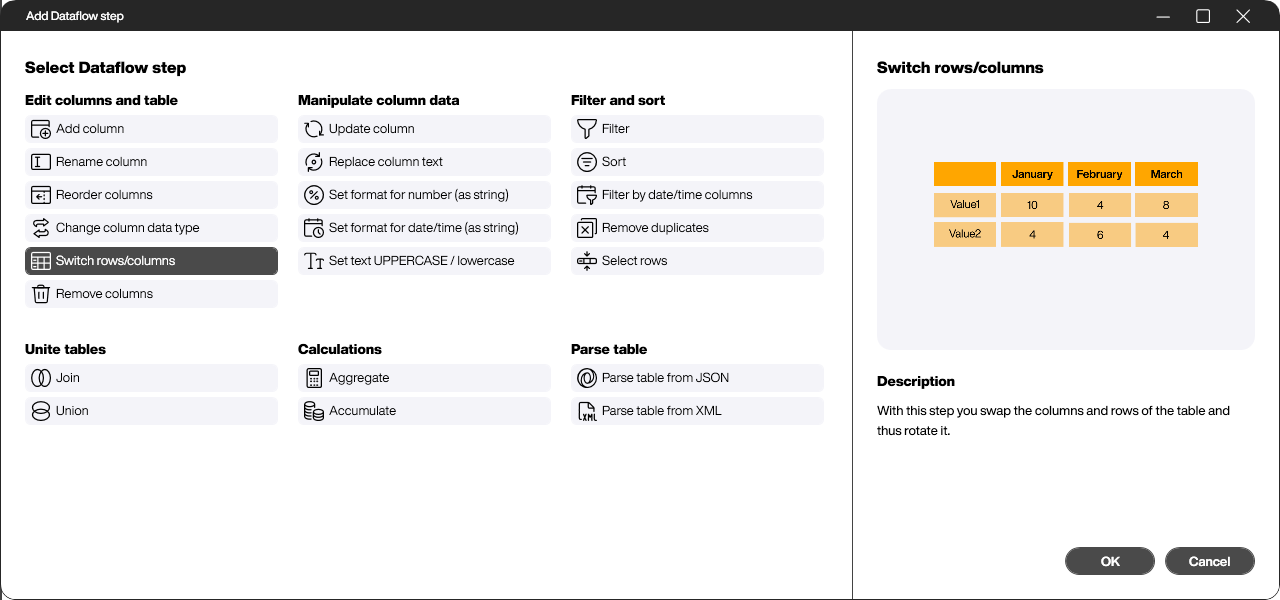
Switch rows/columns
With this step, you switch the columns and rows of the table and thus rotate them. The first column is used for naming the new columns.
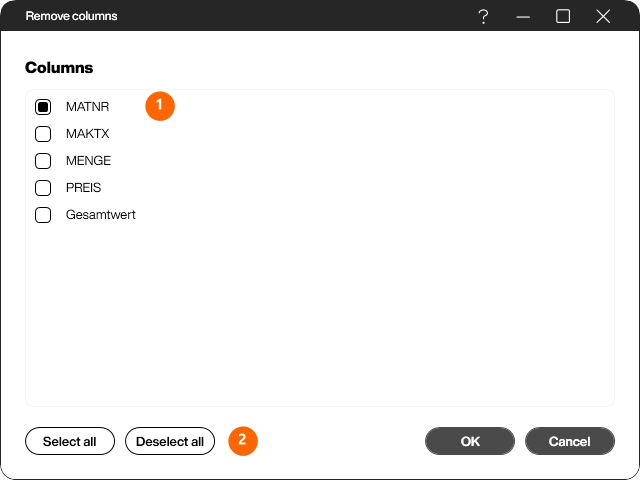
Remove columns
With this step you remove columns. Check all the columns you want to remove (1); use [Select all] and [Deselect all] (2) to select or clear every column at once. All checked columns will be removed and will not be displayed from now on. We recommend to consistently remove all unneeded columns to keep everything as neat as possible.