Peakboard hub
Installation
Peakboard Hub on premise is hosted locally on your server and requires Windows Server from at least version 2016. You do not need to install IIS, the ASP.NET Core Runtime or the matching Hosting Bundle beforehand — the setup takes care of every prerequisite that the Peakboard Hub on premise needs to run. There is no external communication at any time, only between the user, the Peakboard Boxes and Peakboard Hub on premise. Authentication can be handled either via your Windows Domain Controller (Active Directory) or via local users managed inside the Peakboard Hub itself. The Peakboard Hub on premise stores its data in an included SQL Server Express. An already existing SQL Server from version 2017 can also be used instead.
System requirements
The server running Peakboard Hub on premise must meet at least the following requirements:
| Processor | 4 cores |
| Memory | 32 GB RAM |
| Storage | 128 GB SSD |
| Operating system | Windows Server 2016 or higher |
Installation
For the initial installation on a Windows server, you only need the installation file of the Peakboard Hub on premise, which is provided here. Run the file with administrator rights — the installer guides you through the setup in four numbered steps.
Step 1 — Welcome
When you start the installer, the welcome screen appears. Click [Install Peakboard Hub] (1) to open the wizard.

Step 2 — Choose components
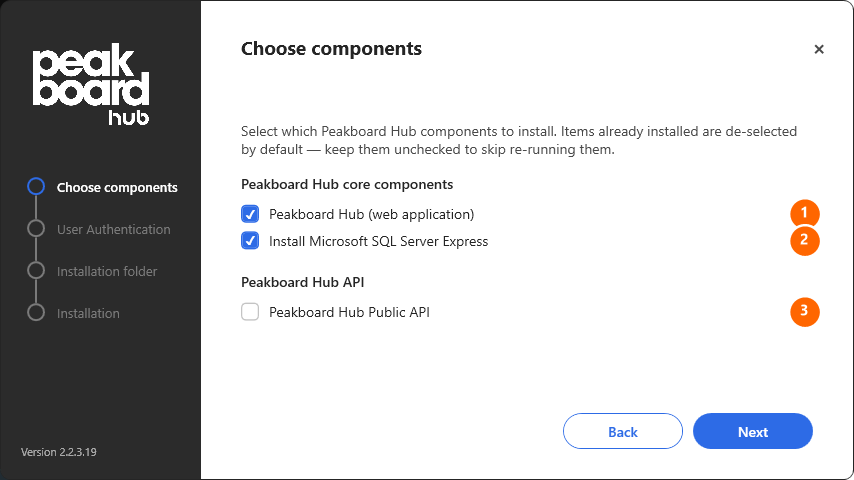
On the Choose components page you decide which parts of Peakboard Hub will be installed. Components that are already installed are de-selected by default, so they are skipped during an update.
- Peakboard Hub (web application) (1) — The Peakboard Hub web application itself. Keep this option enabled for an initial installation.
- Install Microsoft SQL Server Express (2) — Enable this option if you do not have an SQL Server available yet. The installer then sets up a local SQL Server Express instance. If you want to reuse an existing SQL Server, leave the option unchecked.
- Peakboard Hub Public API (3) — Optional REST interface that lets you talk to the Peakboard Hub from other systems.
Click [Next] to continue.
Step 3 — User Authentication
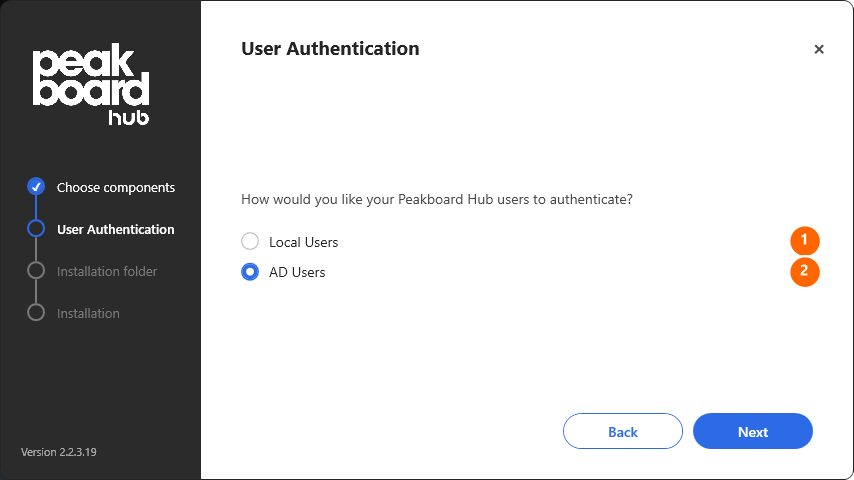
In this step you decide which backend the Peakboard Hub on premise checks logins against. The choice decides where the identities of your users come from — the local Windows of the server, or the Active Directory of your domain.
- Local Users (1) — Authentication goes against the local Windows user accounts of the server that hosts the Peakboard Hub on premise. Those accounts and their passwords are managed inside Windows (for example via the Windows Computer Management console), not inside the Peakboard Hub. There is no dependency on an Active Directory and the server does not need to be a domain member. At the login screen users enter their Windows user name together with the matching Windows password. A good fit for standalone servers, evaluation or test environments and smaller teams without their own domain.
- AD Users (2) — Authentication through your Windows Domain Controller (Active Directory). The server that hosts the Peakboard Hub on premise must be a member of the same domain. At the login screen users enter their Windows user name without the domain prefix together with their Windows password, so they sign in with the corporate credentials they already use.
For both options the same rule applies: the Peakboard Hub on premise does not store any passwords itself, and you do not pre-create user accounts with an initial password in the user management. The Hub account is created automatically on the first successful login. The first user that signs in becomes the administrator. In the Hub user management you only maintain groups and permissions afterwards — the actual credentials stay with Windows respectively the Active Directory.
Pick the option that fits your environment and click [Next].
Step 4 — Installation folder
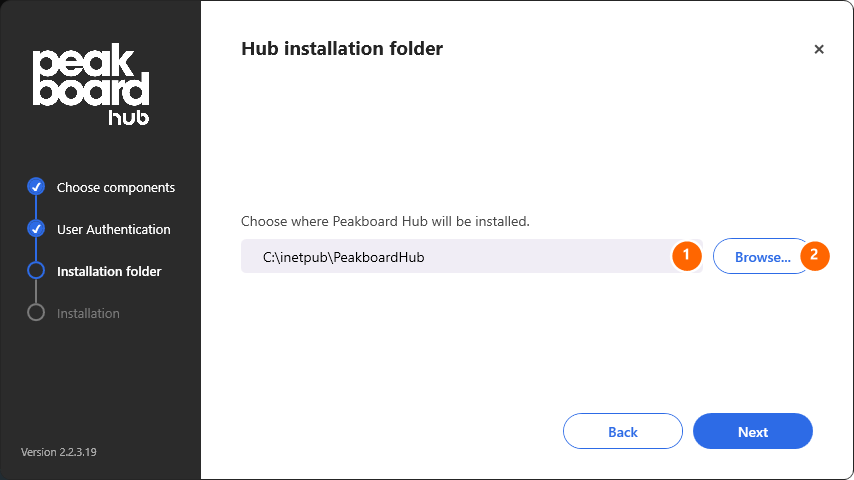
On the Hub installation folder page you choose where Peakboard Hub is installed. The default is C:\inetpub\PeakboardHub (1) — that folder is later added as a site in IIS. Use [Browse…] (2) to pick a different path if you need to.
Confirm your choice with [Next].
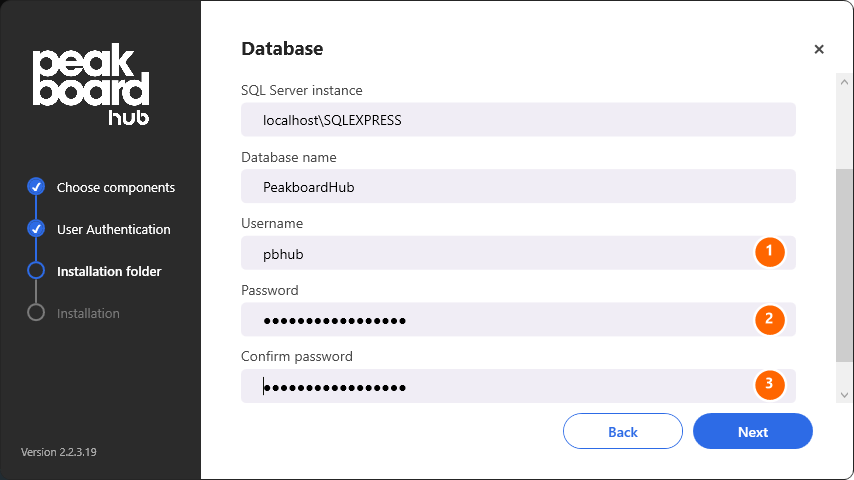
Step 5 — Database
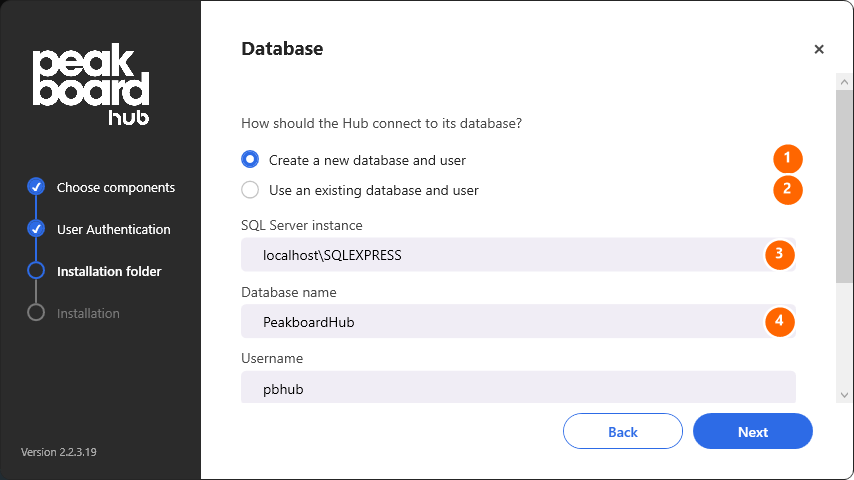
On the Database page you connect the Peakboard Hub to its SQL database.
- Create a new database and user (1) — The installer creates a fresh database together with a new SQL login for you.
- Use an existing database and user (2) — Pick this option to reuse a database that already exists (for example during an update or a migration).
- SQL Server instance (3) — Address and instance name of your SQL Server. With the included SQL Server Express the default is
localhost\SQLEXPRESS. - Database name (4) — Name of the database. The default is
PeakboardHub.
In the lower half of the dialog you supply the credentials for the SQL login:
- Username (1) — Login name of the SQL user (default
pbhub). - Password (2) and Confirm password (3) — Enter a strong password and repeat it for confirmation. The value is masked while you type.
Click [Next] to start the actual installation.
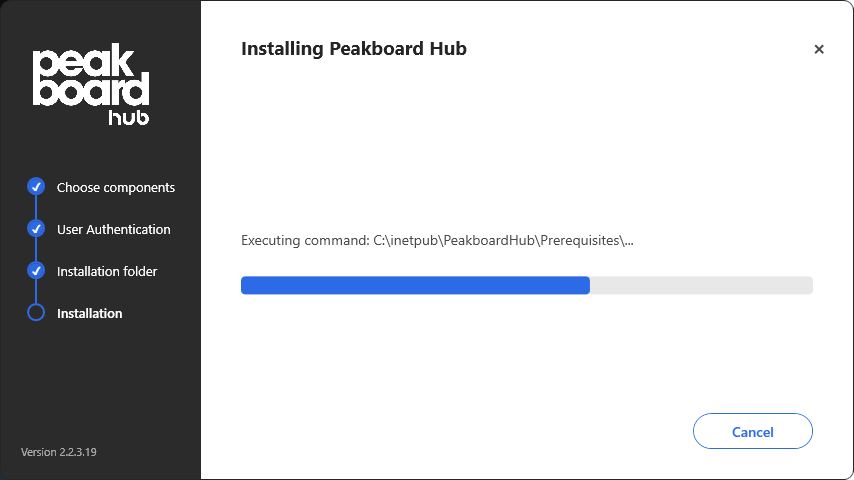
Step 6 — Installation
The wizard now shows the progress and performs the following tasks one after the other: installing the prerequisites, setting up the SQL Server, creating the database, copying the files into the installation folder and registering the IIS site. The currently running task is shown above the progress bar.
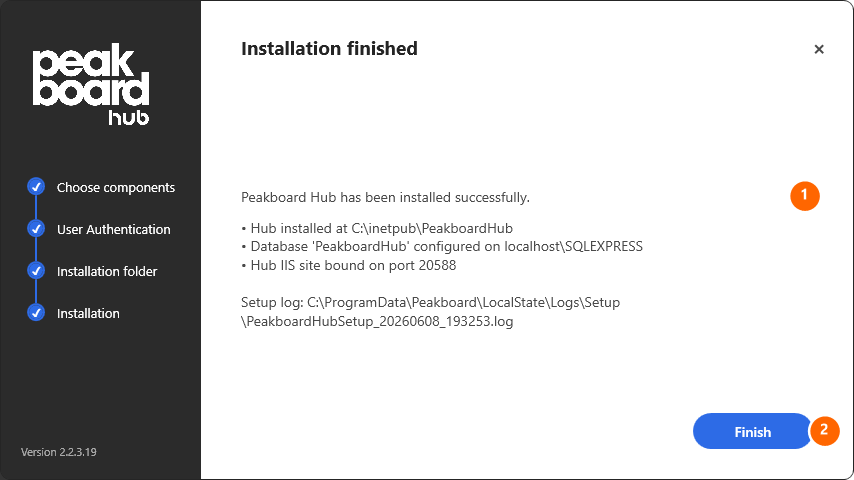
Step 7 — Done
Once every task has finished successfully, the wizard switches to the Installation finished step.
- Summary (1) — A short recap of what has been set up: the installation folder, the database name and SQL Server instance, and the port the IIS site is bound to. Right below you find the path to the setup log, where every step is recorded in detail for later reference.
- Finish (2) — Closes the wizard. The Peakboard Hub on premise is now reachable in your browser at the shown port and appears in the IIS Manager as its own site.
The new site is also visible in the IIS Manager under your sites, where you can configure it like any other IIS site — for example by binding certificates from your company for secure communication.
After the first user signs in to the Peakboard Hub on premise, this user automatically becomes an administrator. You can promote additional users to administrators later from the user management of the Peakboard Hub on premise.
Please note:
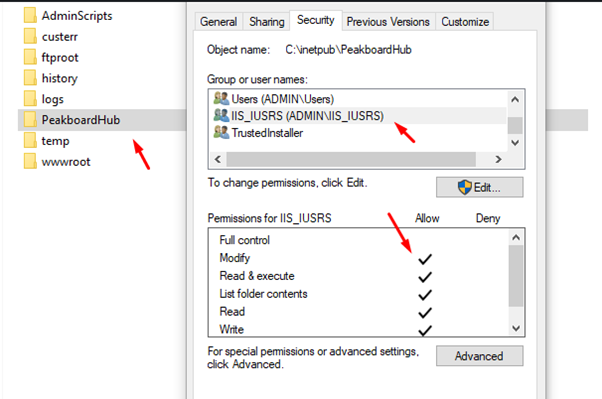
- If you want to update Peakboard Boxes via Peakboard Hub on premise, the IIS process must have permission to write into the installation folder (for example
C:\inetpub\PeakboardHub). - If you want to use MQTT for communication between Peakboard Boxes, open the MQTT port (default 1883).
Here you can see where to set the permissions:
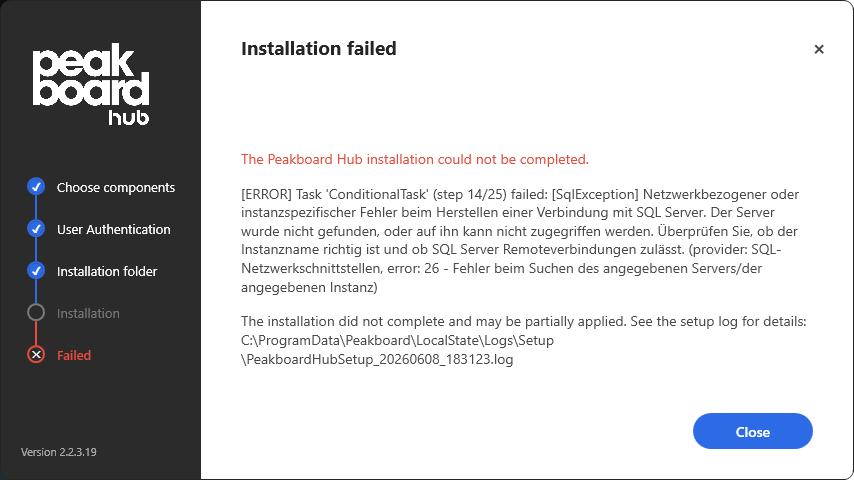
If the installation fails
If something goes wrong during the install, the wizard switches to the Installation failed step and shows the error message together with the path to the setup log file. The log files live under C:\ProgramData\Peakboard\LocalState\Logs\Setup\. Common causes are an unreachable SQL Server instance or missing write permissions on the installation folder. Fix the cause and run the installer again.
Updates
To perform an update, download the latest Peakboard Hub on premise installation file and run the installer on the same server as your existing installation. On the Choose components step the installer automatically de-selects components that are already installed, so you typically keep only the Peakboard Hub (web application) check box enabled. You step through the wizard like in a fresh install; your existing database is preserved.
Uninstall
To remove the Peakboard Hub on premise from a server you use the bundled uninstaller. A step-by-step walkthrough is in the Uninstall article.