Controls
Managing Font Formats With Font Manager
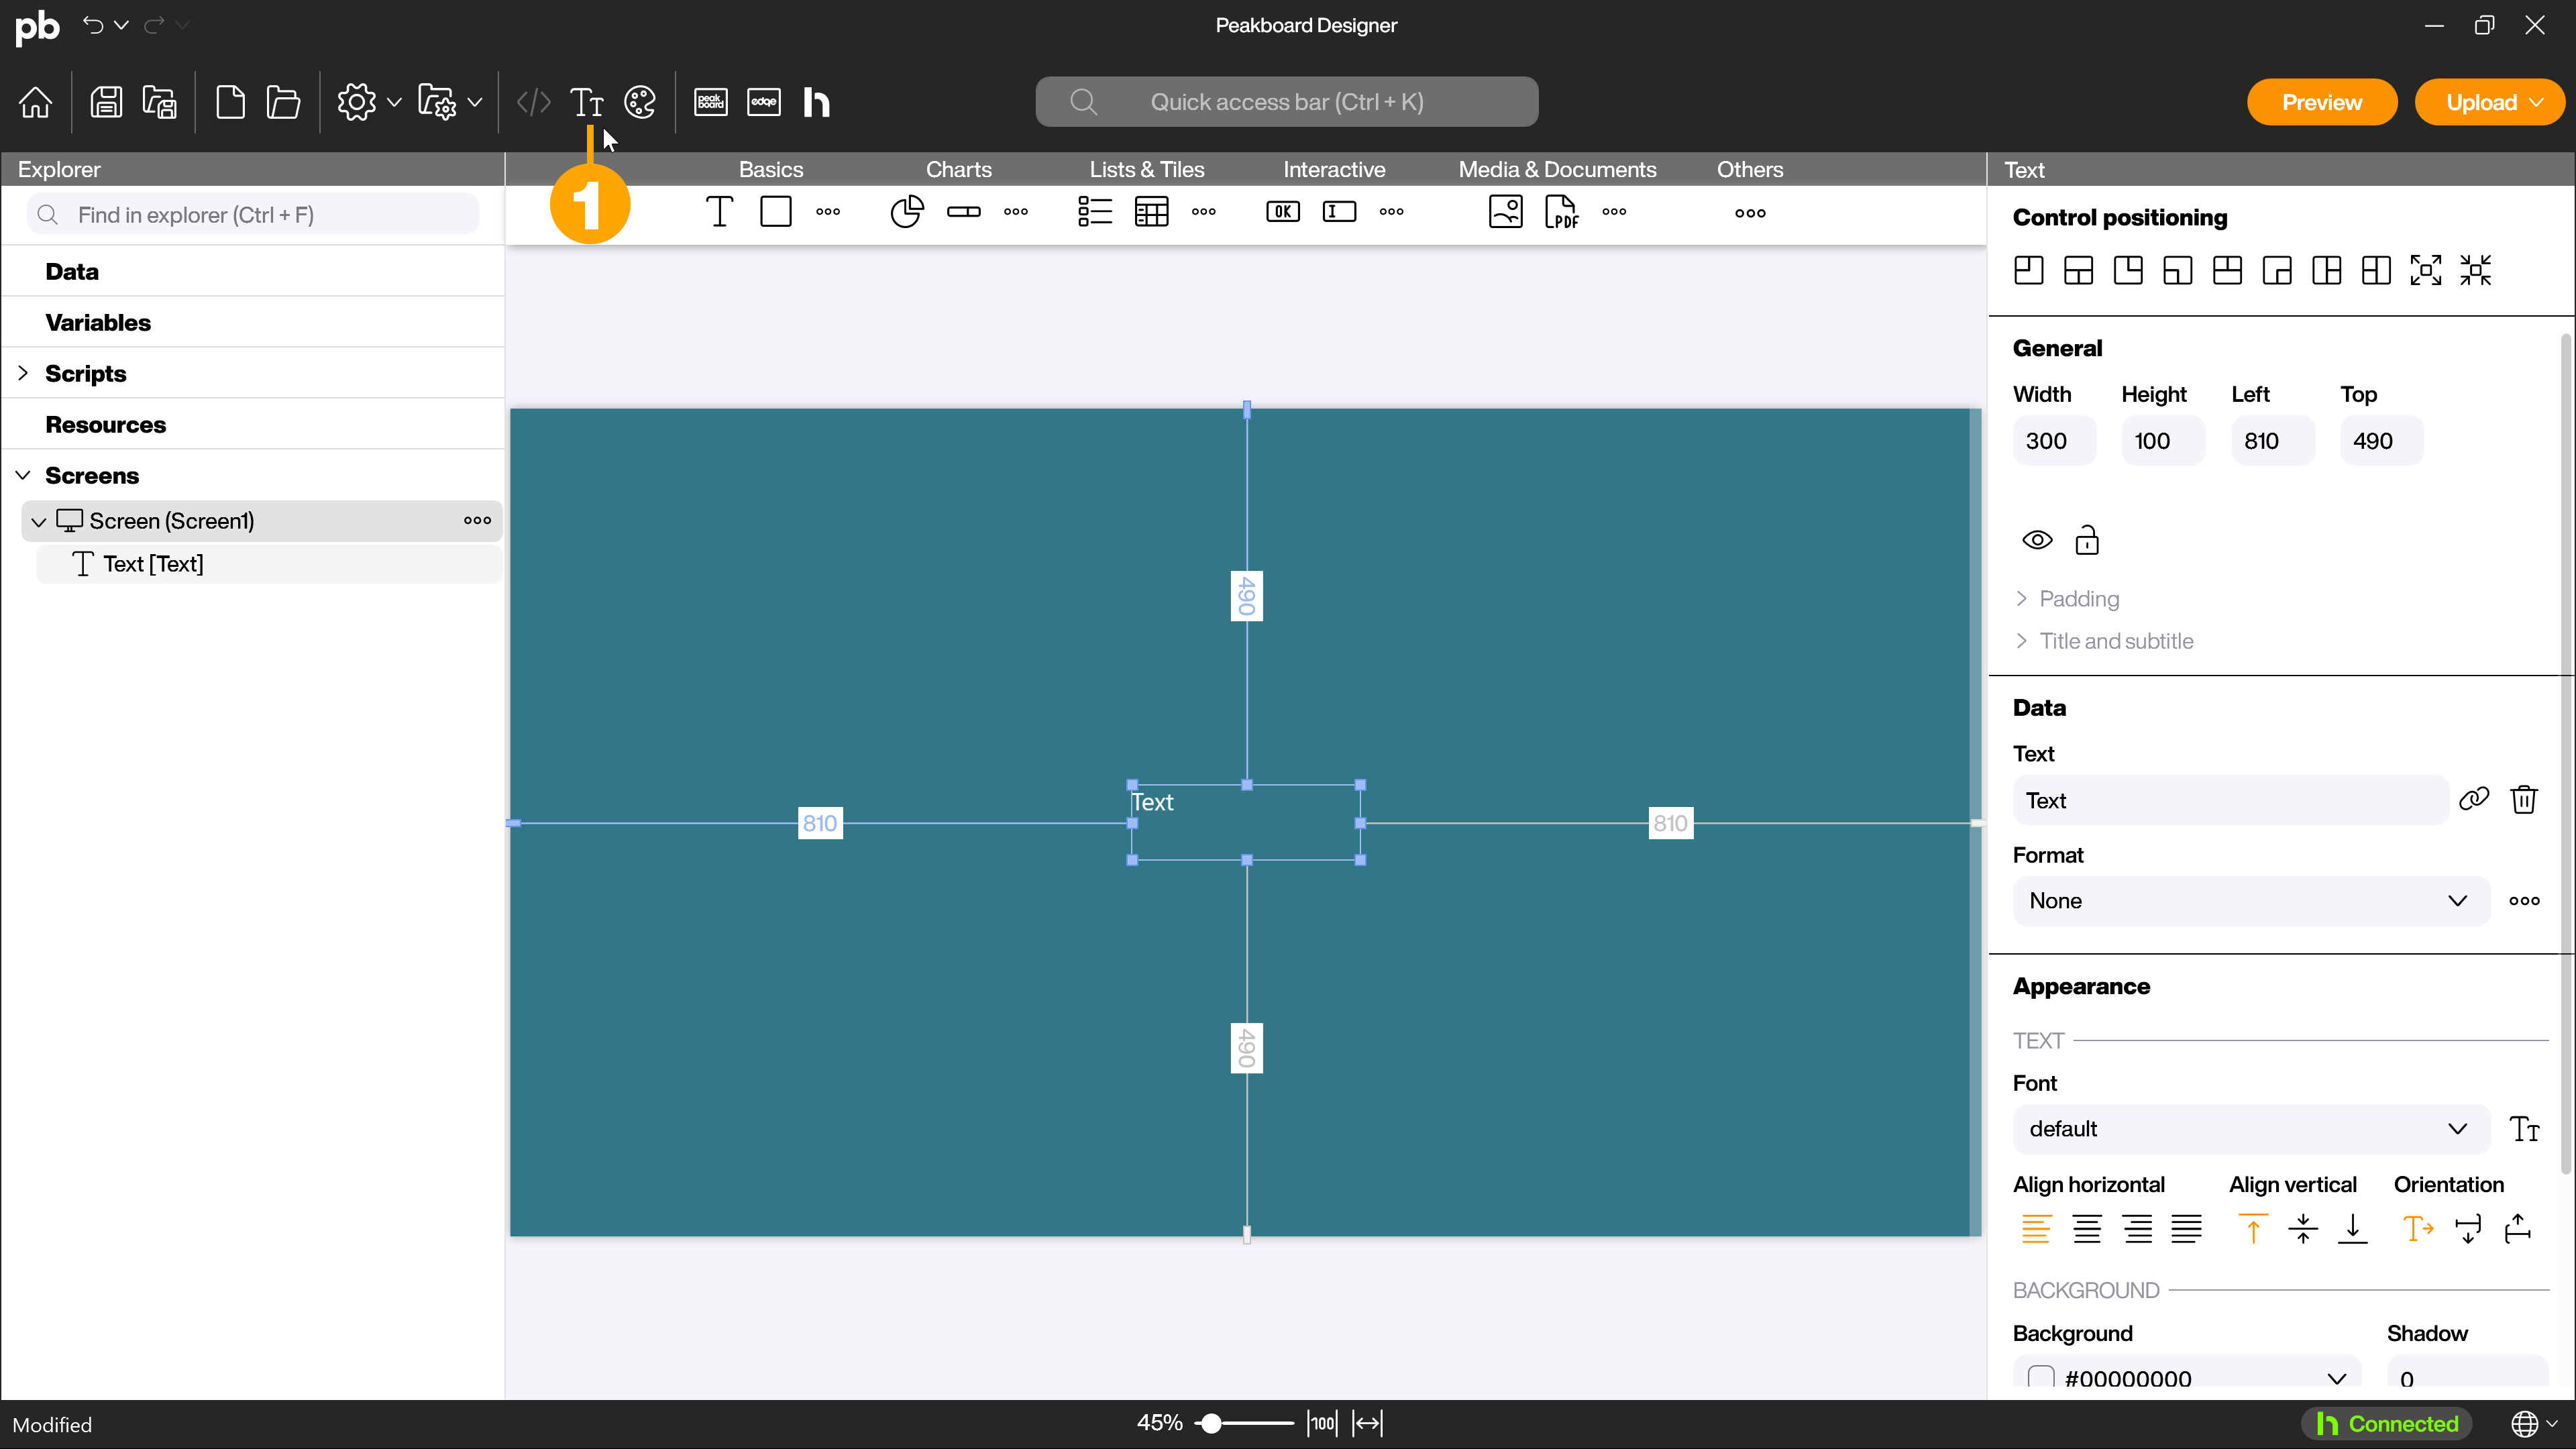
To manage font formats, you can use the Font Manager in the Peakboard Designer. To open the Font Manager, click on the [Fonts] button (1) in the menu bar.
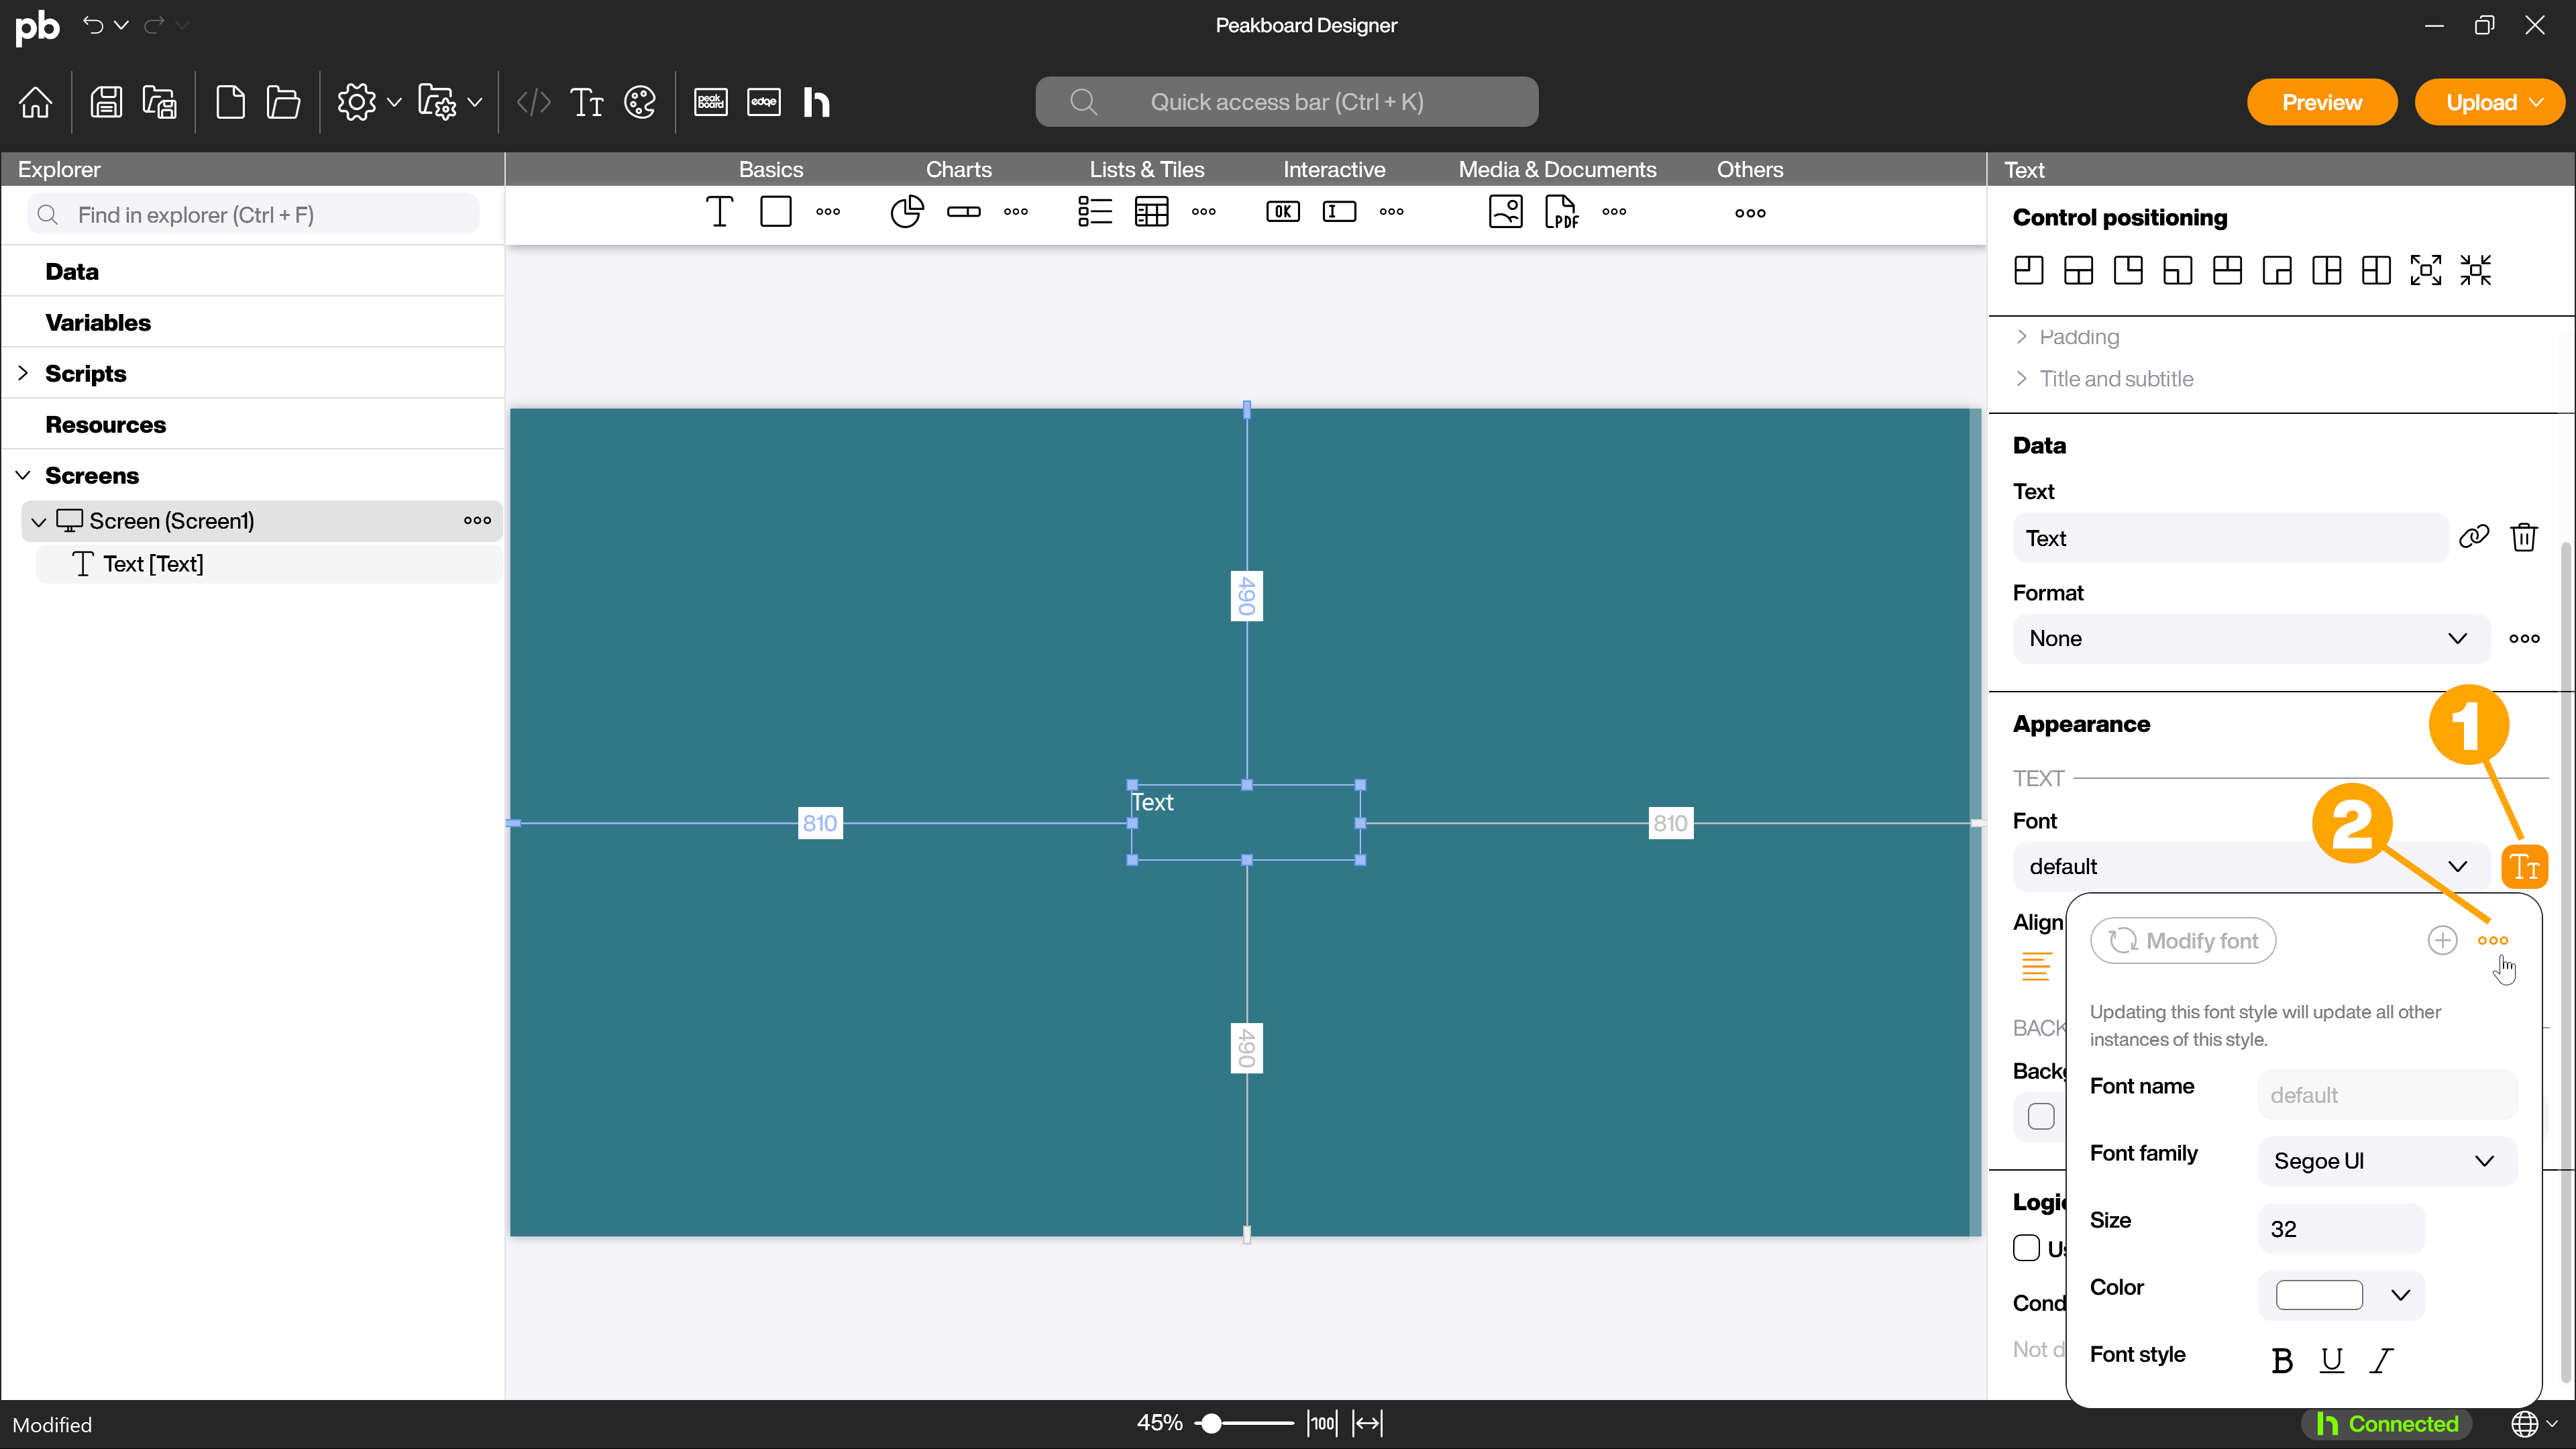
Alternatively, you can also access the Font Manager from the places in the Peakboard Designer where you can select fonts. For example, in the attributes of controls such as the text control, you will find a button (1) to adjust the font in the drop-down menu for selecting the font. In the pop-up, you have the option to quickly and easily customize the currently selected font. You can apply these changes by clicking on [Modify font]. To make further adjustments to other fonts, click on the […] button (2) in the pop-up. The font manager opens.
Add and manage fonts
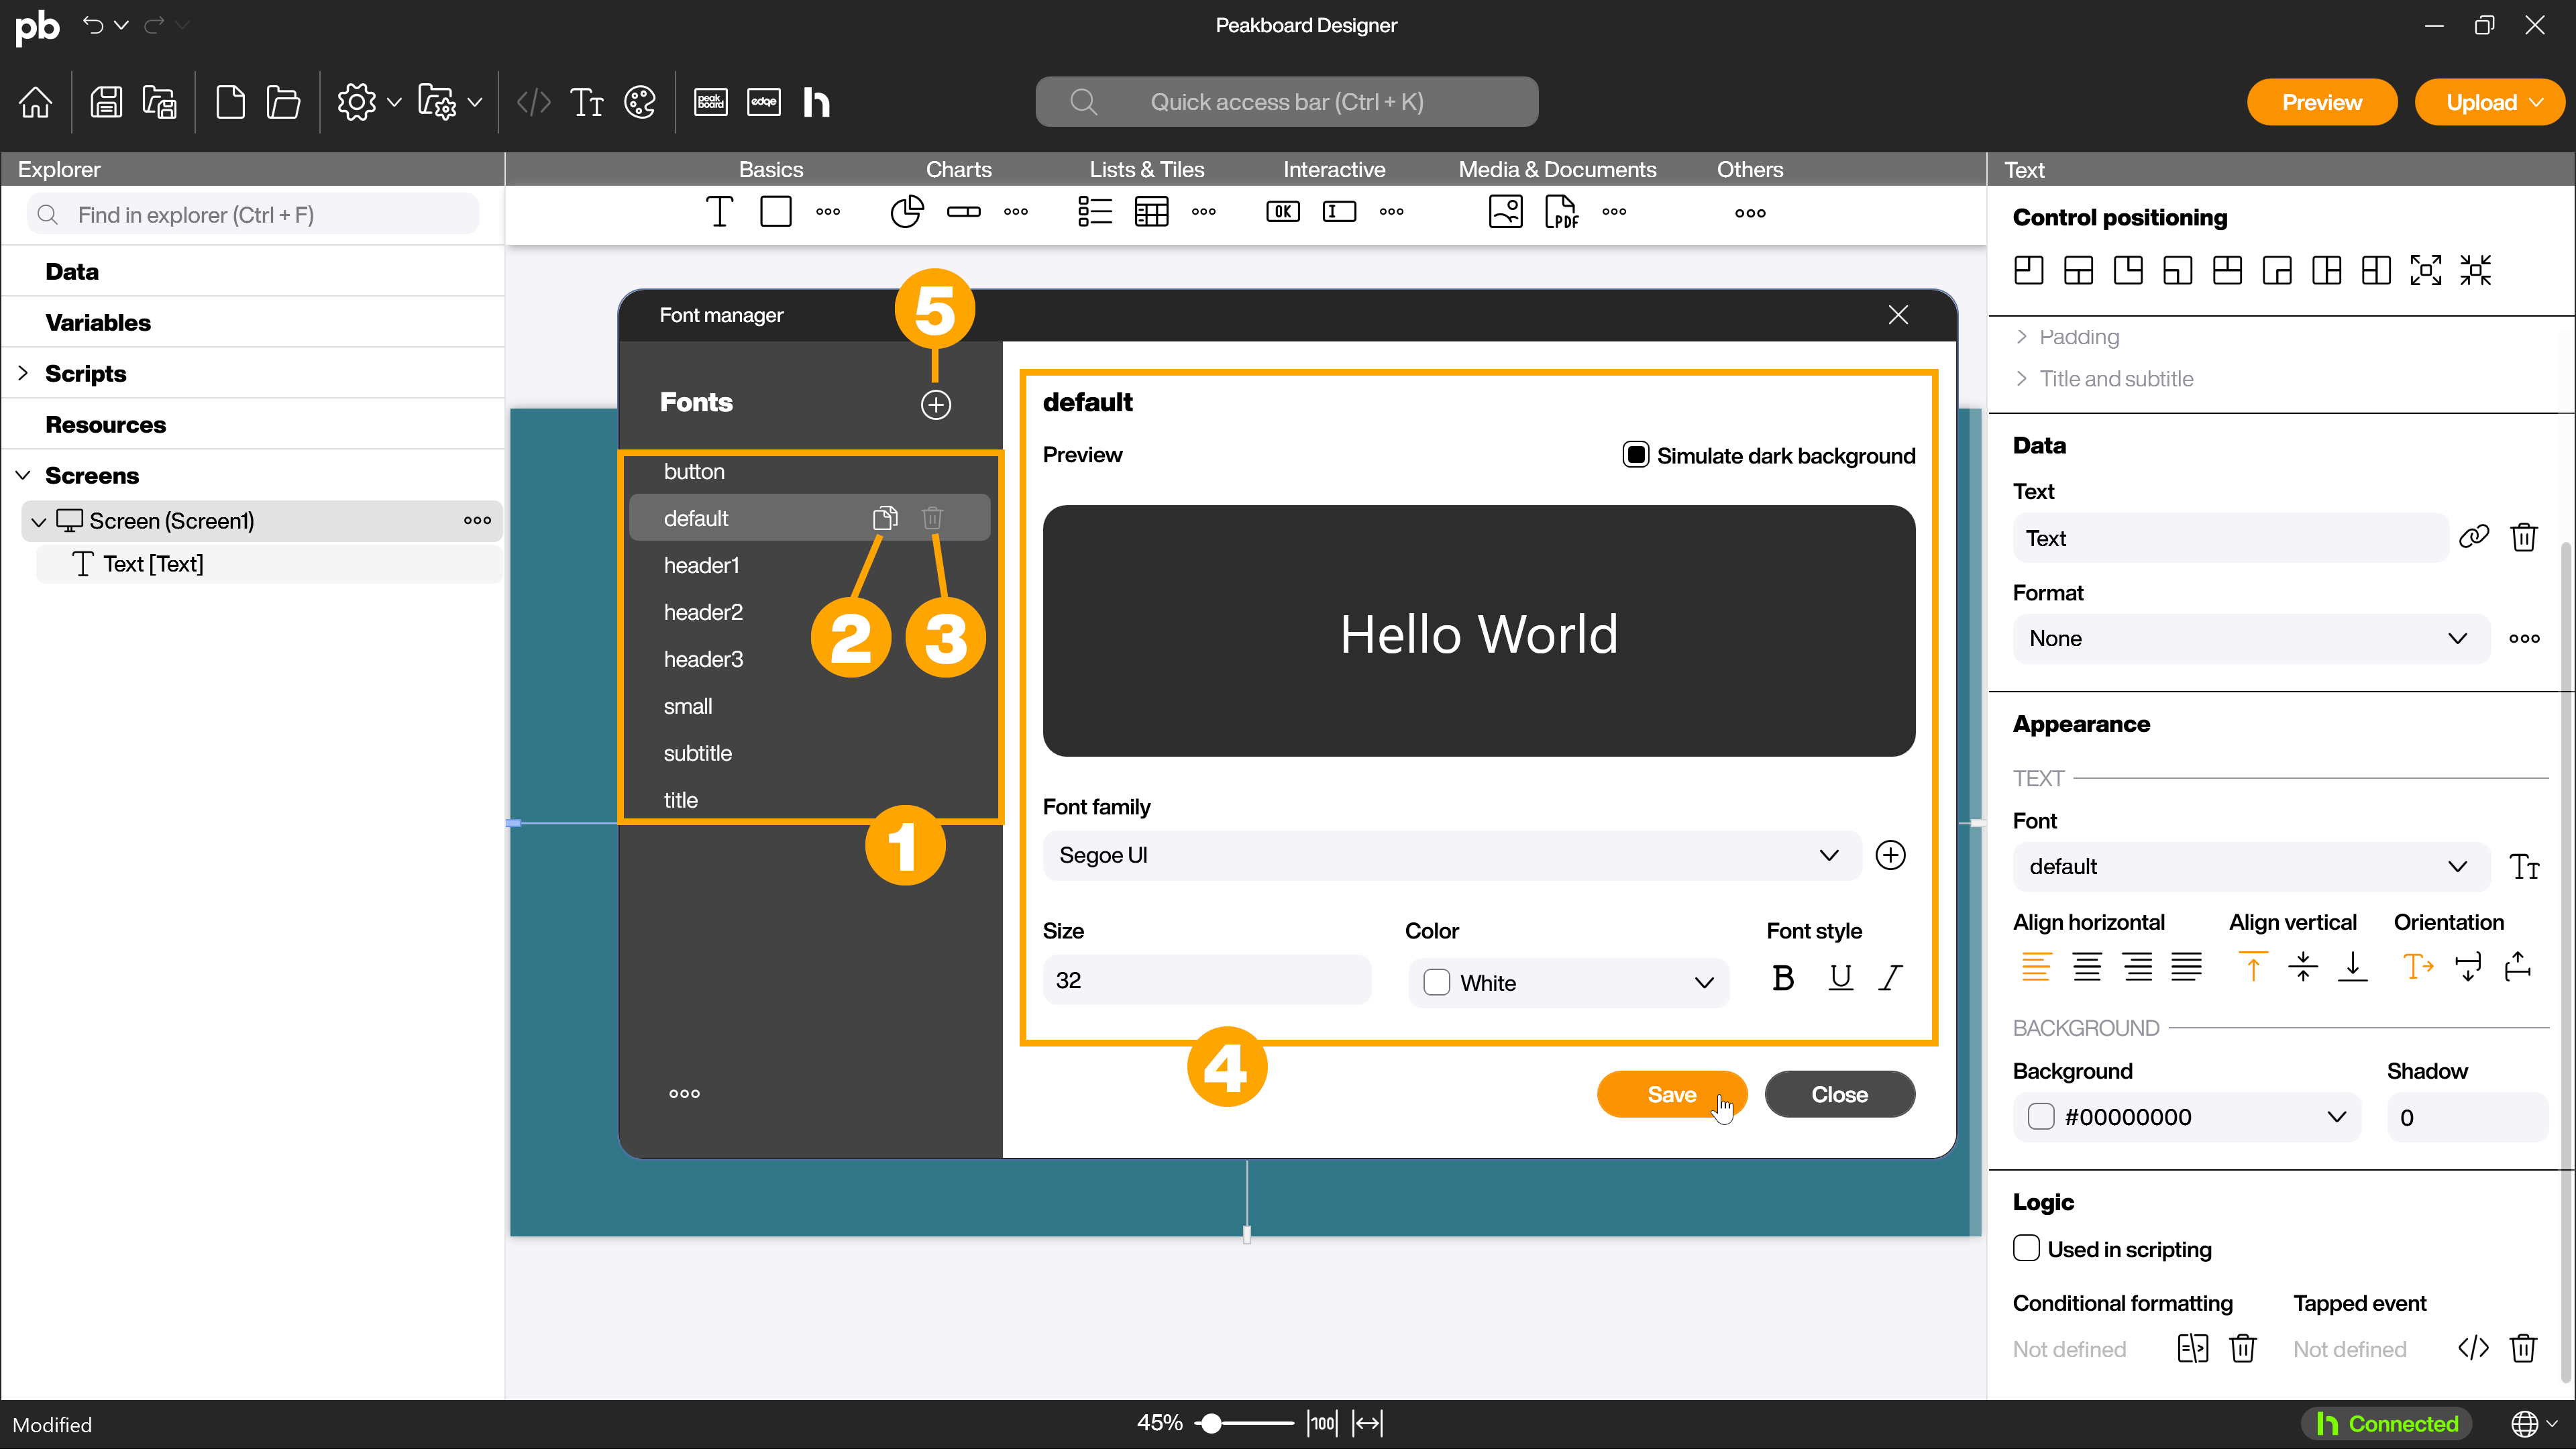
In the Font Manager, you will find all currently available fonts listed by alphabet on the left-hand side (1). If you have created a new project, you will find all standard fonts there. These cannot be deleted. You can copy the existing fonts in the left-hand area (2). The settings of the copied font will be transferred. You can also delete fonts you have created yourself here (3). Click on the name of the respective font to open the font settings options in the right-hand area (4).
You can add a new font using the [+] button (5). Newly added fonts are always created with the same settings.
Edit fonts
You can make settings for each font in the right-hand area.
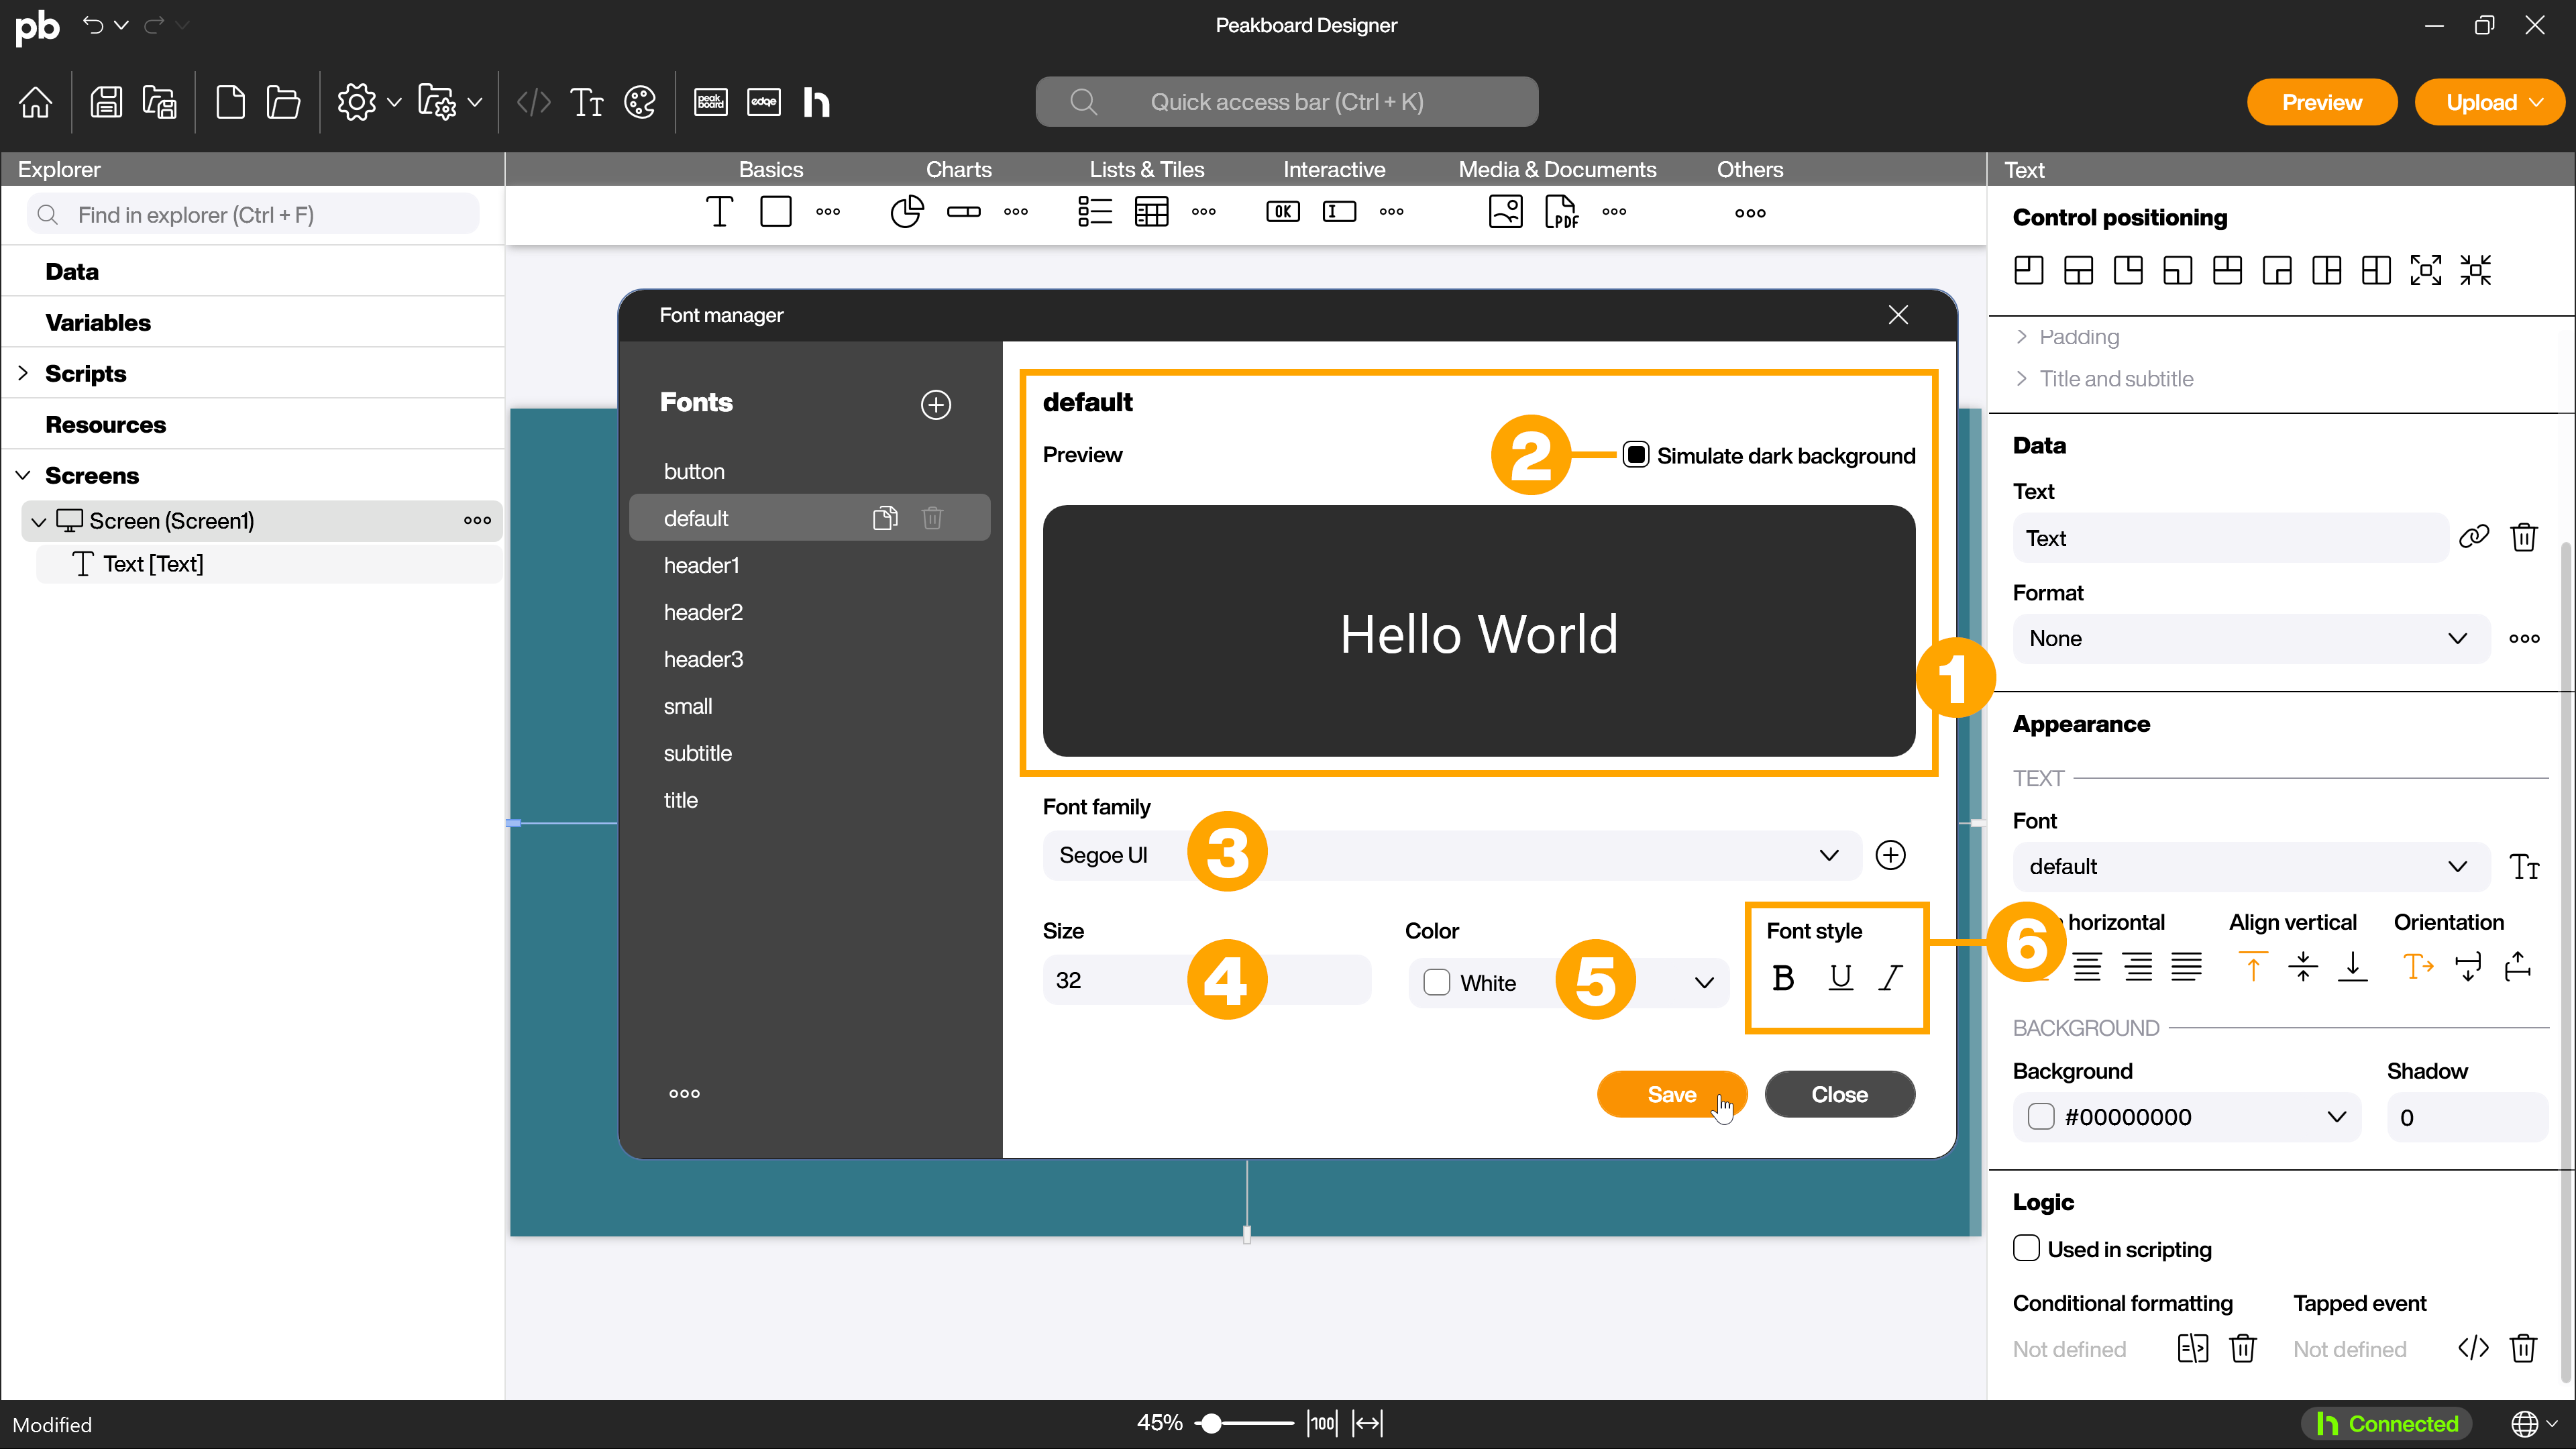
To see what changes your settings cause, you will find a preview of the currently selected font (1) in the upper area. You can simulate a dark background so that you can also see what changes you have made to light fonts. To do this, activate the corresponding checkbox (2).
Make your settings below the preview. You can select the font family (3) and specify the size of the font (4) and its color (5). You can also specify whether the font should be displayed in bold, italics or underlined (6).
Add a new font family
By default, the Peakboard Designer supports a whole range of font families. If these are not sufficient, you can also use many external font families in your Peakboard projects.
Attention!
Currently, adding external font families is limited to TrueType fonts with the file extension .ttf. OpenType fonts with the file extension .otf cannot be used.
If your company has its own in-house fonts, the marketing or IT department or the corporate design style guide are usually good places to obtain the relevant files.
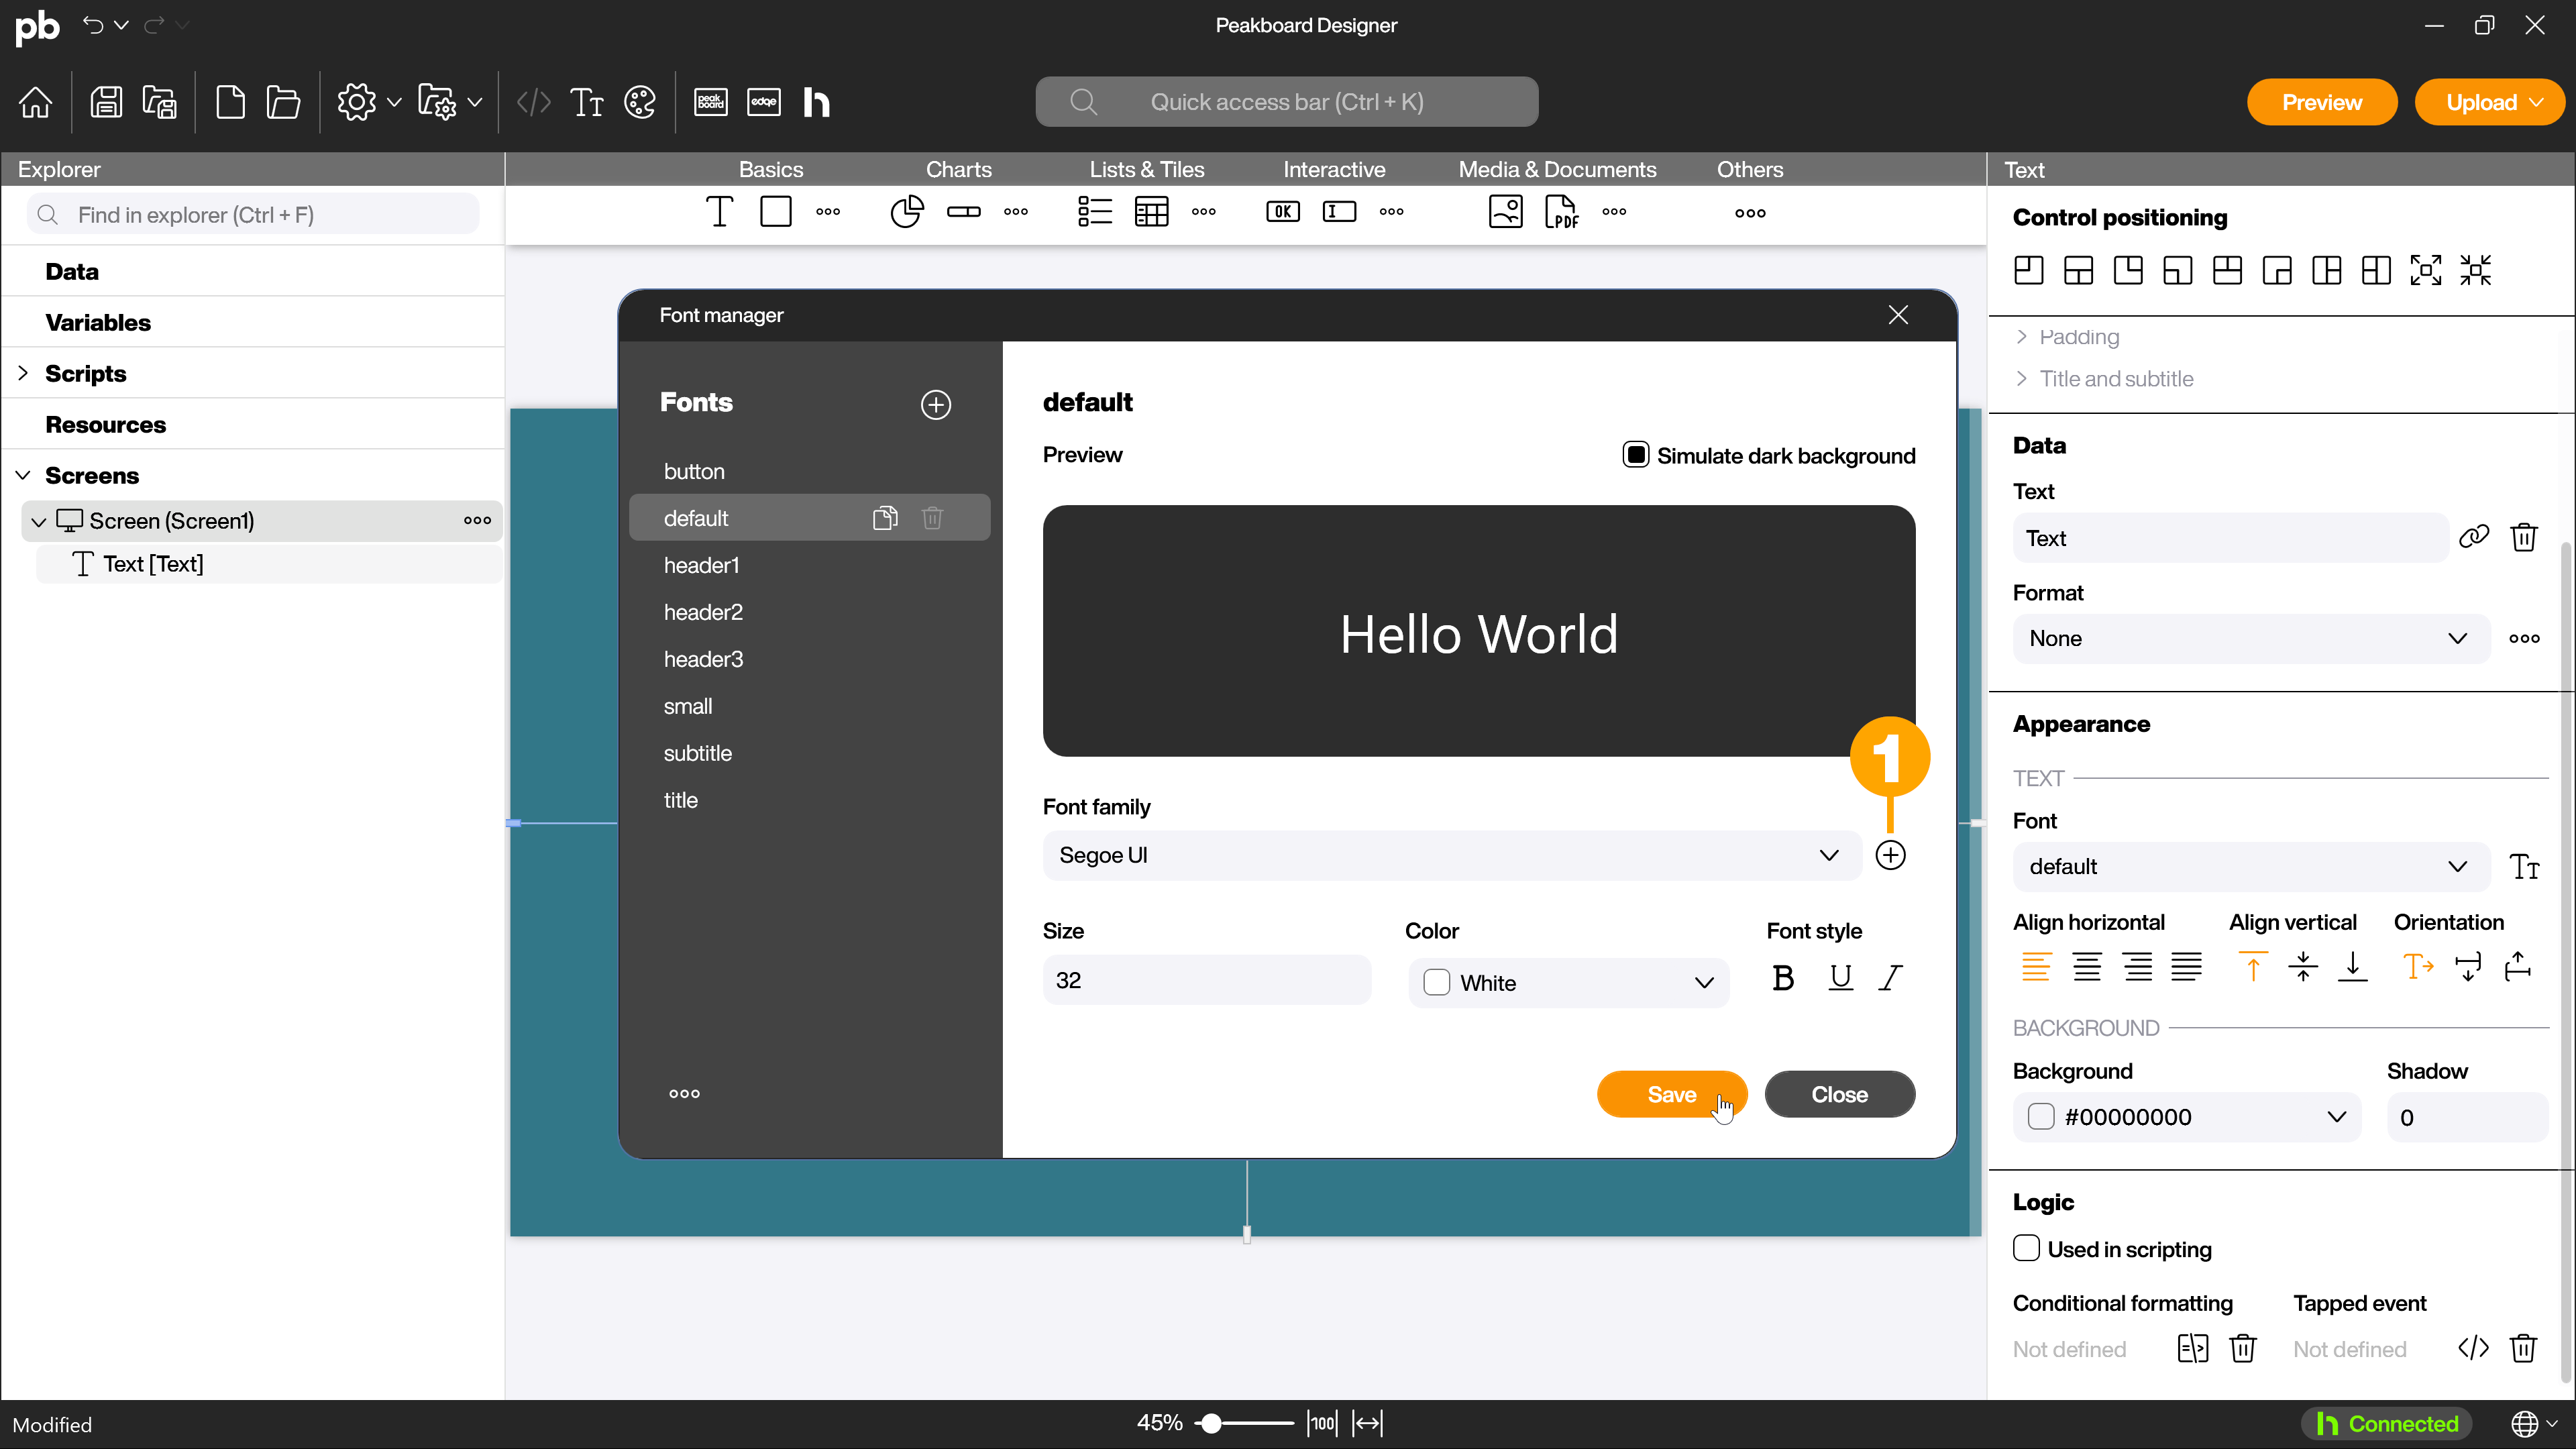
To add a new font family to the Peakboard Designer, click on the [+] button (1) behind the drop-down menu for selecting the font family in the font manager in the editing area of the font you want to change.
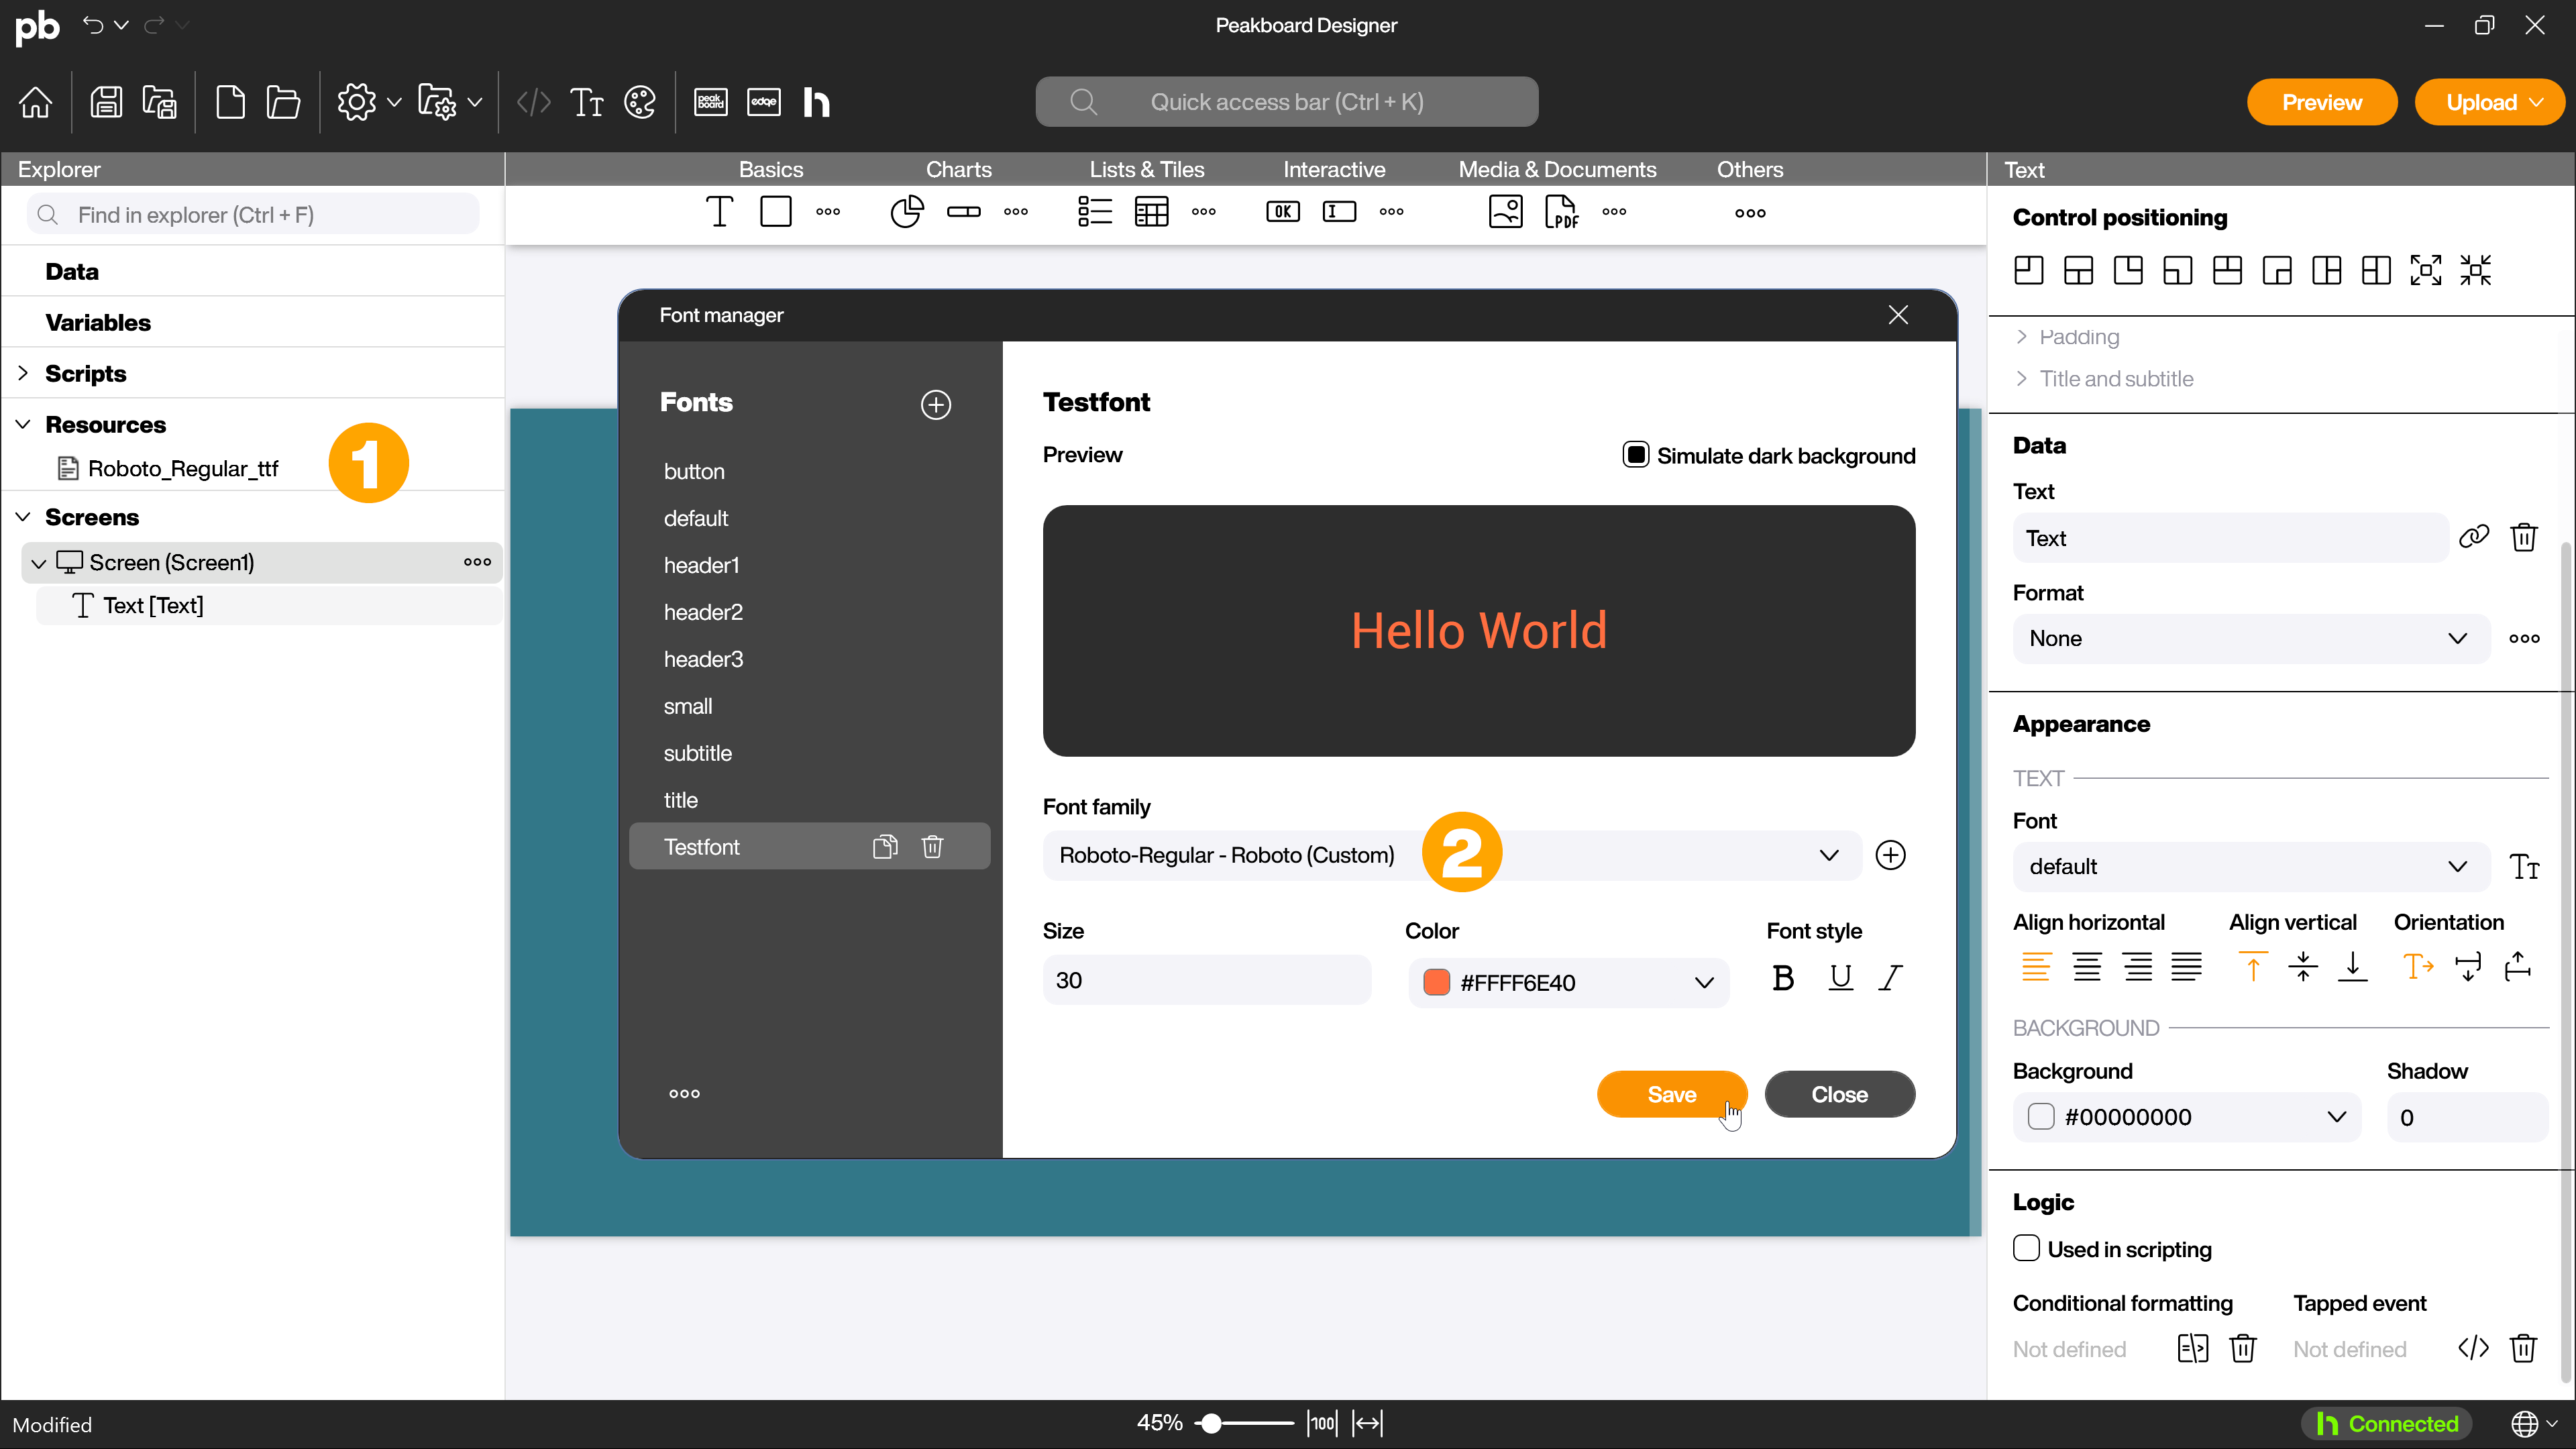
A selection dialog opens in which you select the file on your computer and confirm the addition with [Open]. The file is automatically added to the resources of the current project (1). You can now select the font family from the drop-down menu. External font families can be easily recognized by the [(Custom)] (2) suffix in the list.
Alternatively, you can add font families by dragging and dropping the TrueType font files with the file extension .ttf as a local resource to the resources. The added font families are then automatically available in the drop-down menu in the Font Manager as described above.
Use fonts
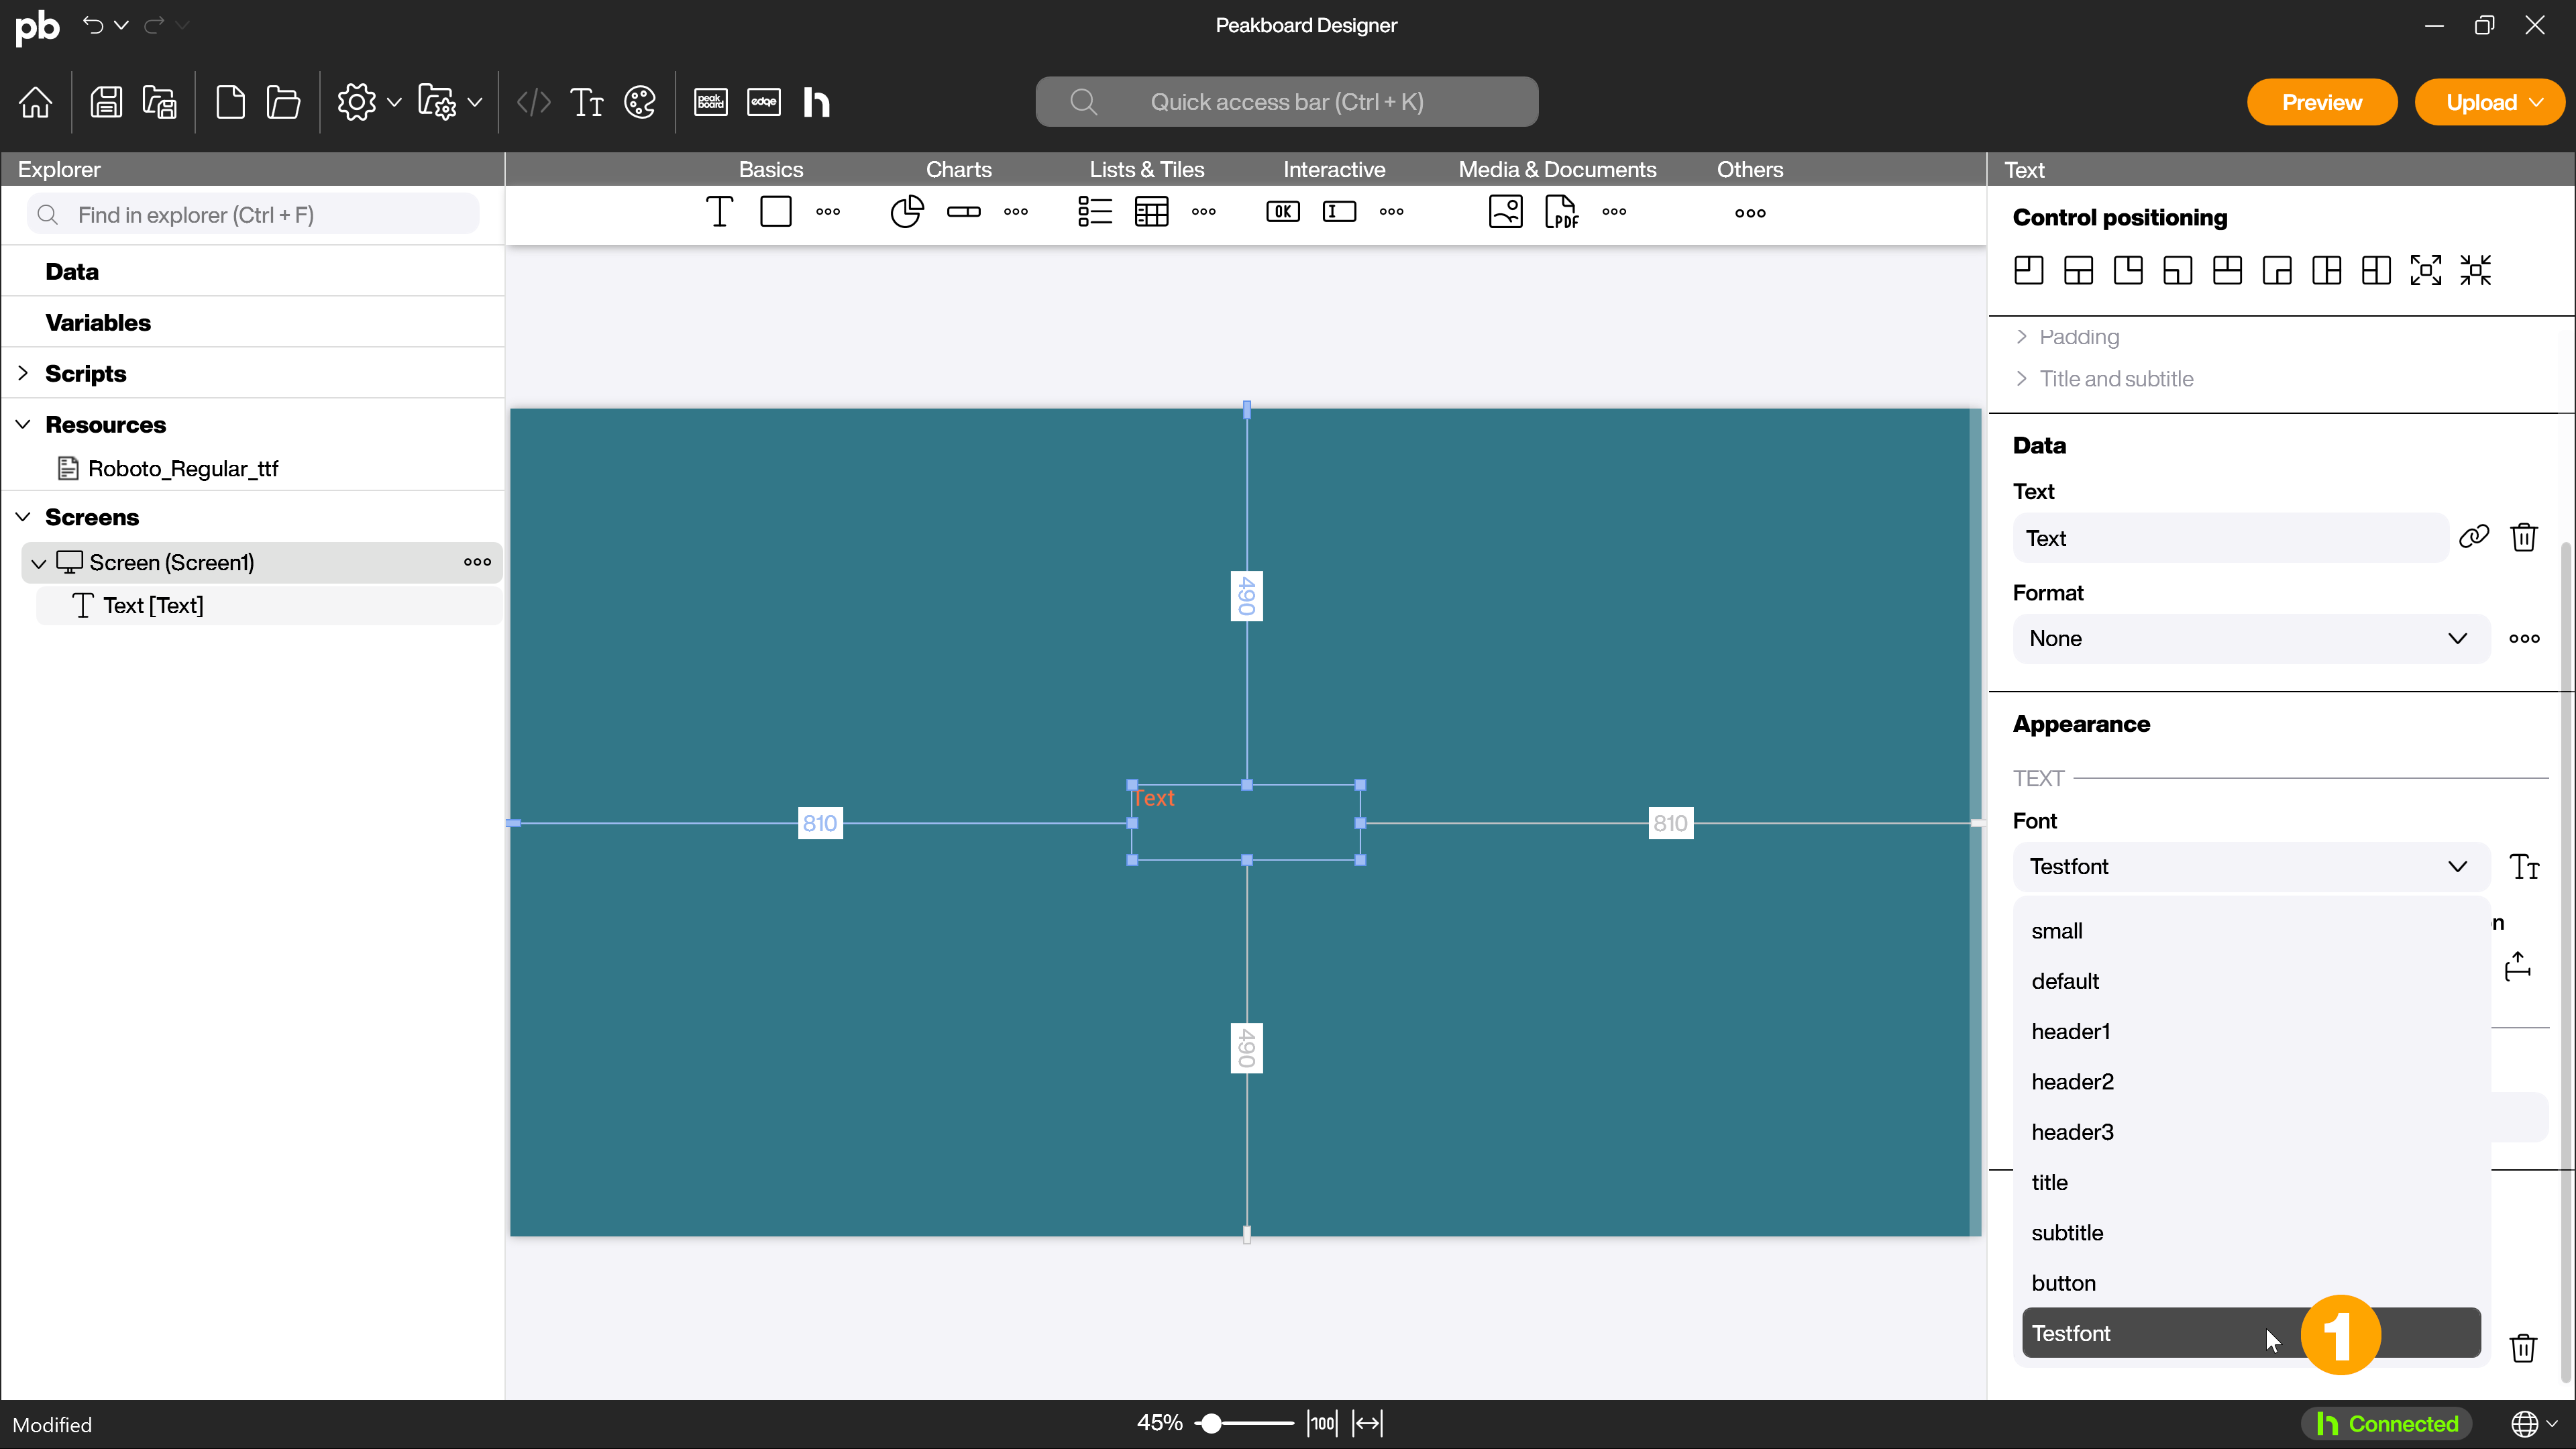
You can now use the fonts you have created and edited anywhere in the Peakboard Designer where you can define a font, for example in the text control. To do this, select the desired font (1) from the corresponding drop-down menu in the attributes.
