Controls
Text
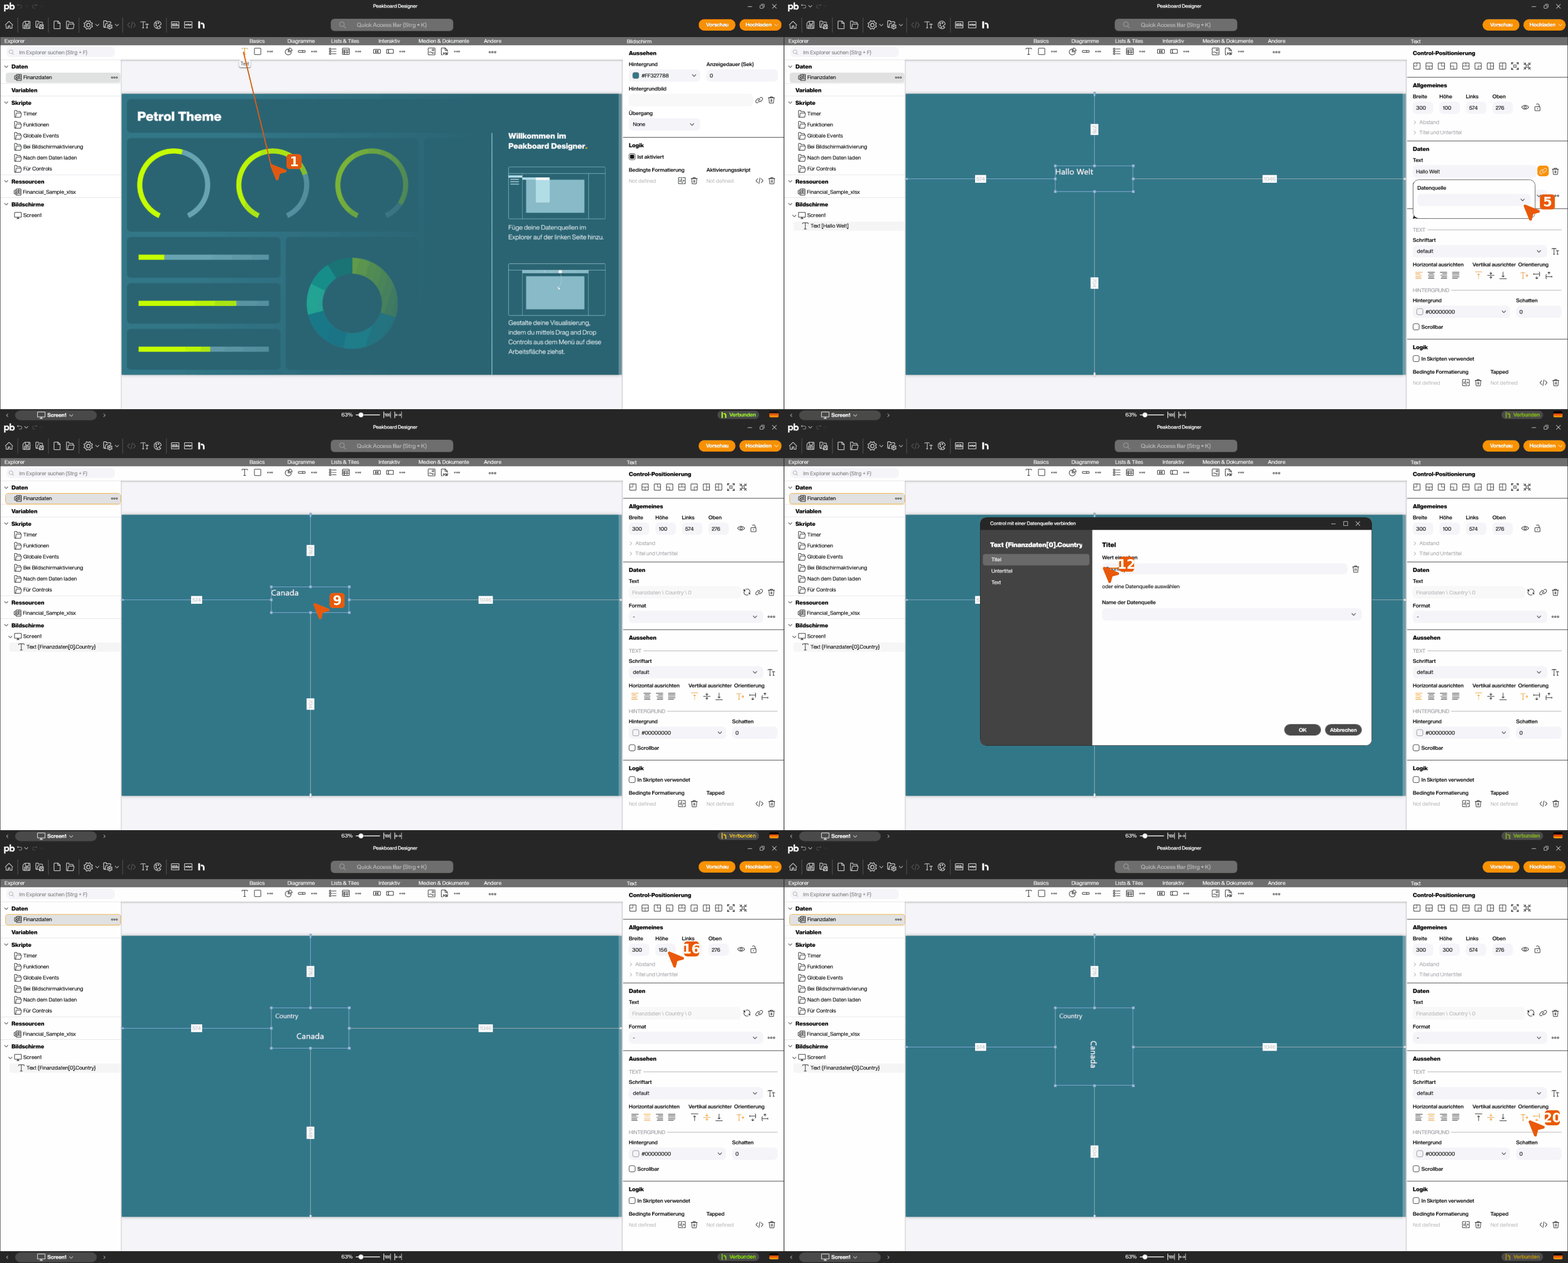
With the control [Text] you can display individual texts, headlines or KPIs, as well as label your dashboard elements. The content of this control is determined by the attribute [Text] in the lower right corner. All other properties can be found under General Properties. You can select different fonts or colors in the Font Manager and to format KPIs, click on Format under the attributes. You can use the Font Manager for fonts and colors.

Step-by-Step Guide
-
Creating a Text
Drag the text control from the basics group to a new position on the interface.
-
Linking to a Data Field
In the right section of your interface, click on the text input field under “Data.” Here, enter the desired text or edit existing text in the field. This changes how the text appears on the canvas.
-
Moving a Text Element on the Workspace
Drag the selected text element labeled “Text” across the surface to change its position. Ensure you maintain the correct size and alignment to ensure clear presentation.
-
Resetting the Text Input
Click on the trash can icon next to the text input field to quickly clear the content.
-
Assigning a Data Source
Click on the “Data Source” dropdown menu and select the desired data source such as “Financial Data.” This assignment links your text elements with the corresponding data for dynamic display.
-
Assigning a Title
Click on the title and enter the desired title, e.g., “Country”. You can also link the title to your data source if needed. This ensures that the correct data is displayed on the dashboard and readability is enhanced.
-
Adjusting Text Alignment
In the “Appearance” section, click on the alignment icons for horizontal and vertical text alignment to the left and center to format the text accordingly. These adjustments optimize readability and layout.