Data sources
Azure IoT Hub
This article describes the [Azure IoT Hub] data source in Peakboard and sets it apart from the Azure Event Hub data source.
While the event hub data source is used purely to receive events – ideal for reacting to events asynchronously – Peakboard takes an active role with the IoT hub data source: Peakboard acts as its own device within the Azure IoT Hub. Communication is therefore bidirectional. Peakboard can receive messages, answer direct methods and send messages to Azure itself.
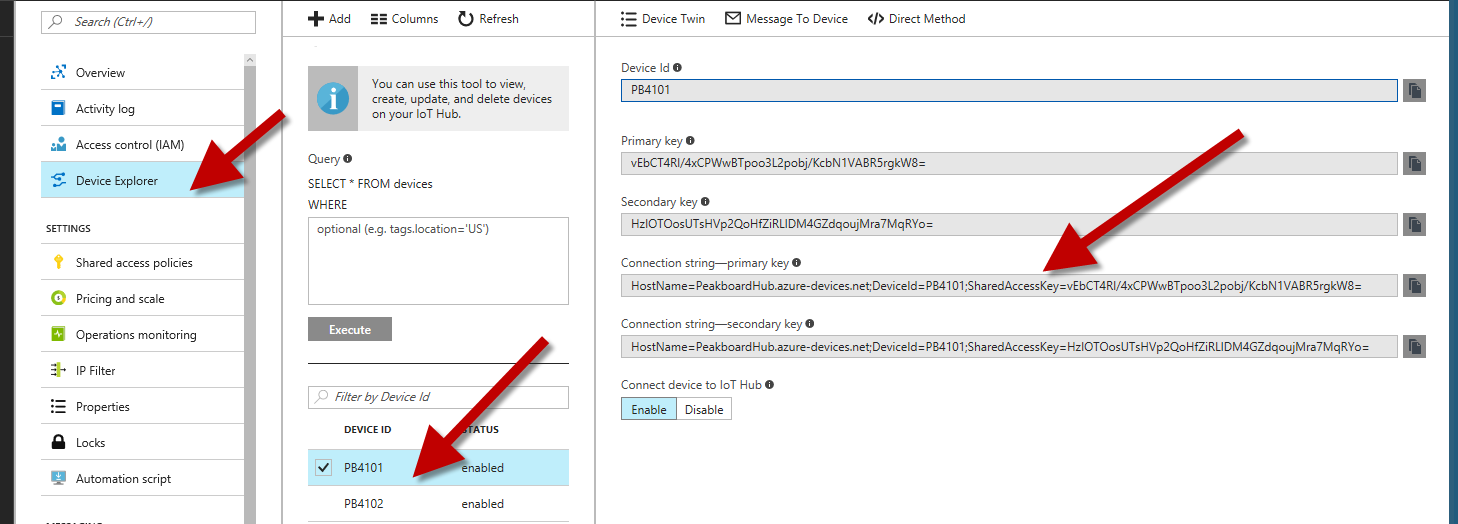
For this to work, Peakboard must be registered as a device in the Azure IoT Hub. To learn how to create a device, see the Microsoft documentation:
https://learn.microsoft.com/azure/iot-hub/iot-hub-create-through-portal
The connection uses the device connection string, which is stored directly with the device in the Azure portal:
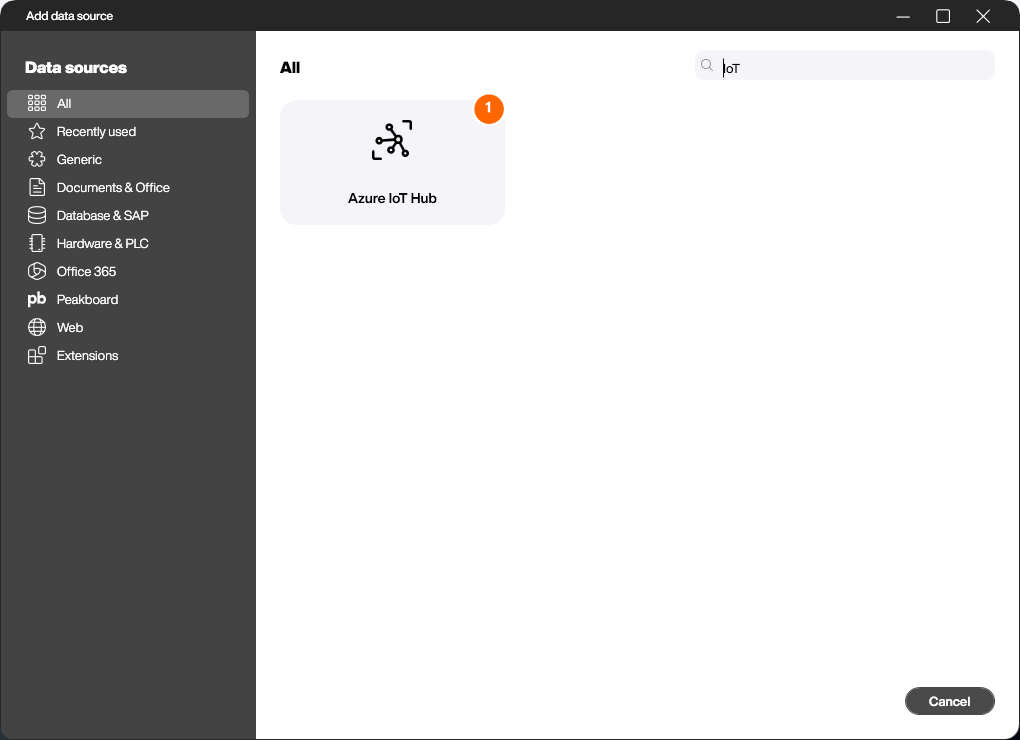
Add the data source
Right-click [Data] or click the […] button and choose [Add data source]. You will find the Azure IoT Hub in the [Generic] category – or simply type “IoT” into the search box. Then double-click the [Azure IoT Hub] tile (1).
Configure the connection
In the following dialog you set up the connection and the processing:
- Data source name (1) – the name under which the data source appears in the Explorer.
- Connection string (2) – the device connection string from the Azure portal (see above).
- Queue size (3) – the maximum number of the most recent messages kept in the queue table.
- Script (4) – an optional script that is called for every incoming message (see below).
- Direct methods (5) – the list of methods the device answers. Use [New] to add a new method.
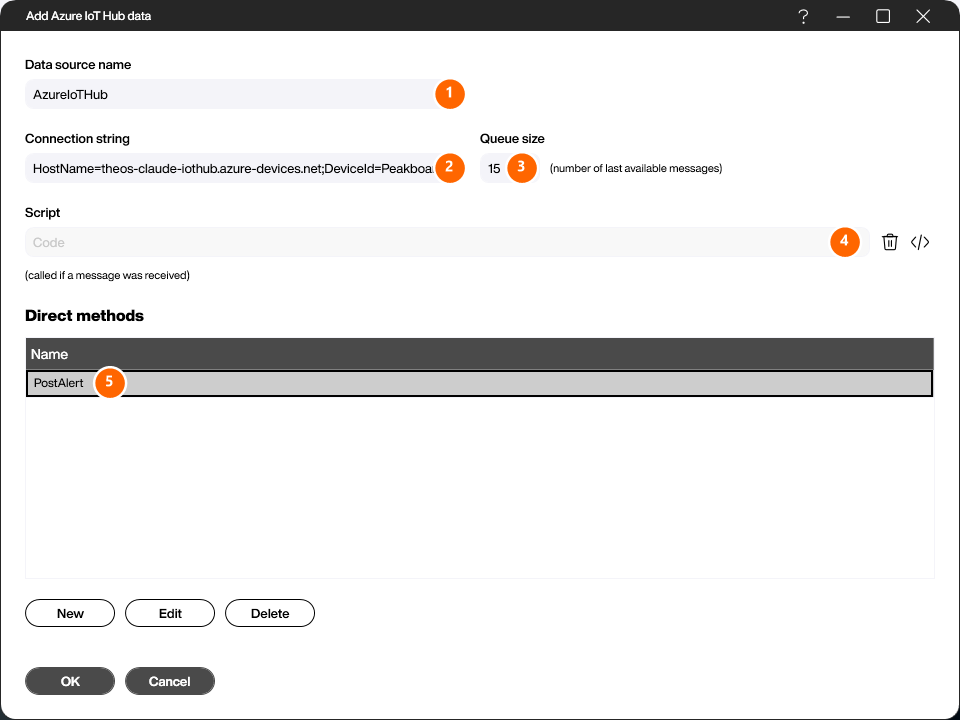
The connection string contains a secret key. In the screenshot the
SharedAccessKeyvalue is masked – enter your real value from the Azure portal here.
Receiving messages
Incoming messages are stored automatically in a table-like structure – just like any other Peakboard data source. The table has three columns: Timestamp (when the message was received), Topic (the message source) and Text (the content). Use [Queue size] to define how many of the most recent messages are kept.
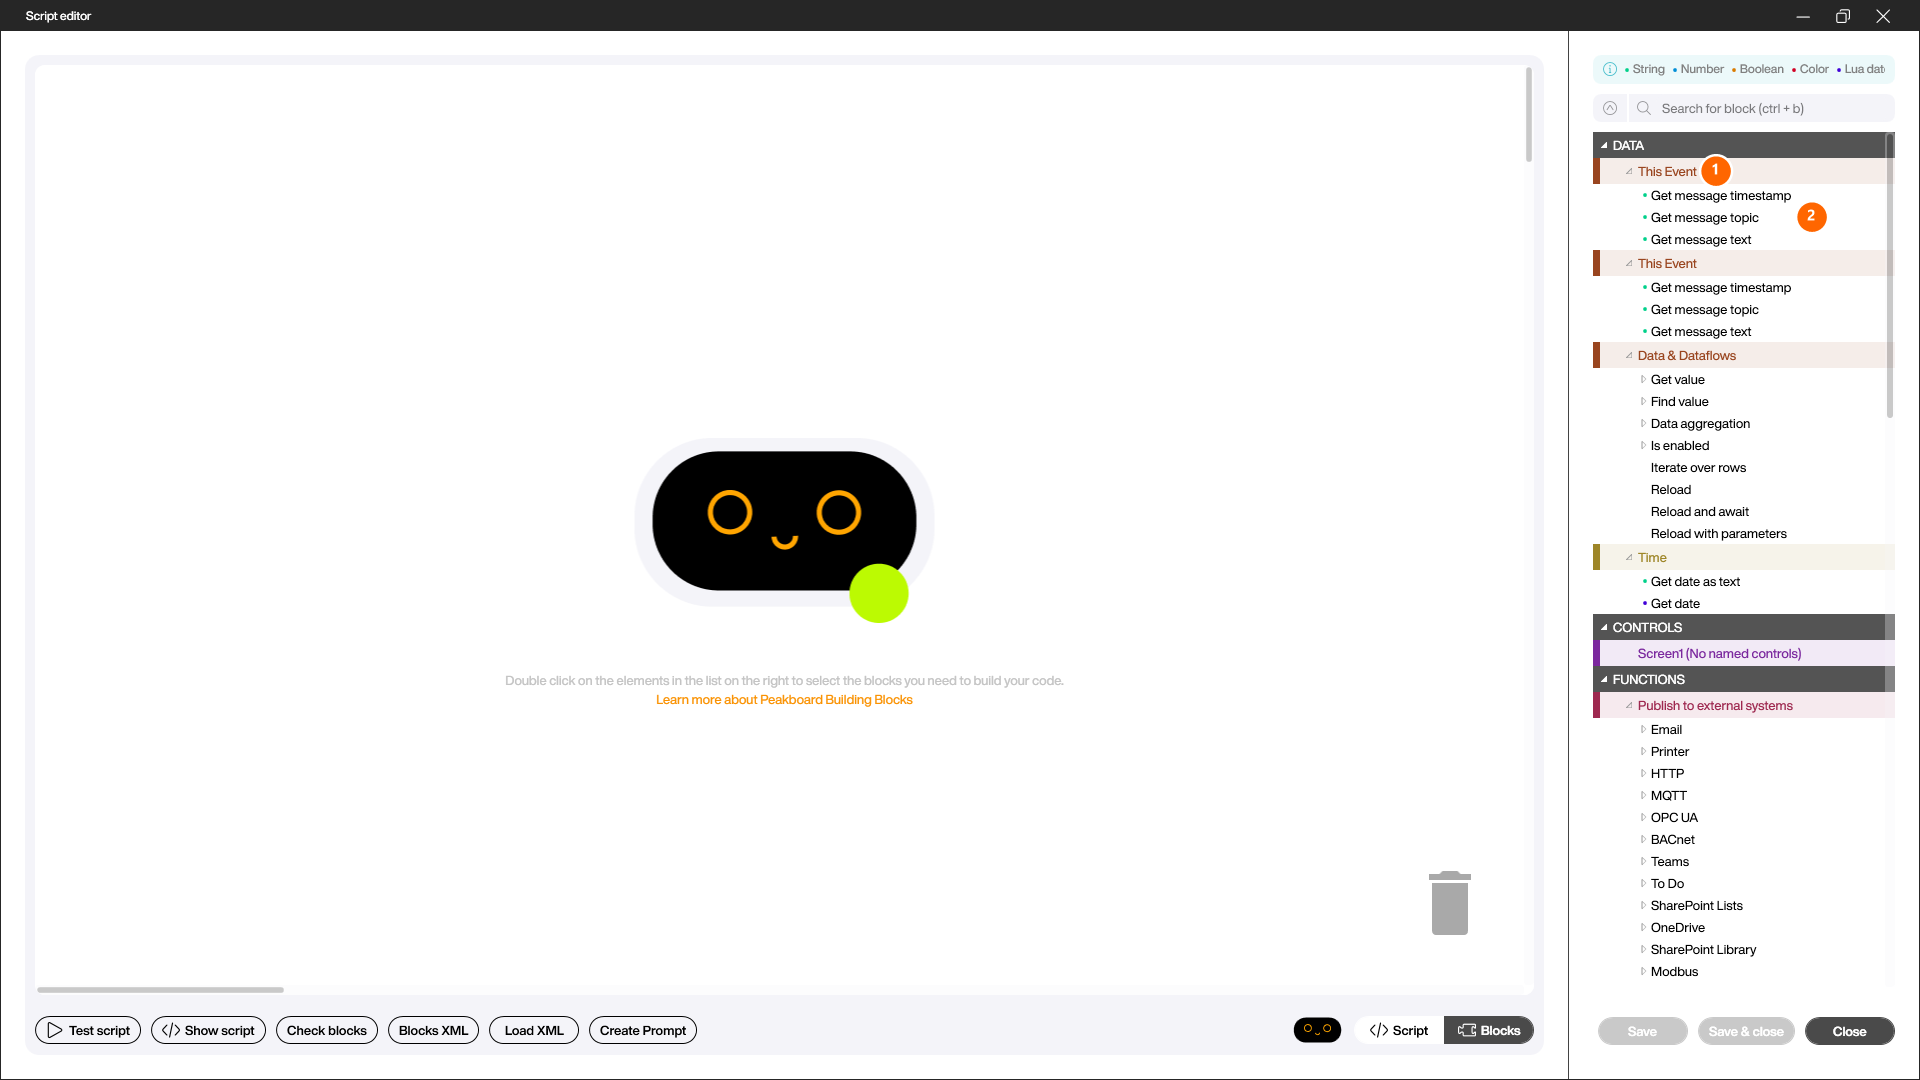
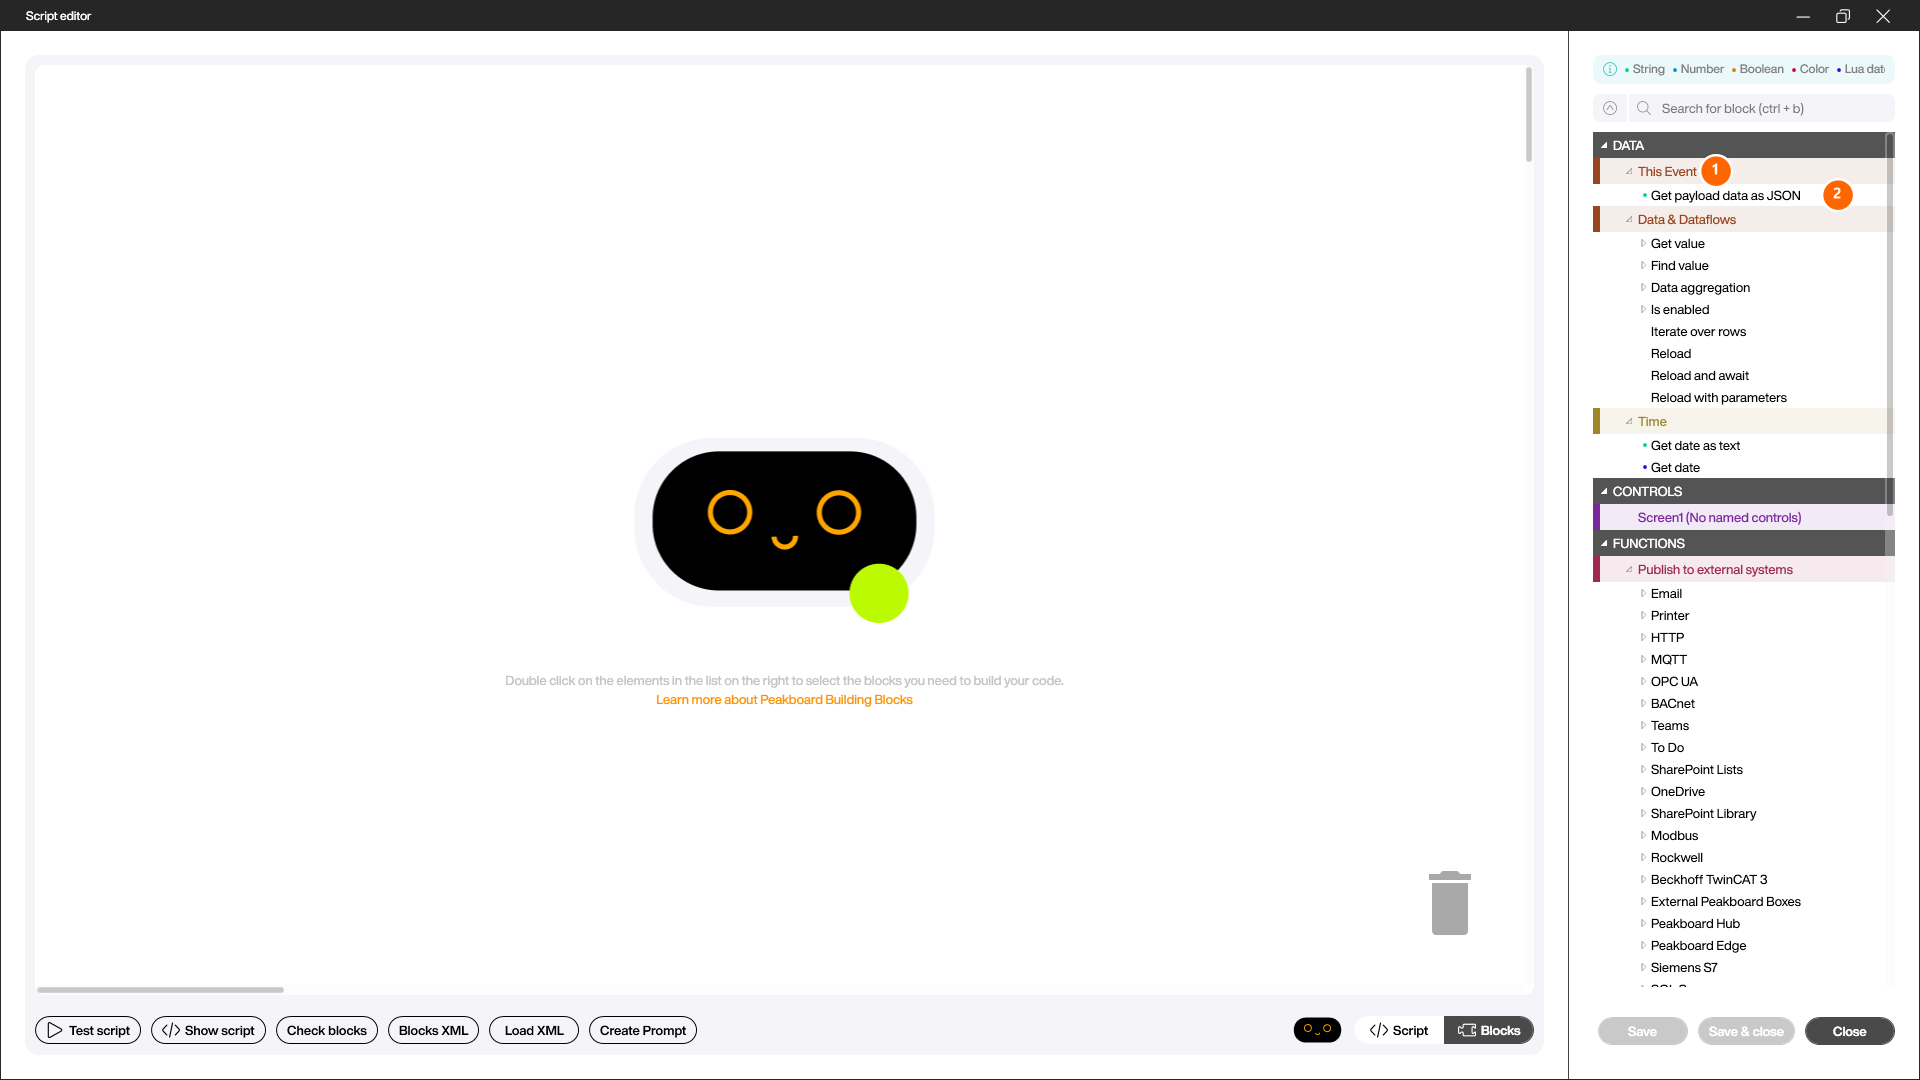
Alternatively, or in addition, you can react to each incoming message directly with a script, without evaluating the queue. The script is triggered automatically for every message. In the Building Blocks editor, the [This Event] group (1) gives you the blocks [Get message timestamp], [Get message topic] and [Get message text] (2) to access the current message.
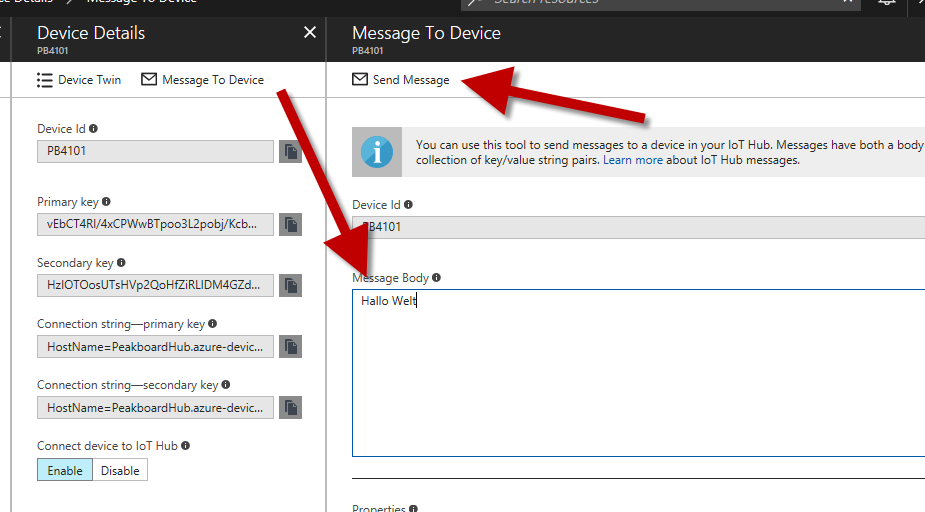
To test incoming messages, use the message test mode in the Azure portal:
Receiving and answering direct methods
Besides messages, the Azure IoT Hub supports so-called direct methods. They differ from messages in that they are called synchronously and expect a return value. Peakboard can therefore not only react, but also return an answer (for example an acknowledgement) to the calling system.
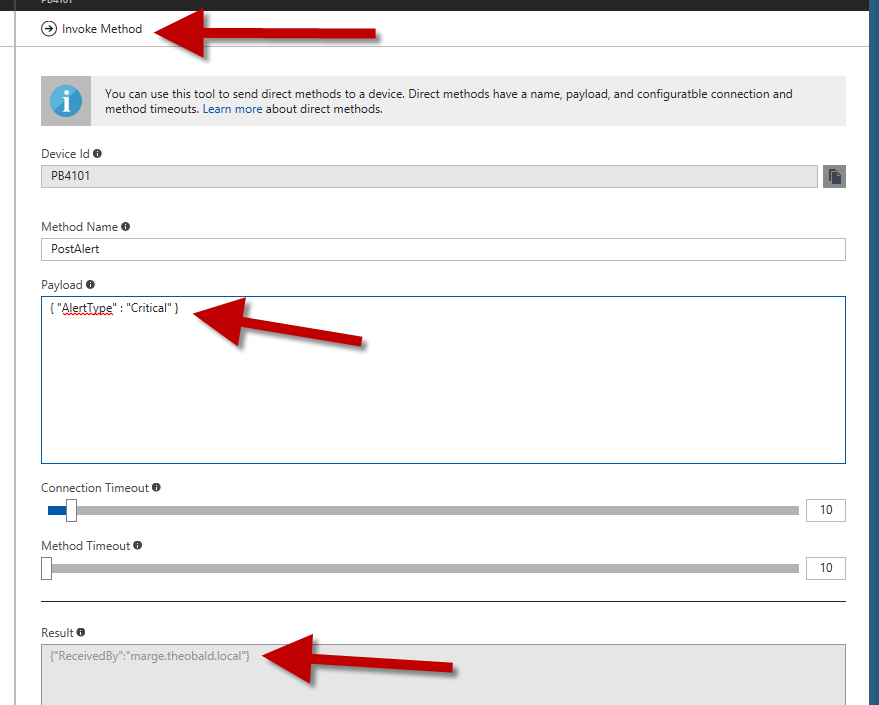
For each method you add an entry to the [Direct methods] table via [New] in the connection dialog (in the example the method PostAlert). In the method script you access the supplied JSON payload through the [Get payload data as JSON] block (2) in the [This Event] group (1), evaluate it, and return a value as the answer.
The matching method call can be triggered directly in the Azure portal through the method test dialog – just like the message test. Peakboard’s answer is then shown under [Result]:
Sending messages from Peakboard to the IoT Hub
The third communication channel is actively sending messages from Peakboard to the cloud. This is done with a script bound, for example, to a button’s [Tapped] event – so an end user can send a message at the push of a button. In the script you typically build a JSON object and pass it to the send function of the IoT hub data source. This lets you integrate Peakboard seamlessly as a sending device in your IoT architecture.