Administration
Switching the Peakboard Box on and off remotely
Peakboard Boxes in factory halls or similar workplaces often hang in hard-to-reach places a little further above the floor. If, for example, no work is being done at night, it makes sense to switch off the Peakboard Boxes overnight. In this article, you will learn how to shut down your Peakboard Box remotely and how to start it remotely with Wake-on-LAN (WoL).
There are three different ways to shut down a Peakboard Box remotely.
Shut down Peakboard Box with a timer script
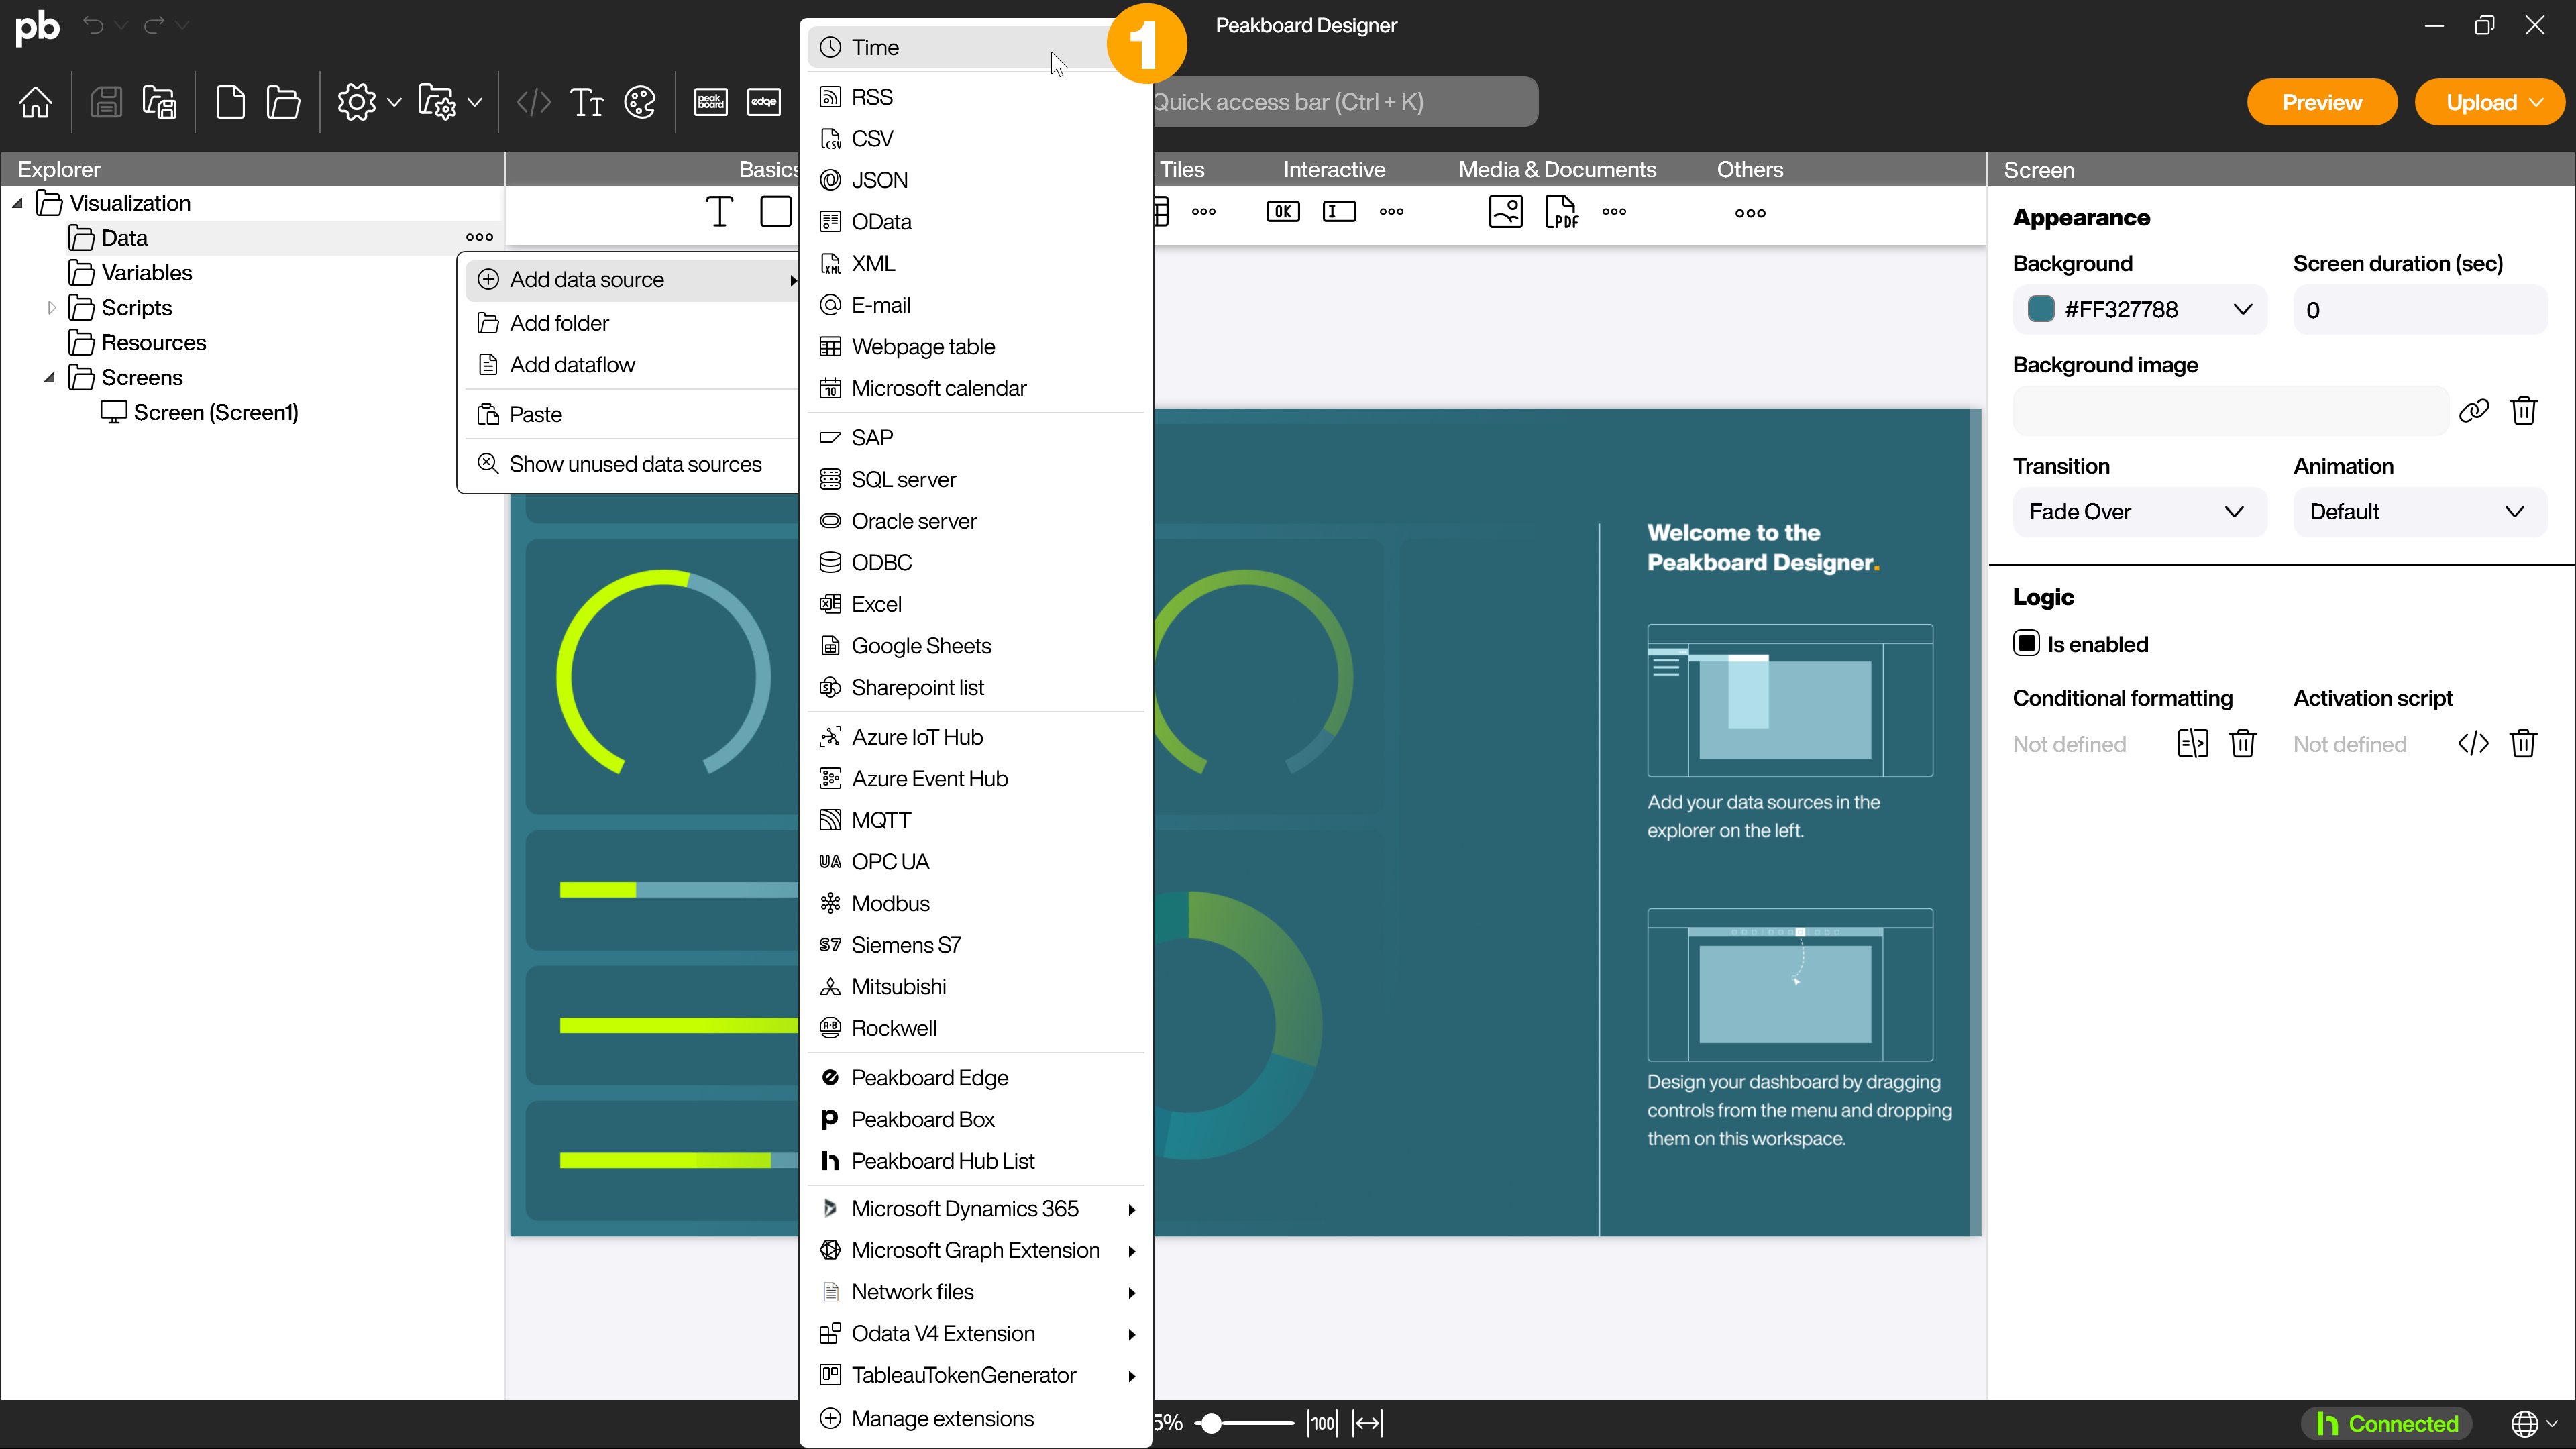
You can shut down your Peakboard Box directly from an application. To shut down your Peakboard Box automatically at a certain time, you must first create a time data source via [Add data source] and then [Time] (1).
In the next step, add a timer script (1).
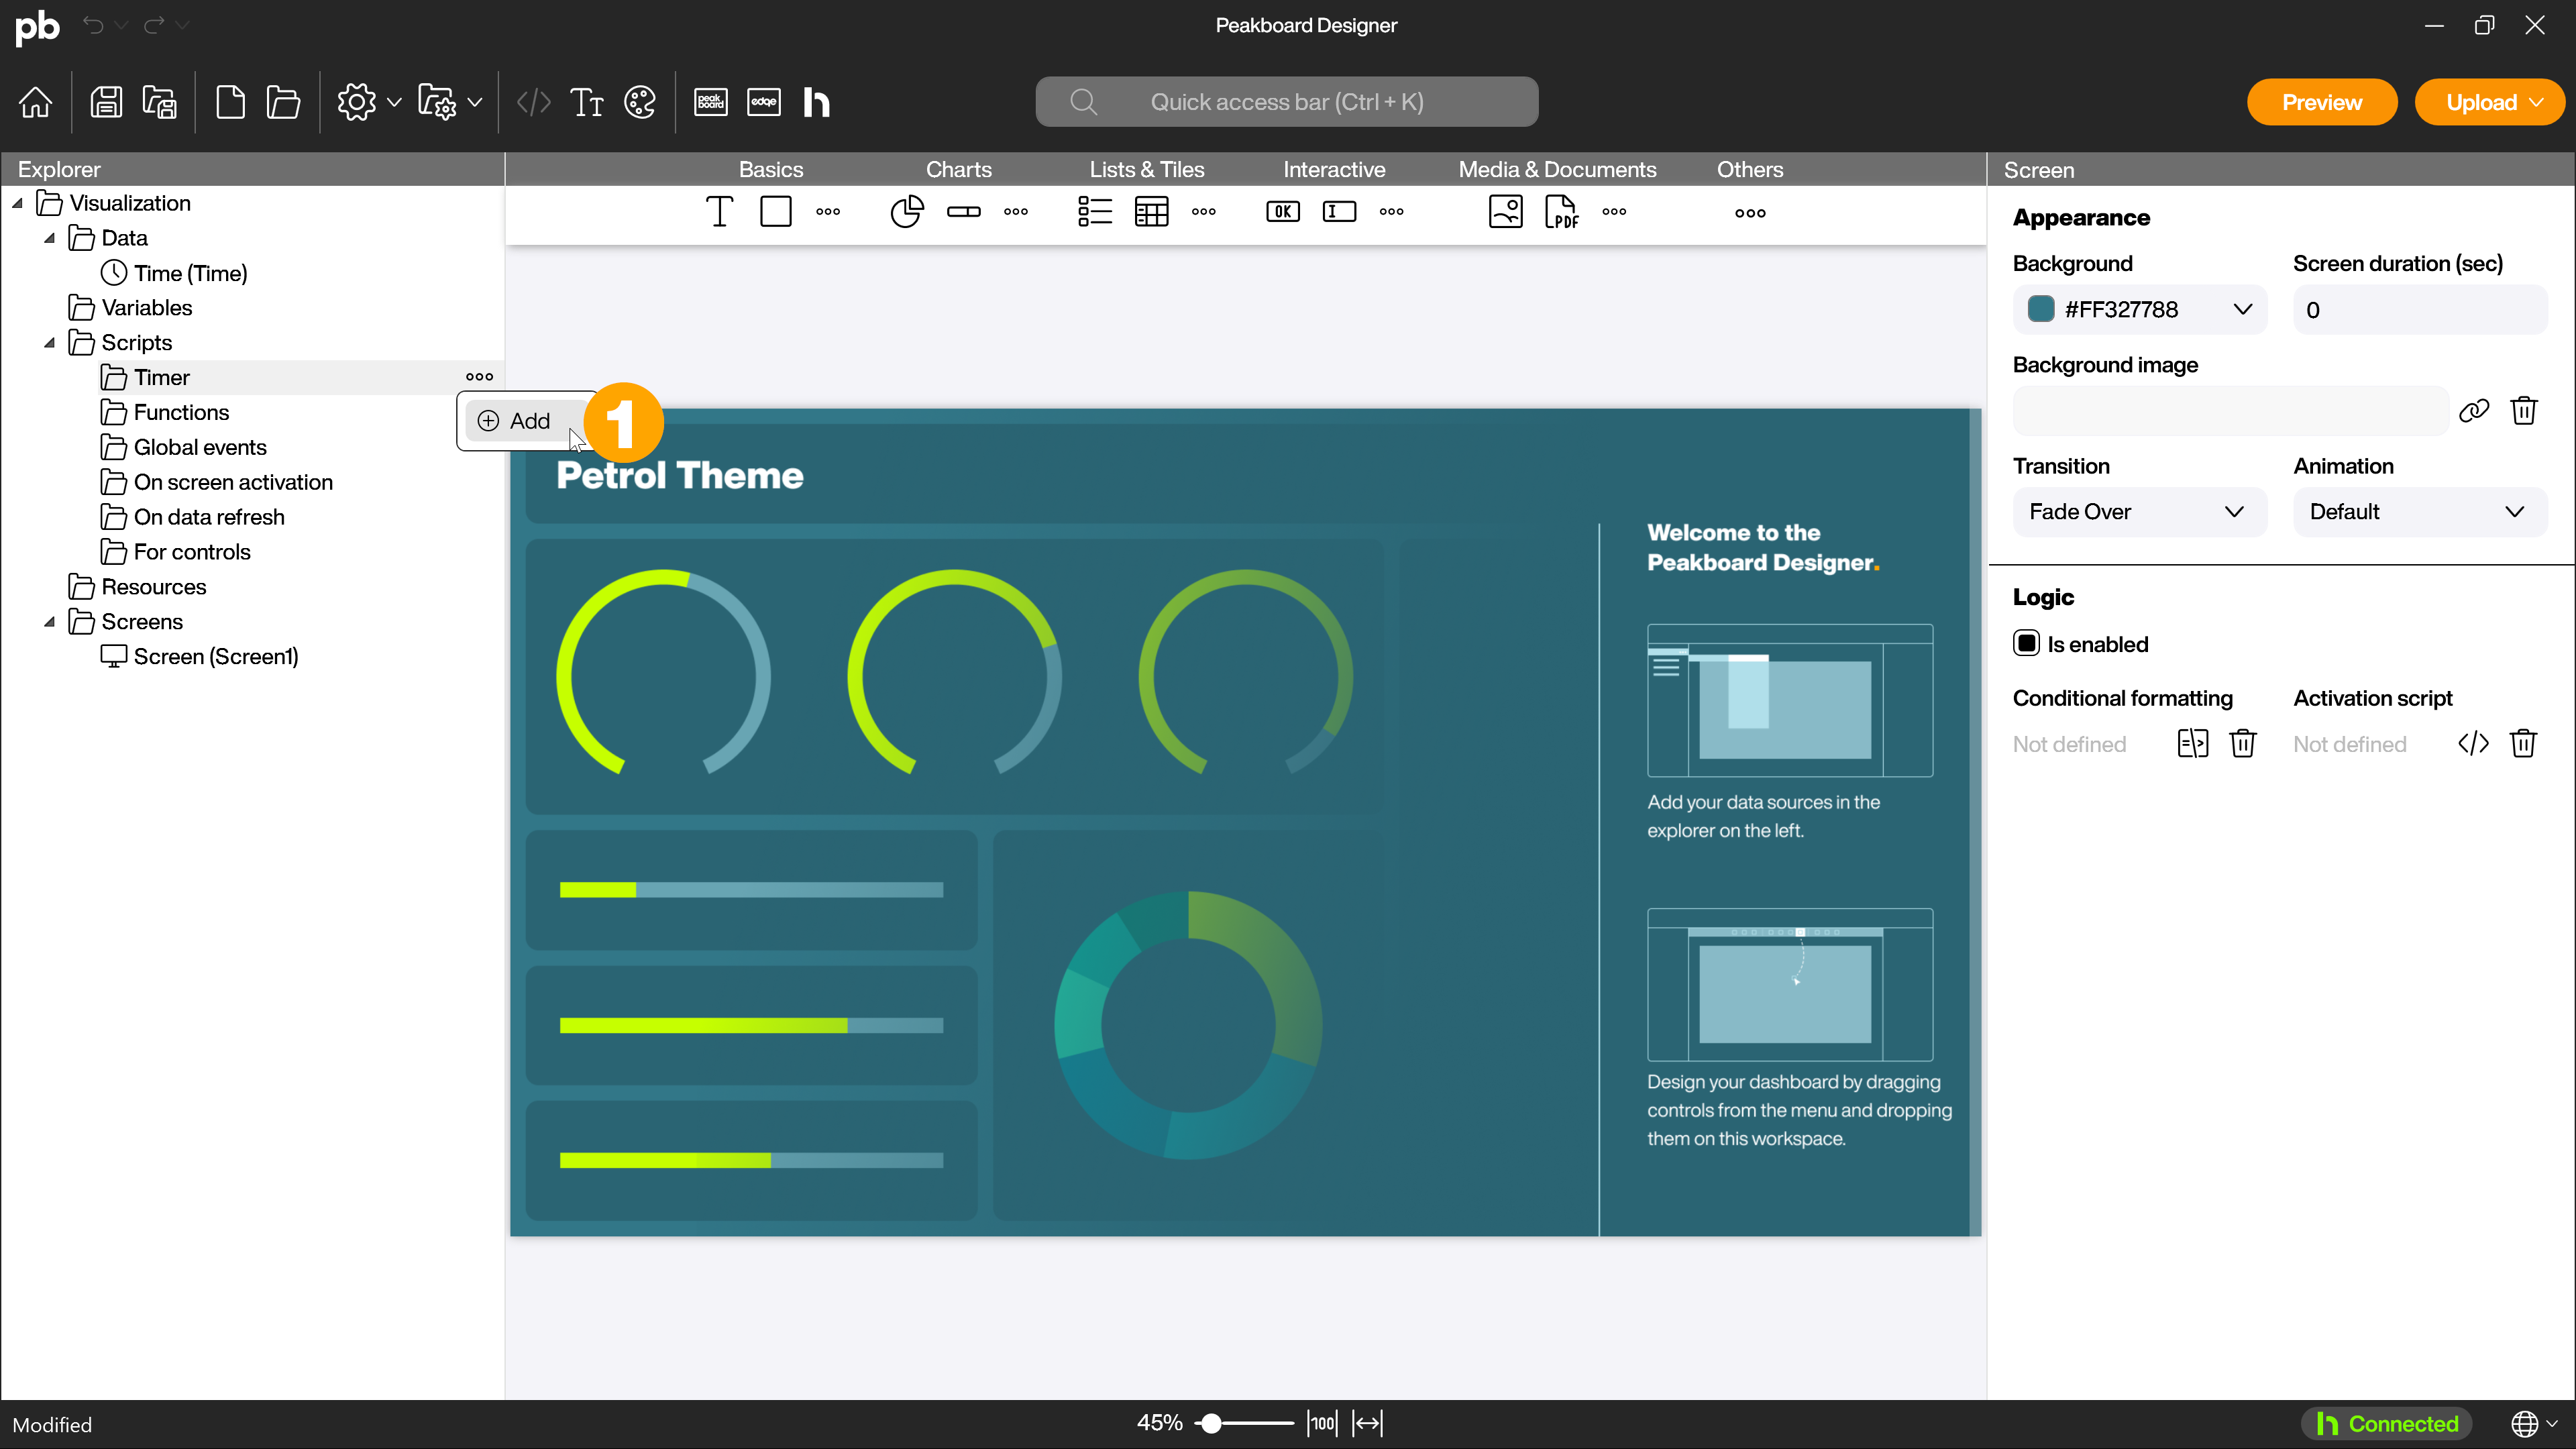
There are various ways in which the script can be set up.
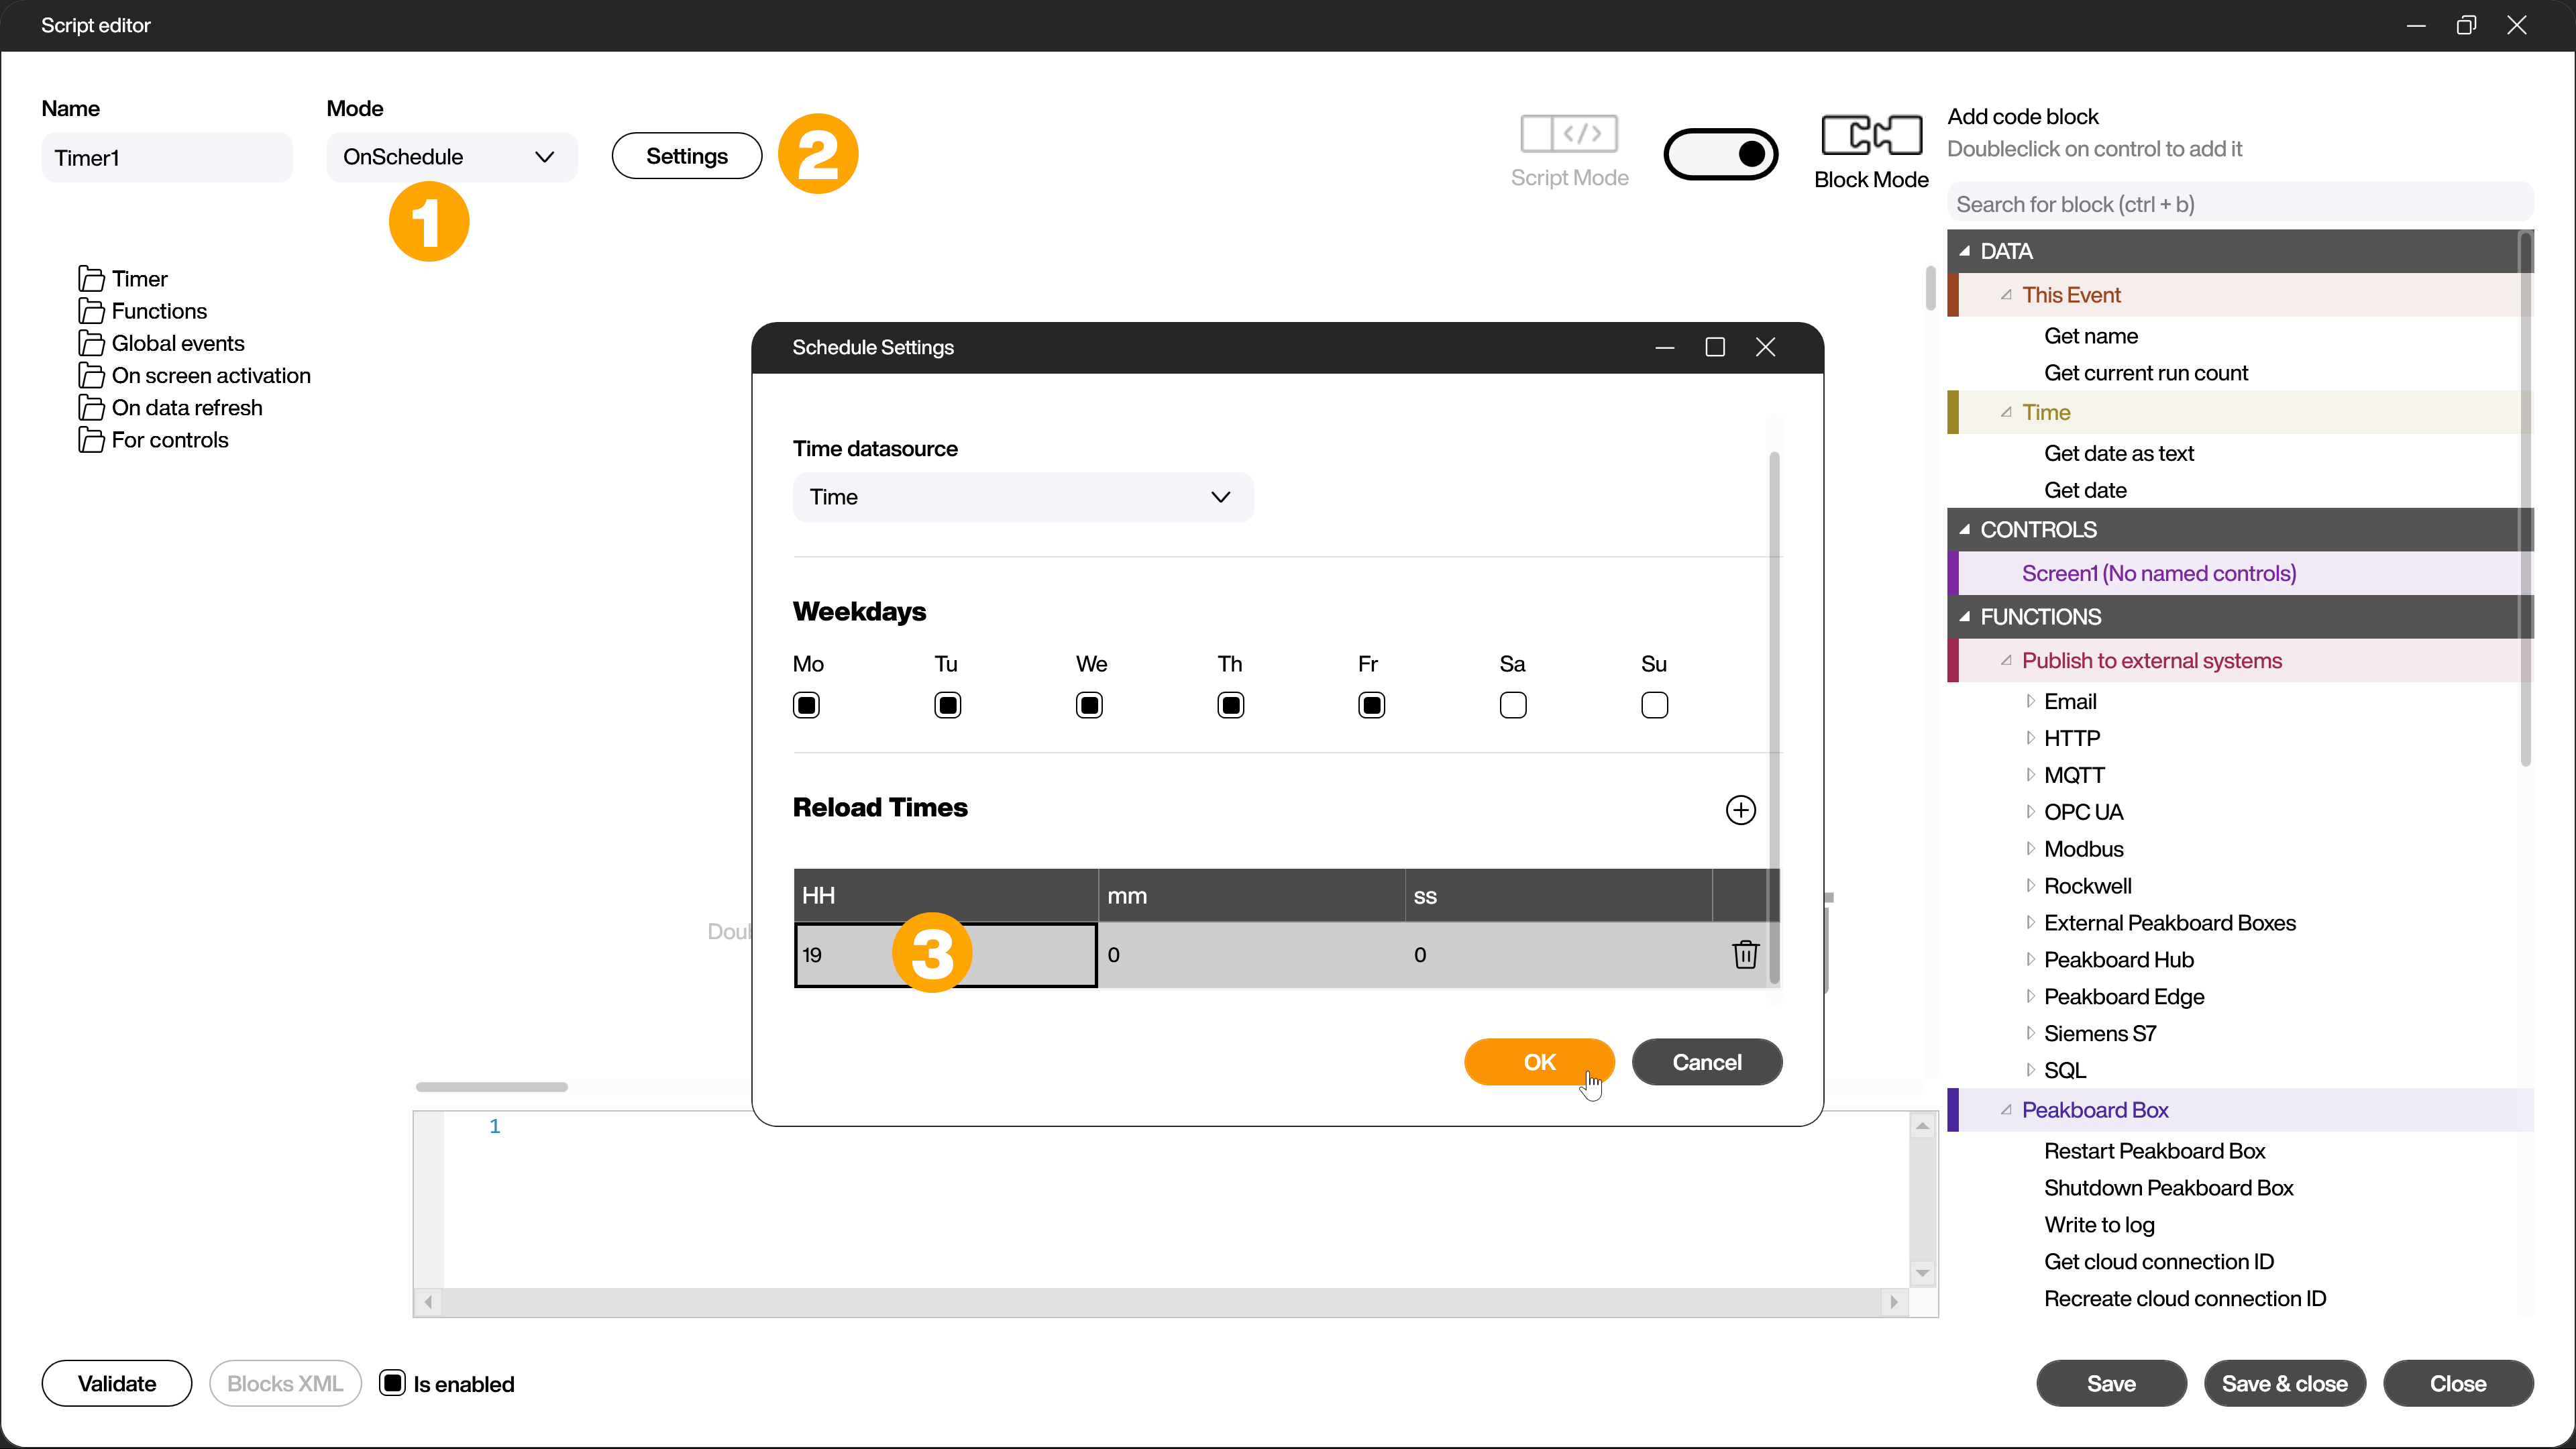
For the first option, select [OnSchedule] (1) as the mode in the script editor that opens and then click on the [Settings] button (2) to specify the days of the week and times at which the script should be executed. In this example, the script is executed on weekdays every day at 7 pm (3) at the end of working hours.
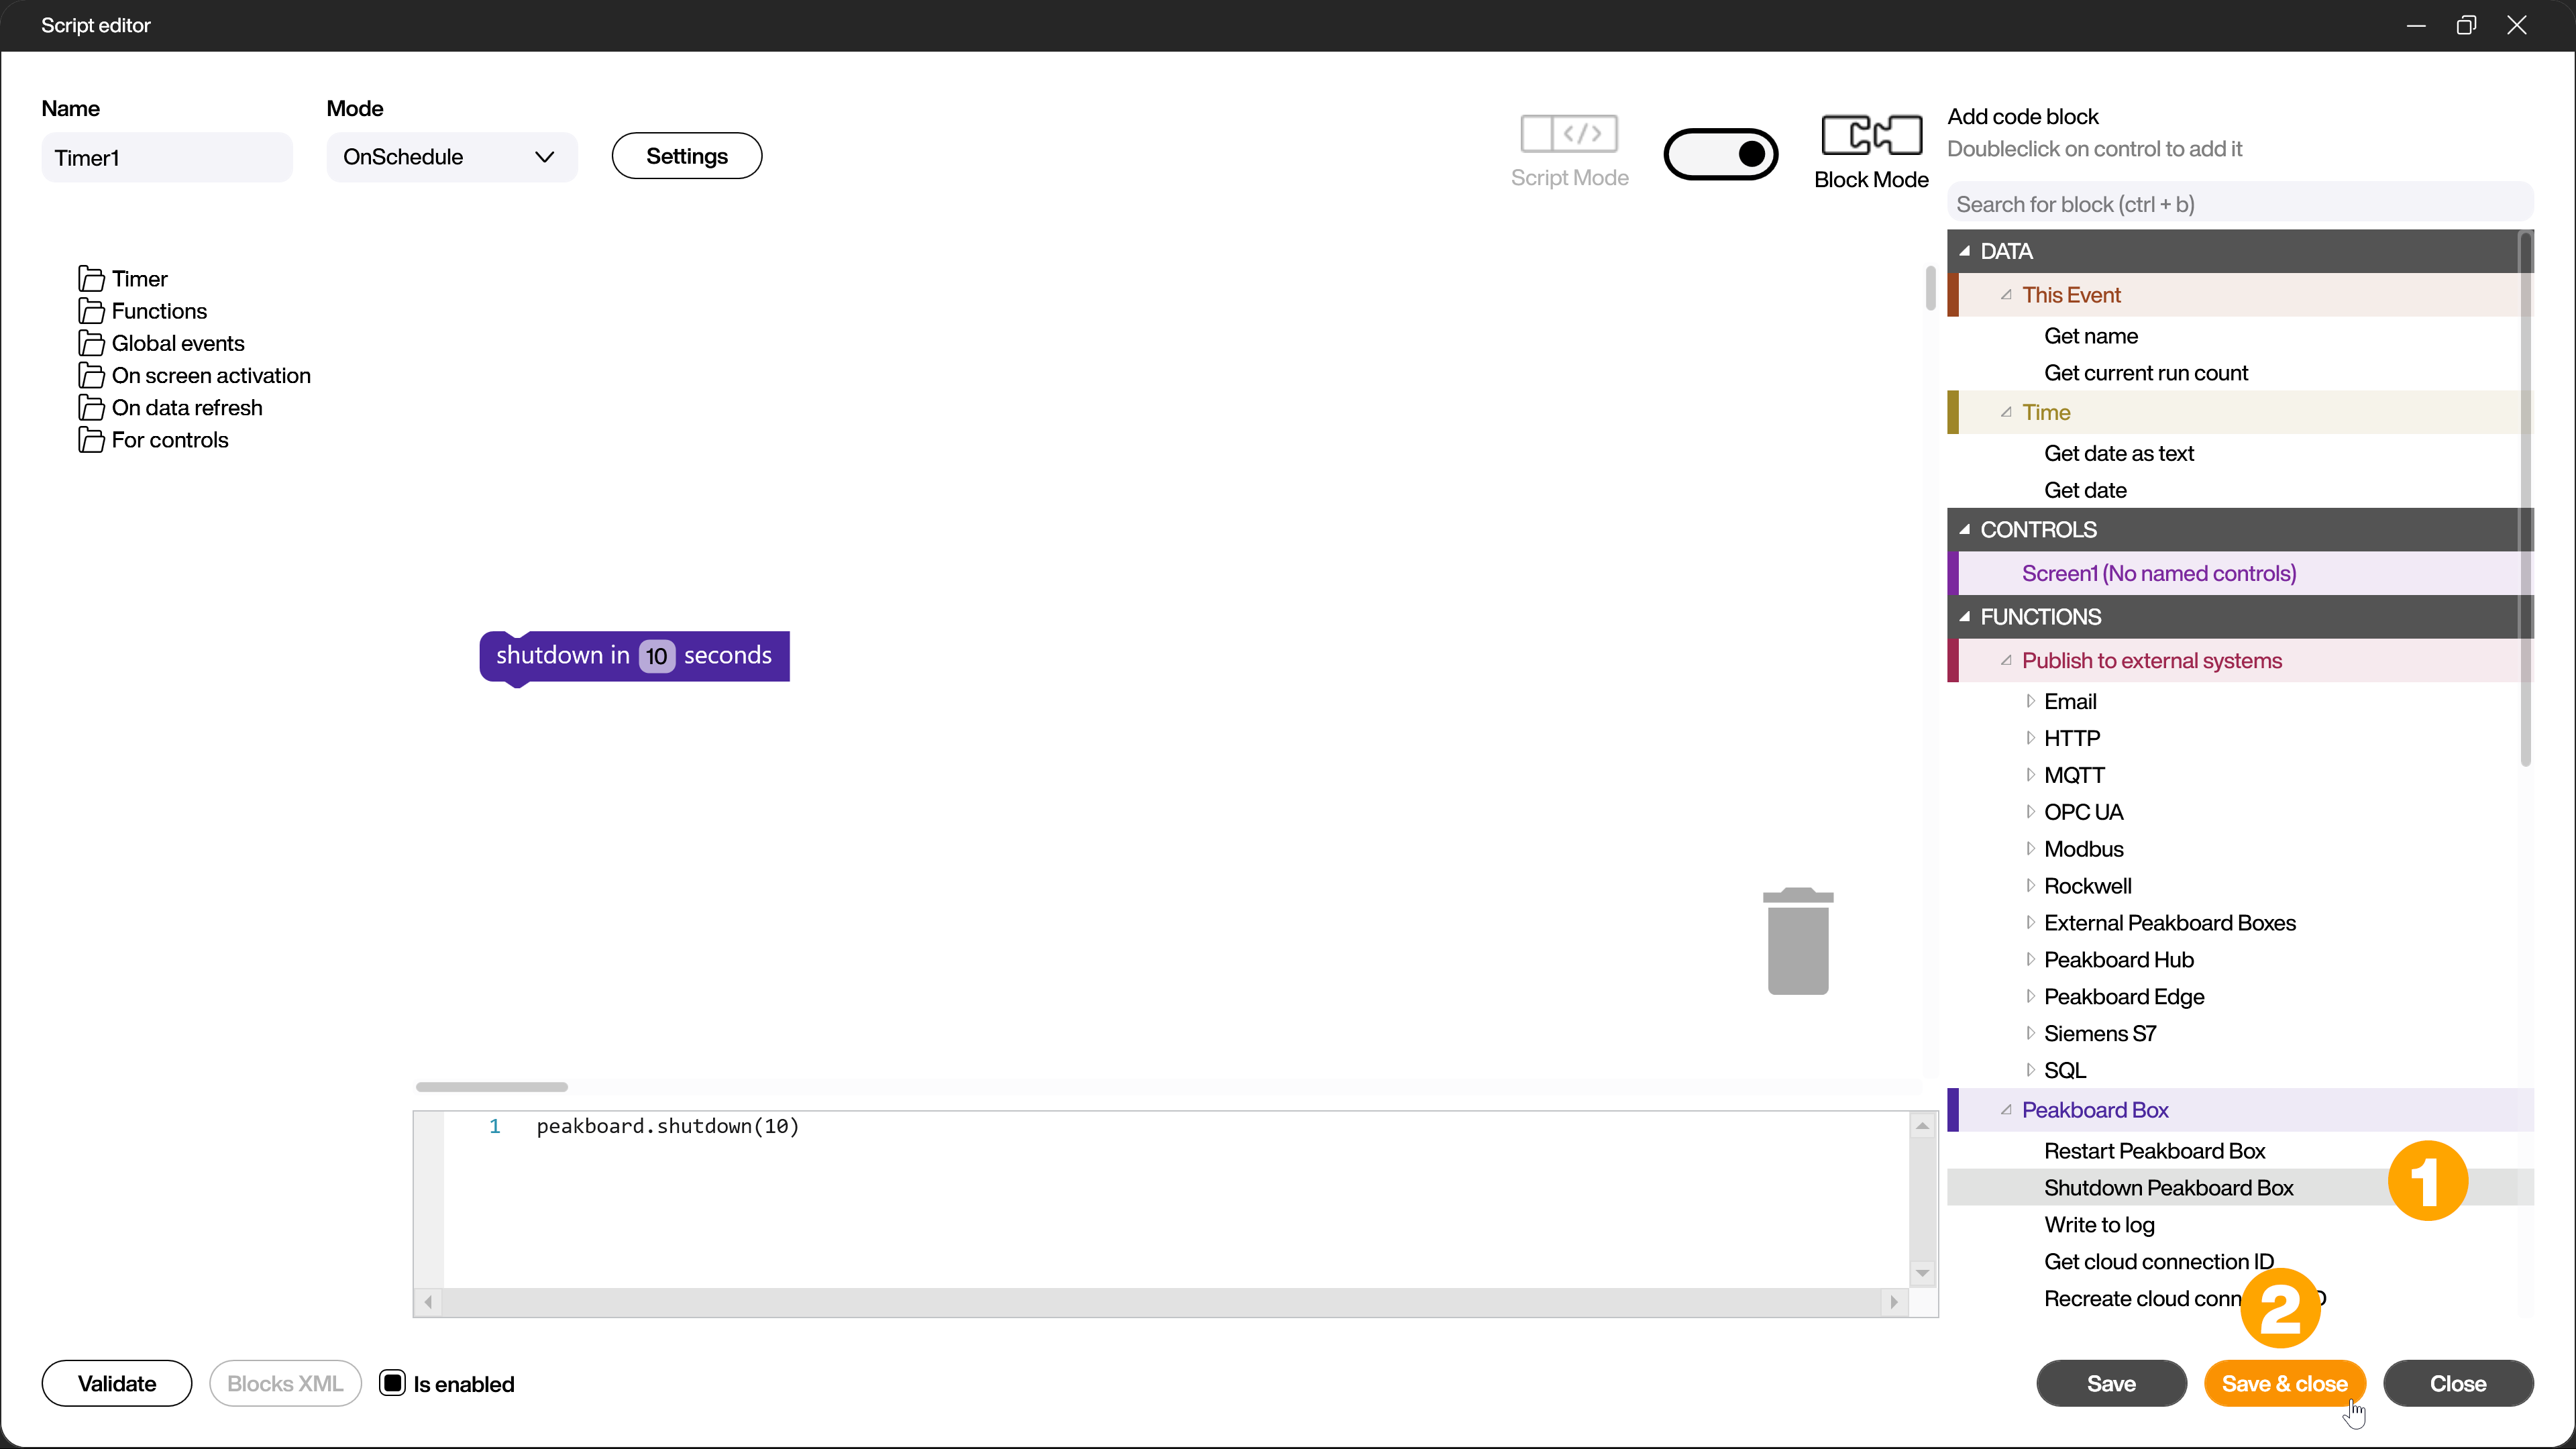
After clicking on [OK], add the building block [Shutdown Peakboard Box] (1) from the [Functions/Peakboard Boxes] area. Alternatively, enter peakboard.shutdown(10) in script mode, where 10 is the number of seconds after which the Peakboard Box shuts down. With [Save & Close] (2) you leave the script editor and have successfully set up the automatic shutdown.
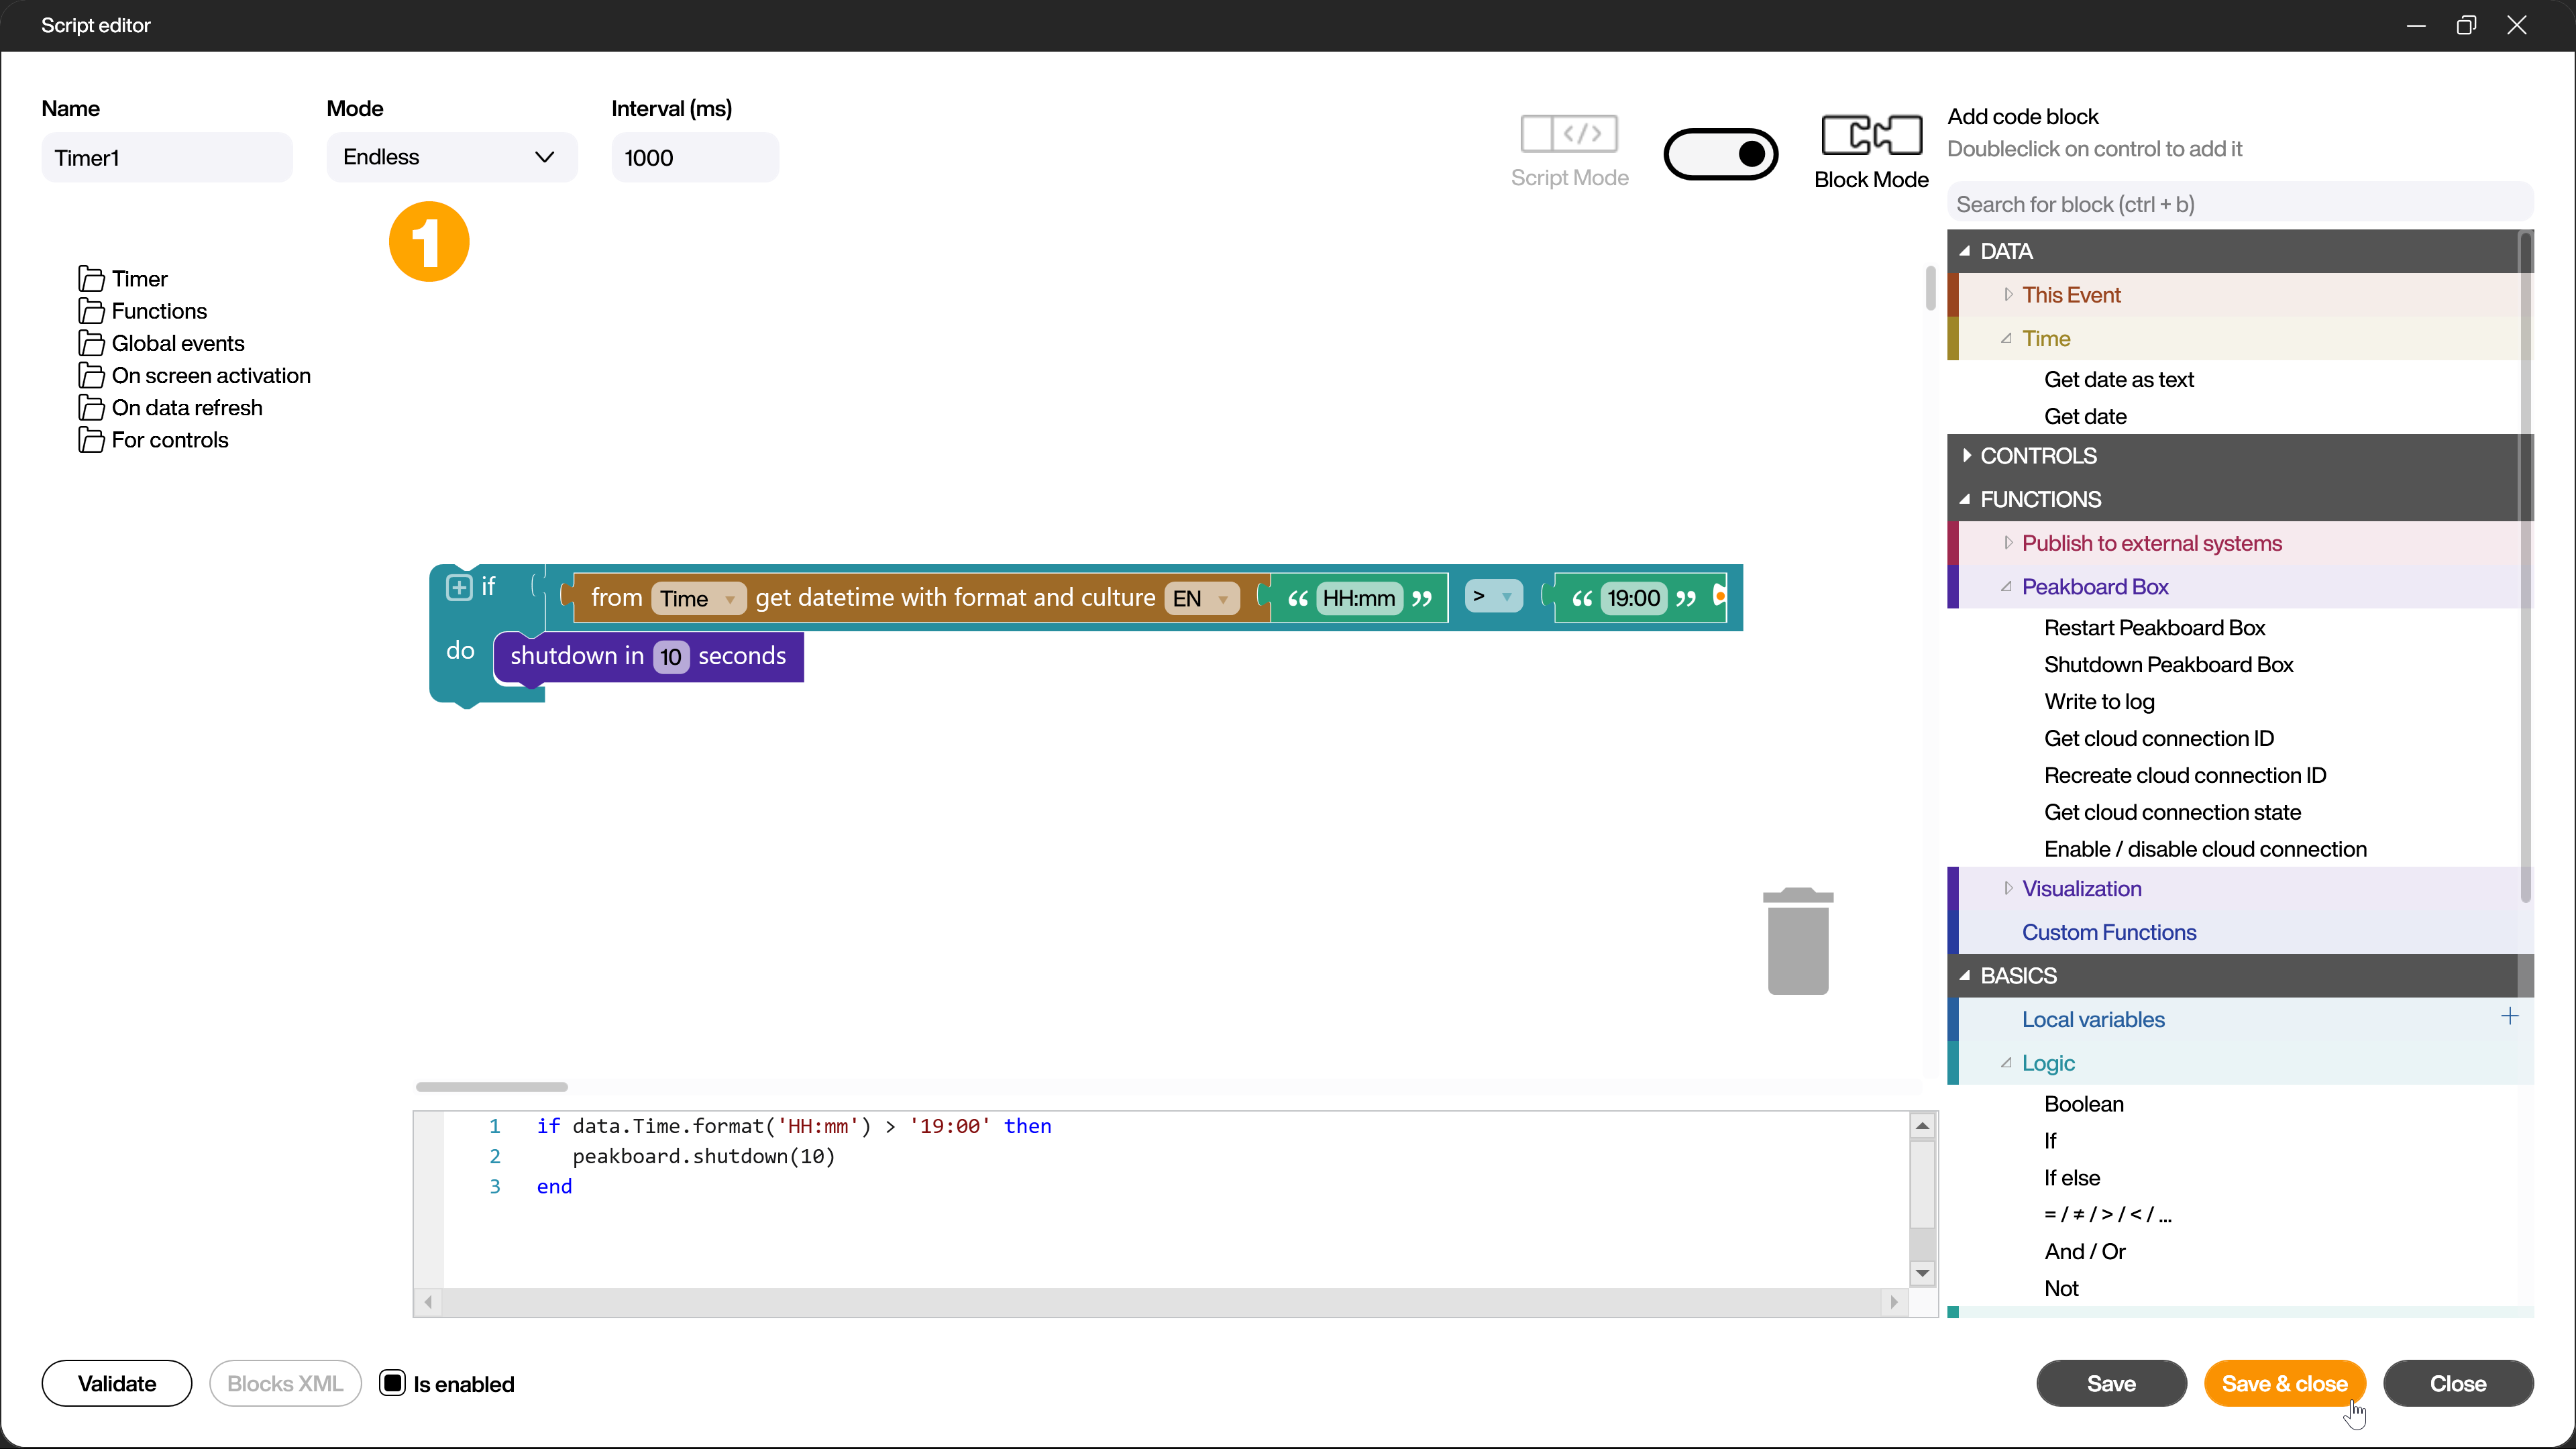
Alternatively, you can also build a script that checks the time of a [Get date as text] building block from the [DATA/Time] section with an [If statement] building block from the [BASIC/Logic] section in [Endless] (1) mode and shuts down the Peakboard Box with the same [Shutdown Peakboard Box] building block as the previous method once the desired time has been reached. In script mode, the script looks like this.
if data.time.format('HH:mm', 'DE') > '19:00' then
   peakboard.shutdown(10)
end
Here [time] is the name of your time data source.
Shut down Peakboard Box with a global shared function
Another method to shut down your Peakboard Box remotely is a global shared function that you execute via web access or via HTTP POST request. You use the same building block as in the previous method.
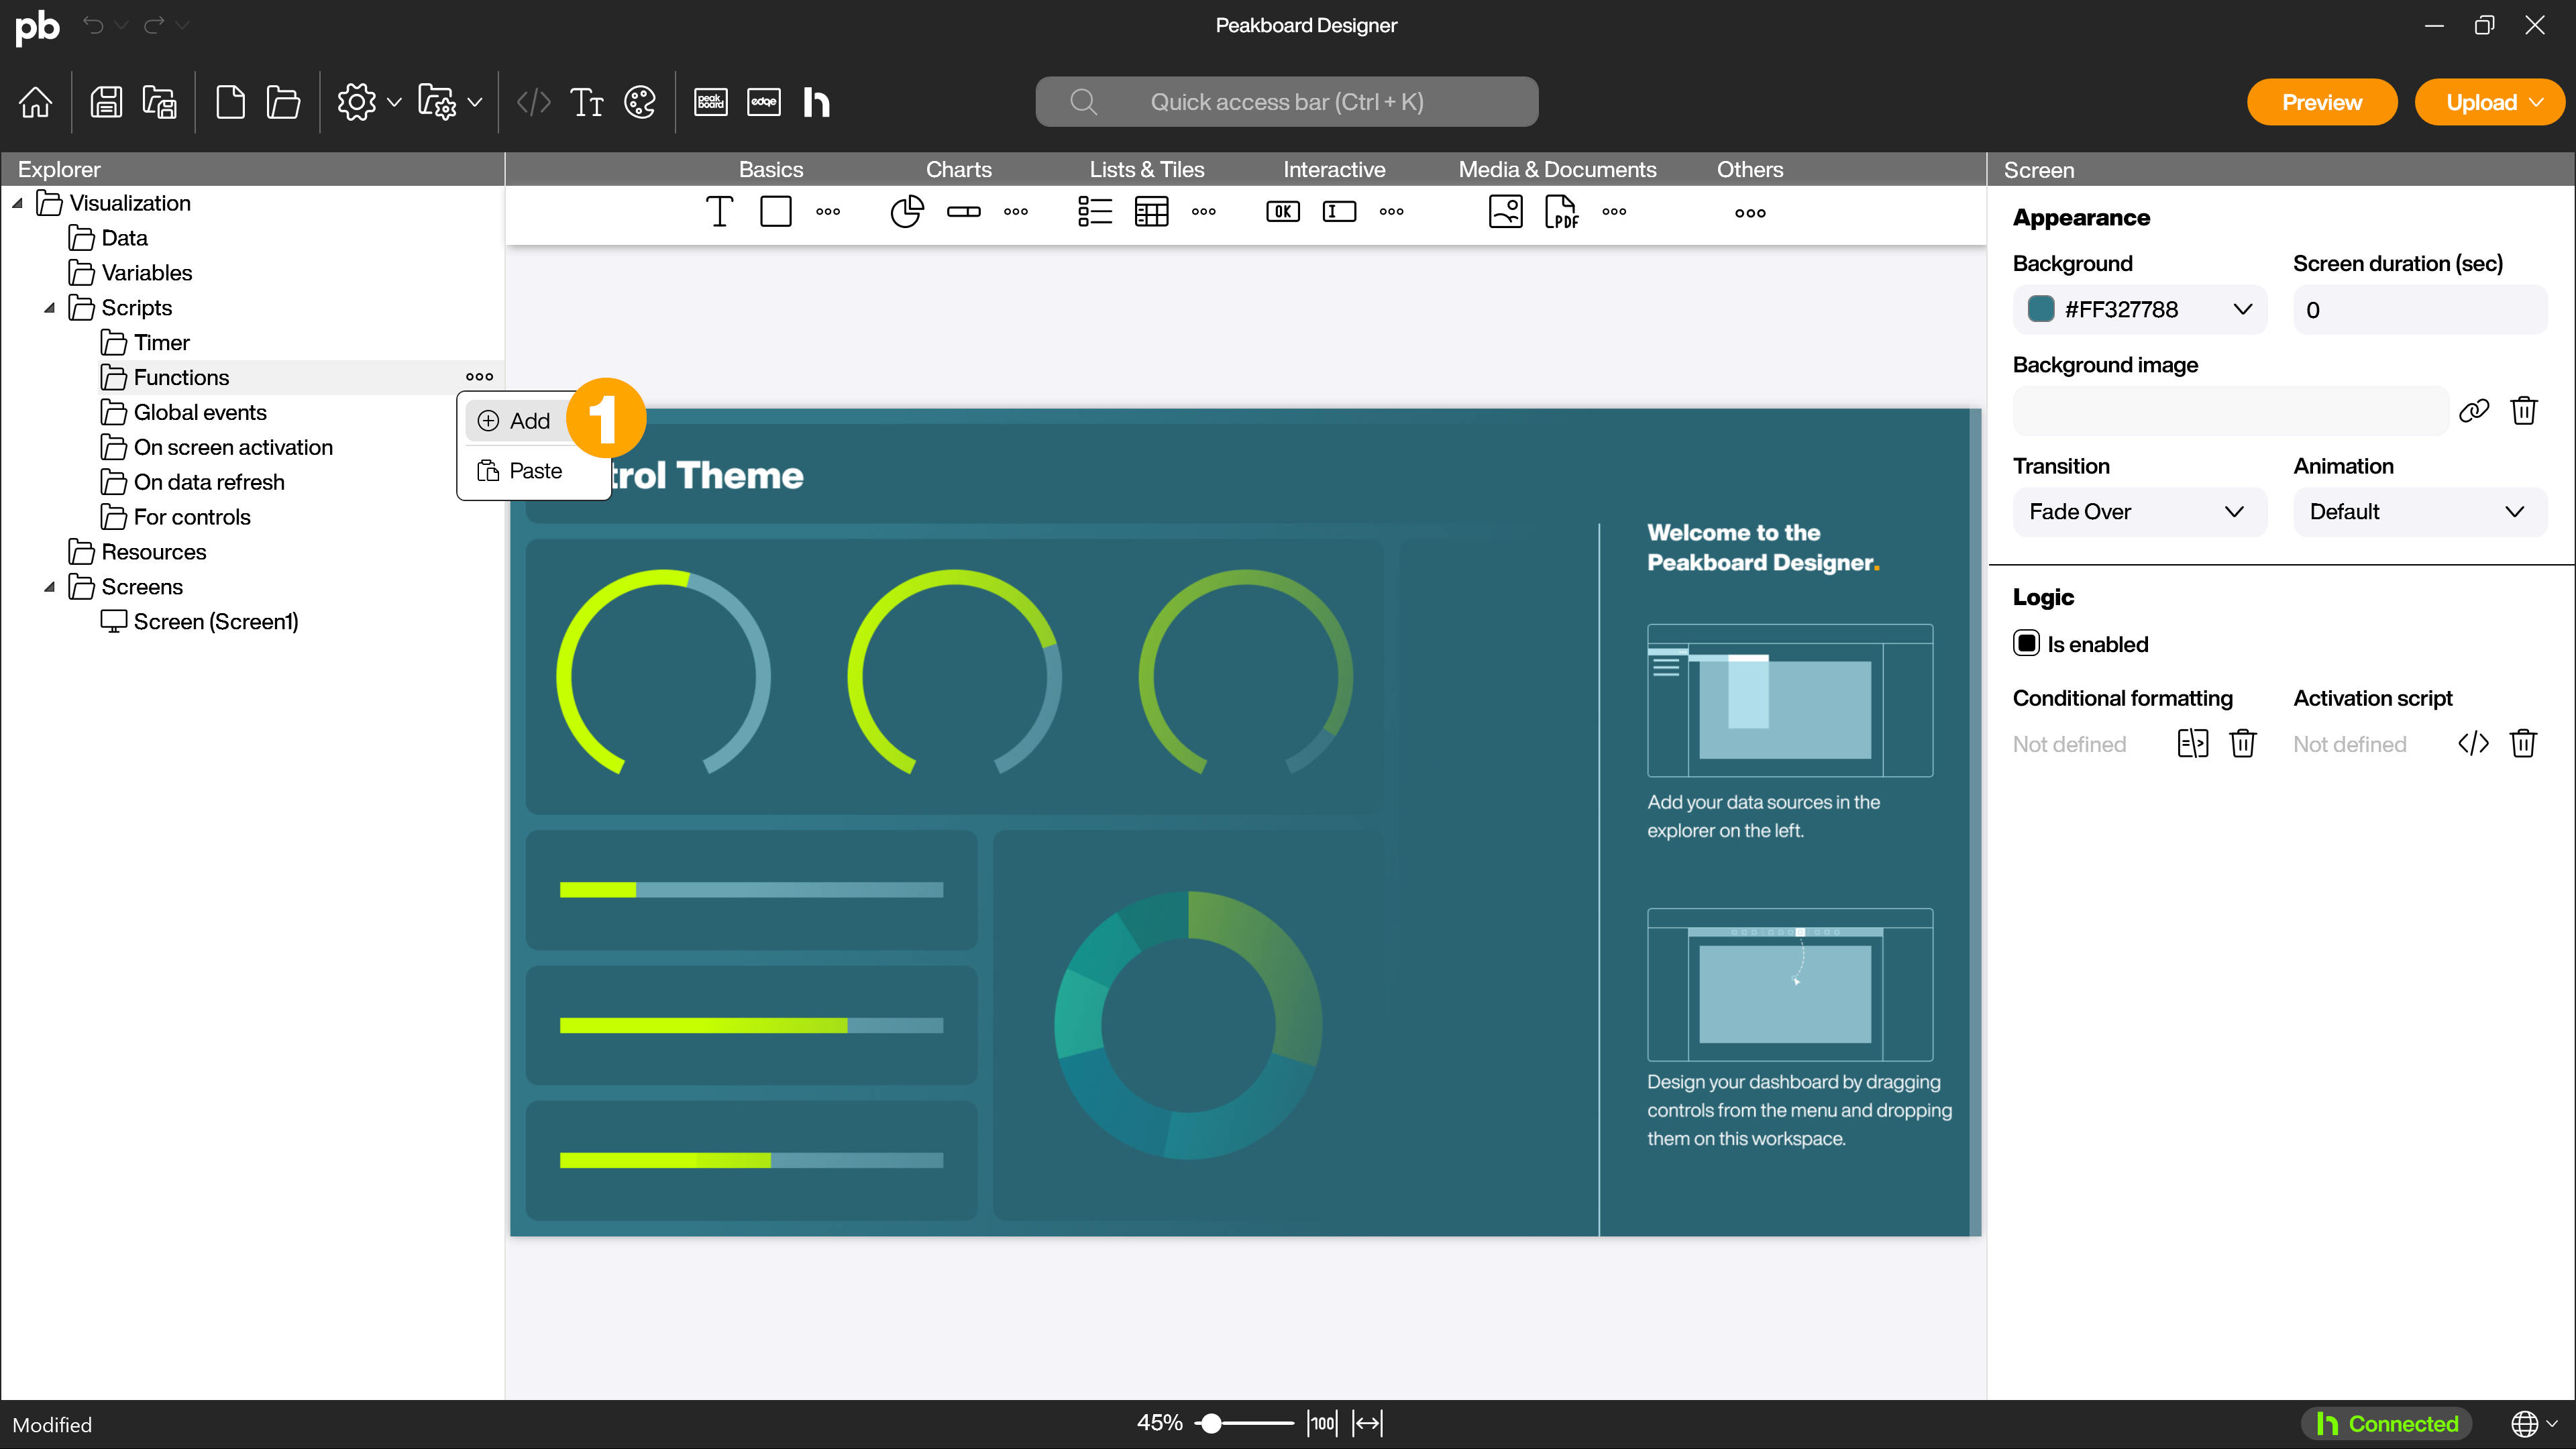
This time, however, you do not create a timer script, but a global shared function. To do this, right-click on [Functions] in the [Scripts] area and select [Add] (1).
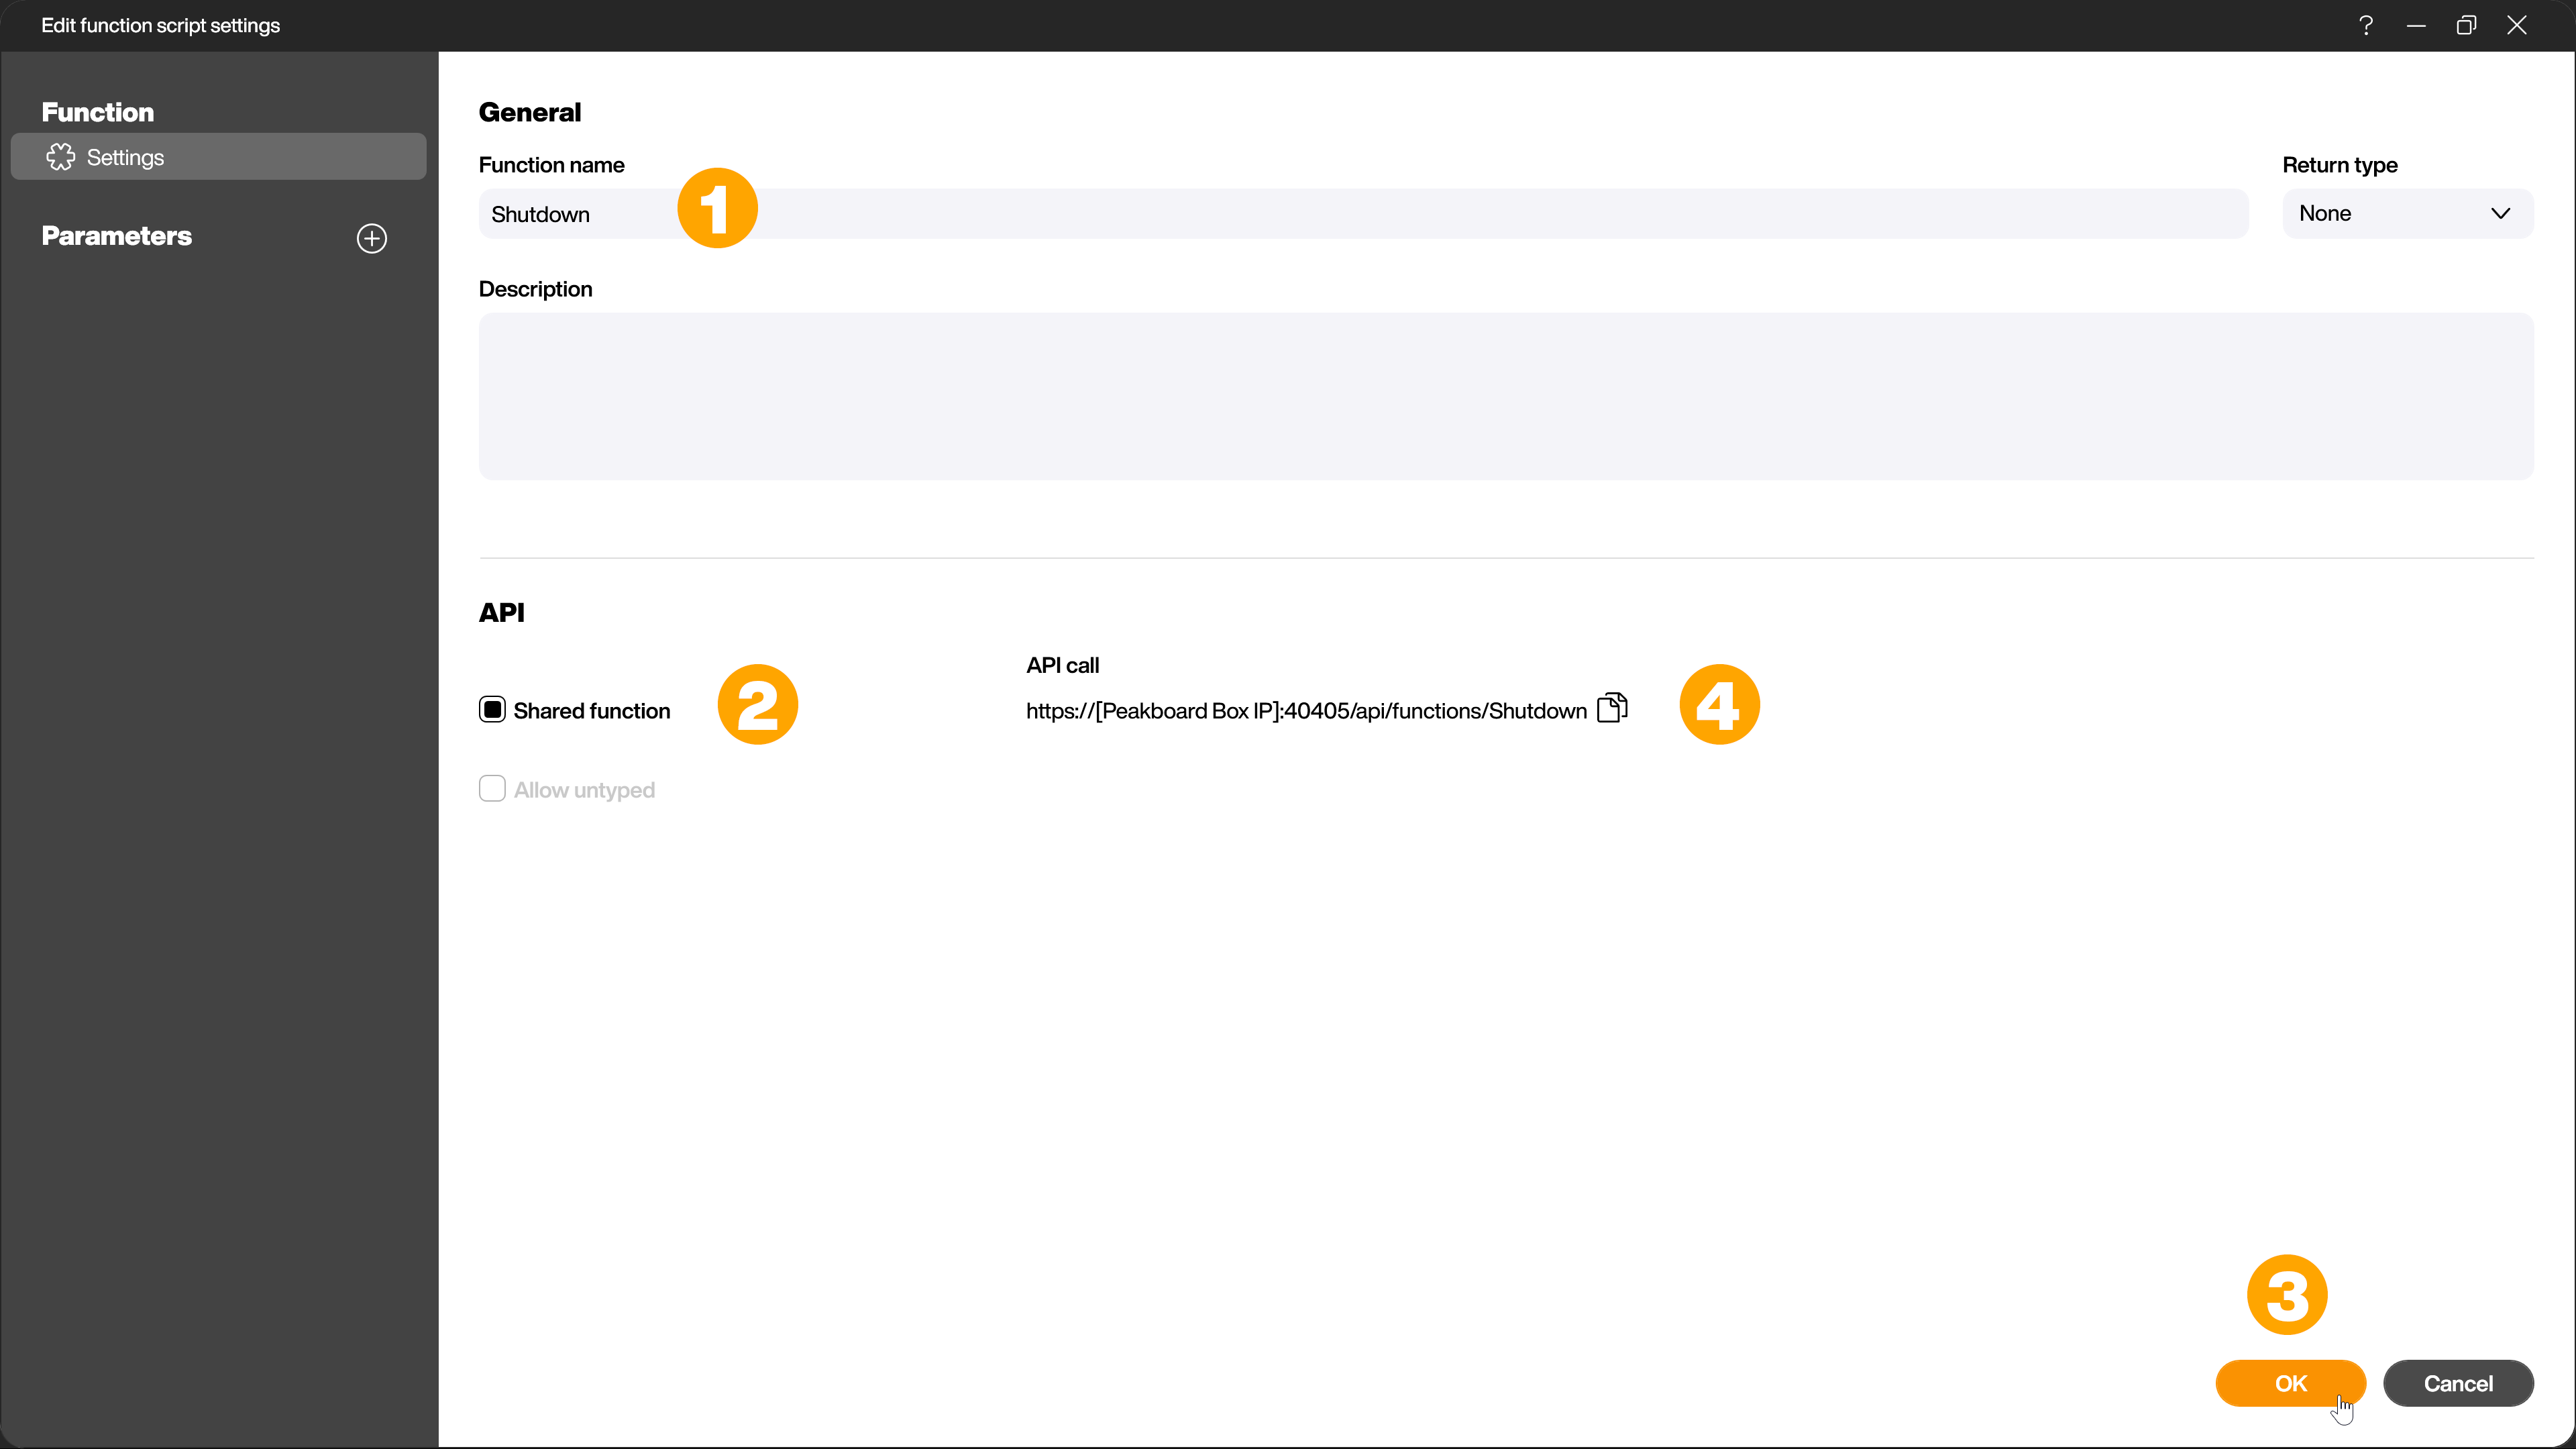
Give the function a name (1), activate the [Shared function] checkbox (2) and confirm with [OK] (3).
Next to the checkbox you will already see the REST-API endpoint (4) https://[Peakboard Boxes IP]:40405/api/functions/[function name].
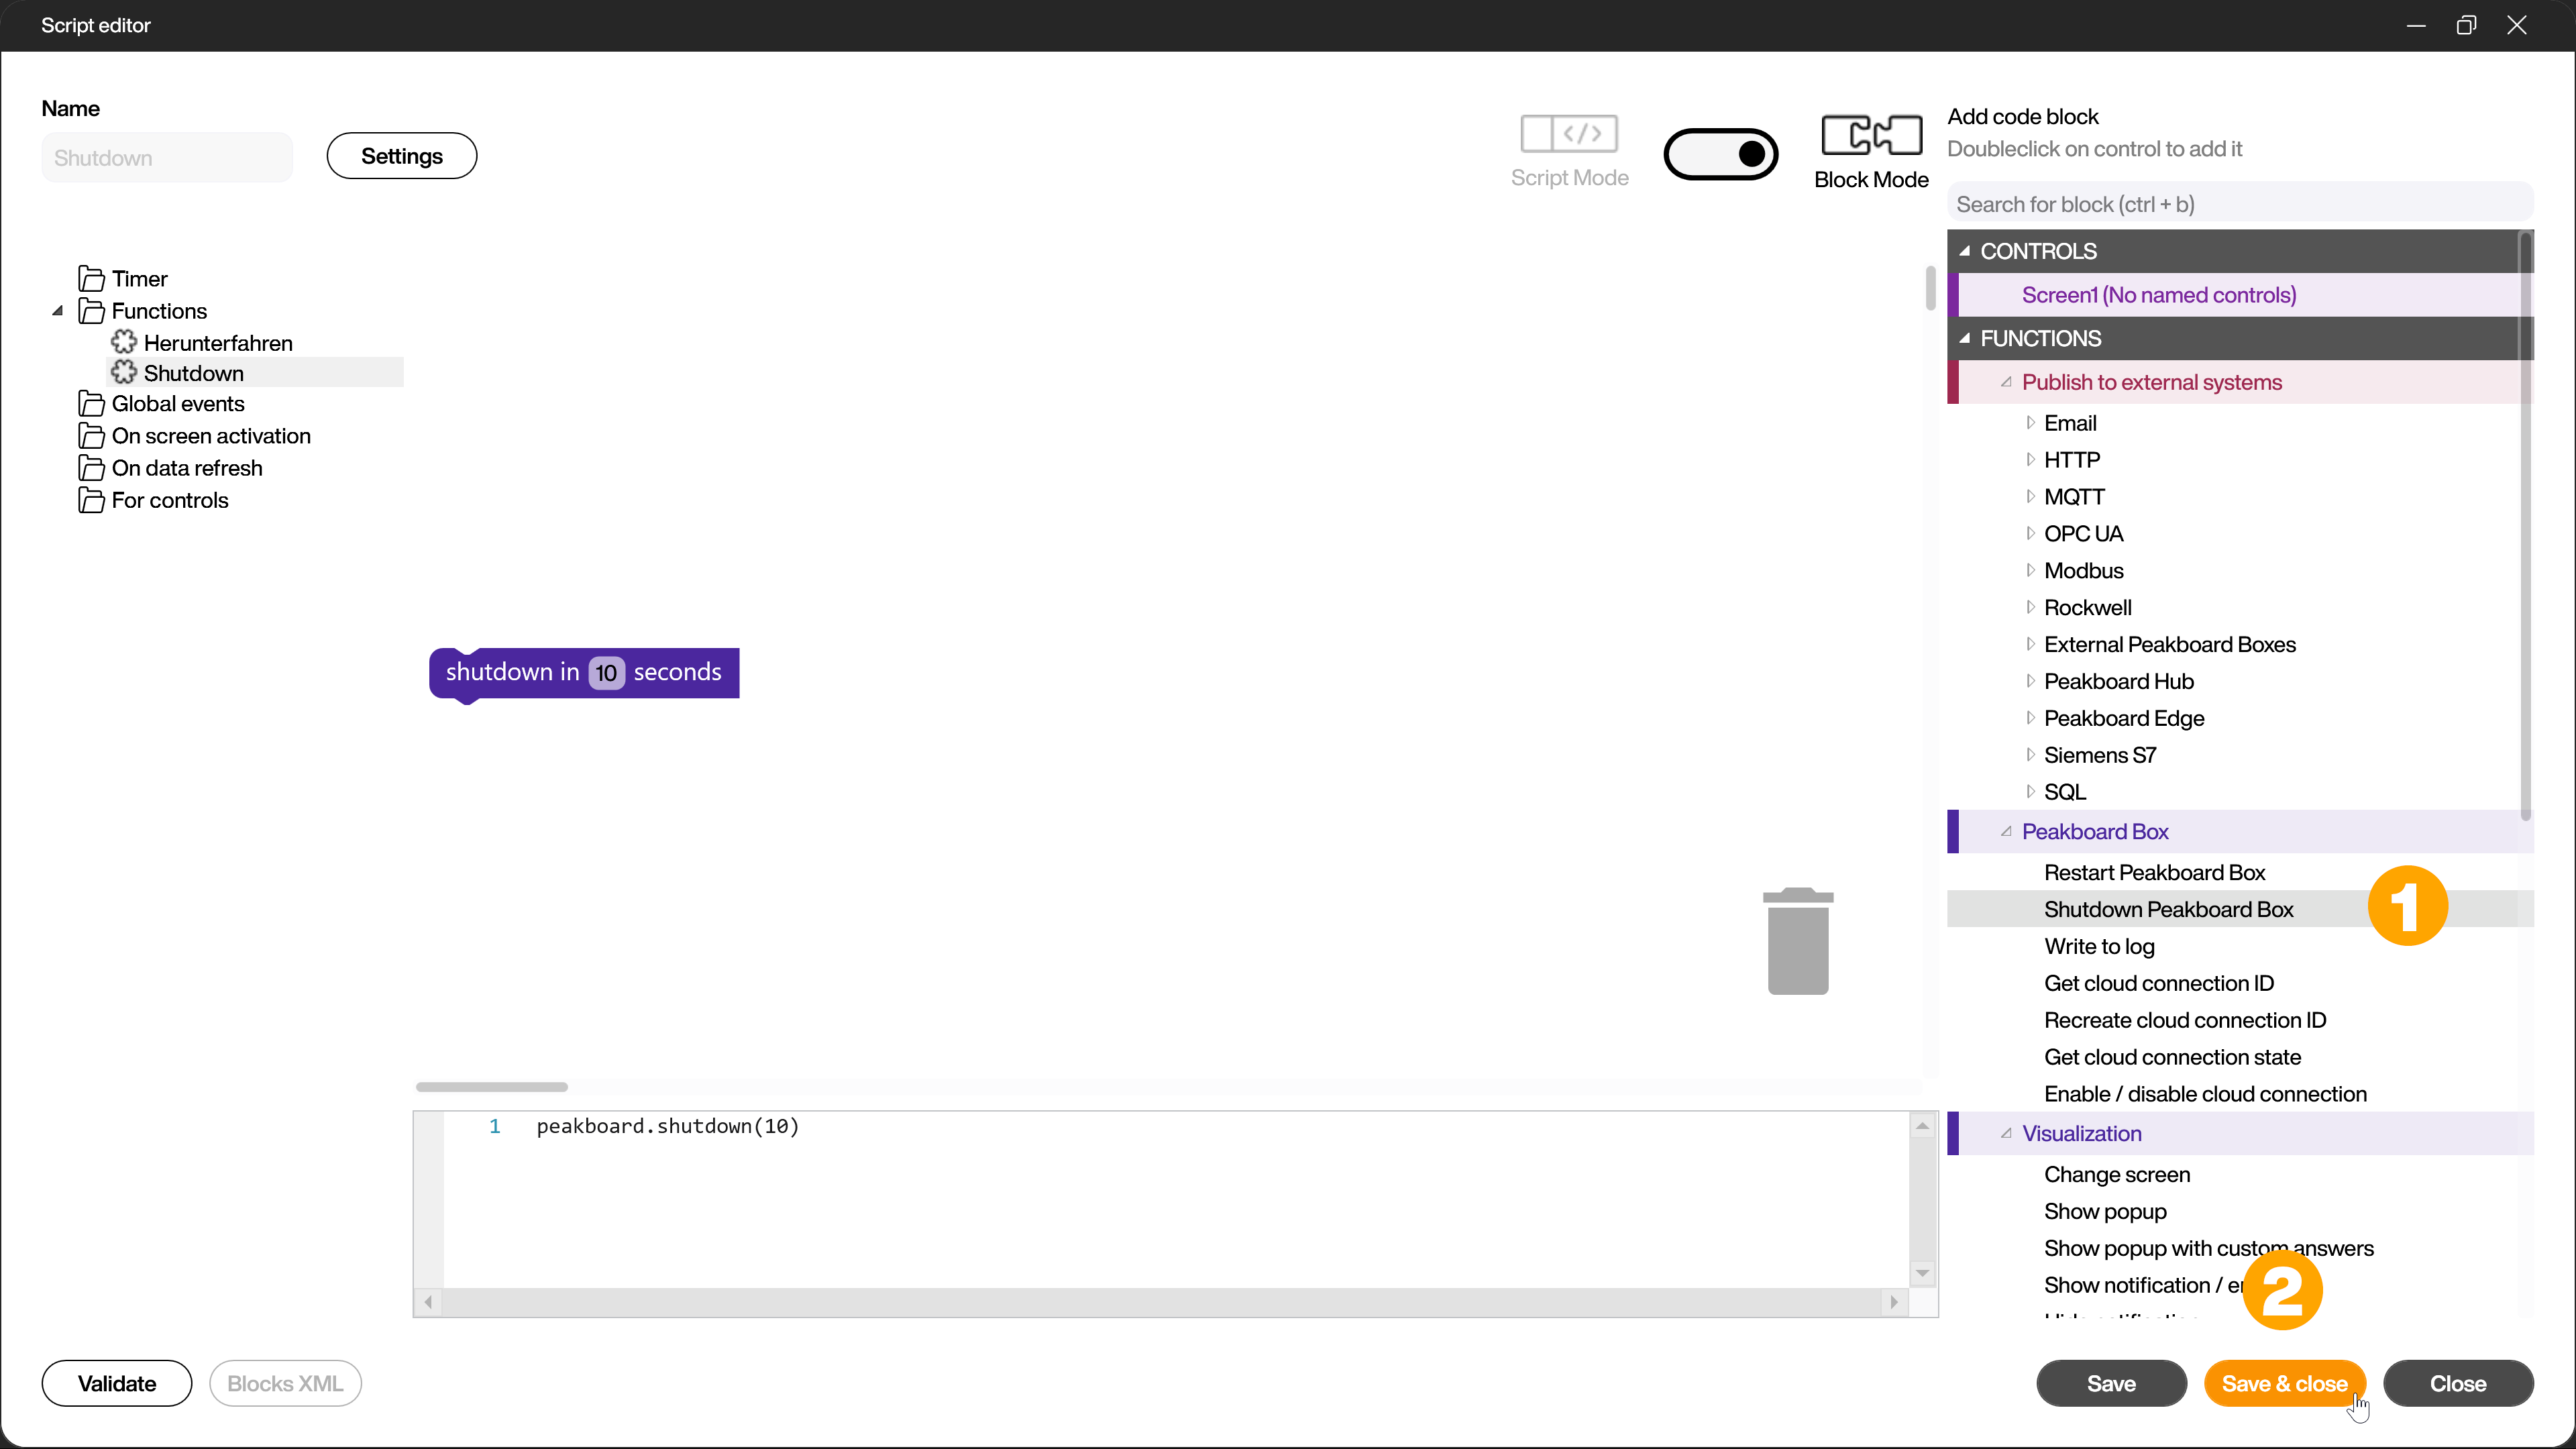
In the script editor that opens, add the building block [Shutdown Peakboard Box] (1) and confirm with [Save & Close] (2). Or use the script peakboard.shutdown(10) in script mode again.
Now you can execute the function (1) for example using web access to shut down the Peakboard Box.
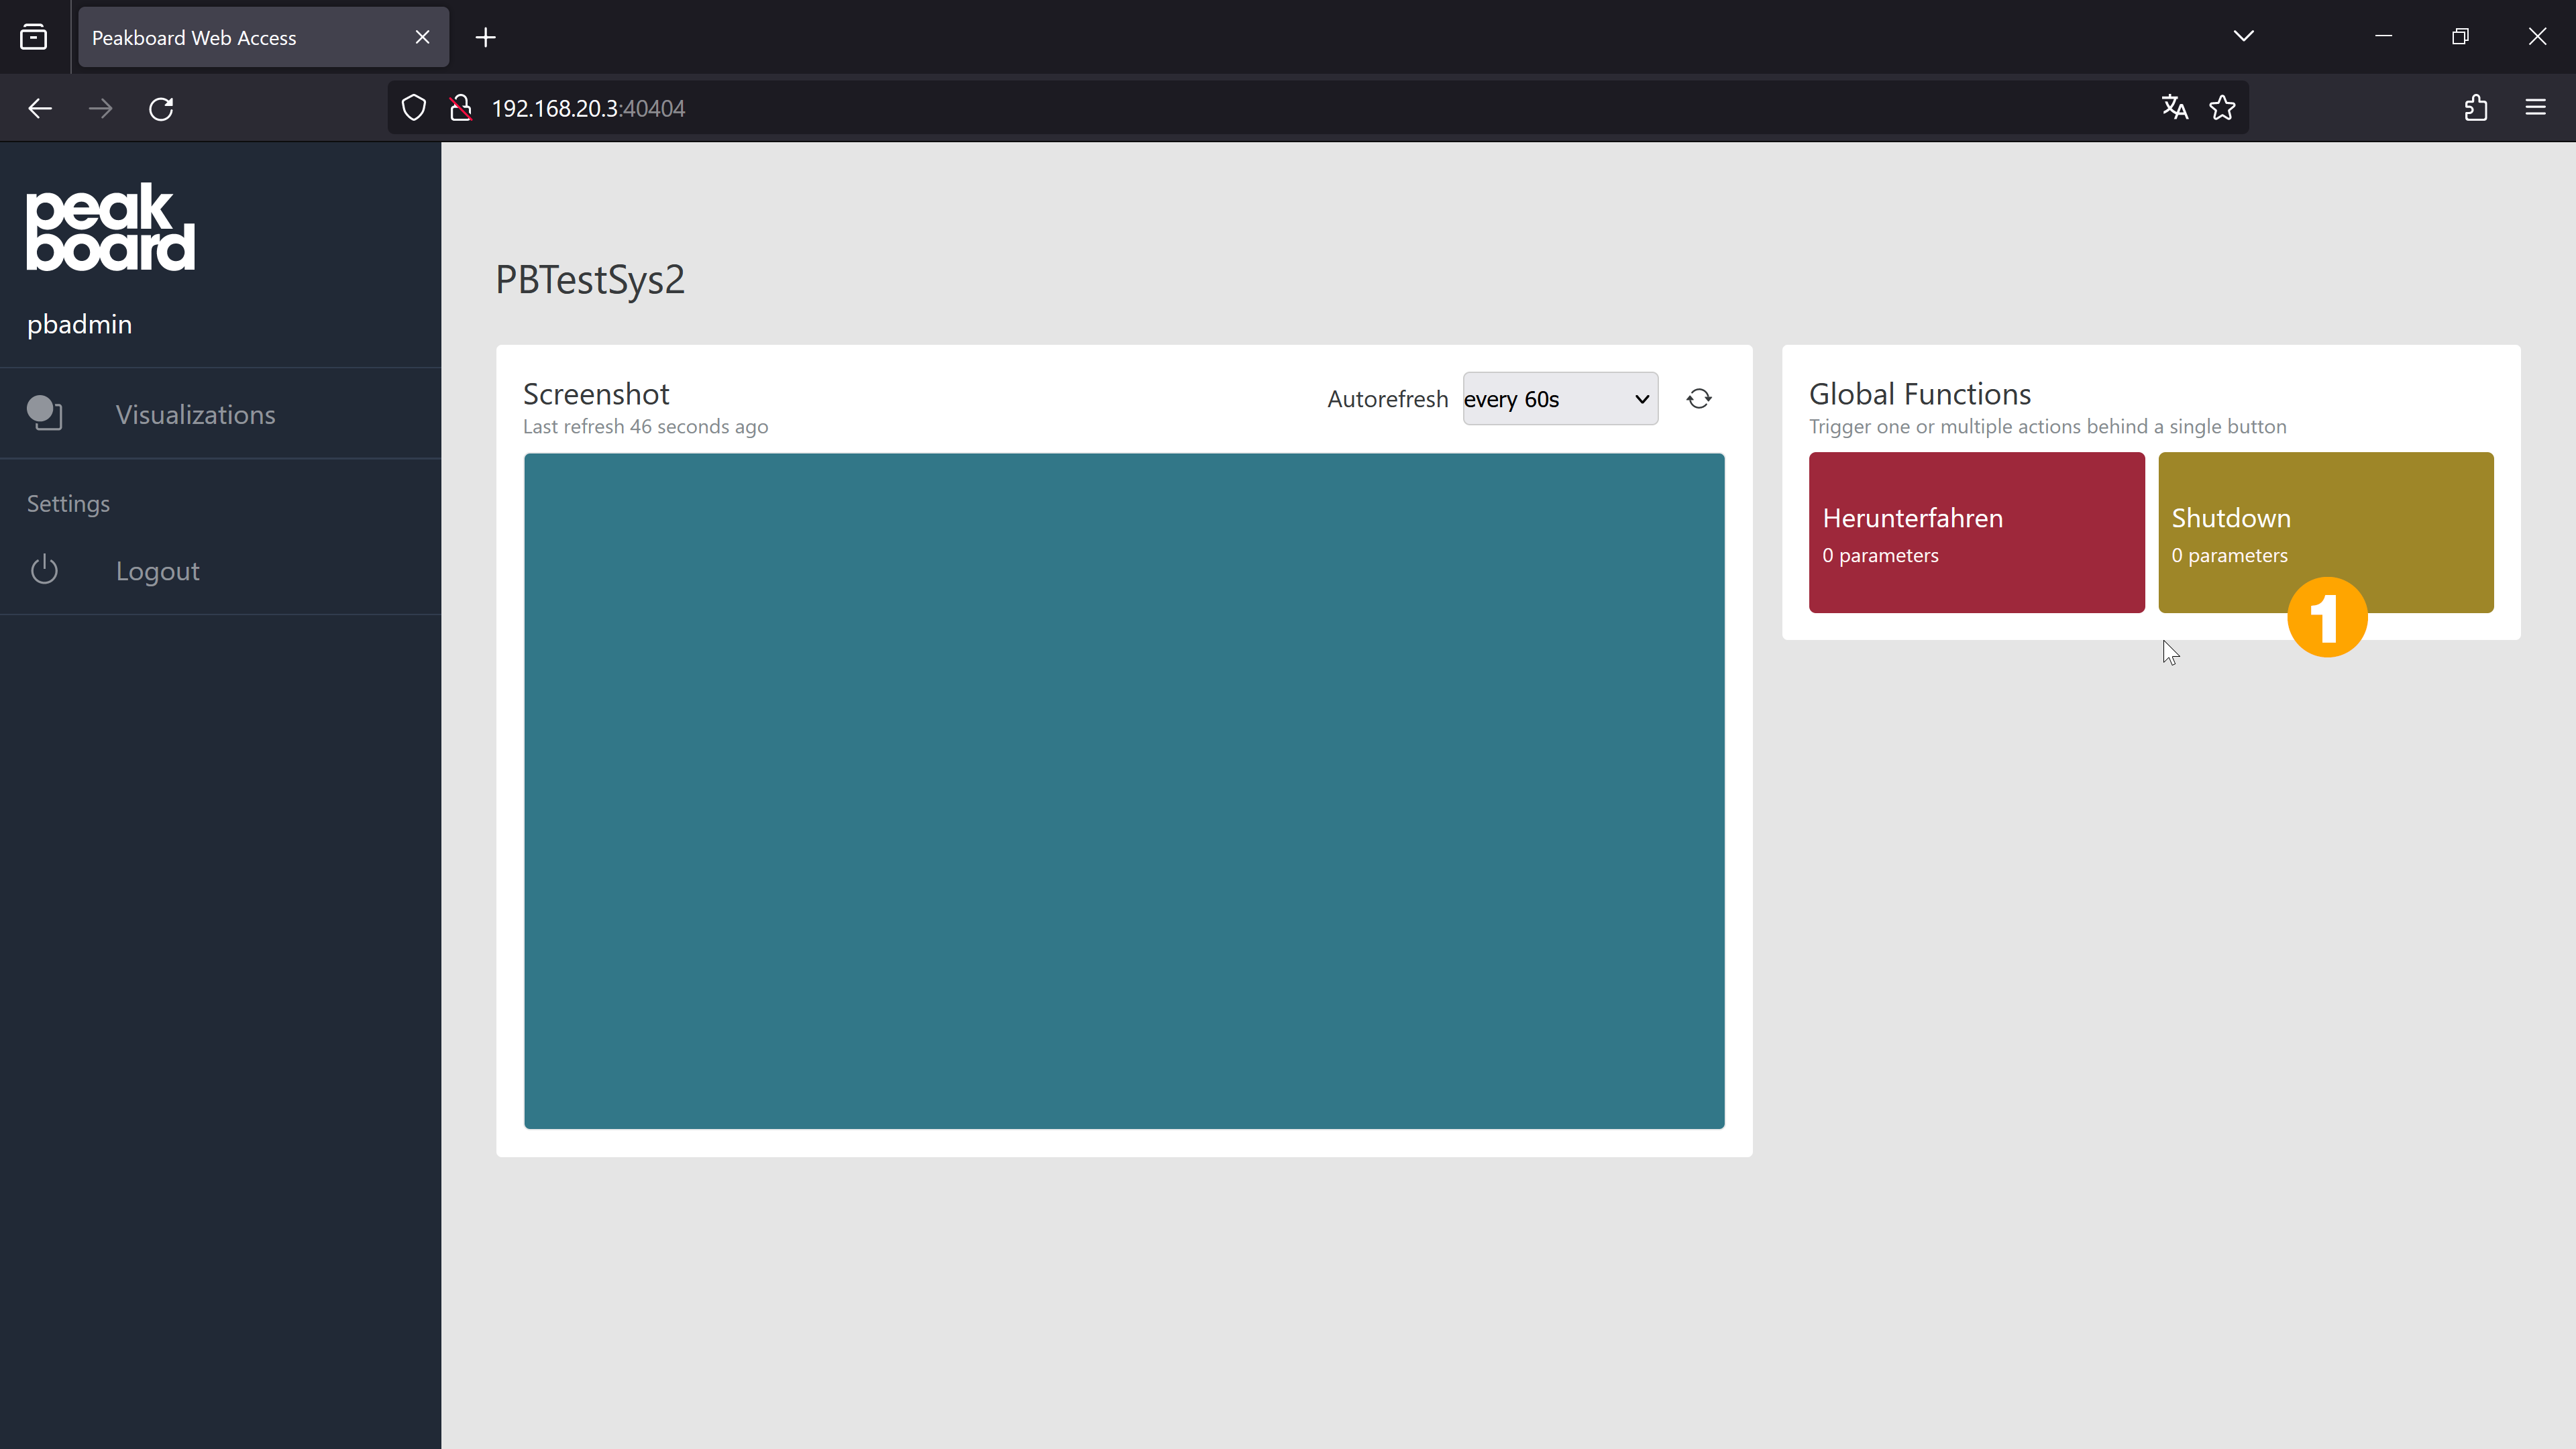
You can also call the function with an HTTP POST request from outside via the endpoint https://[Peakboard Box IP]:40405/api/functions/[function name]. You have to provide the credentials, username and password of the Peakboard Box and an empty JSON string ({ }).
Switch off Peakboard Boxes with a network-controlled power plug or a power plug with a timer
A less elegant method is to switch off the Peakboard Box by pulling the mains plug / disconnecting the power supply. In addition to the manual option, there are also options that work remotely and/or automatically, such as power plugs that can be controlled via Wi-Fi or power plugs with a timer.
There are two options for starting the Peakboard Box back up in the morning.
Start Peakboard Box with MagicPacket
The first option is to use the free Microsoft app MagicPacket. With MagicPacket you send WoL data packets to your Peakboard Box to switch it on.
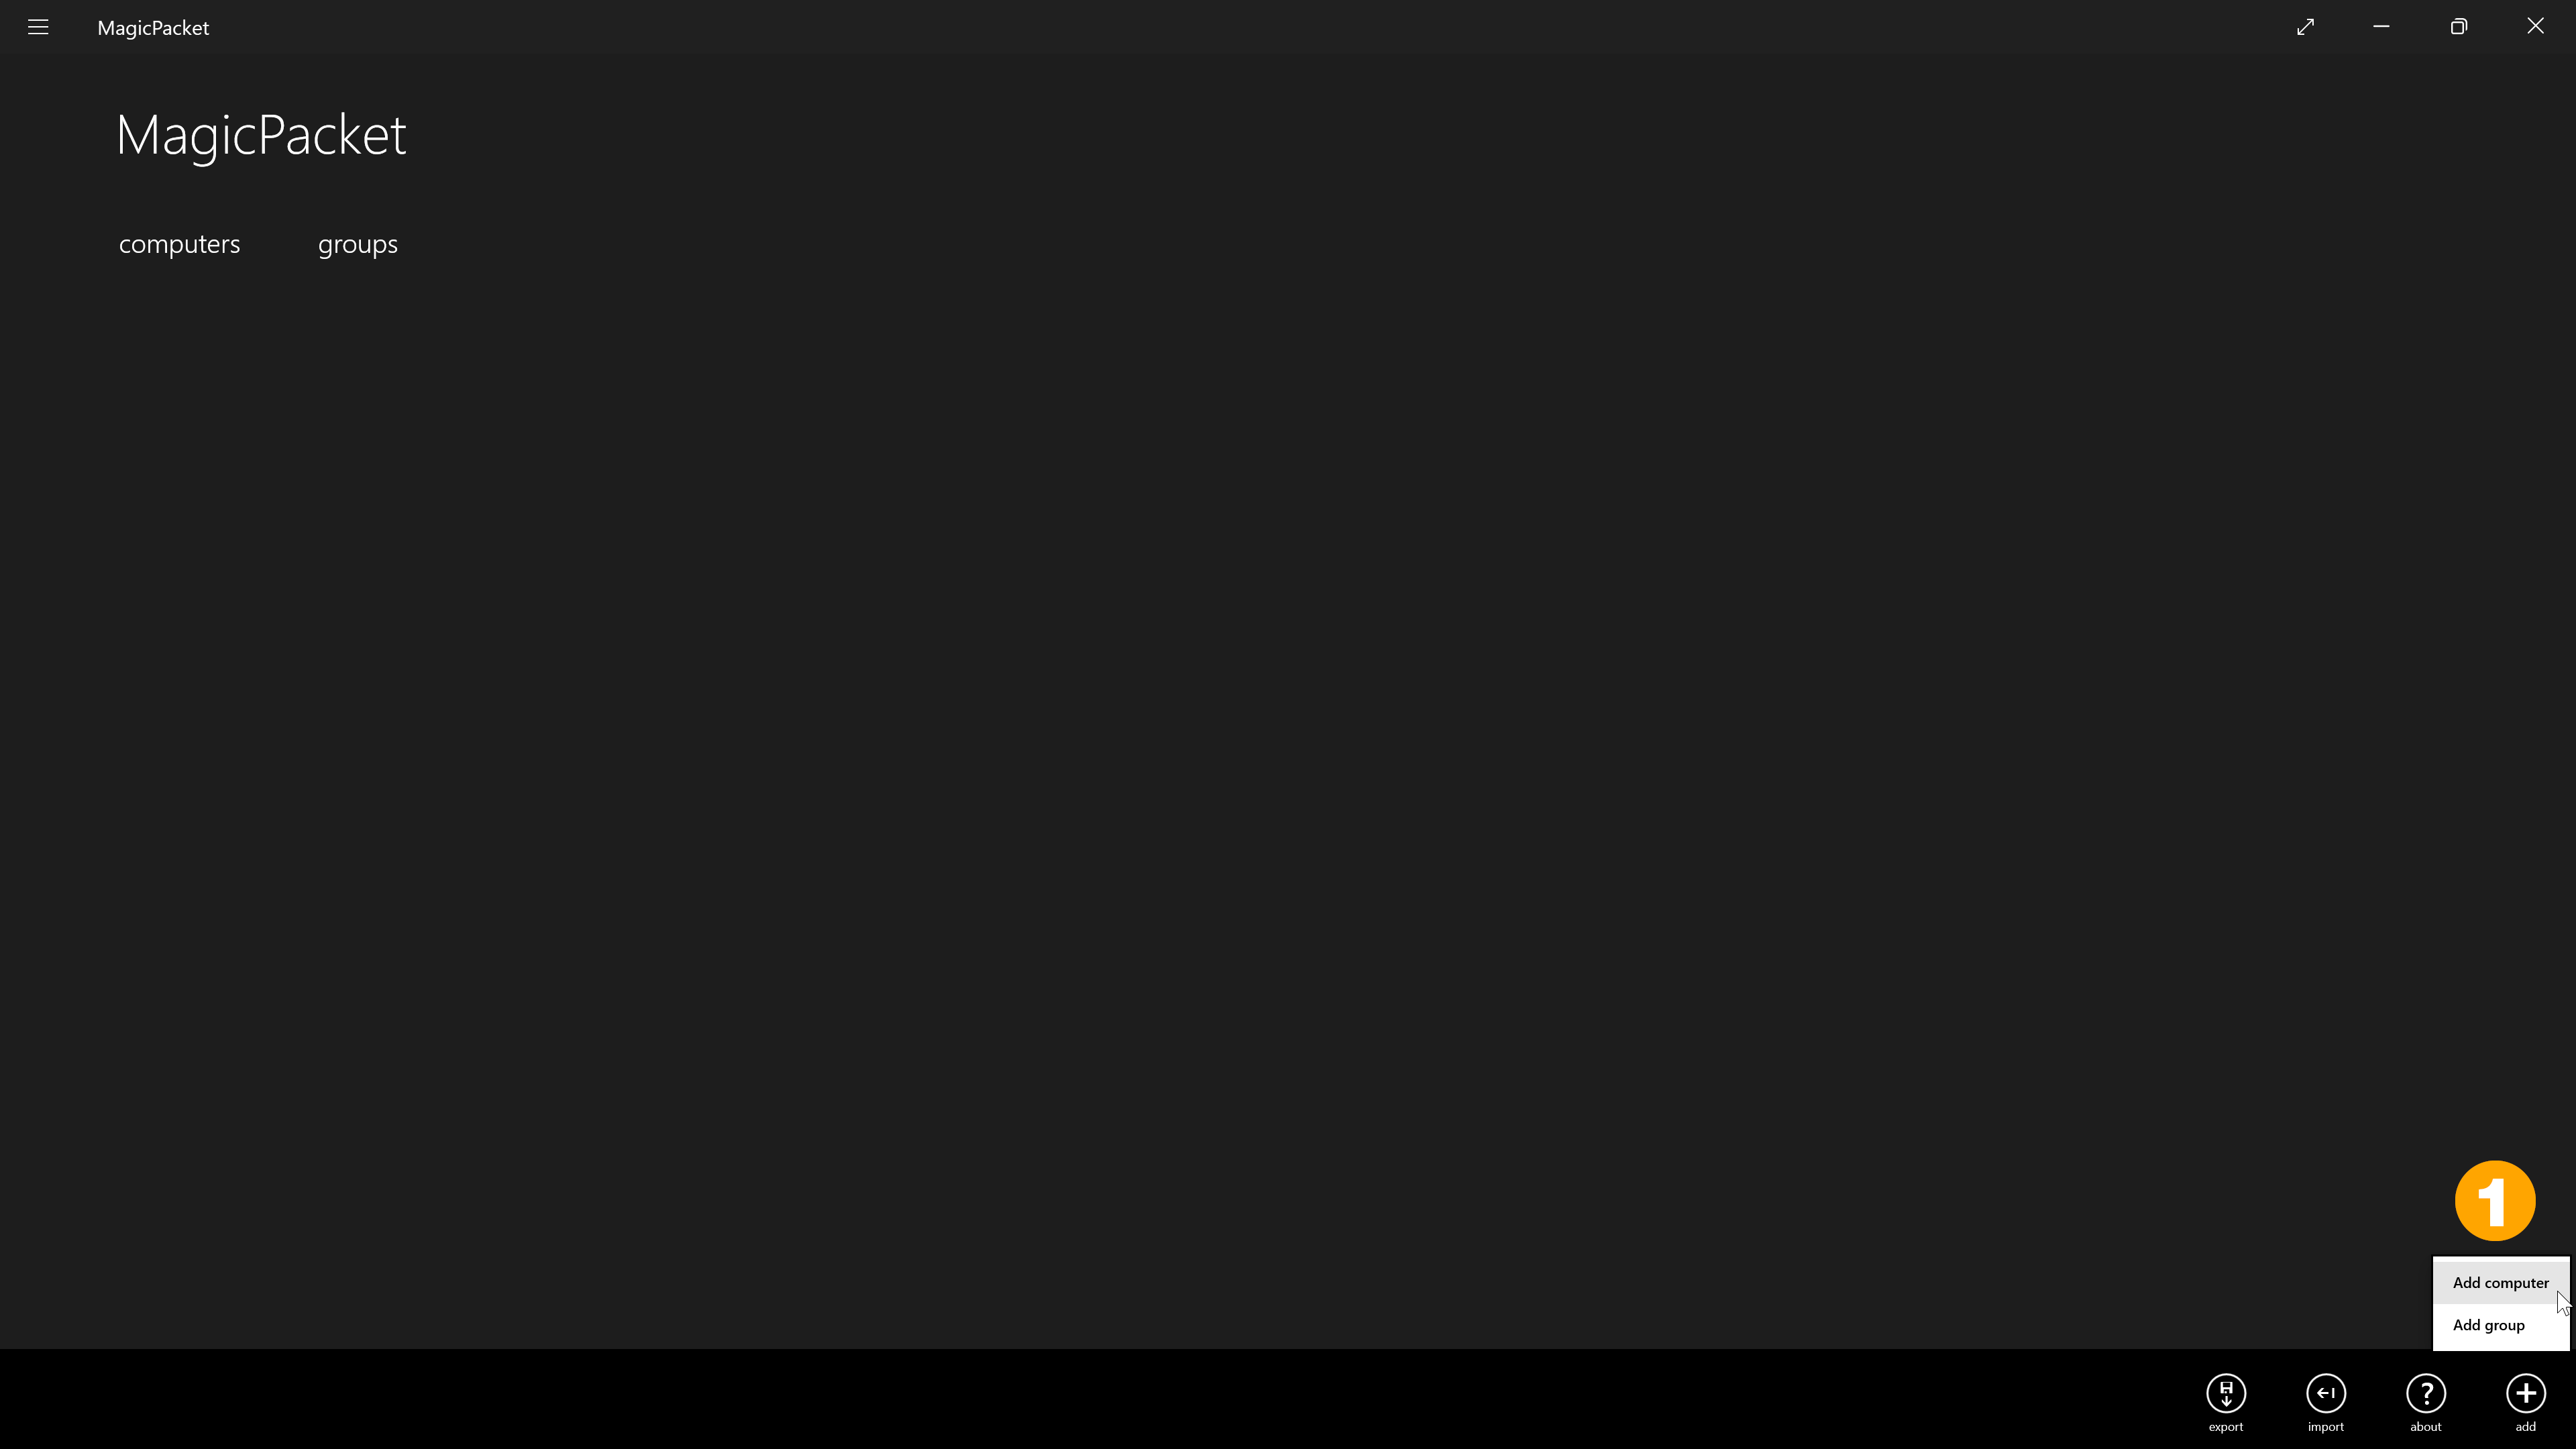
After installing the app, open it and add a new computer. To do this, click on [Add] and [Add computer] (1).
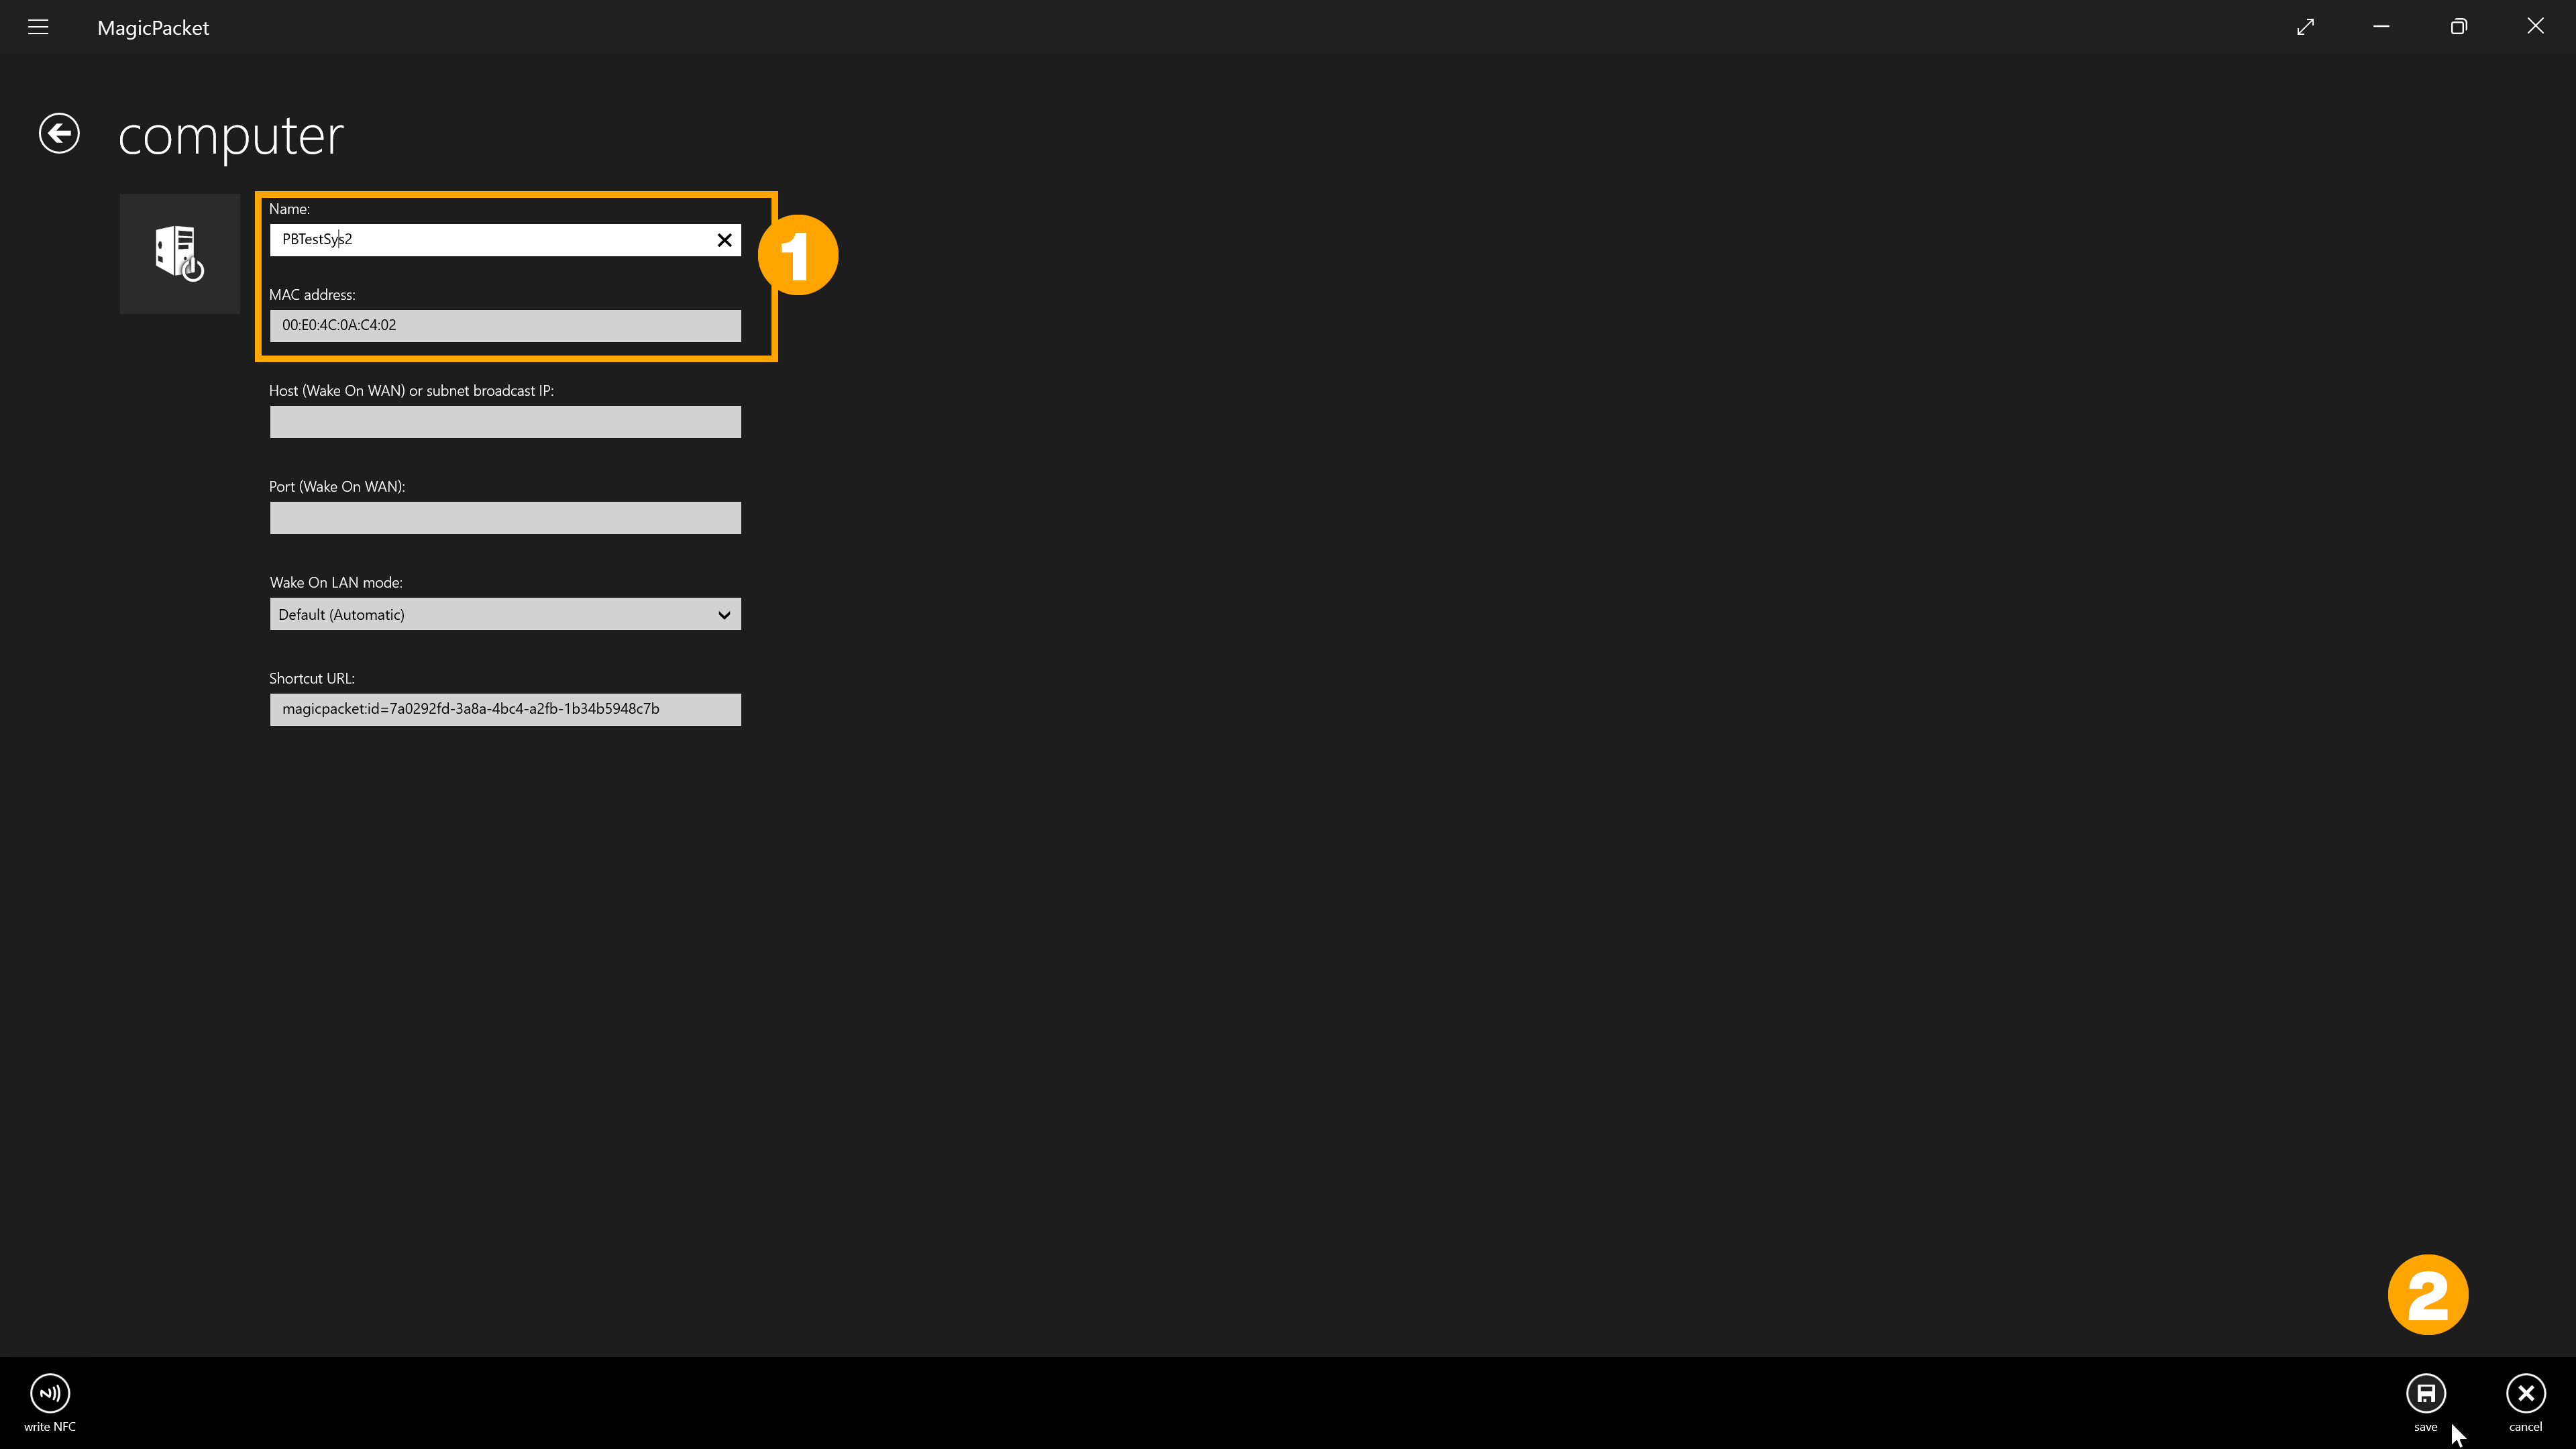
To fill in the mask, you need the name (1) and the MAC address (2) of your Peakboard Box. You can find both in the Peakboard Box settings in the Peakboard Designer.
Fill in the two fields (1) with the data of your Peakboard Box and confirm with [Save] (2).
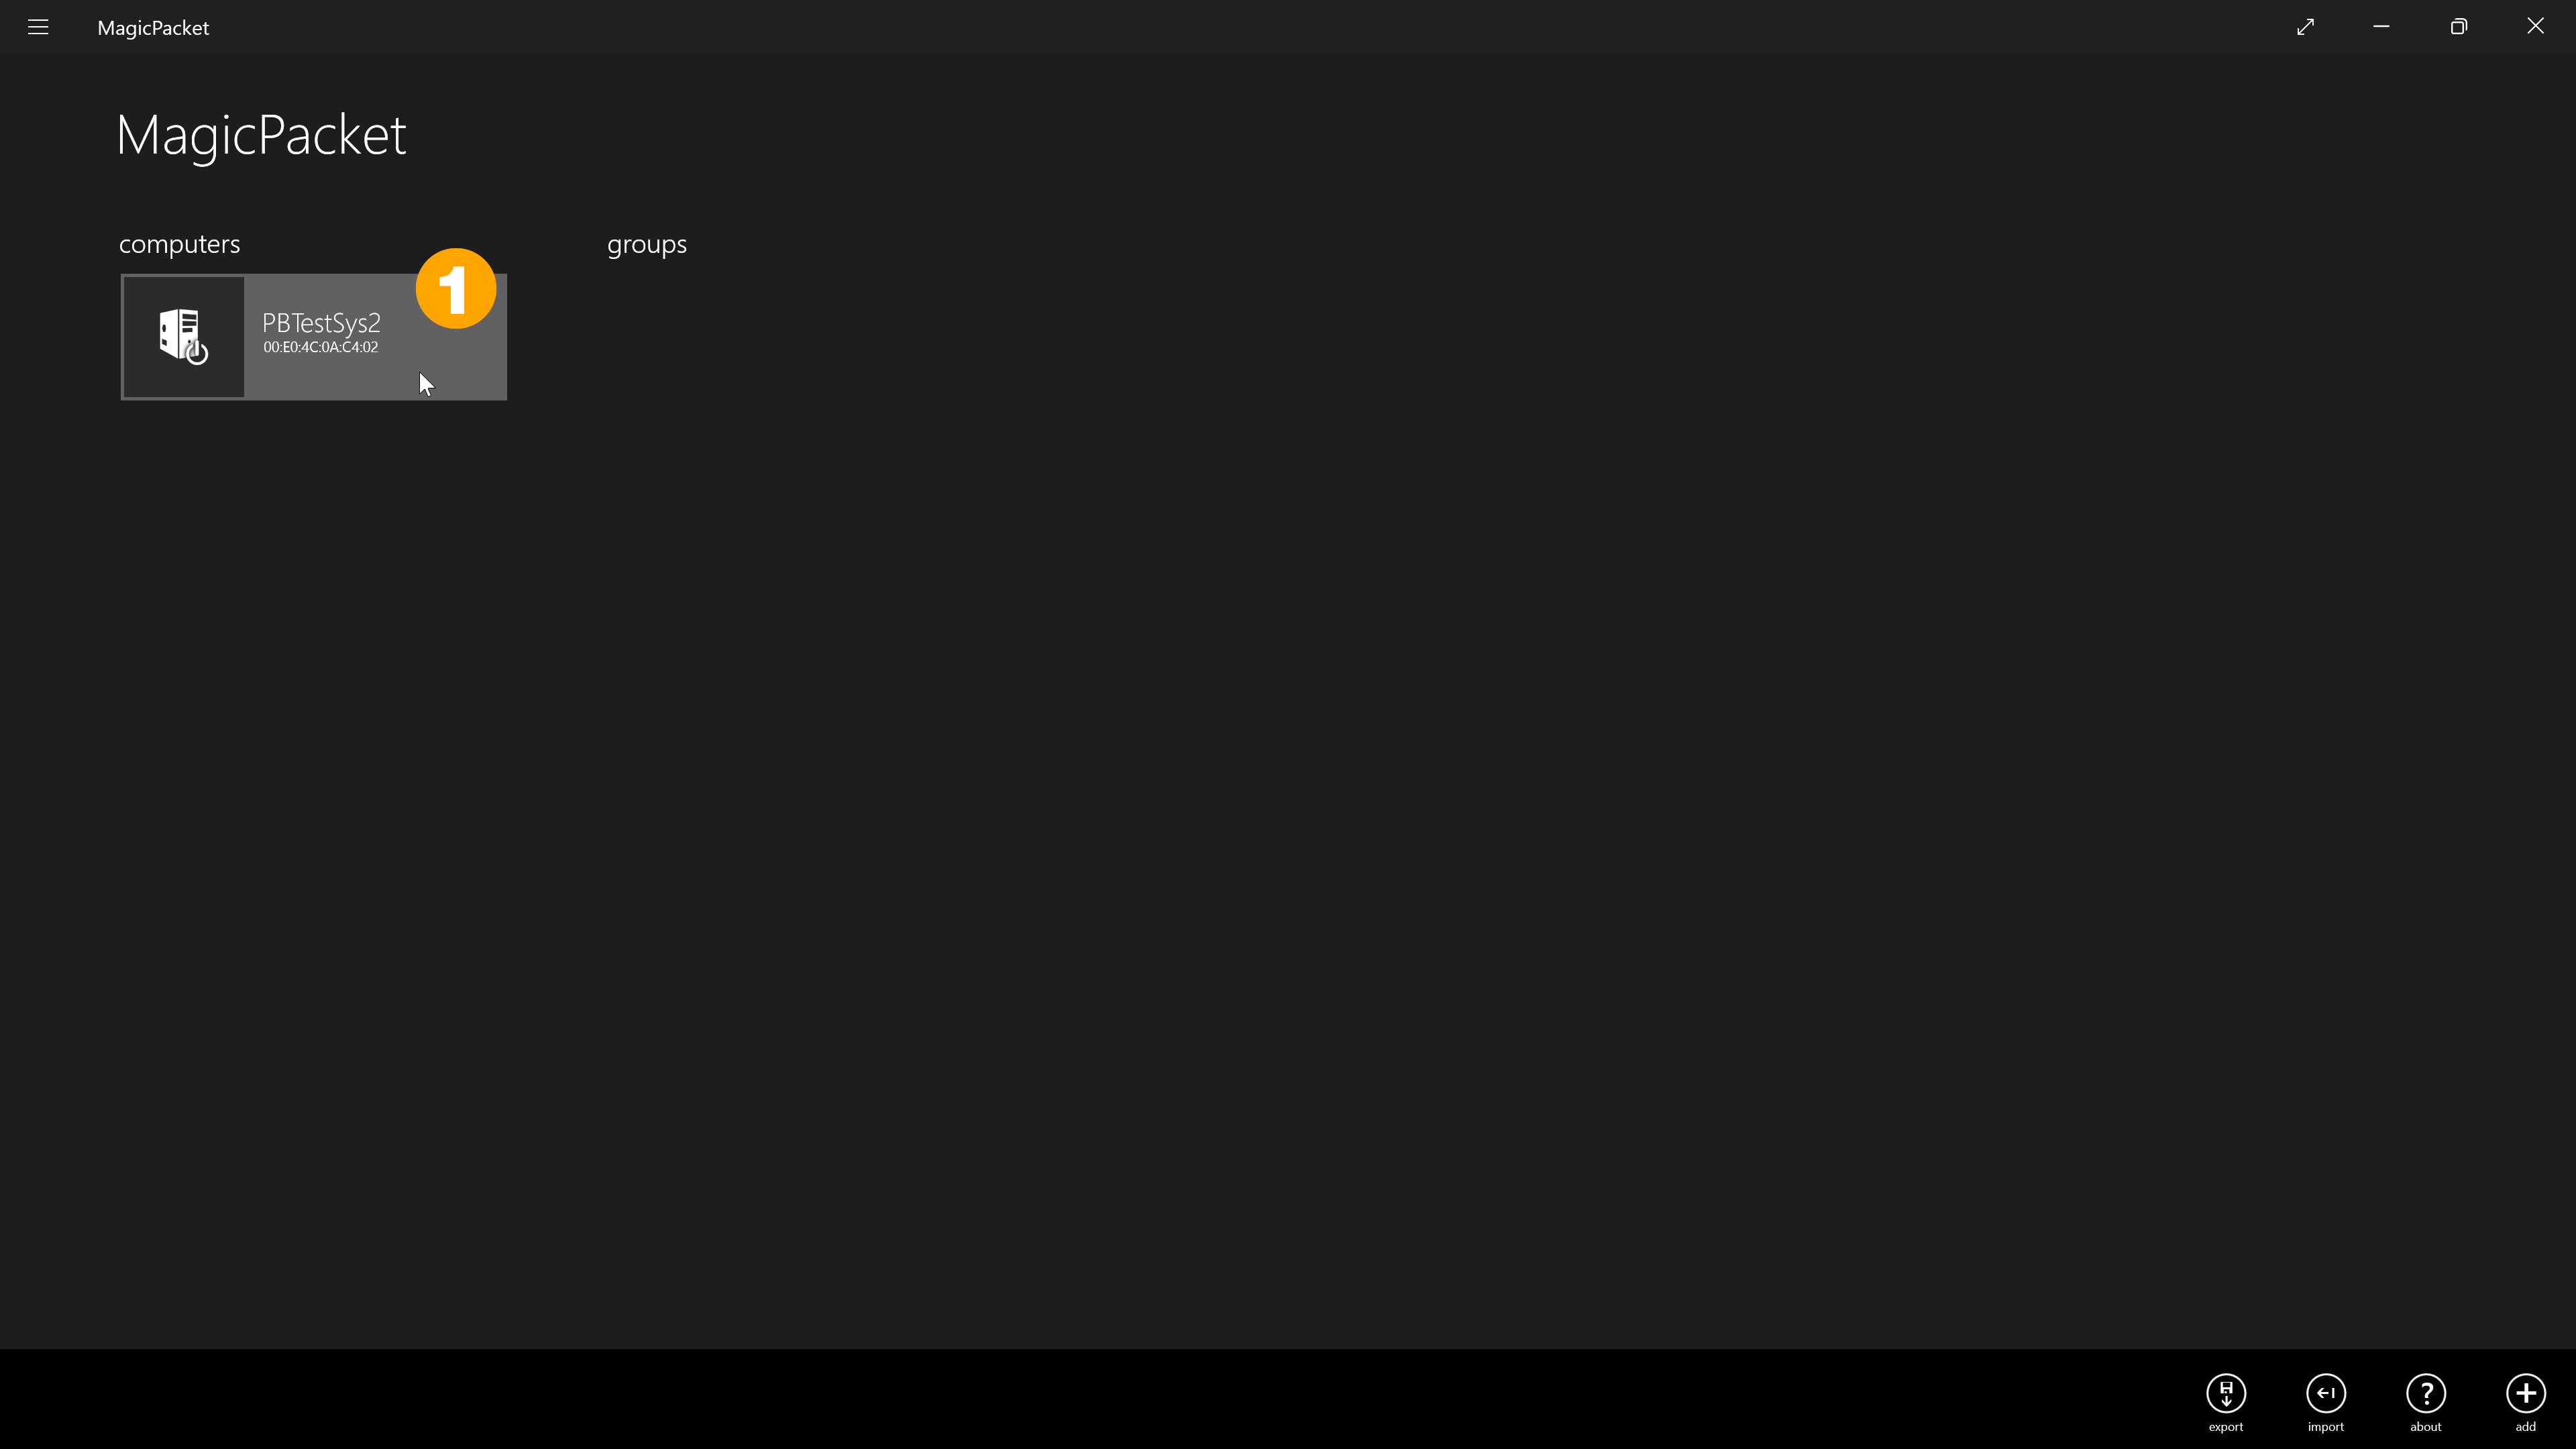
Now you have to click on the tile of the desired Peakboard Box (1) to start the Peakboard Box via WoL.
Start Peakboard Box with powershell
You can also start your Peakboard Box with powershell. Use the following script. You do not need any other scriptlets or functions. Replace the specified MAC address with that of your Peakboard Box.
$mac = '00:E0:4C:0C:73:9C';
[System.Net.NetworkInformation.NetworkInterface]::GetAllNetworkInterfaces() | Where-Object { $_.NetworkInterfaceType -ne [System.Net.NetworkInformation.NetworkInterfaceType]::Loopback -and $_.OperationalStatus -eq [System.Net.NetworkInformation.OperationalStatus]::Up } | ForEach-Object { $targetPhysicalAddressBytes = [System.Net.NetworkInformation.PhysicalAddress]::Parse(($mac.ToUpper() -replace '[^0-9A-F]','')).GetAddressBytes(); $packet = [byte[]](,0xFF * 102); 6..101 | Foreach-Object { $packet[$_] = $targetPhysicalAddressBytes[($_ % 6)] }; $client = [System.Net.Sockets.UdpClient]::new([System.Net.IPEndPoint]::new(($_.GetIPProperties().UnicastAddresses | Where-Object { $_.Address.AddressFamily -eq [System.Net.Sockets.AddressFamily]::InterNetwork })[0].Address, 0)); try { $client.Send($packet, $packet.Length,[System.Net.IPEndPoint]::new([System.Net.IPAddress]::Broadcast, 9)) | Out-Null } finally { $client.Dispose() } }