Controls
Signal lamp
With the signal lamp control, you can use signal rules to create an automatically switching signal lamp with little effort, for example to display a current status.
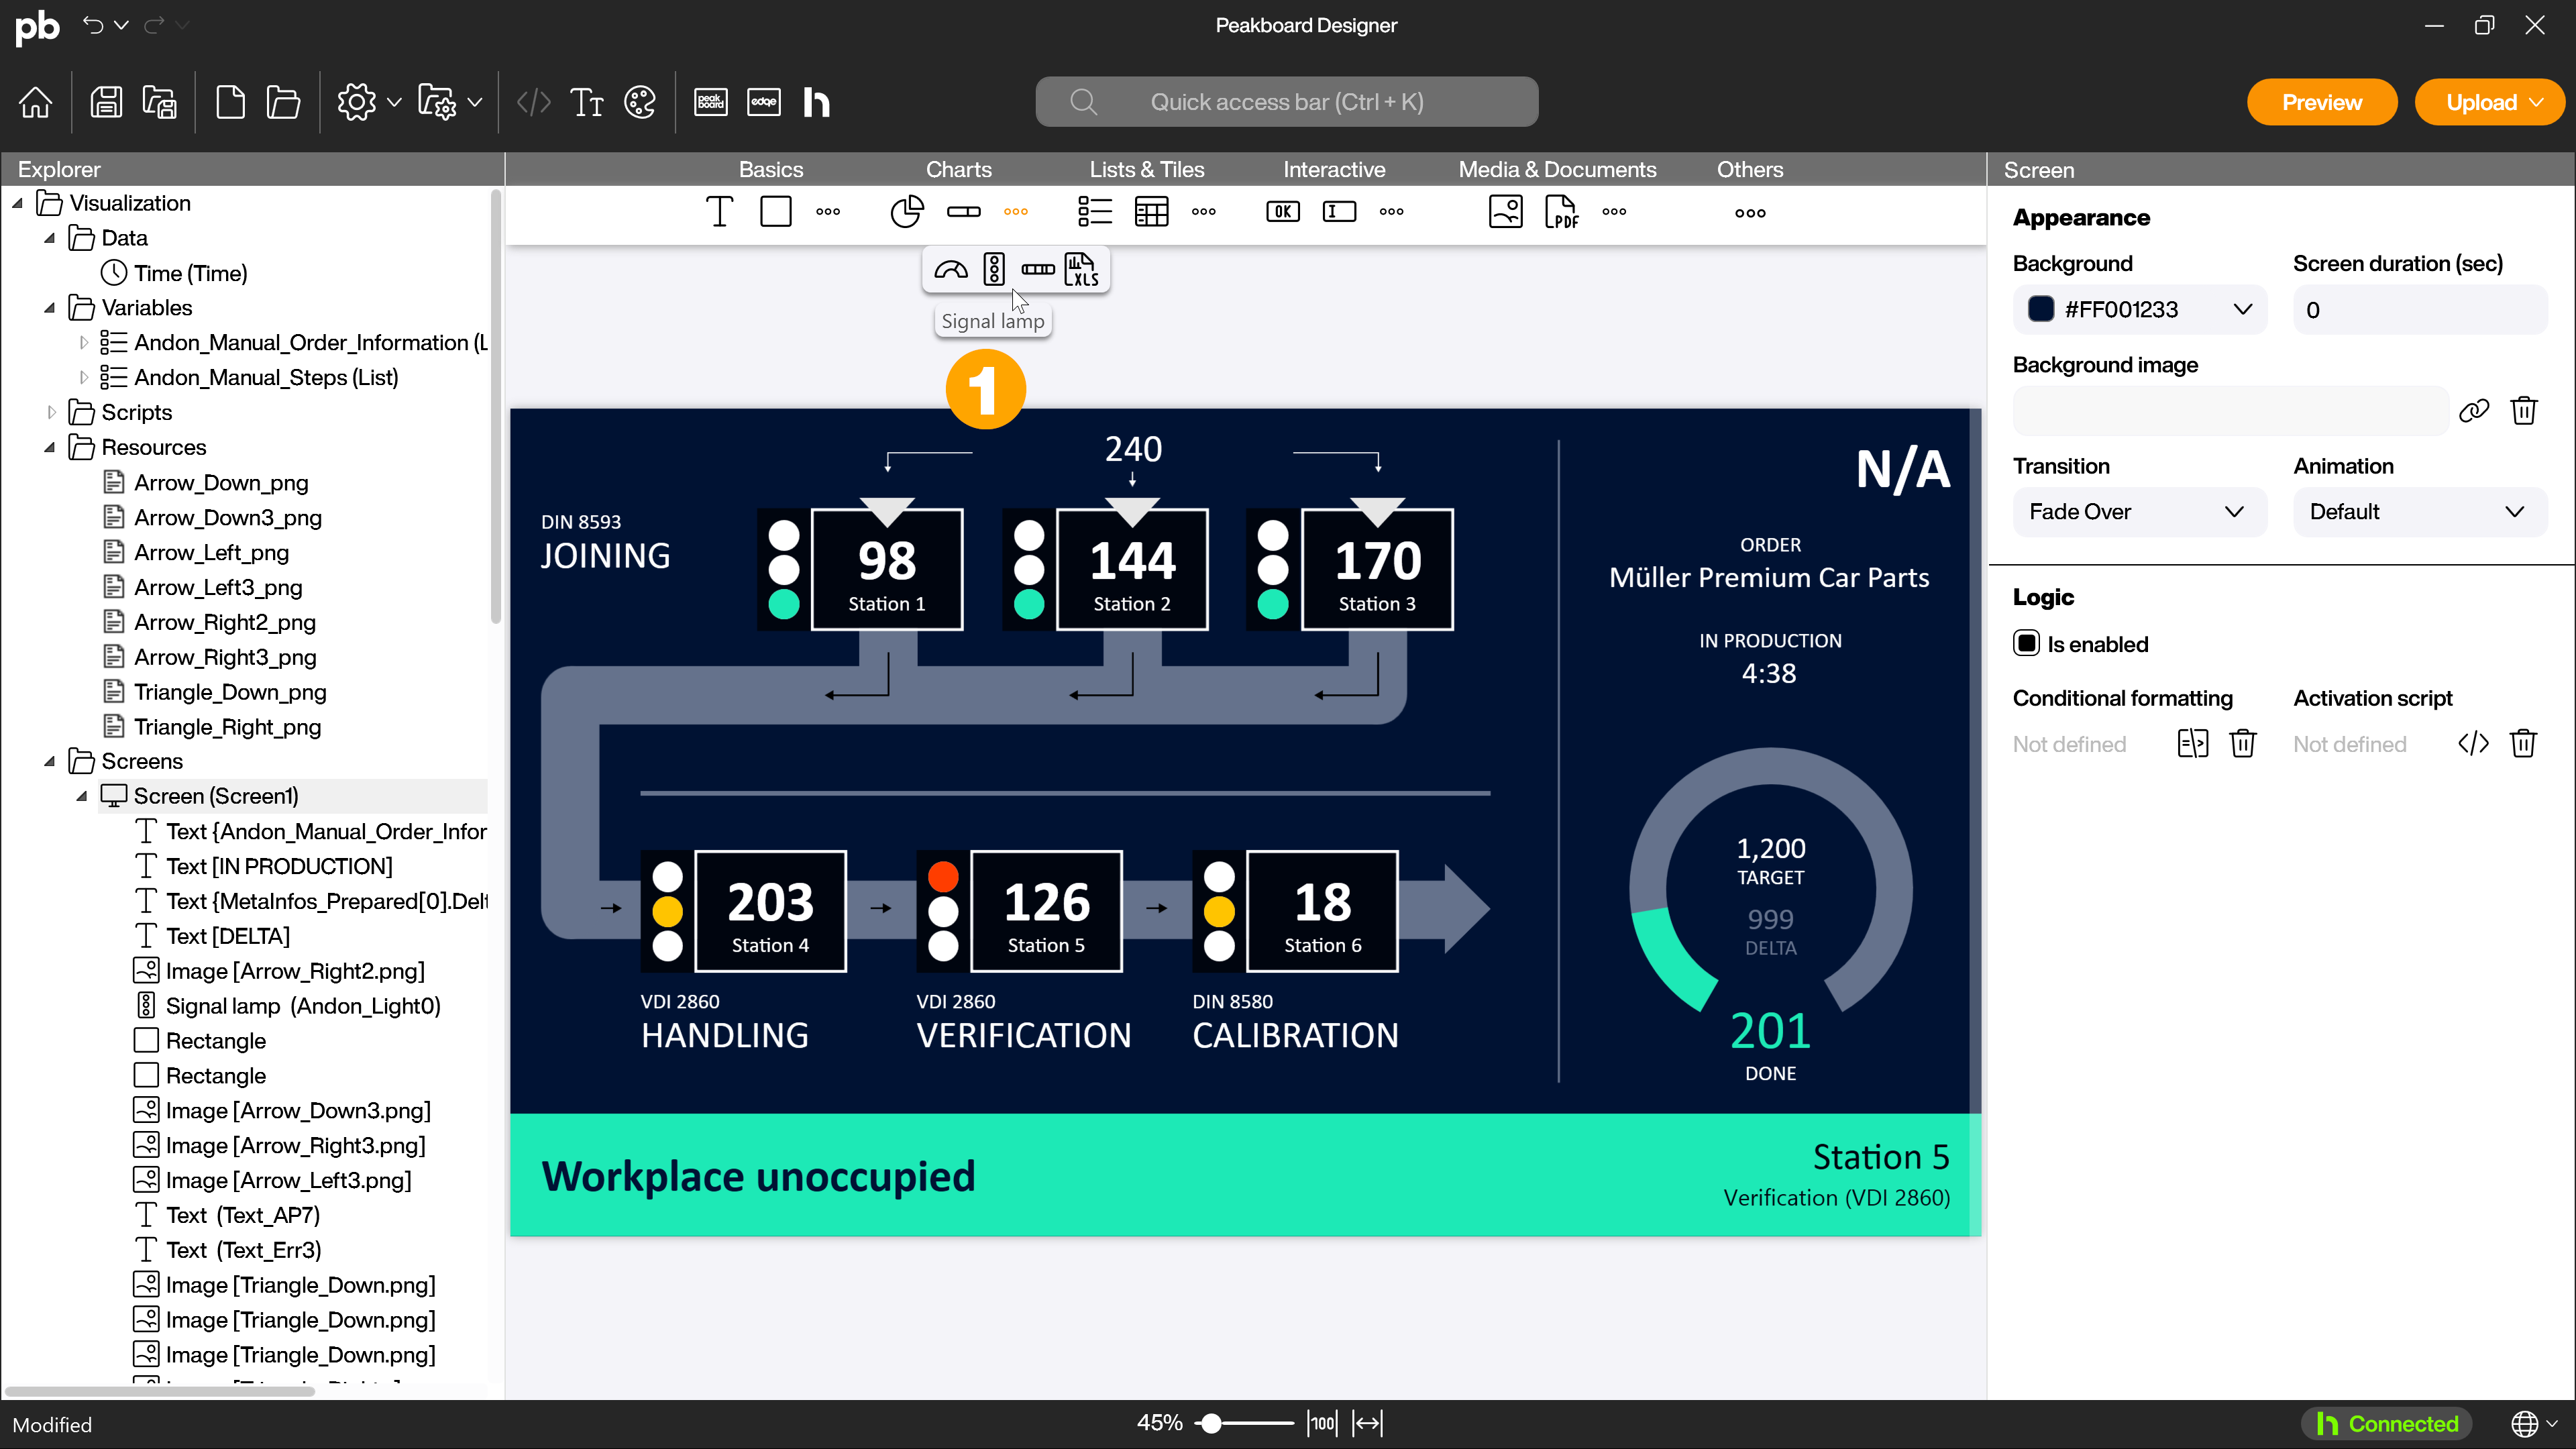
Add signal lamp
Drag and drop the signal lamp control (1) onto the workspace to add it to your application. The configuration dialog opens automatically.
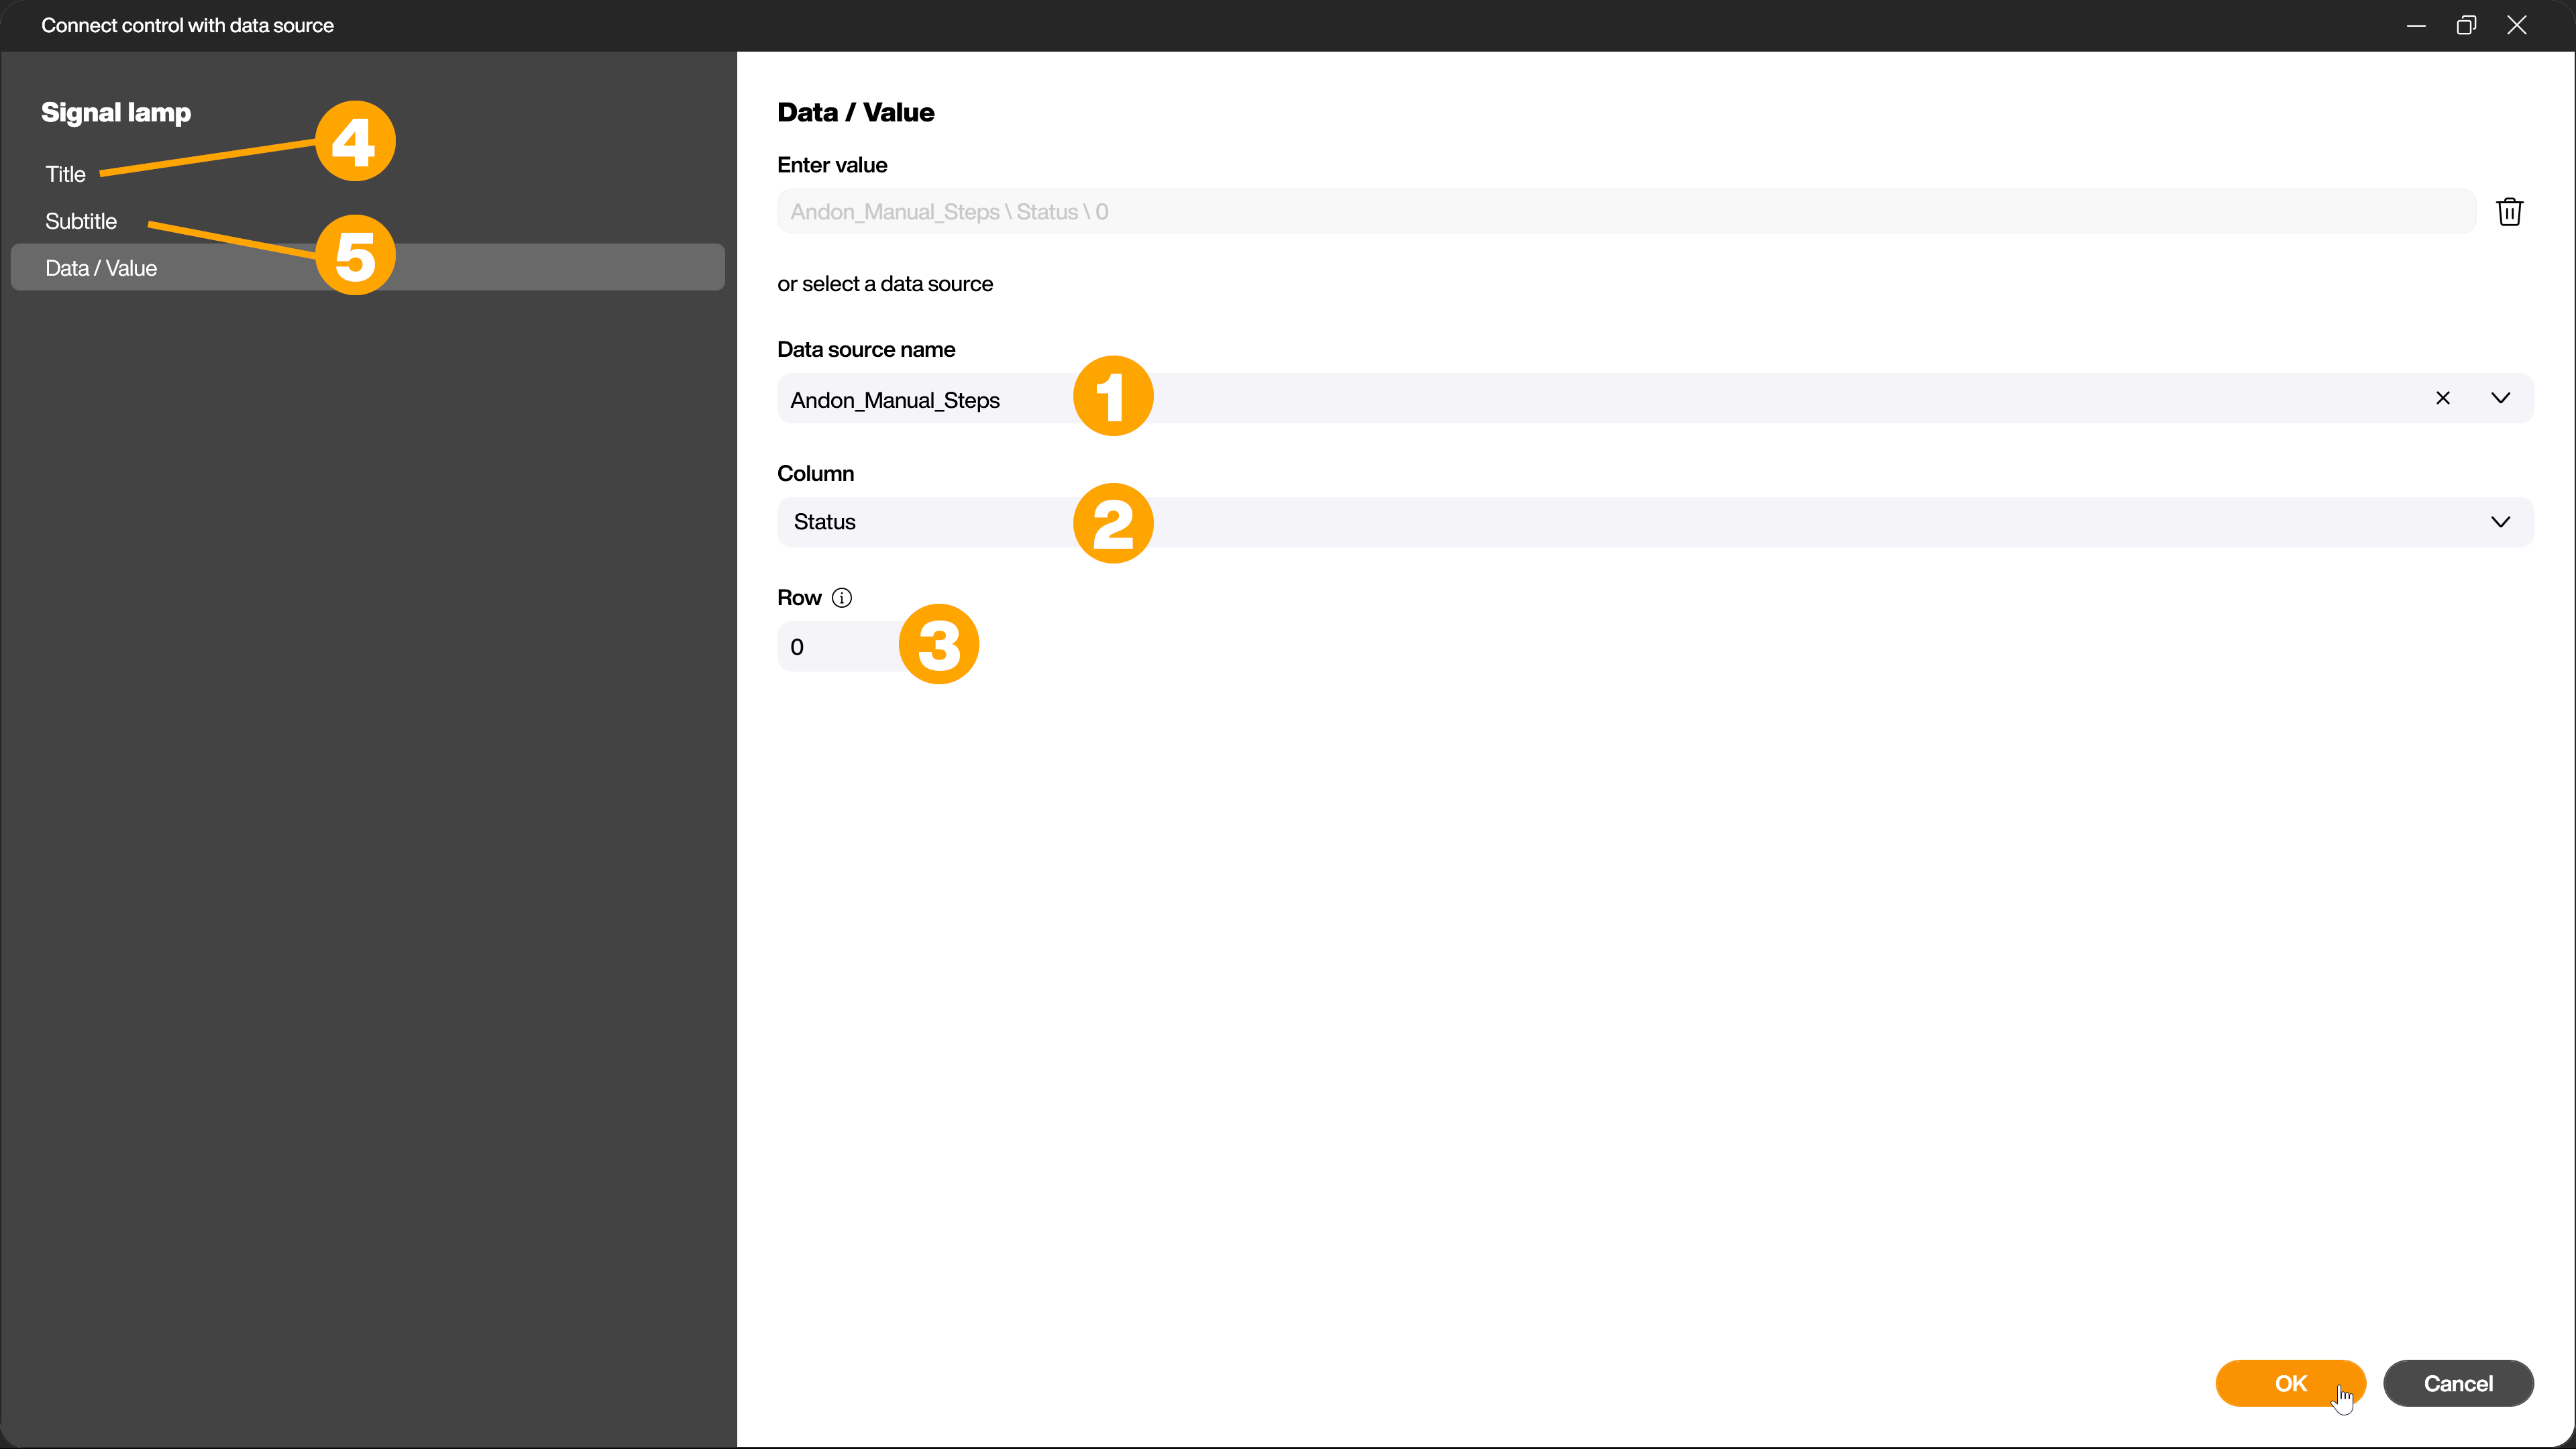
Link signal lamp with data source
Many different data sources are suitable as the basis for the signal lamp. The signal rules allow many different inputs to be used. Select the desired data source from the drop-down menu (1). If it is a tabular data source, you can then select the column (2) and row (3) to be used for the signal.
If desired, you can also assign a title (4) and subtitle (5). Then confirm the dialog.
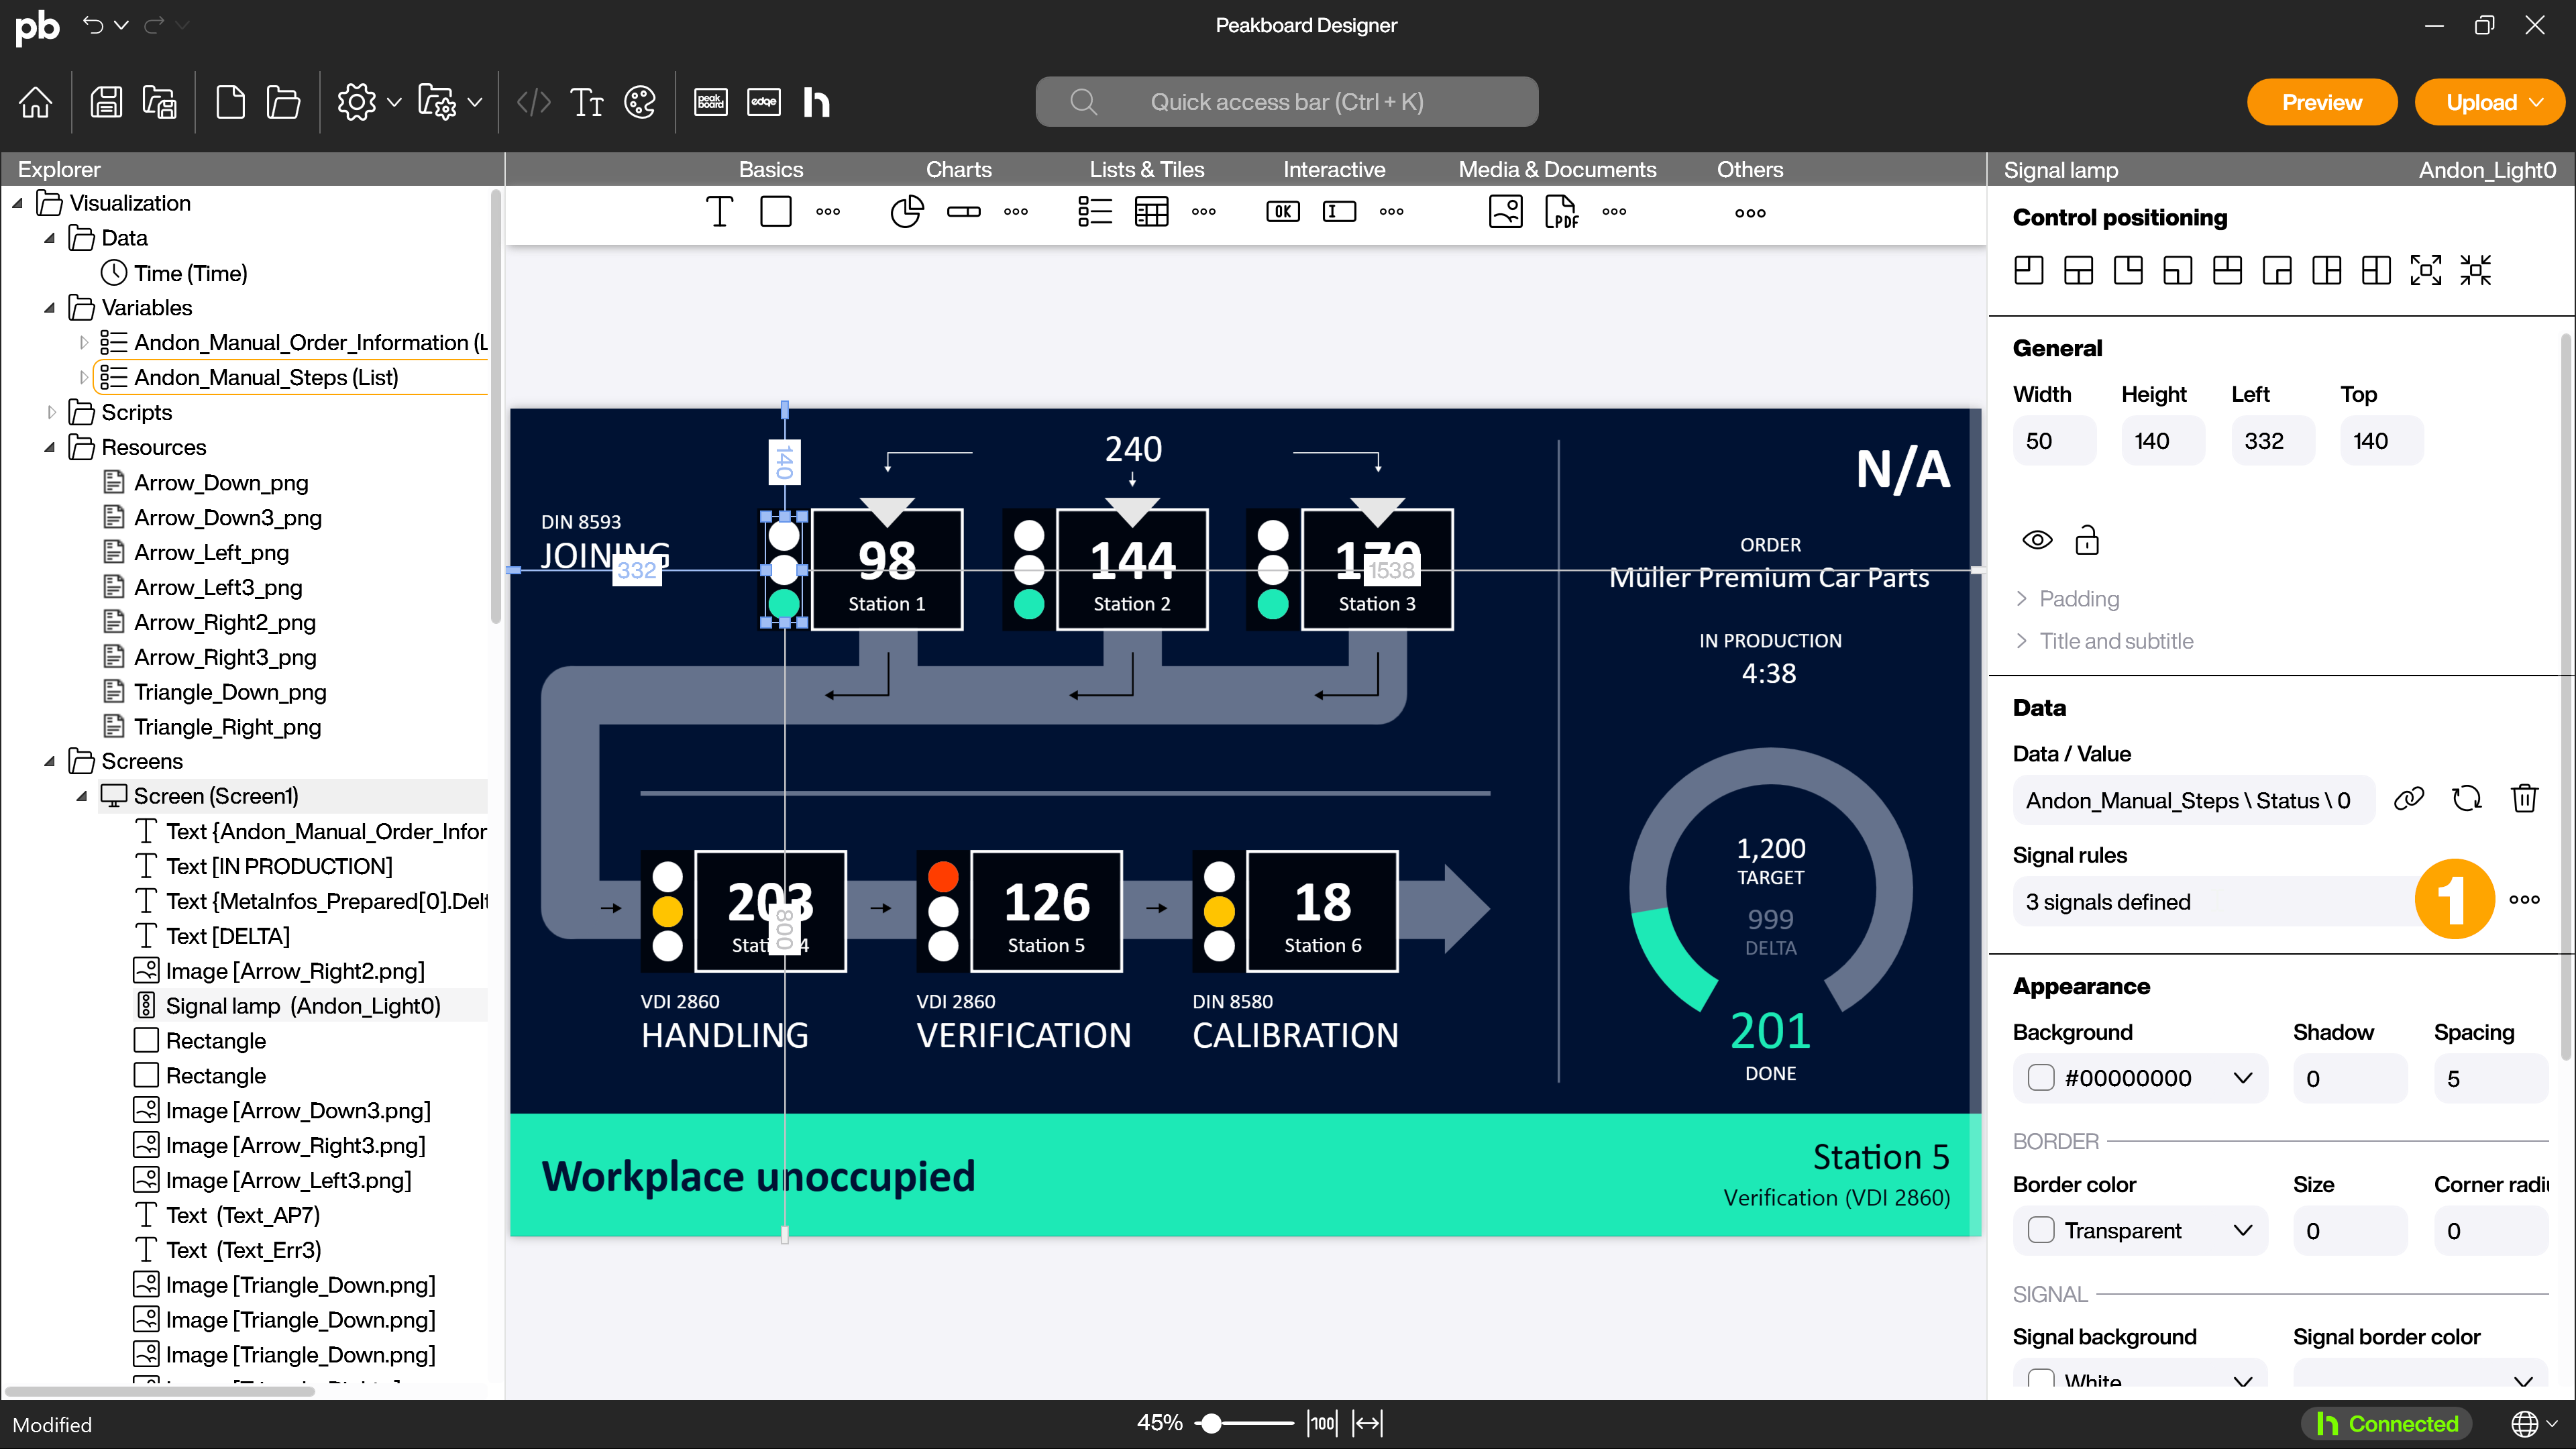
Edit signal rules
In the next step, you define how many signals you want to display and which rules should be applied when they are triggered. To do this, click […] (1) behind [Signal rules] in the [Data] section of the control’s attributes to open the dialog for editing.
Add and adjust signals
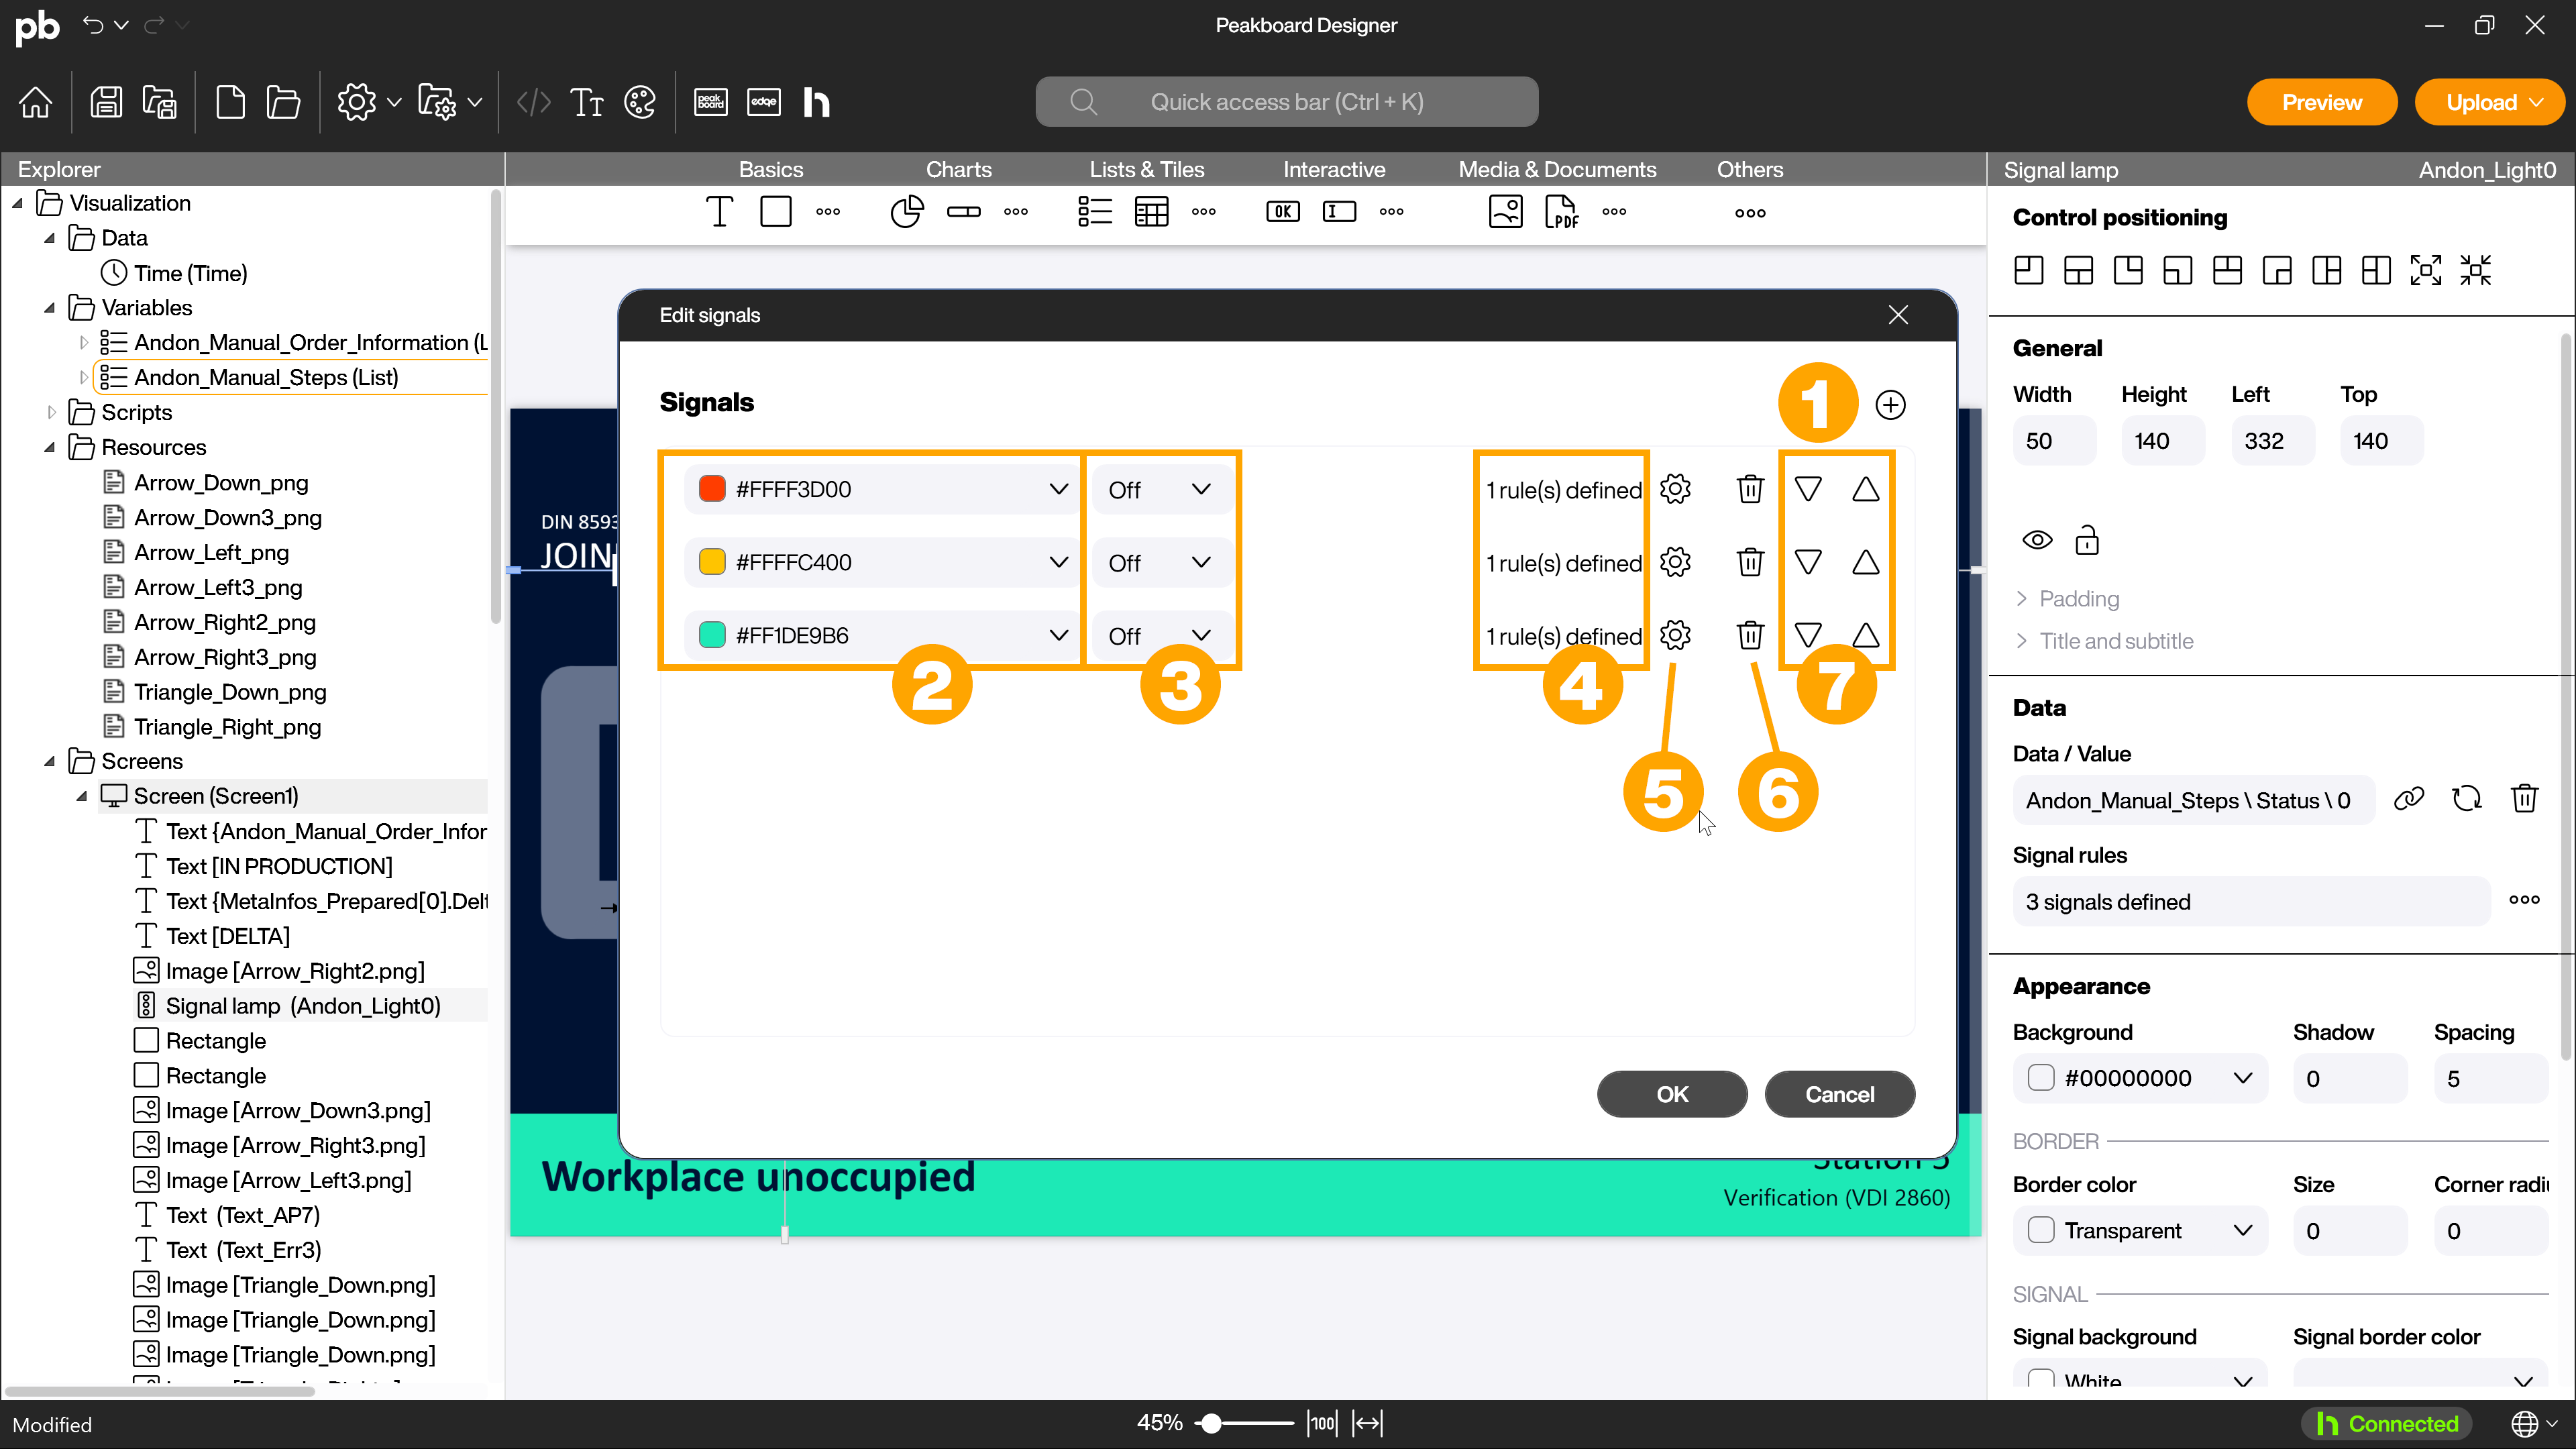
The dialog shows an overview of the signals currently added. Use the [+] button (1) to add additional signals.
The first column shows the colors of the signals (2). The second column shows the basic status of the respective signal (3). You can choose between [On], [Off] and [Blink]. In the third column, you can see how many rules have been defined for the signal (4). Clicking on the cogwheel icon (5) takes you to the dialog for editing the rules.
Signals can be deleted by clicking on the recycle bin icon (6). Use the arrows (7) to change the order of the signals.
Define signal rules per signal
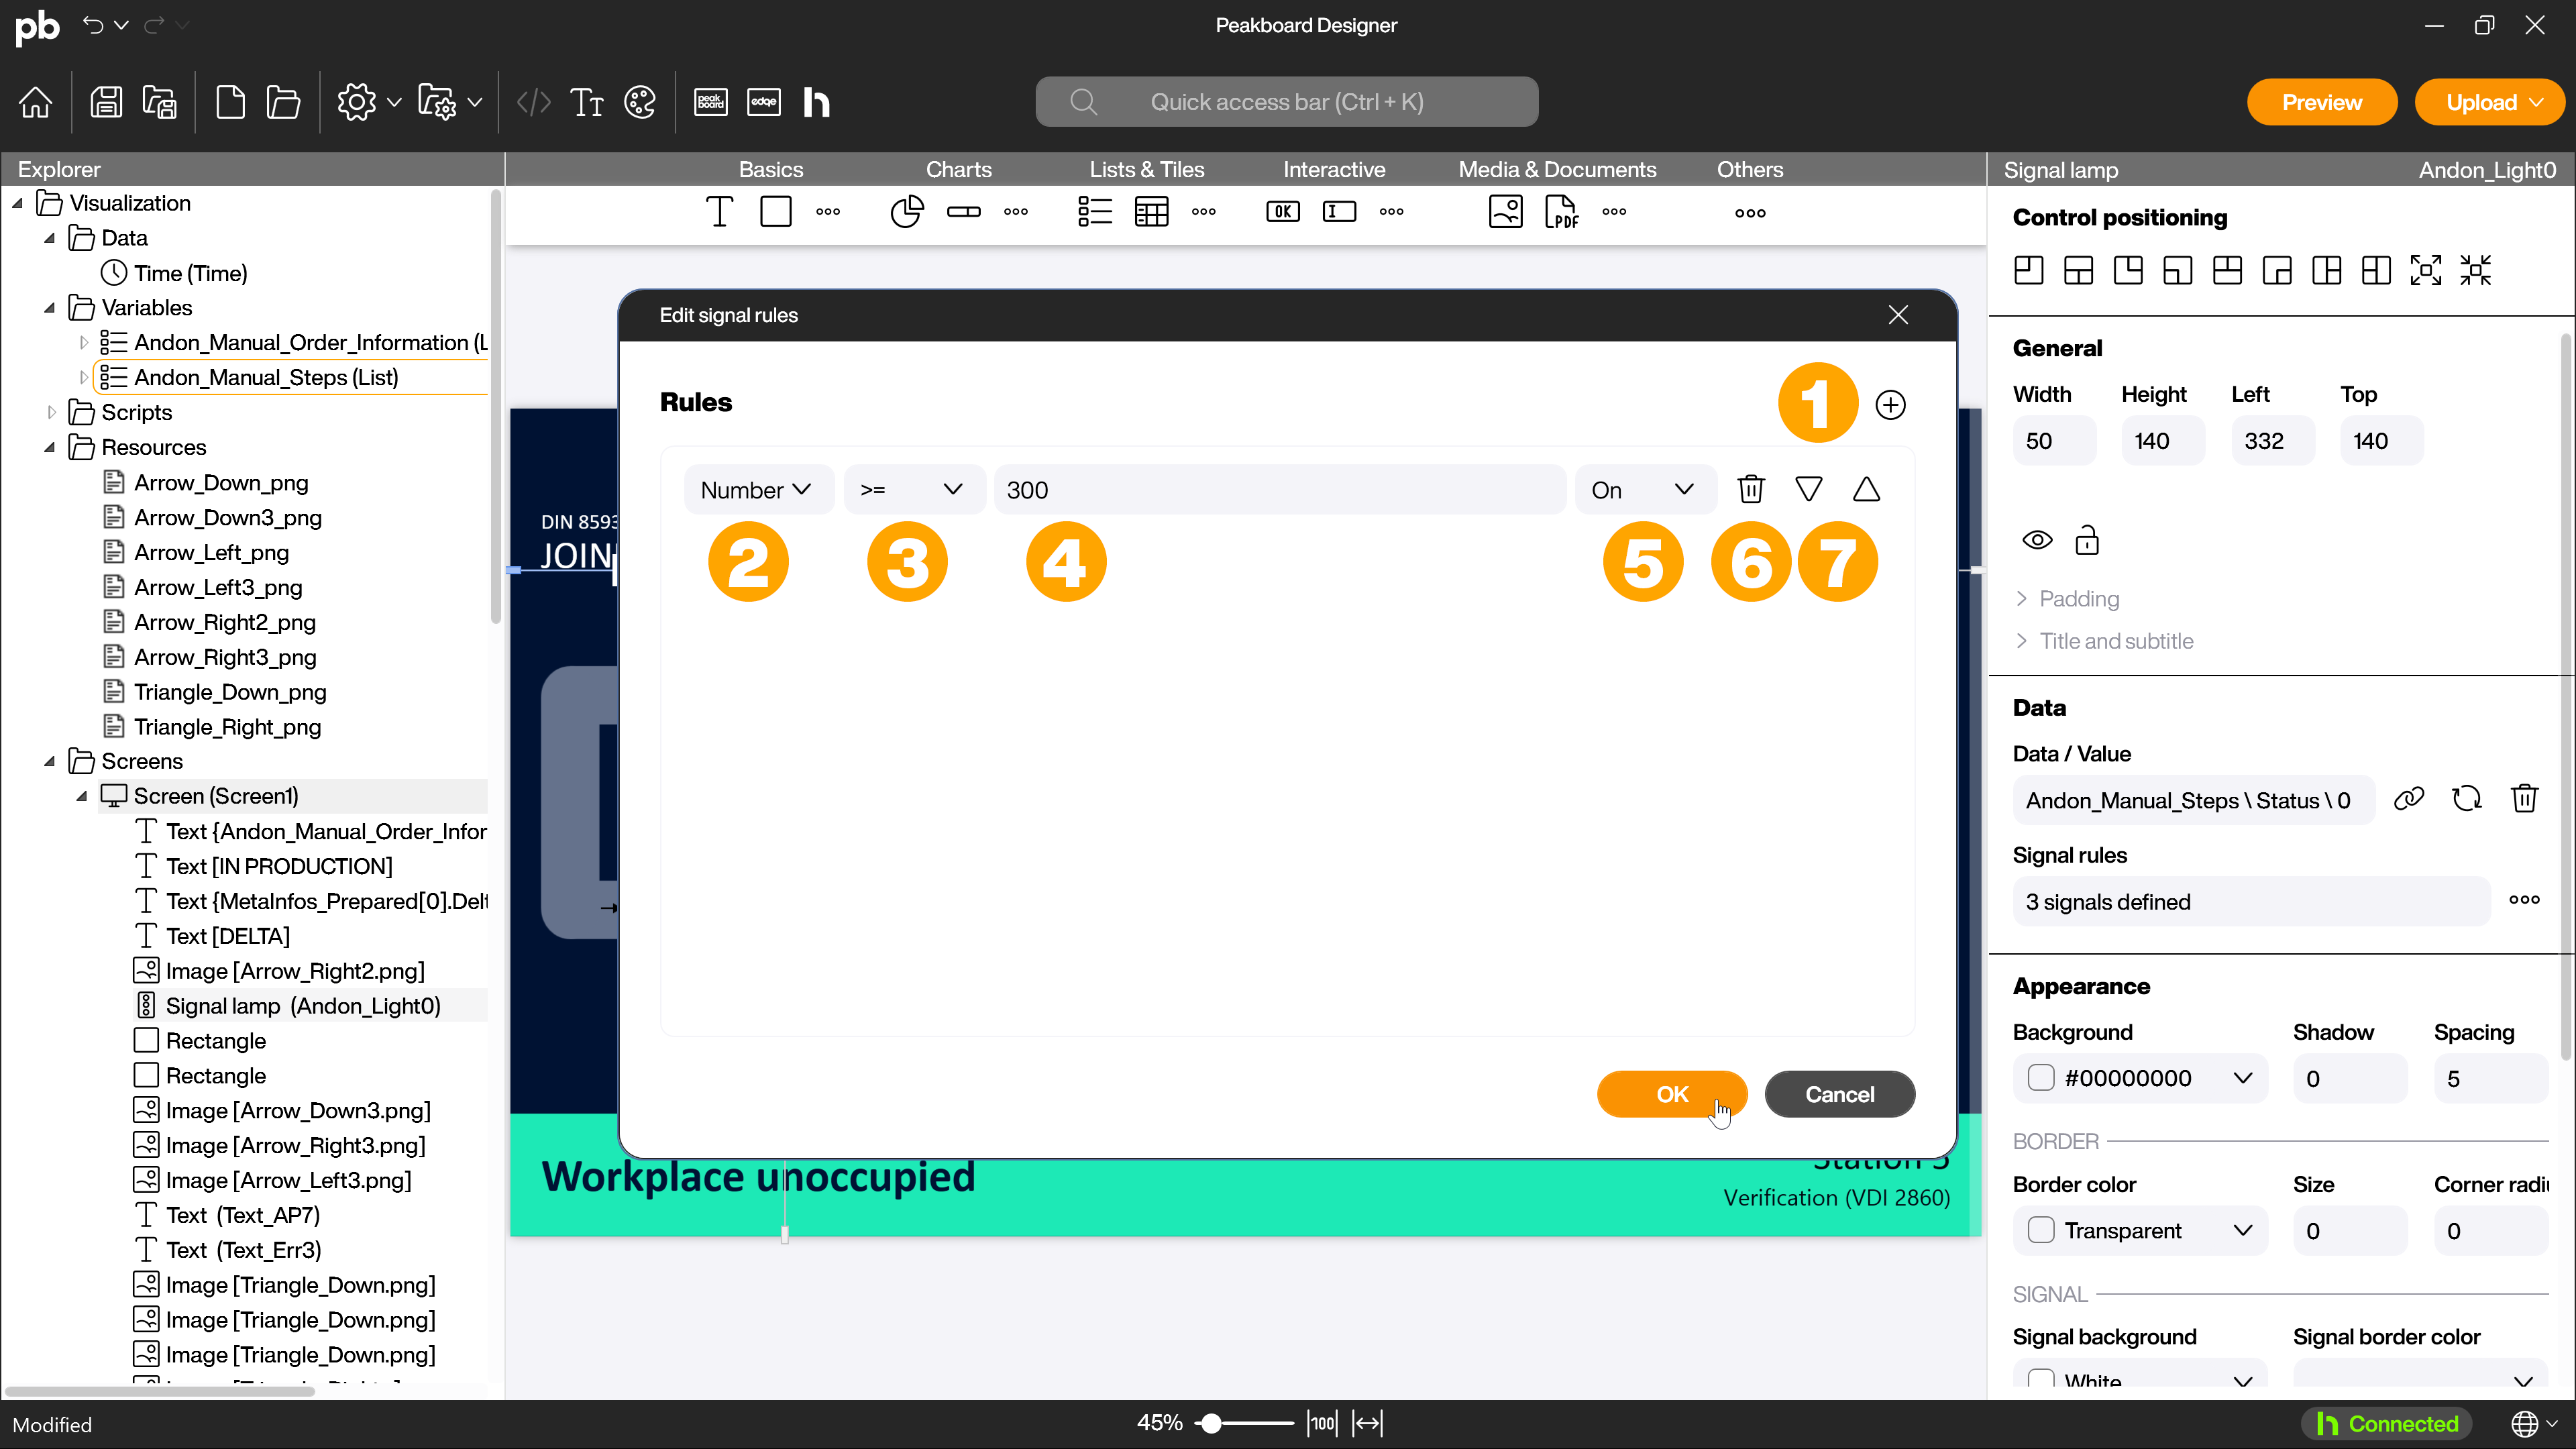
Once you have clicked on the cogwheel symbol, the dialog for editing the rules opens. Use the [+] symbol (1) to add a new rule.
In the first selection field, specify which data type is used for the rule (2). The second selection field defines the operator (3) and the third field the value (4) that is used. In the fourth field, you define which state the signal should have (5) if the condition from the other three fields is fulfilled.
You can delete created rules with the recycle bin symbol (6). Use the arrows (7) to change the order of the rules.
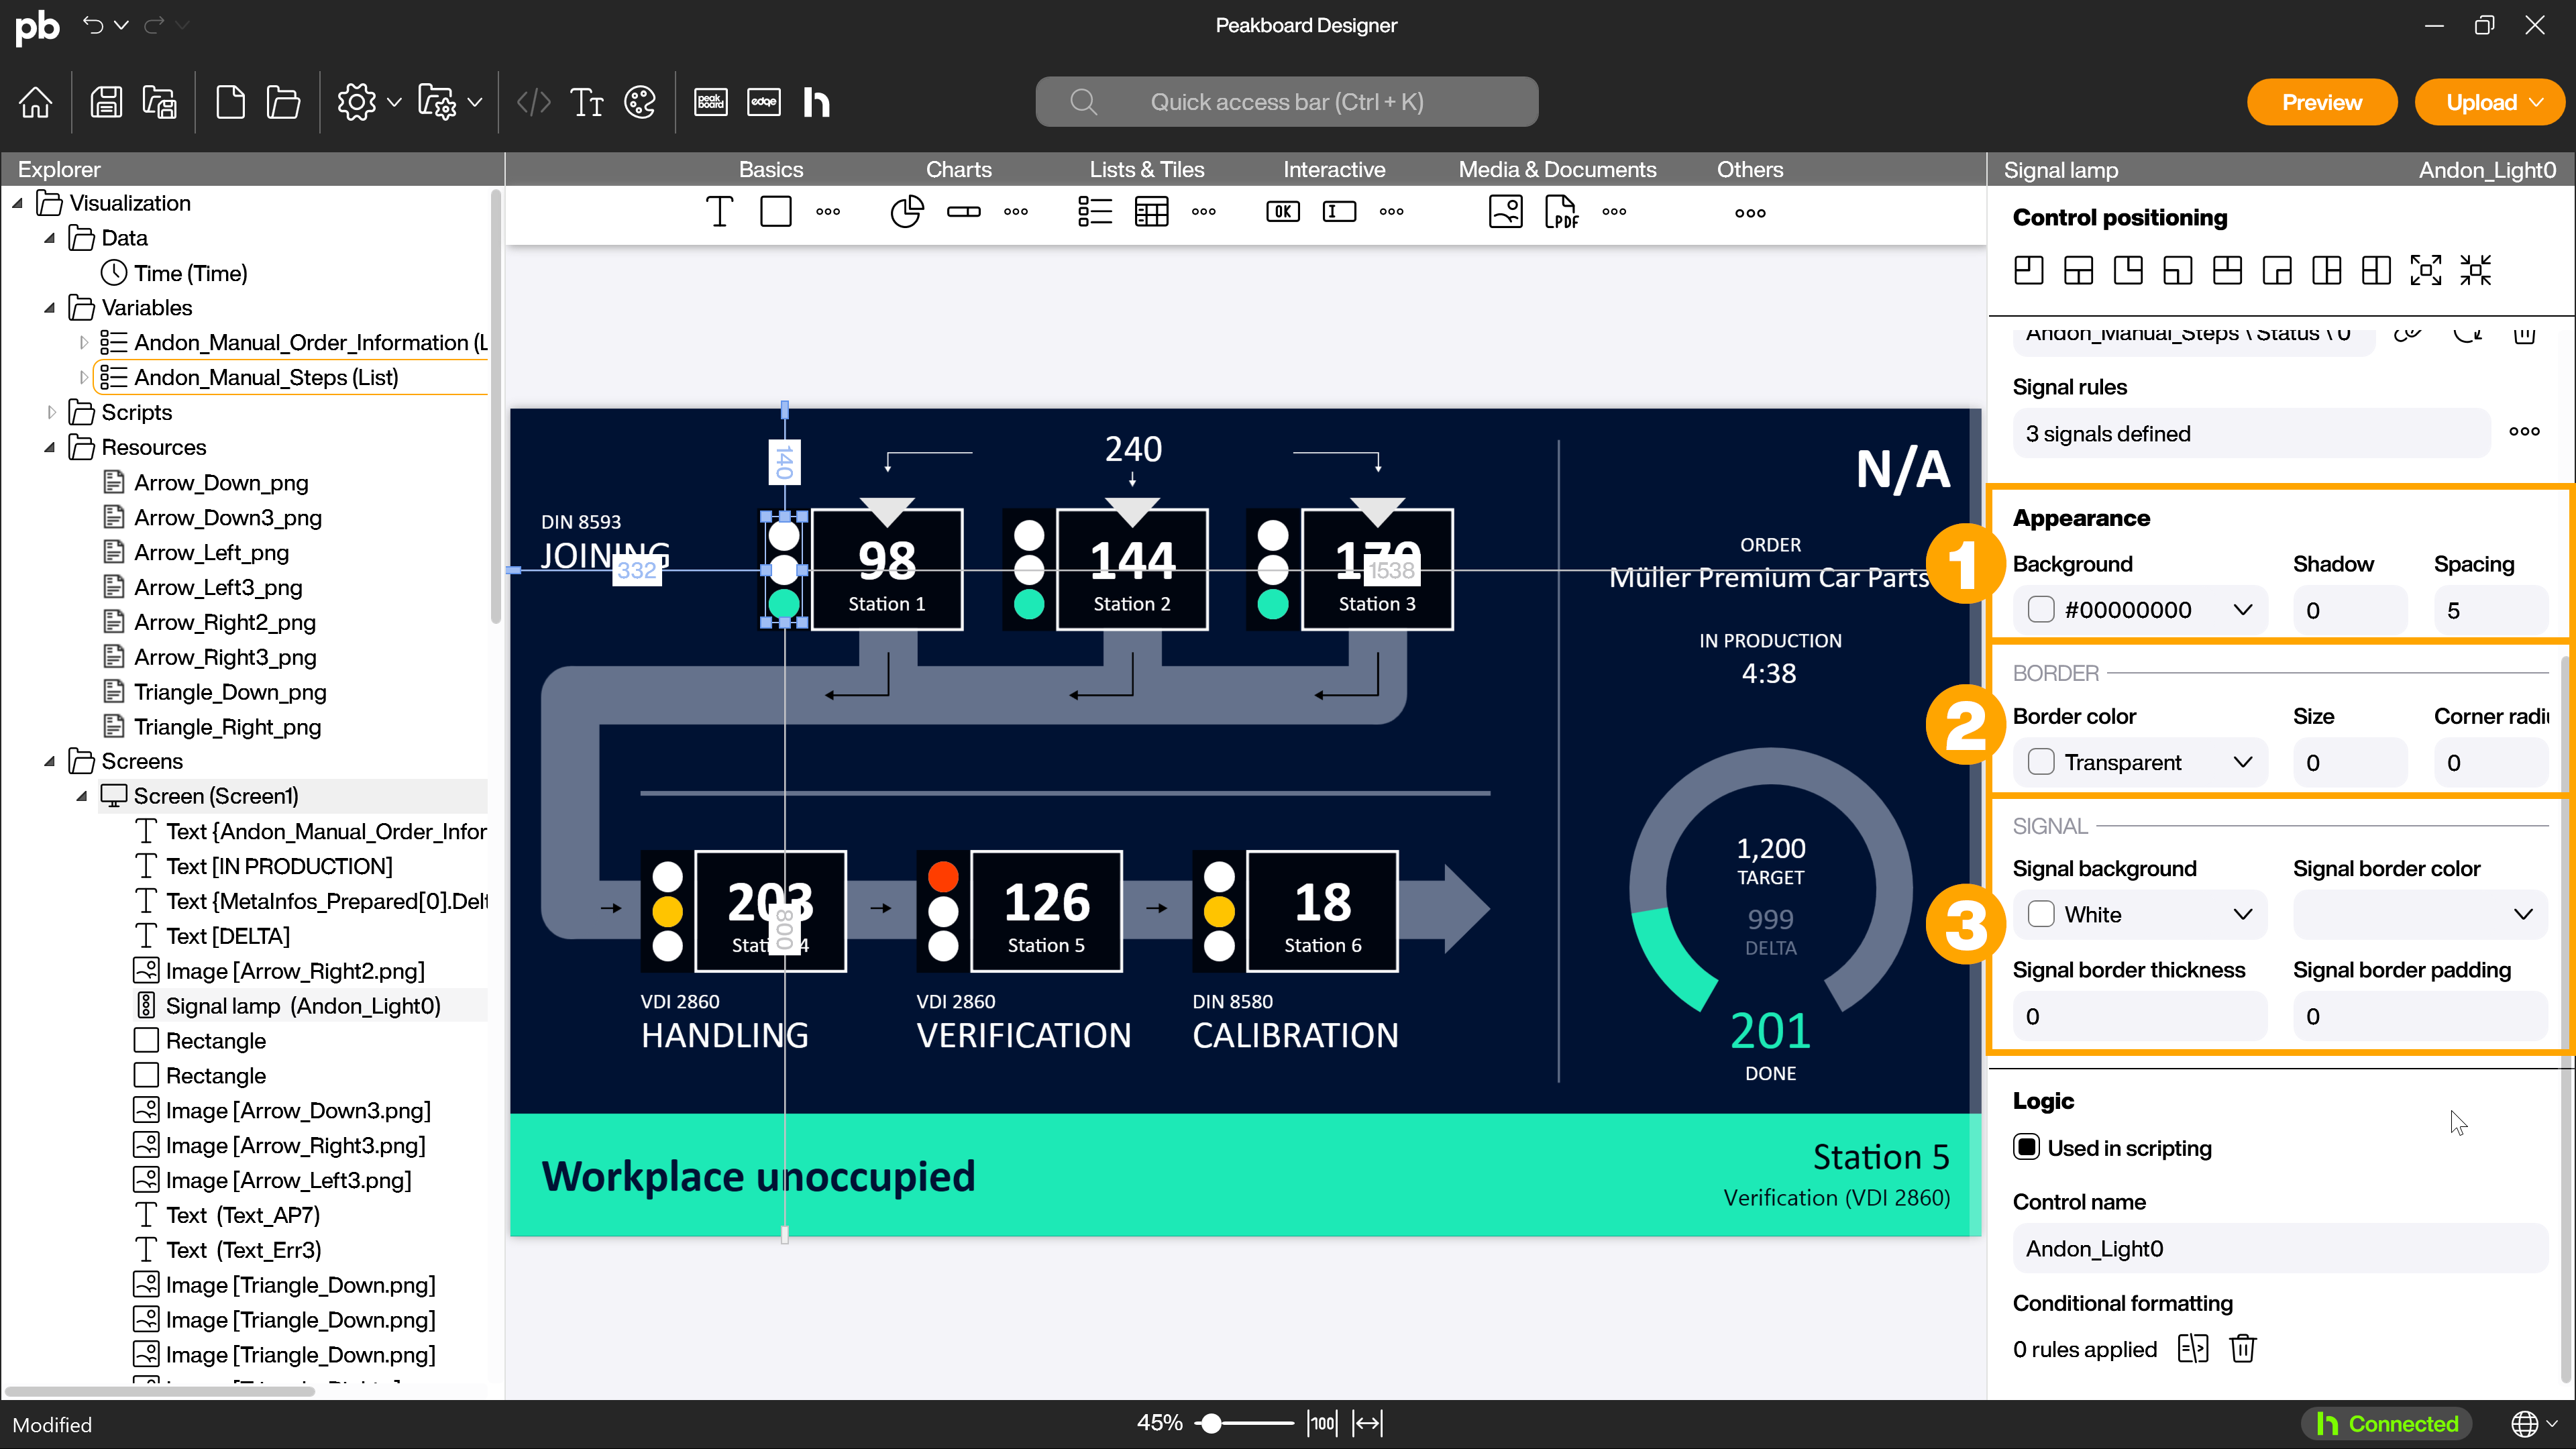
Customize the appearance of the signal lamp
Finally, you can now customize how your signal should look in the attributes in the [Appearance] section. To do this, change the general background (1), the contour of the signal light (2) and the attributes of the individual signals (3). This allows you to design the signal lamp to suit your application.