Peakboard hub
Microsoft Power Automate Peakboard Connector
The Microsoft Power Automate Peakboard connector allows you to automate the forwarding or other reuse of alerts sent from your Peakboard Boxes to the Peakboard Hub.
Requirements
In order to use the Peakboard connector, you need to have Peakboard Hub online. You also need a premium license for Microsoft Power Automate to use the connector.
Sample application: Forwarding Peakboard Alerts as a message to a Slack channel
You can use the Peakboard Connector in Microsoft Power Automate to forward your alerts to various external applications such as Slack, Teams or similar. You determine the content of the forwarding yourself. The variety of applications is only limited by what Microsoft Power Automate offers.
Preparation: Creating a new connection to Peakboard Hub online
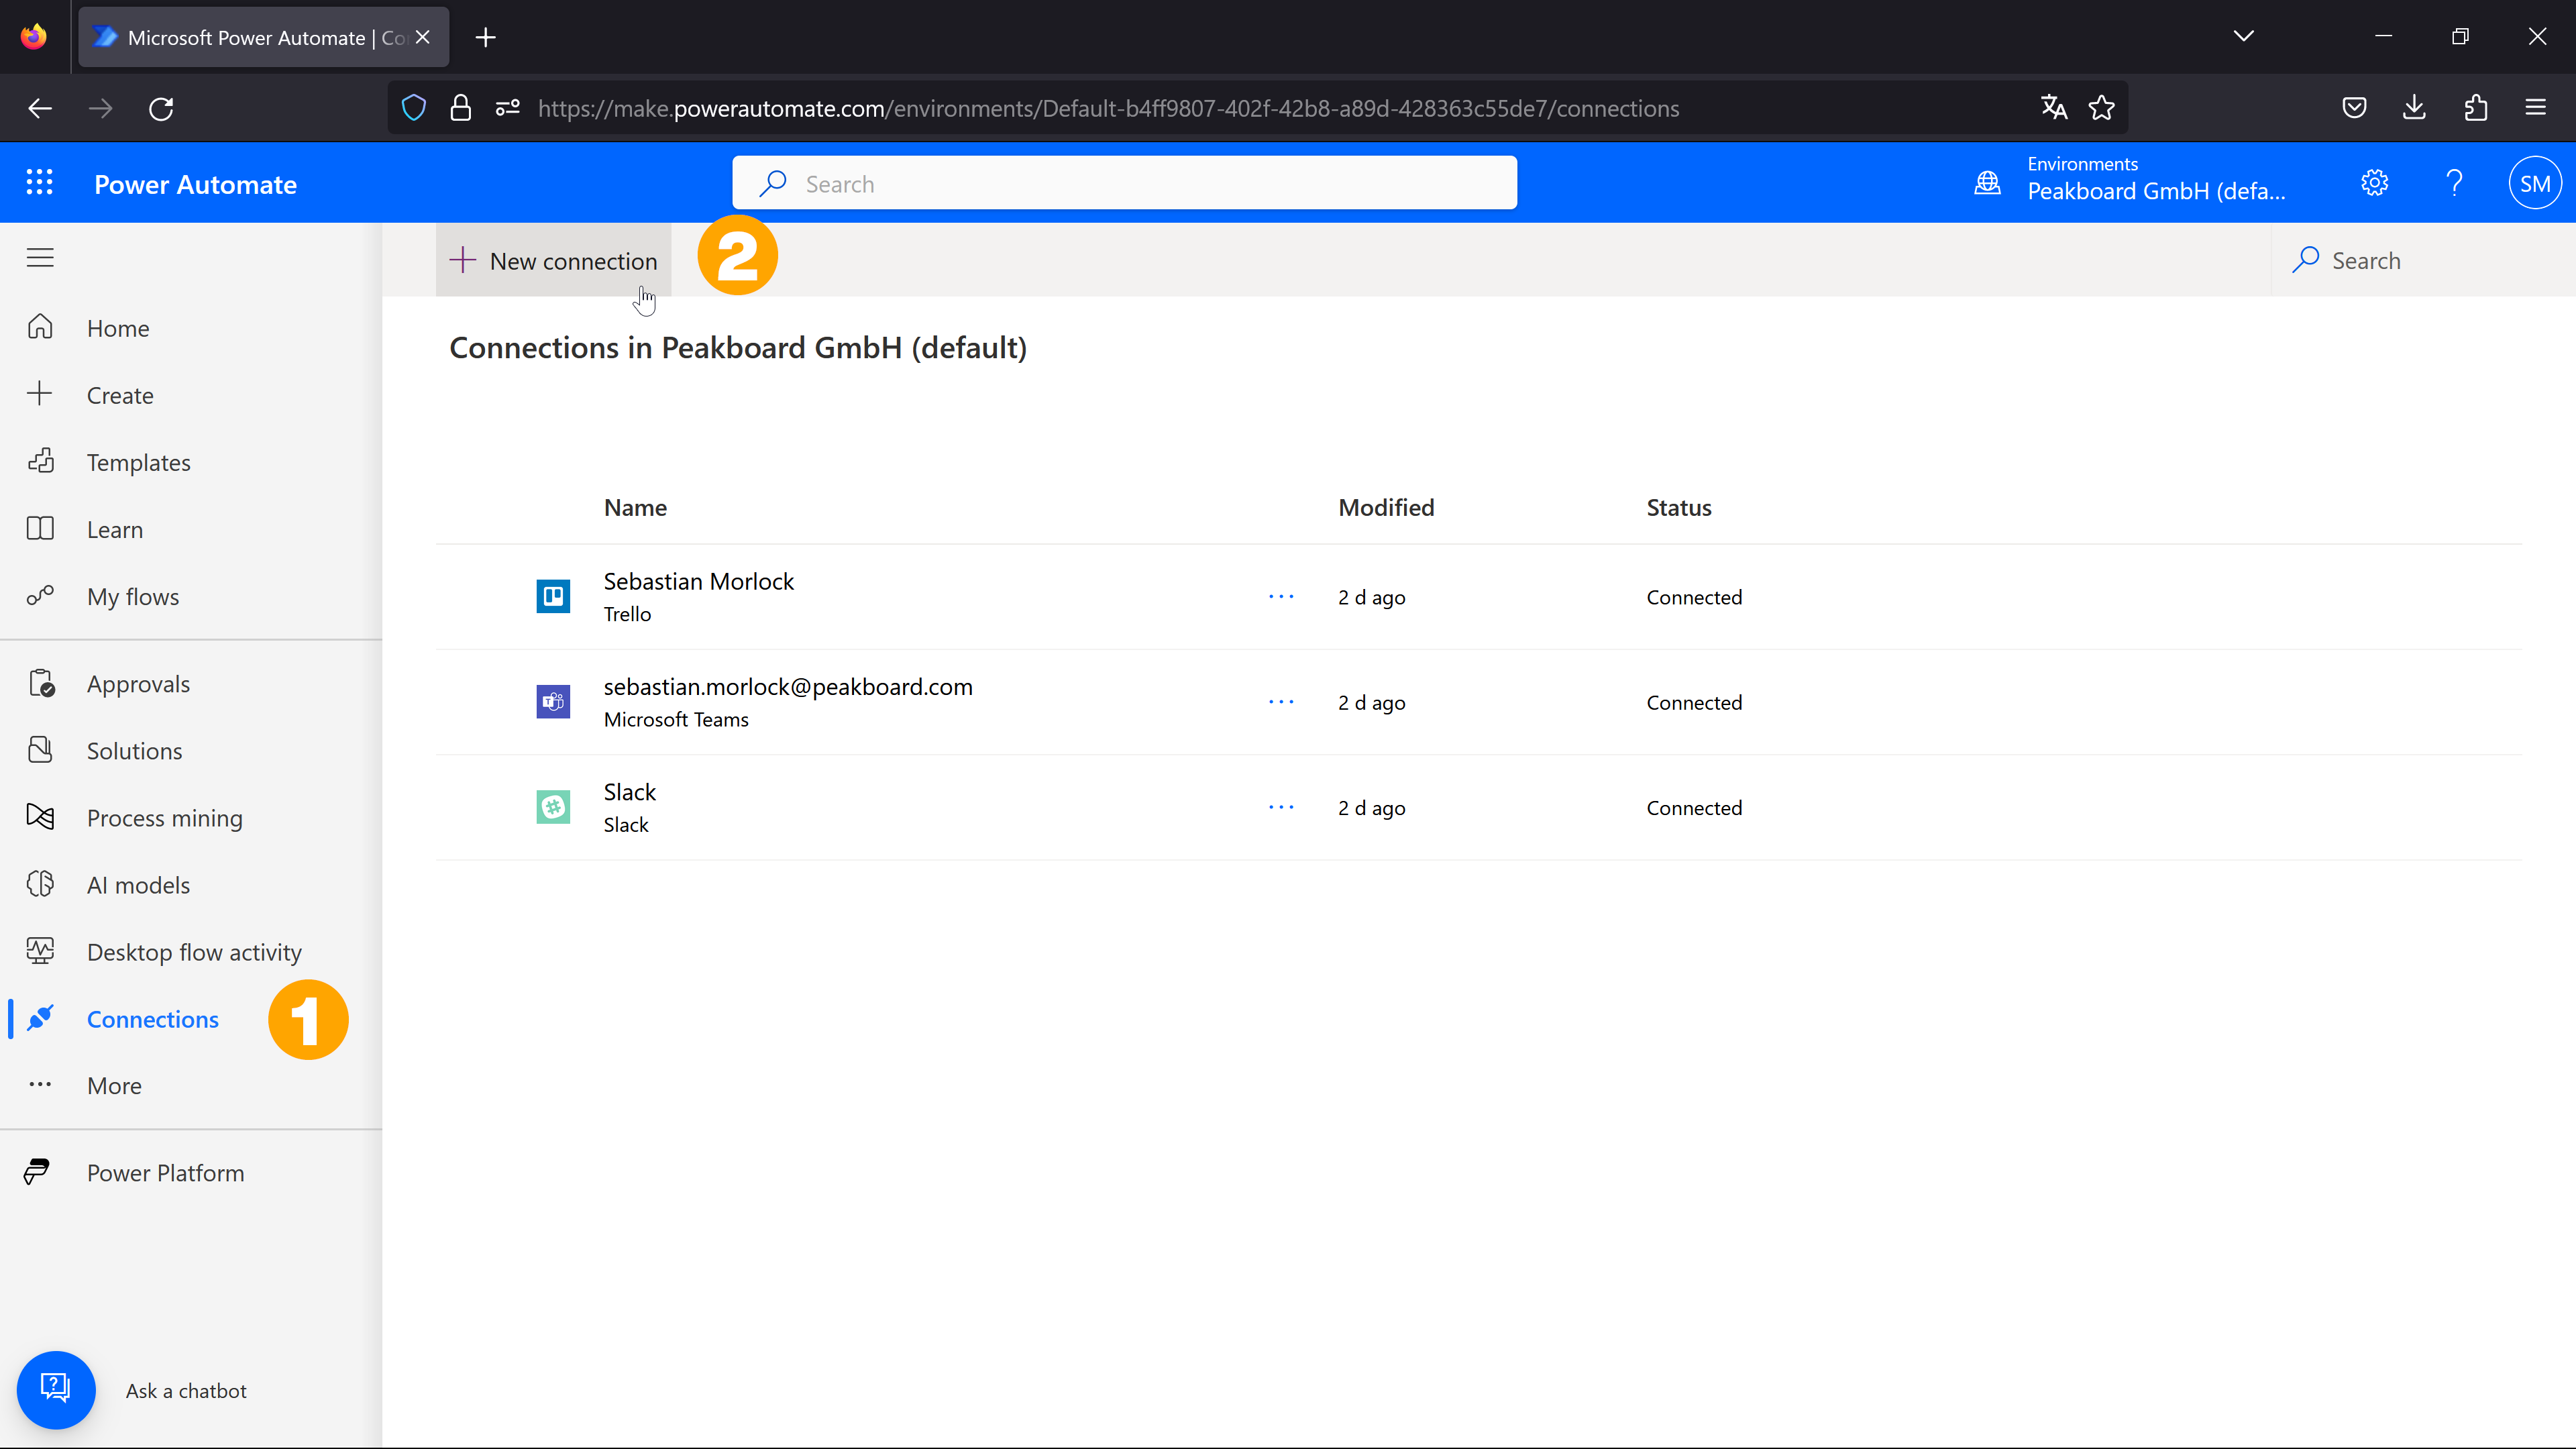
To create a connection to Peakboard Hub online, click on [+ New Connection] (2) in the [Connections] (1) section of Microsoft Power Automate.
Select [Peakboard] there and enter the group key of your user group from the Peakboard Hub online in the window that opens. You can find the group key by clicking on Show Group Key in the profile icon of the Peakboard Hub online.
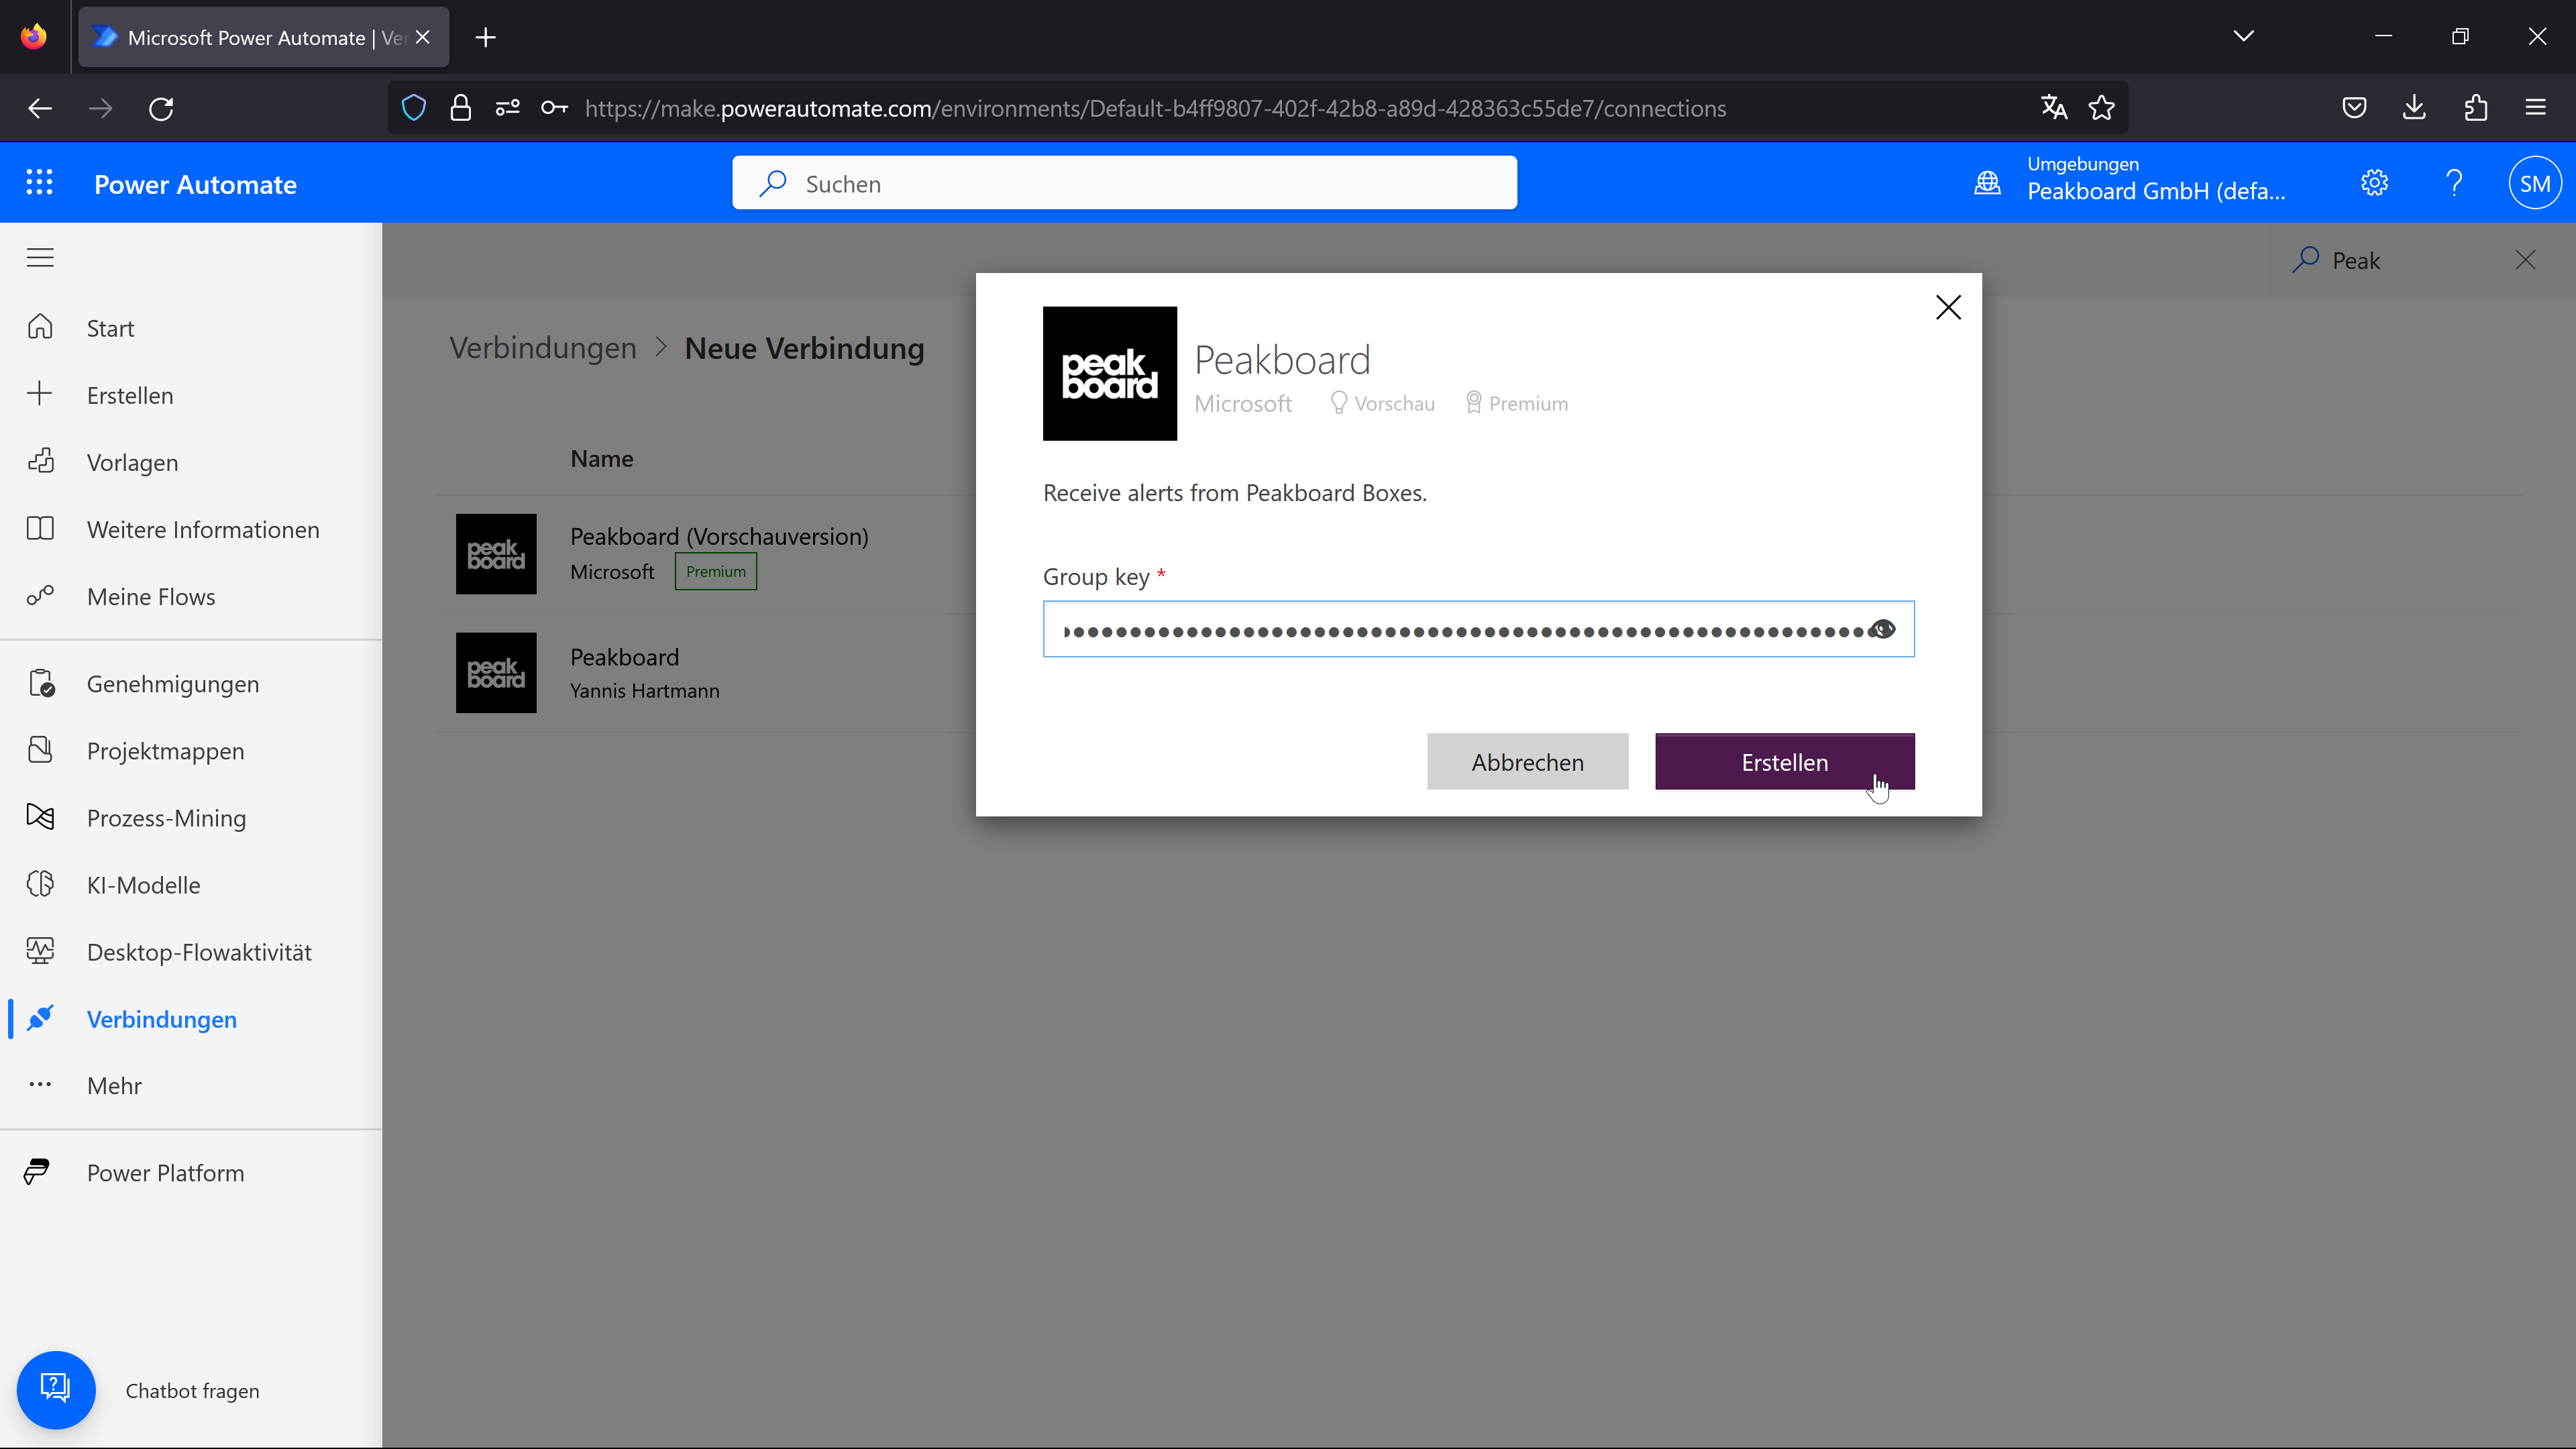
The connection is now successfully created.
Creating a new flow
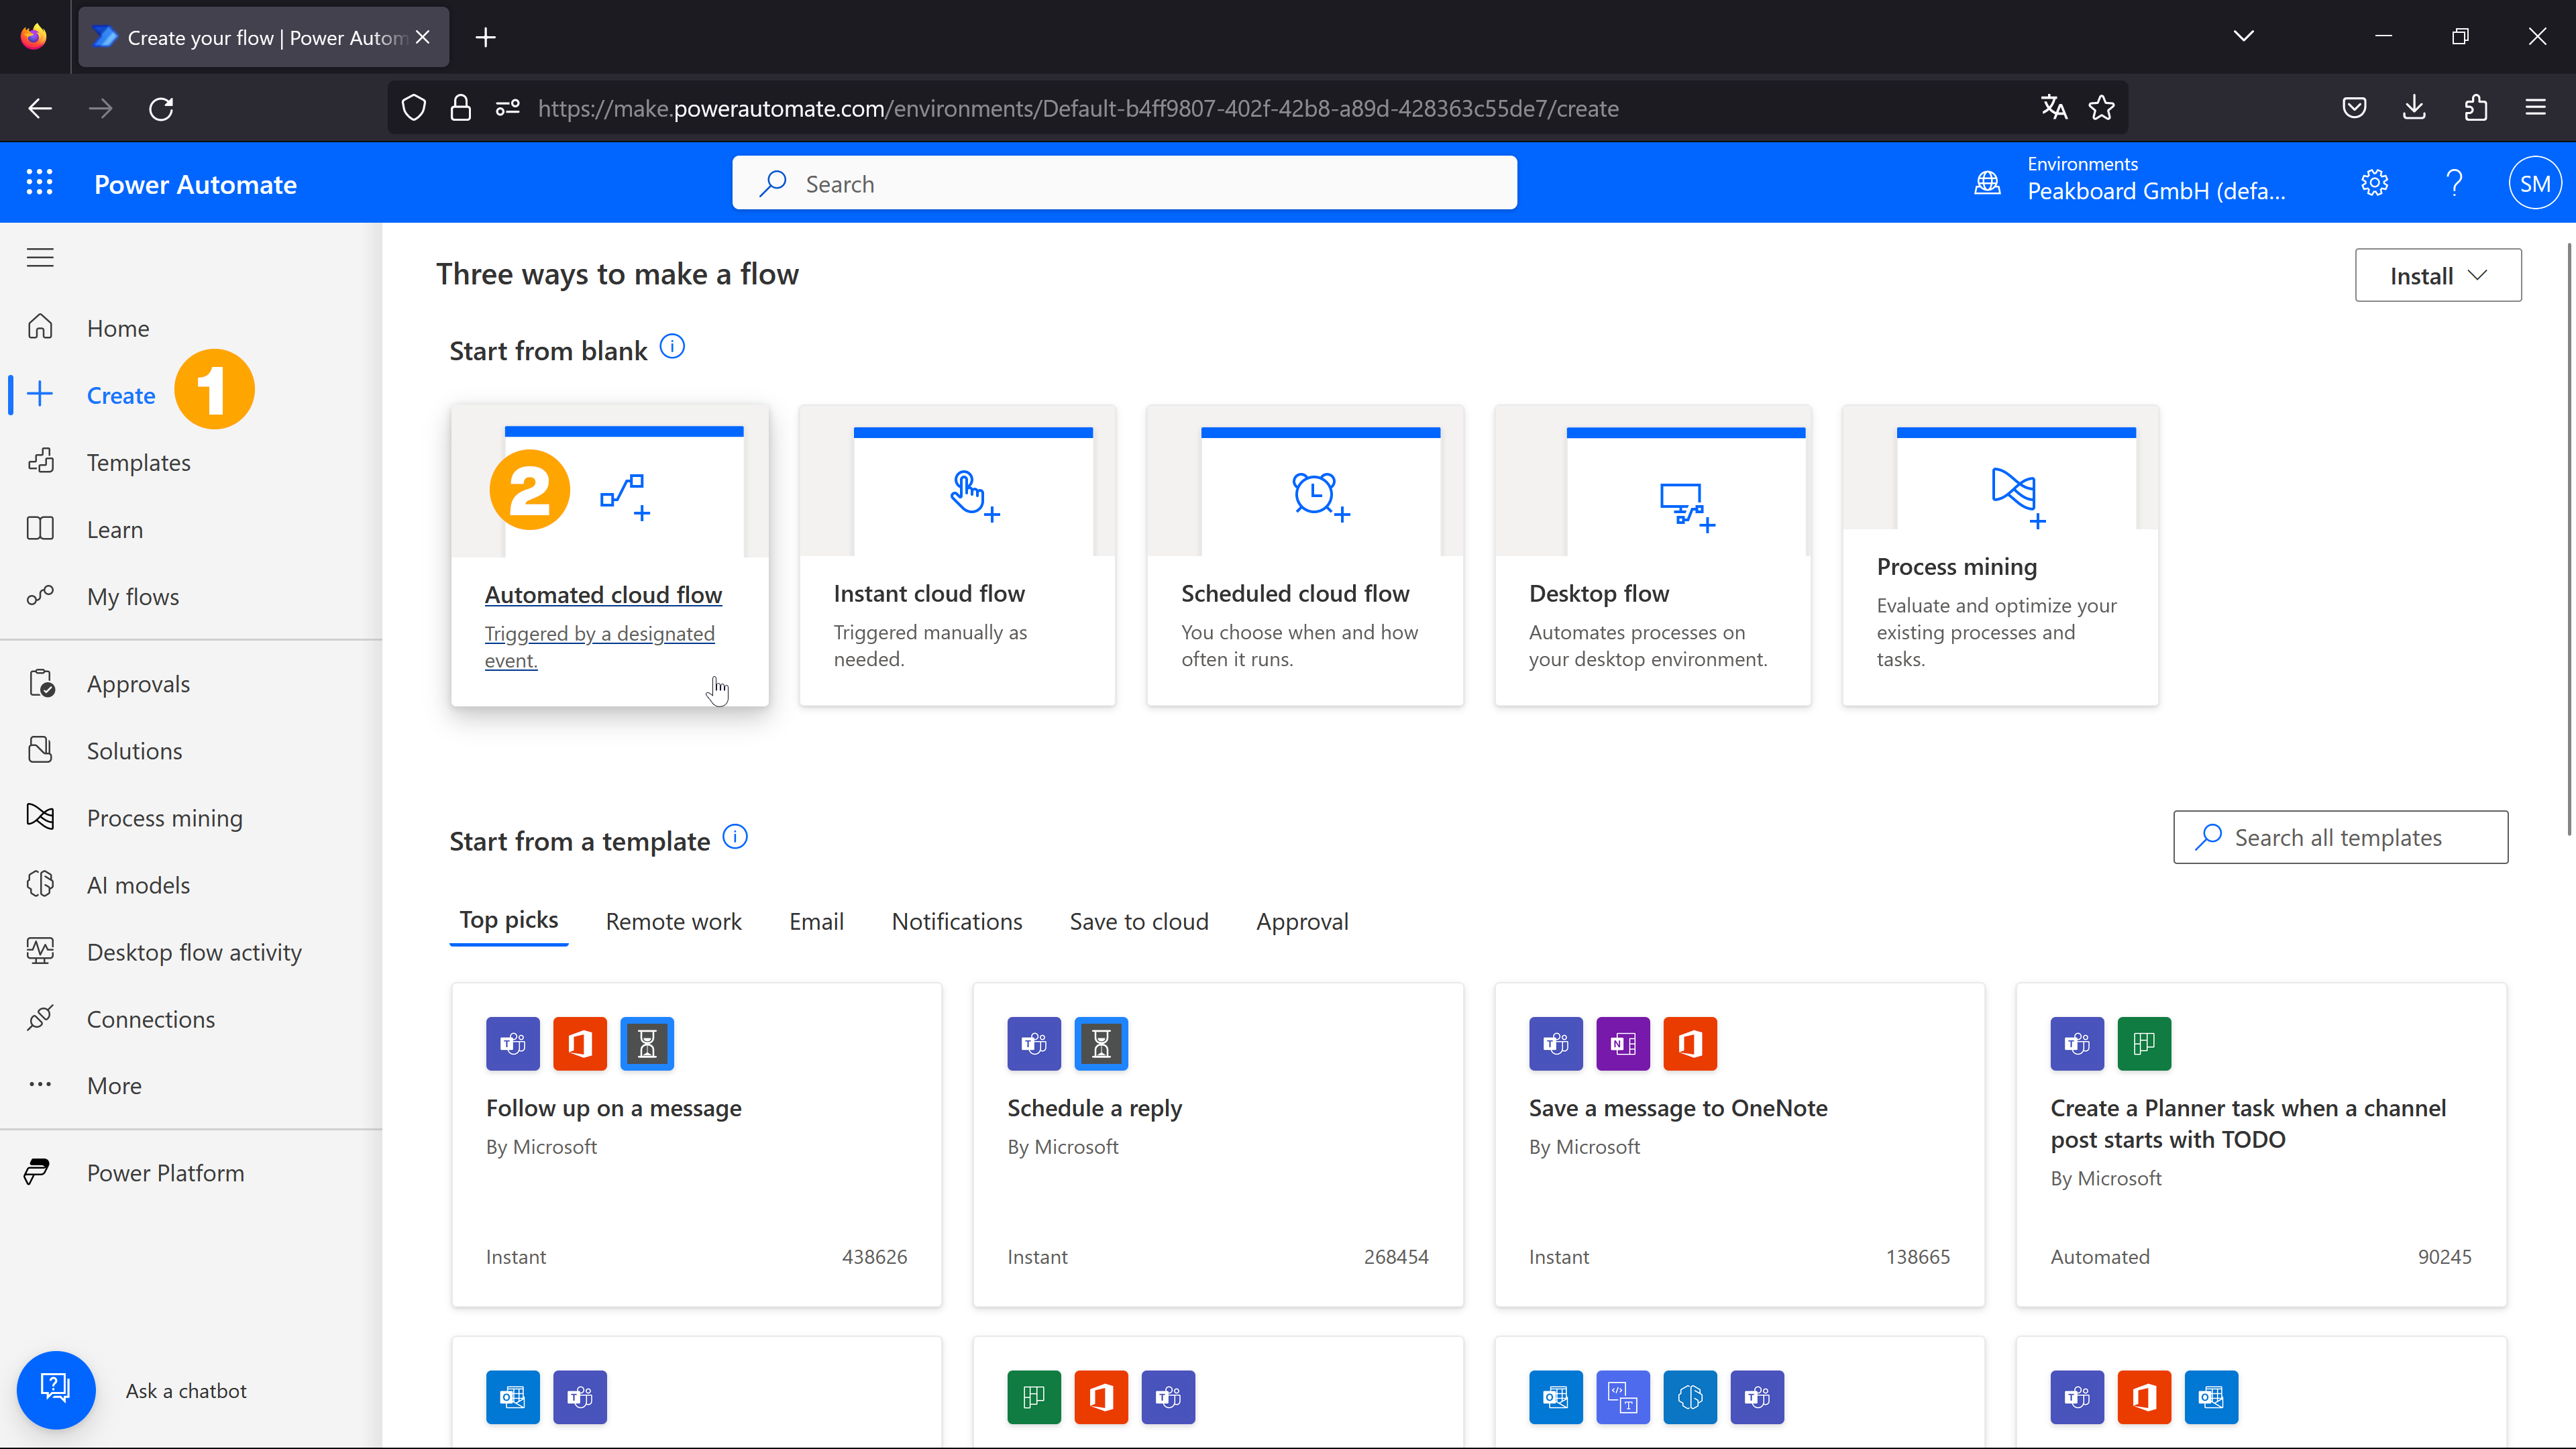
To create a new flow, click on [Create] (1) in the Microsoft Power Automate menu. Then select [Automated cloud flow] (2). For Peakboard alerts, this is the only type of flow that makes sense, as they are not normally triggered manually, nor do they occur on a scheduled basis.
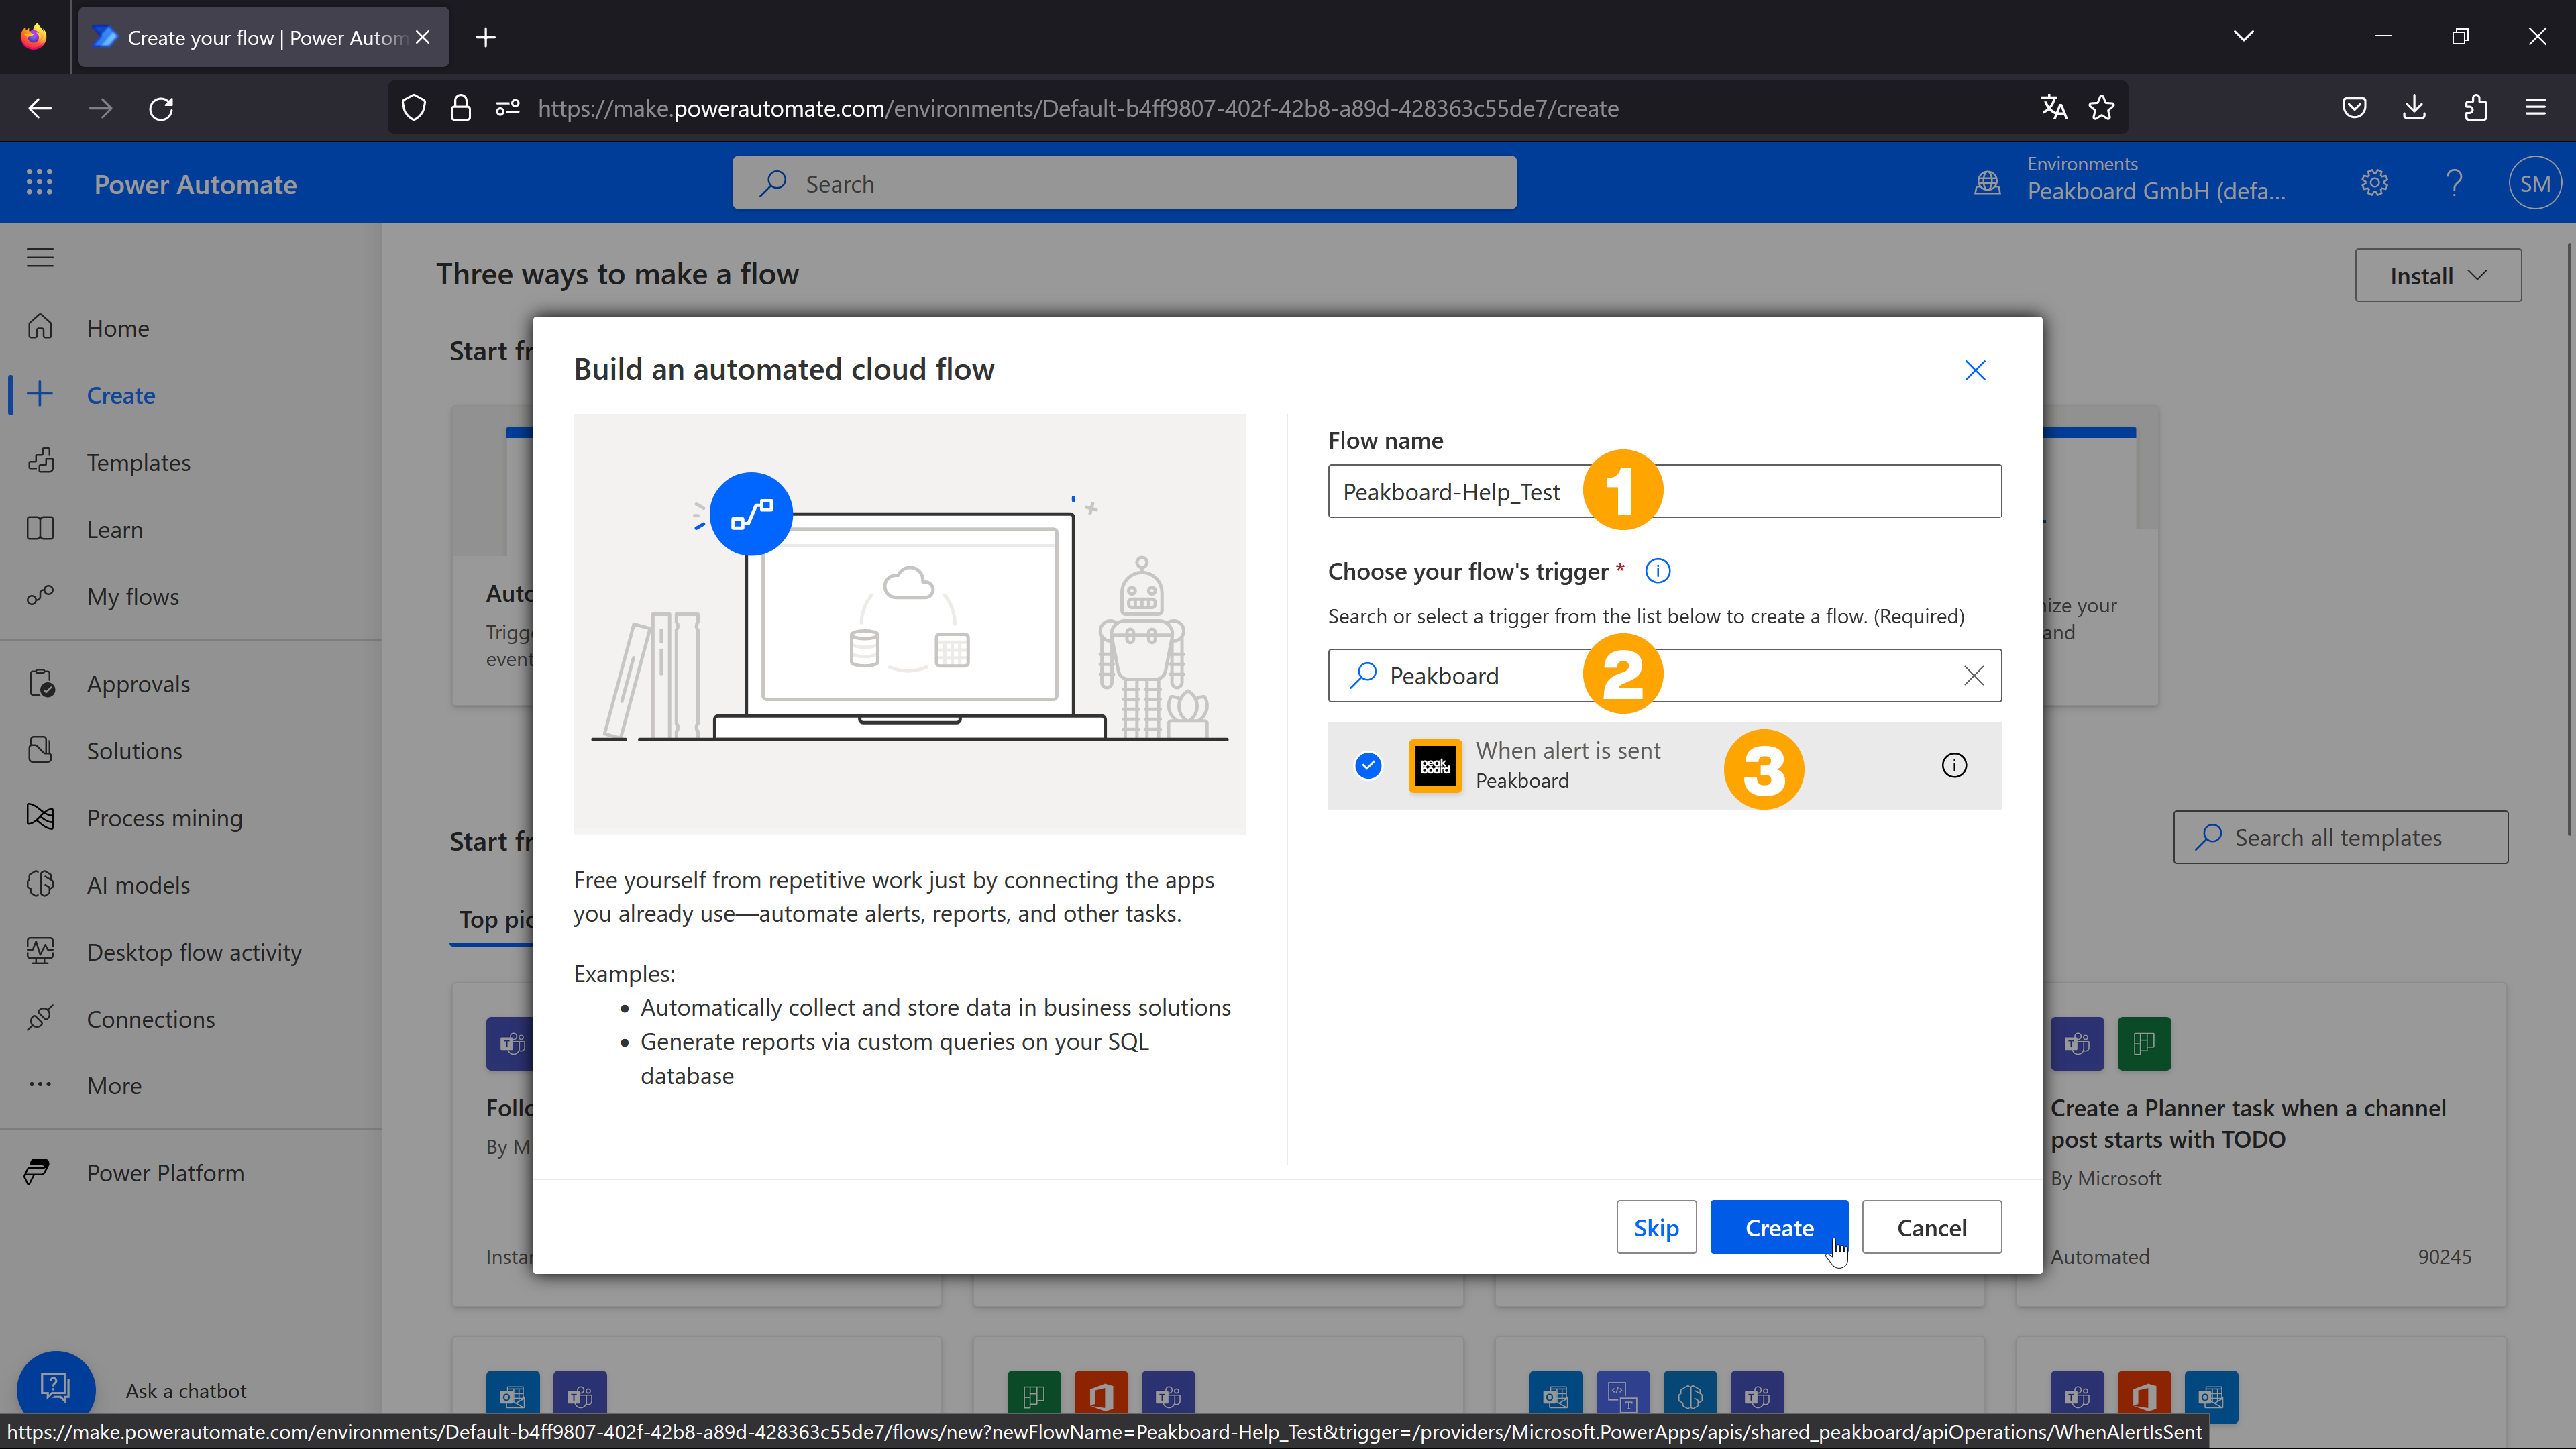
Give the flow a name in the mask under [Flow name] (1). Then select the Peakboard trigger [When alert is sent] (3) under [Select flow trigger] (2).
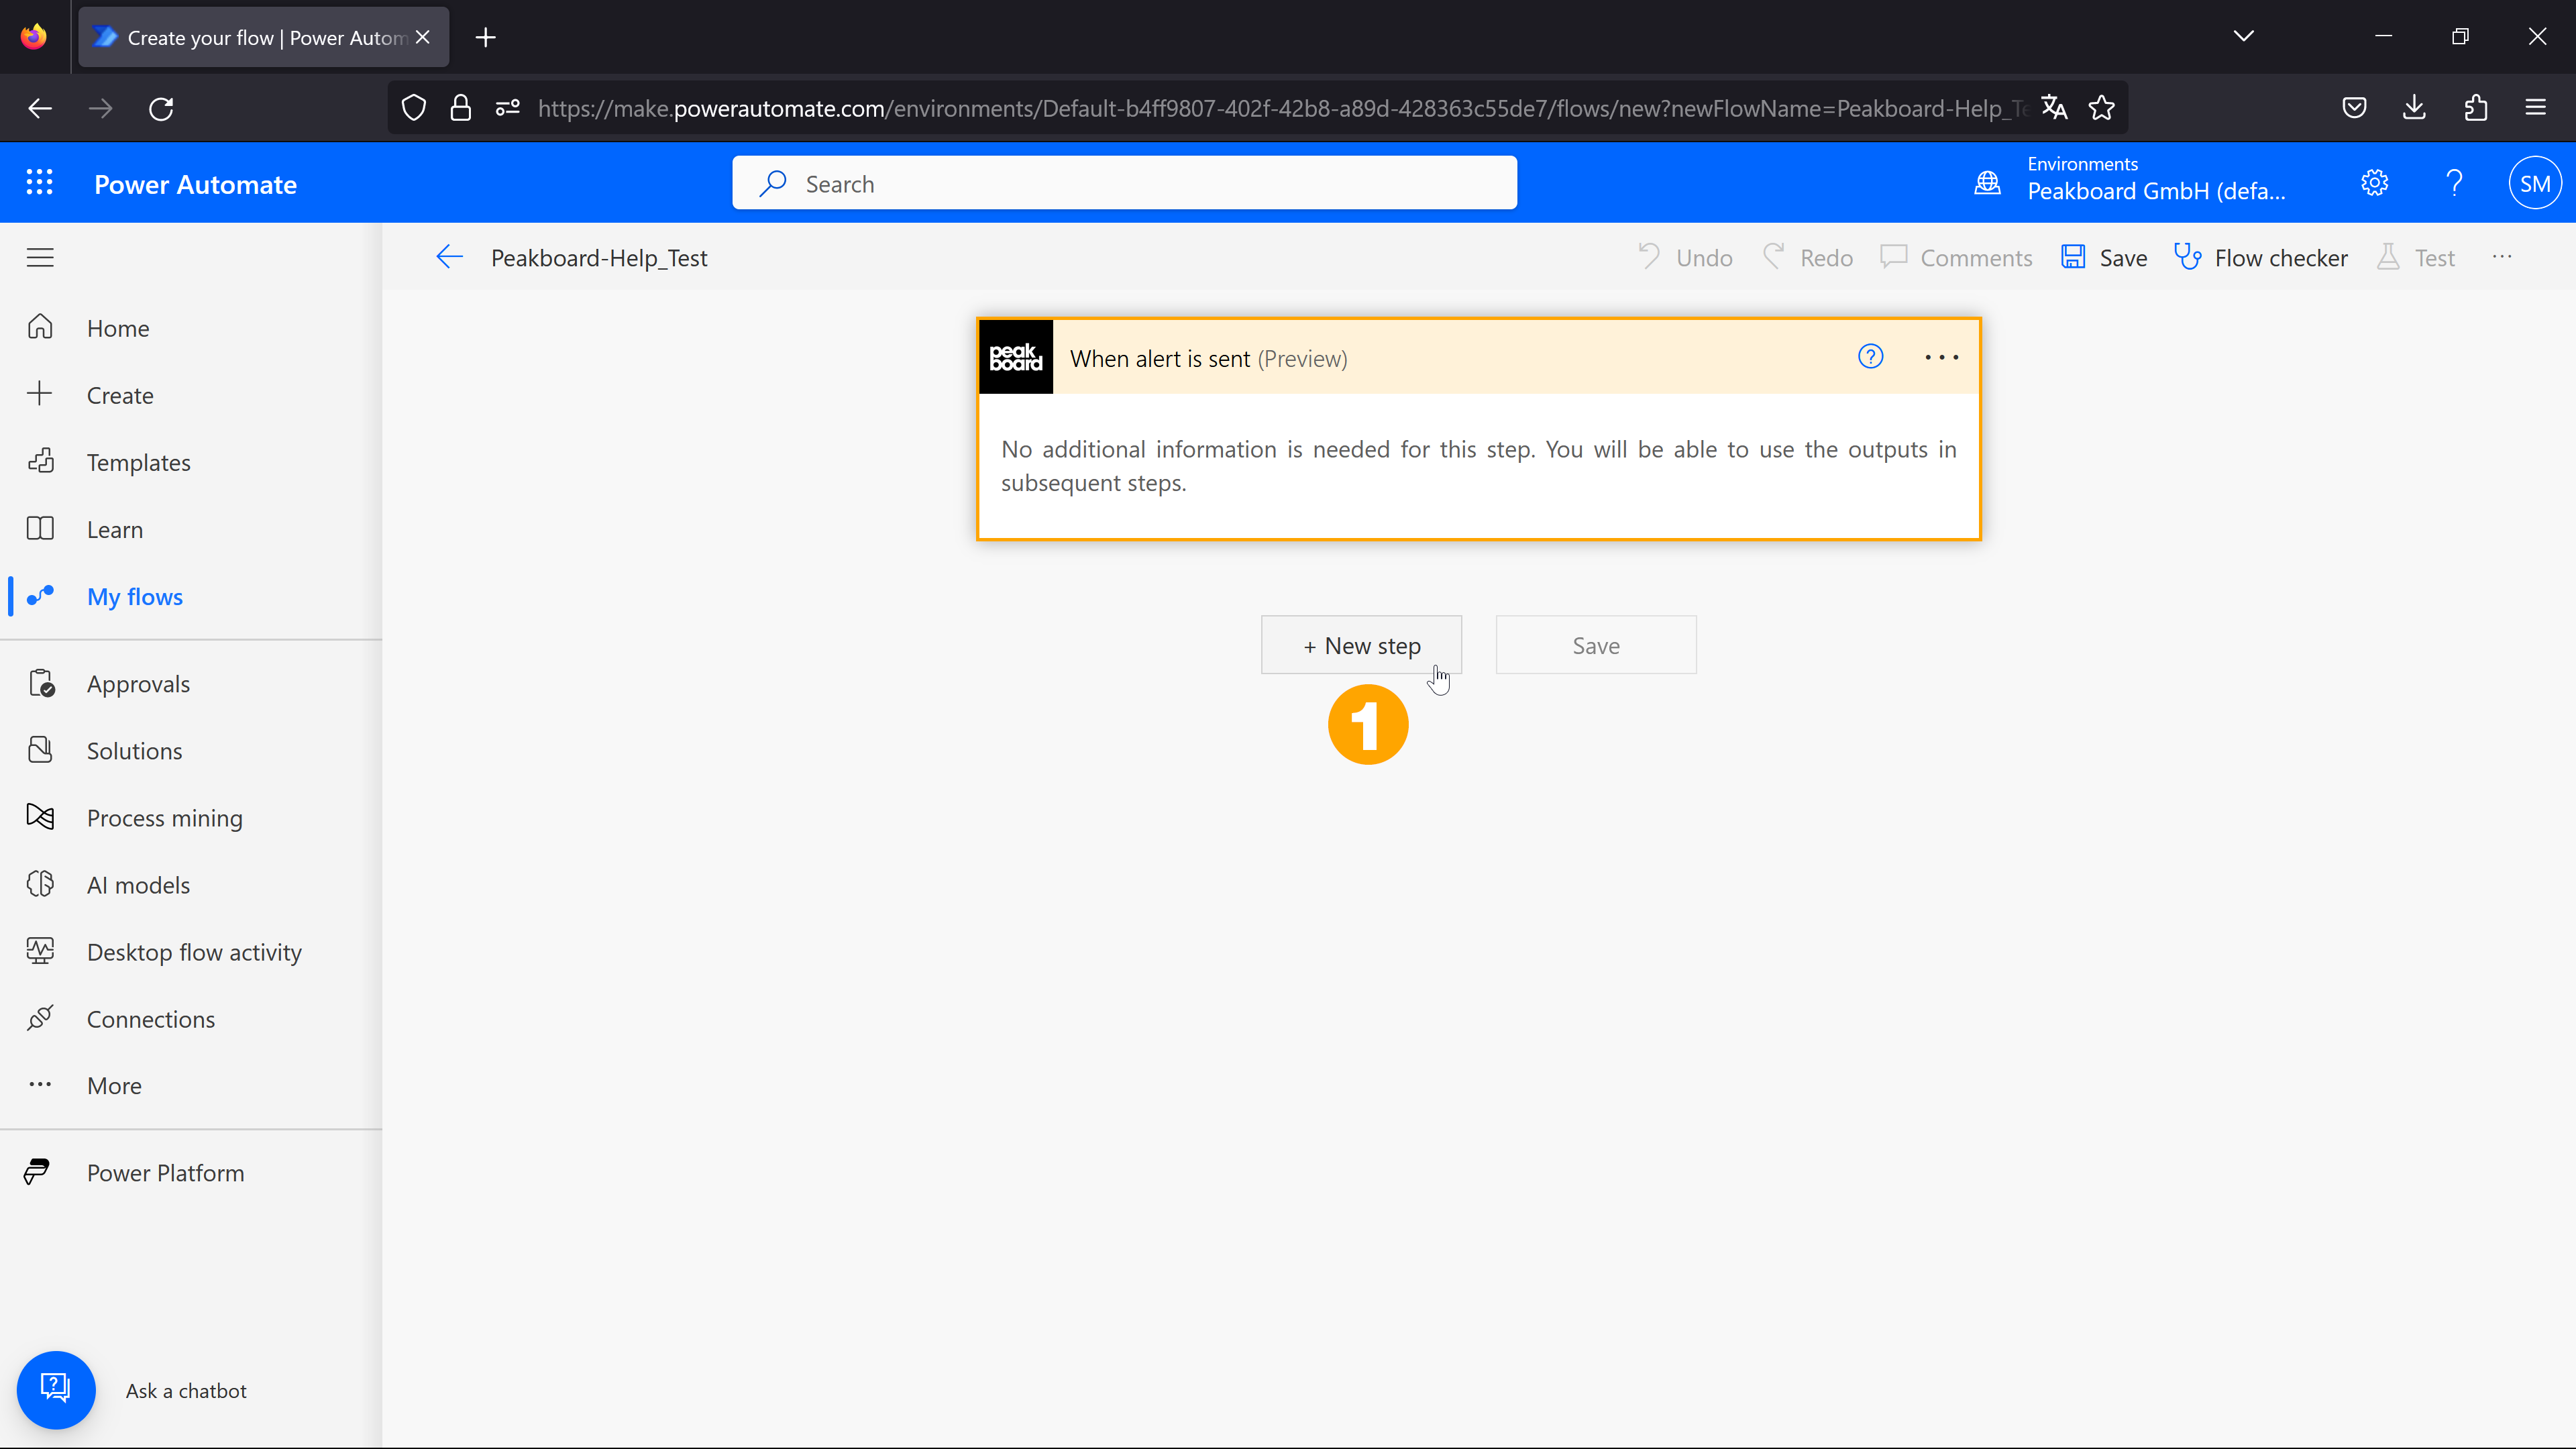
Next add a new action via [+ New Step] (1).
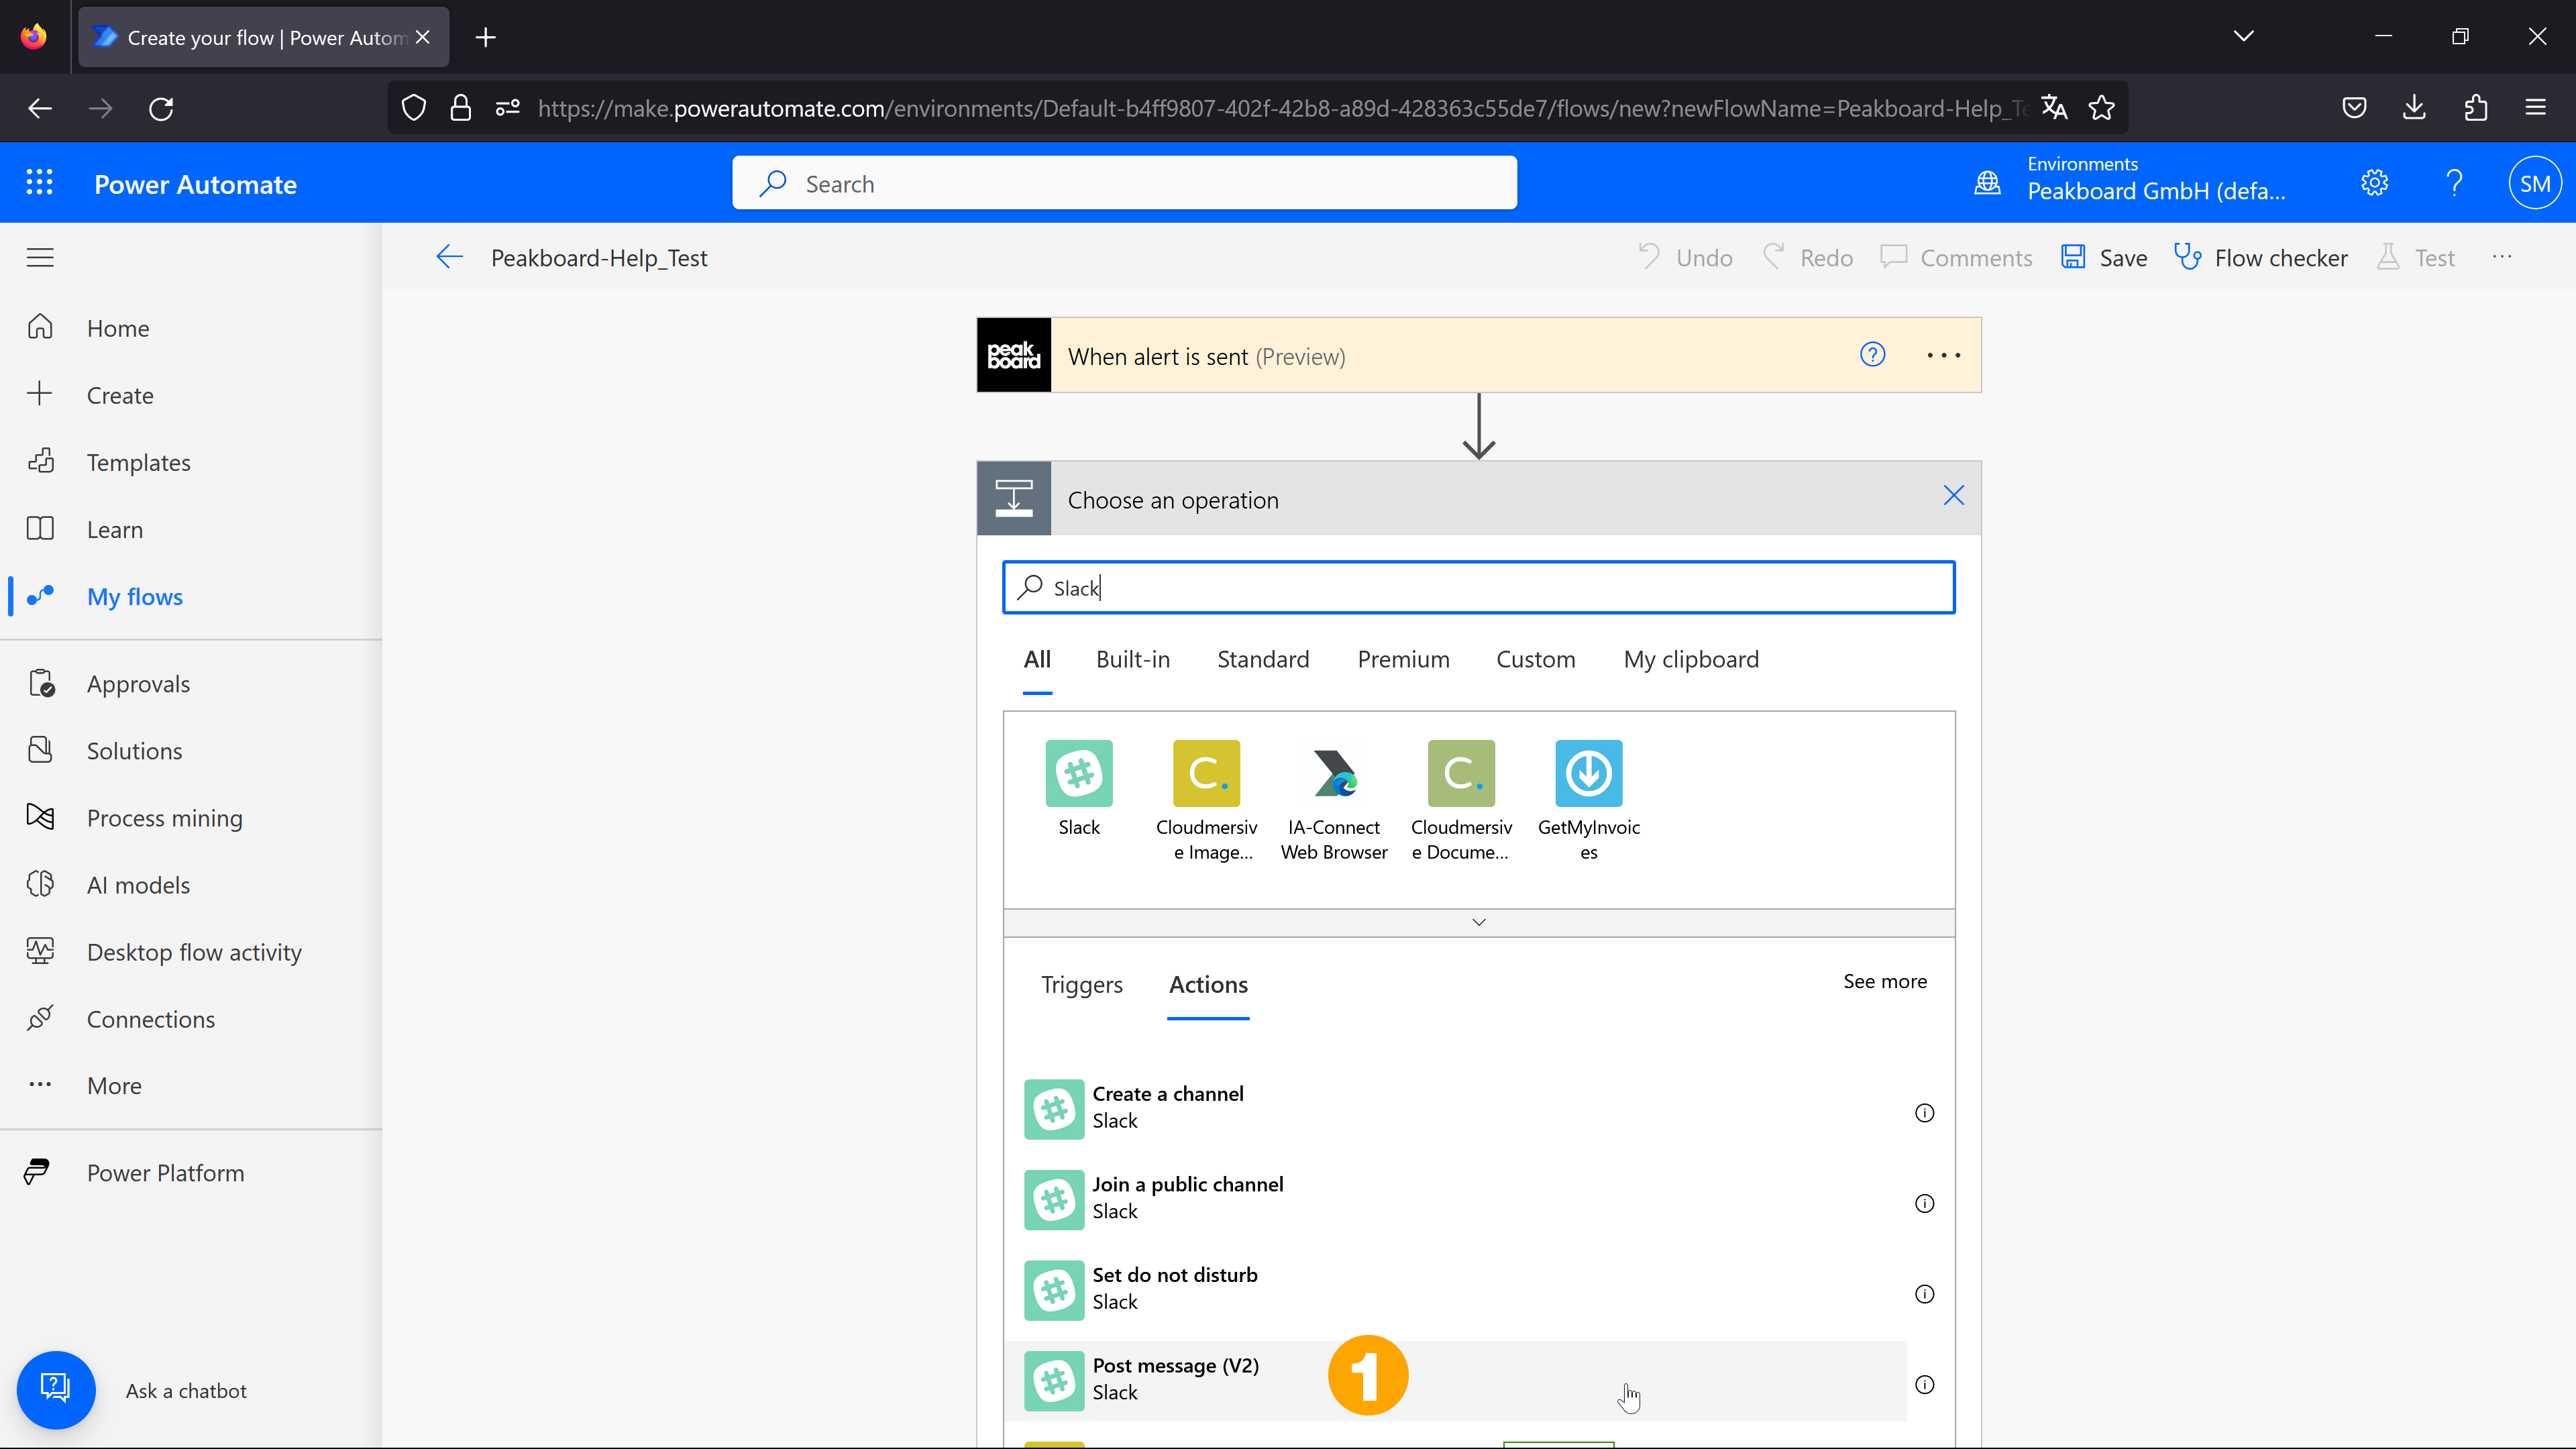
For our example, we use the [Publish Message (V2)] (1) action from Slack. To use it, you need to authenticate with your Slack credentials.
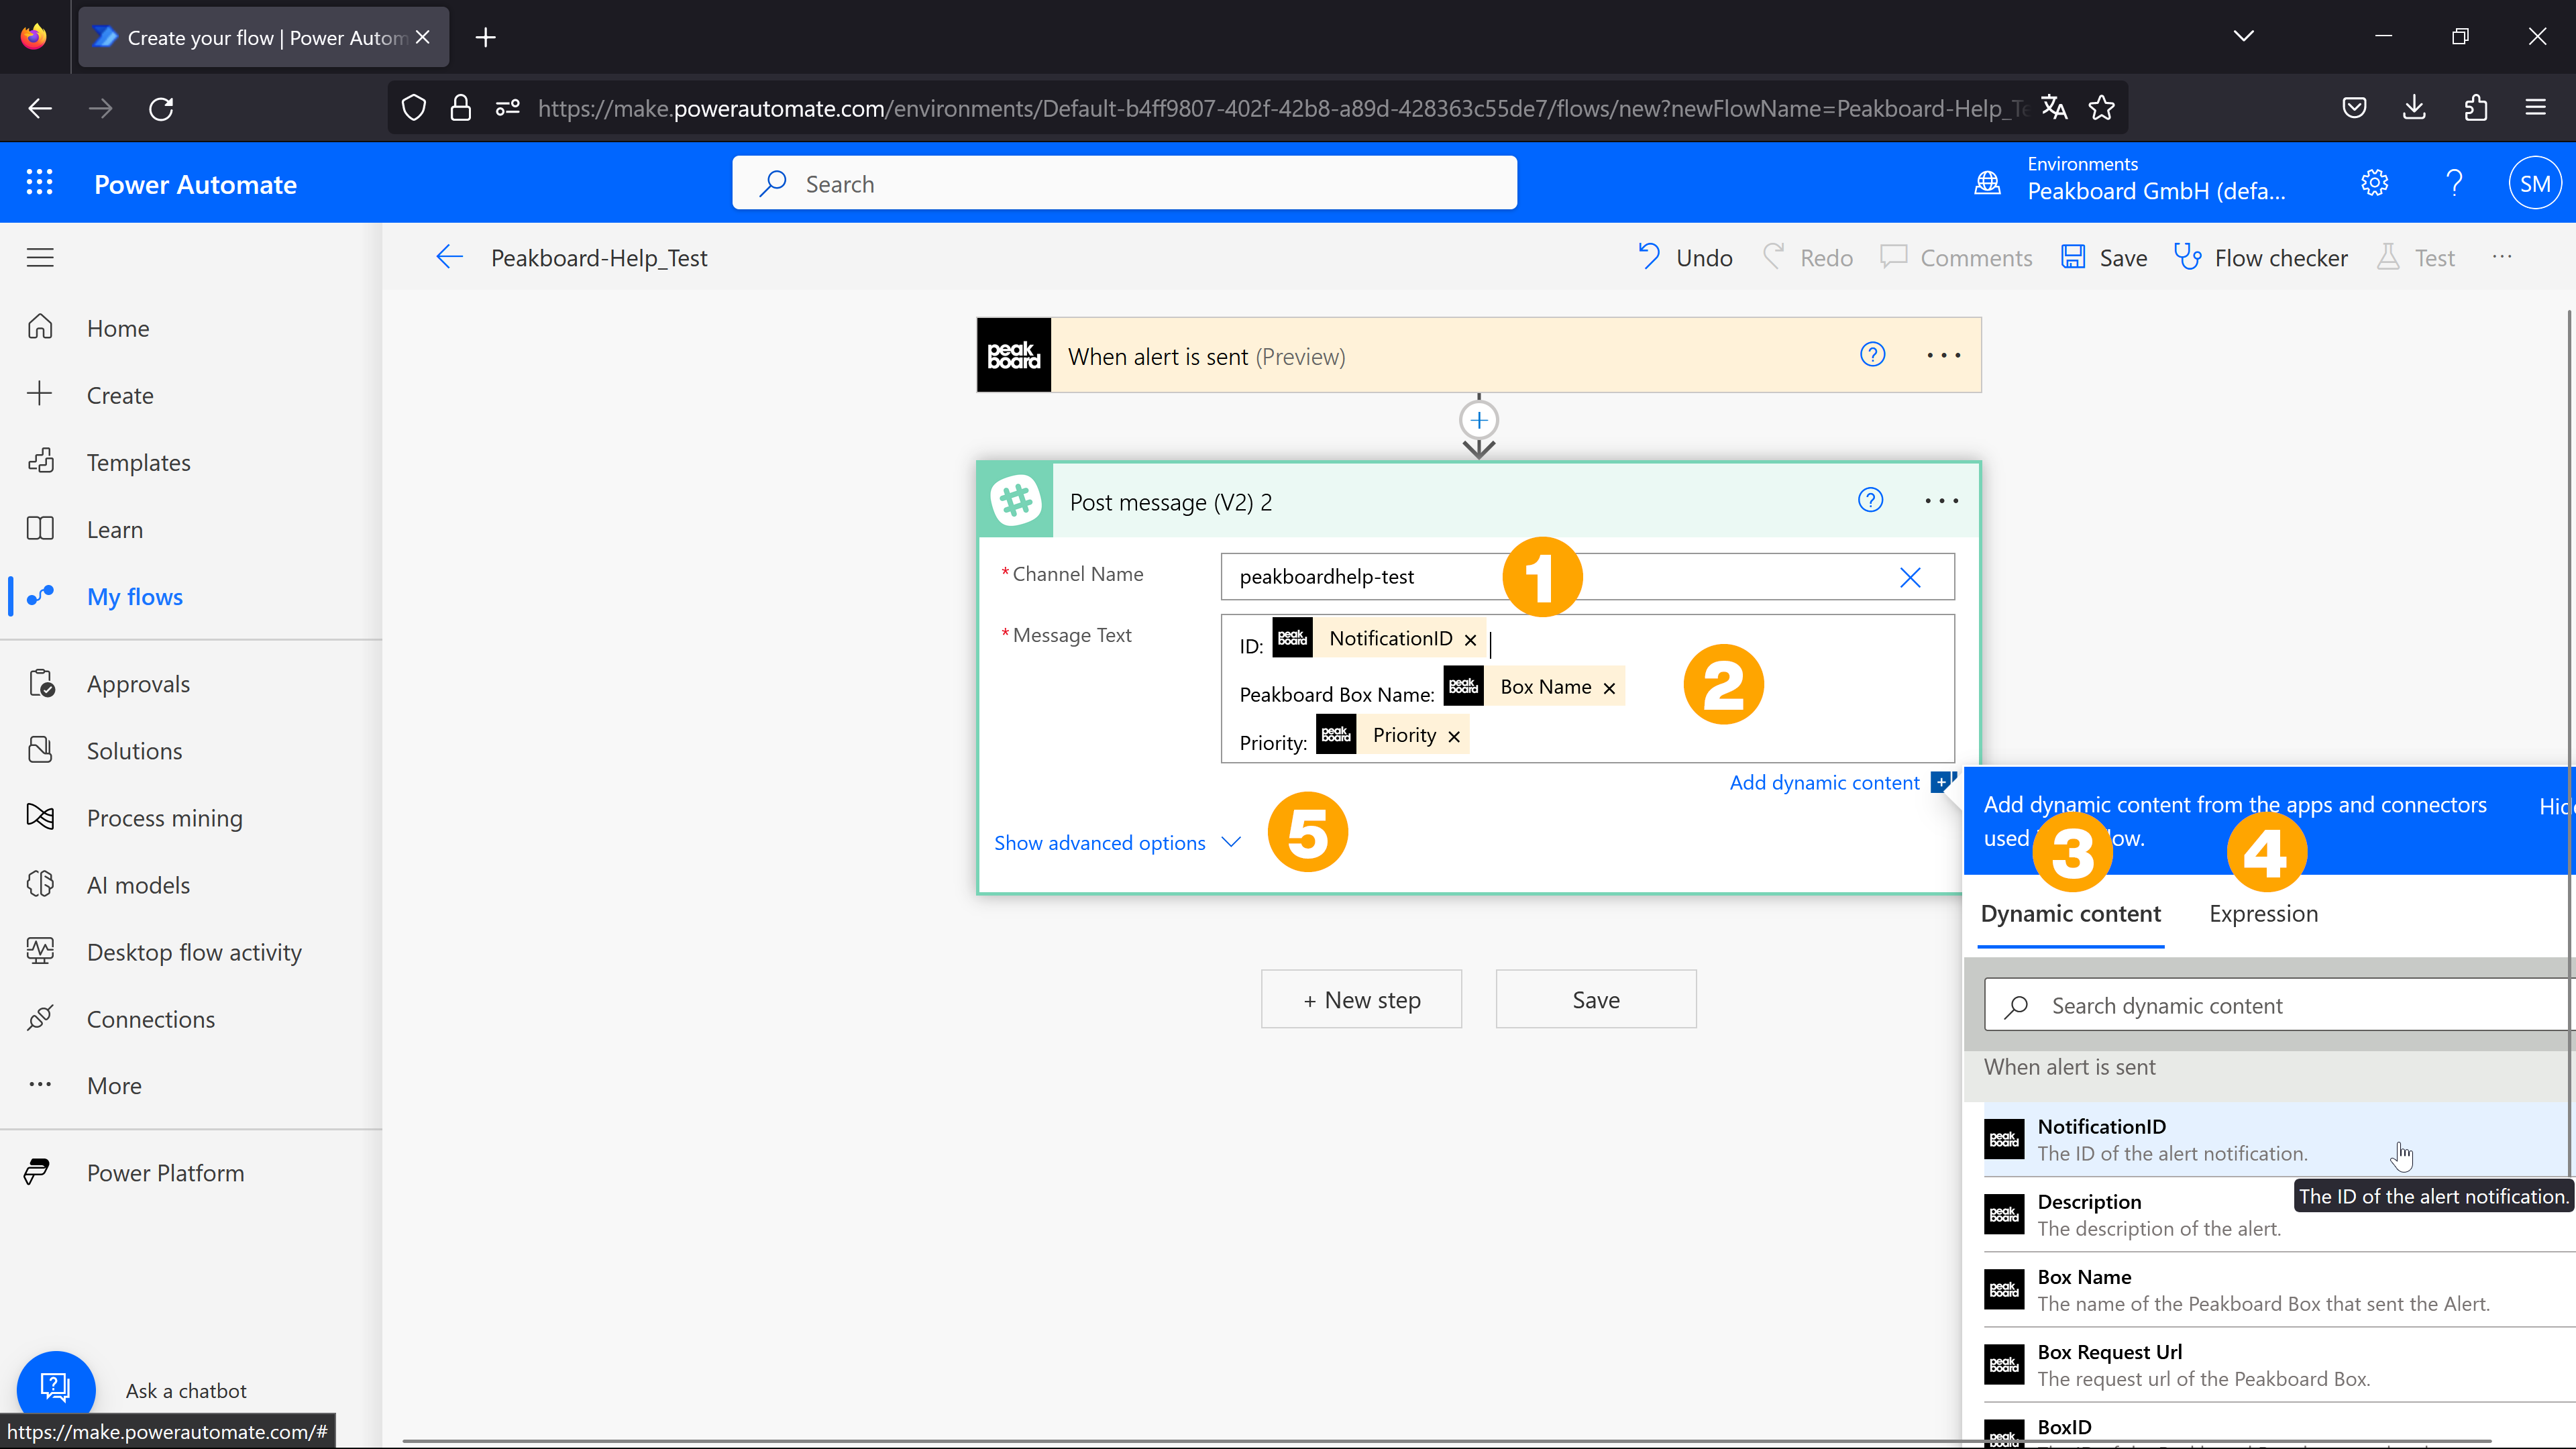
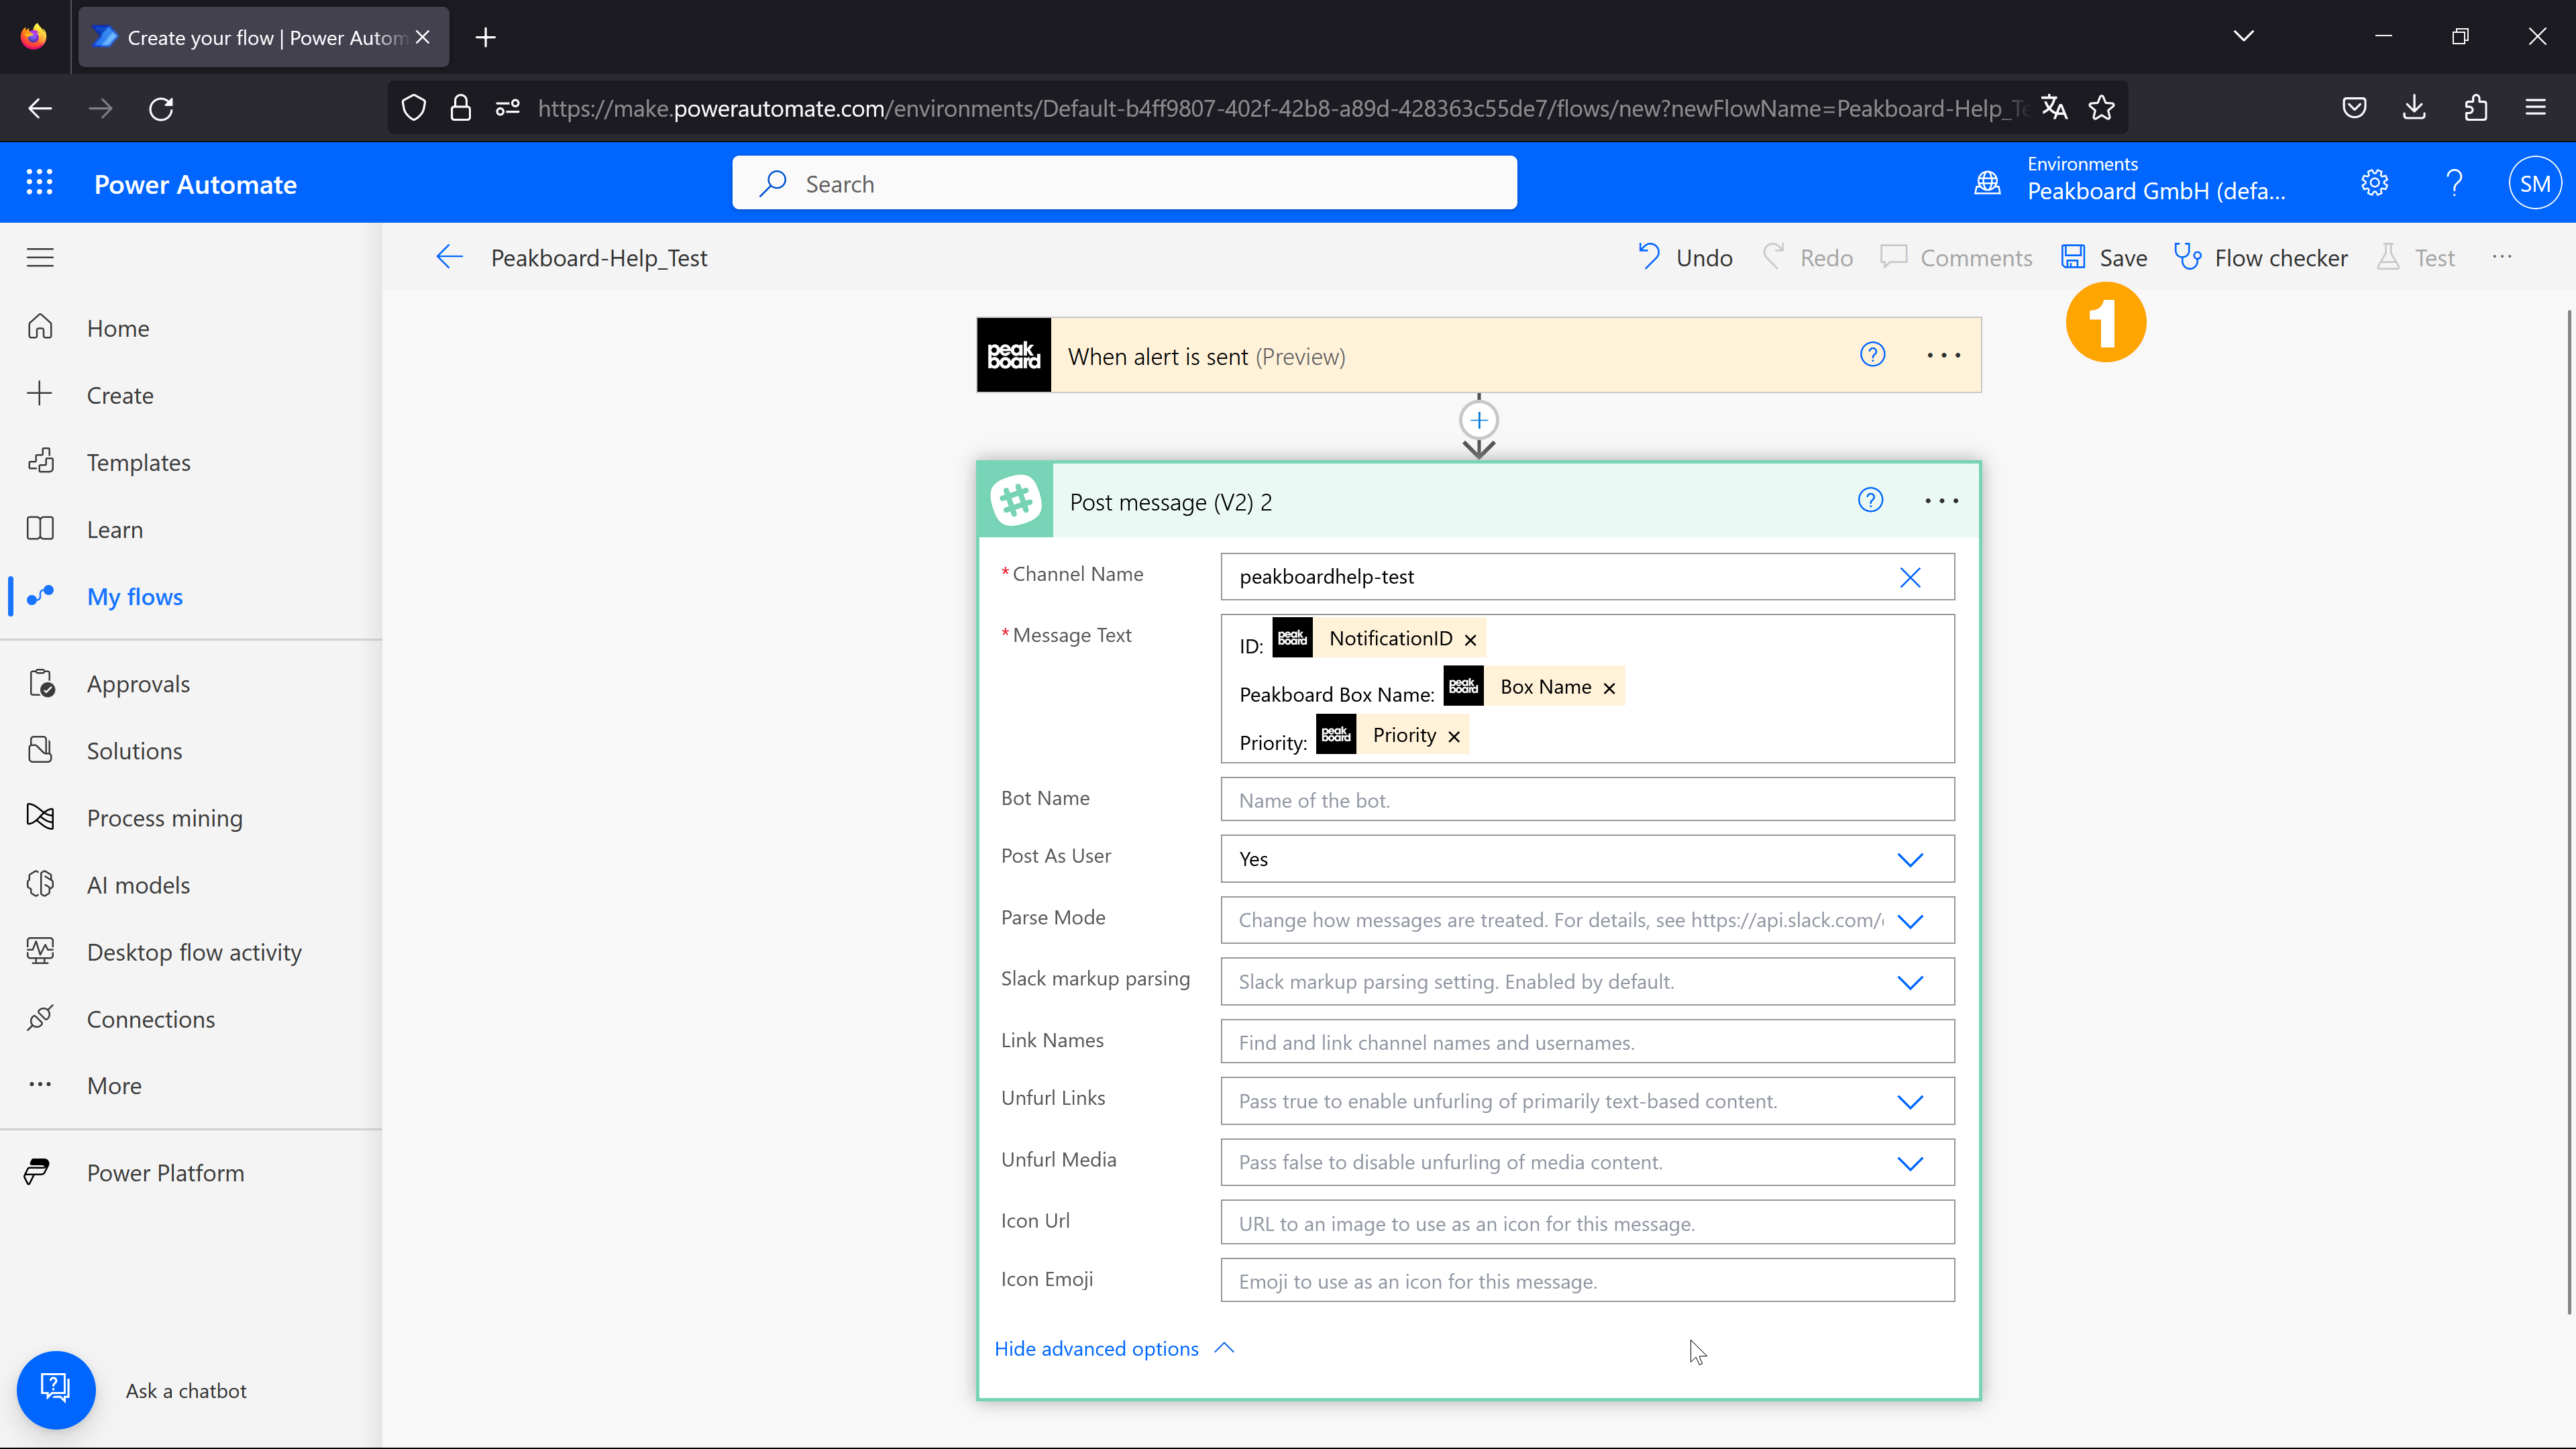
Select the [Channel name] (1) where you want the message to be published. Private channels are not automatically displayed here, but you can enter their name as a user-defined value. Under [Message text] (2) you define how the message should look like that will be published in the selected channel. The message can consist of static input as well as dynamic blocks. Click on the [+] symbol to open the pop-up and select blocks in the [Dynamic content] (3) area to add them to the message. Use the [Expression] tab (4) to add predefined functions or write your own custom function. These options allow you to implement even complex requirements. Under [Show advanced options] (5) you can add more Slack specific settings to the message.
Make your desired settings in the newly opened [Advanced options] section, then click [Save] (1) to save your flow.
Test, use and monitor the flow
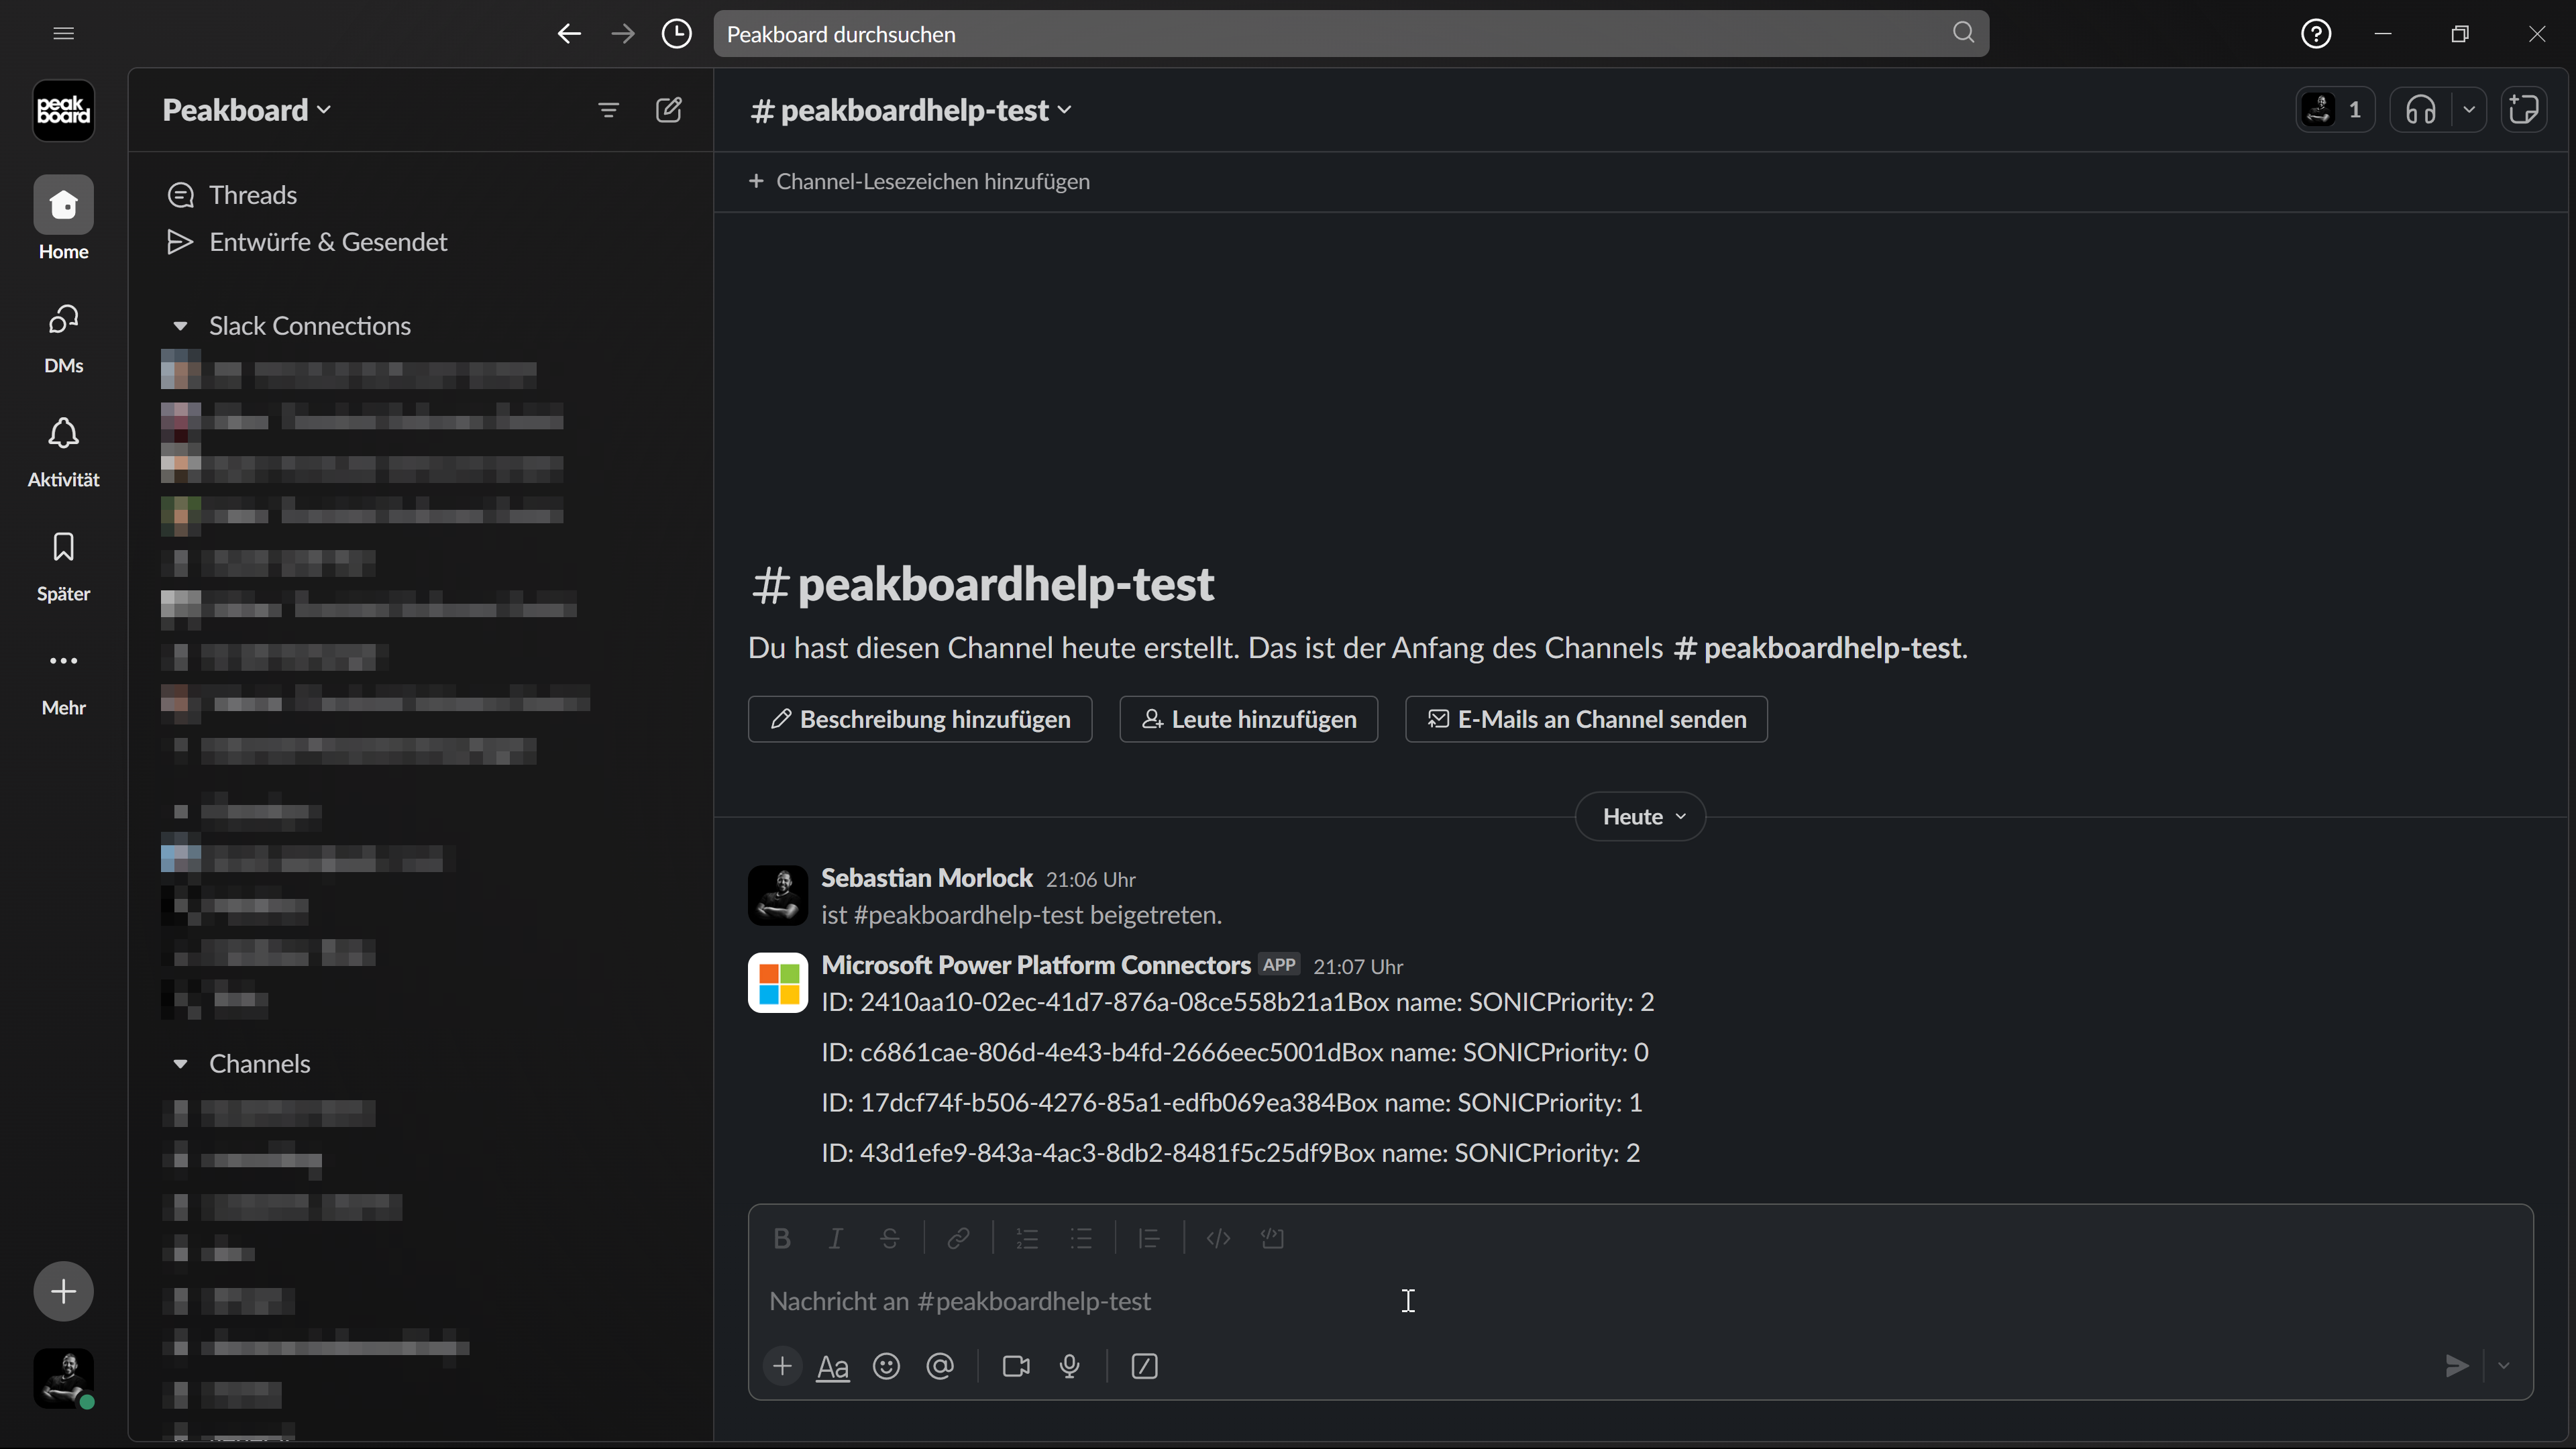
The flow is now ready to be tested and used. When an alert is sent from a Peakboard Box from the user group in Peakboard Hub that was used for the connection, the Flow is automatically triggered and a message with the specifications made is sent to the selected channel in Slack.
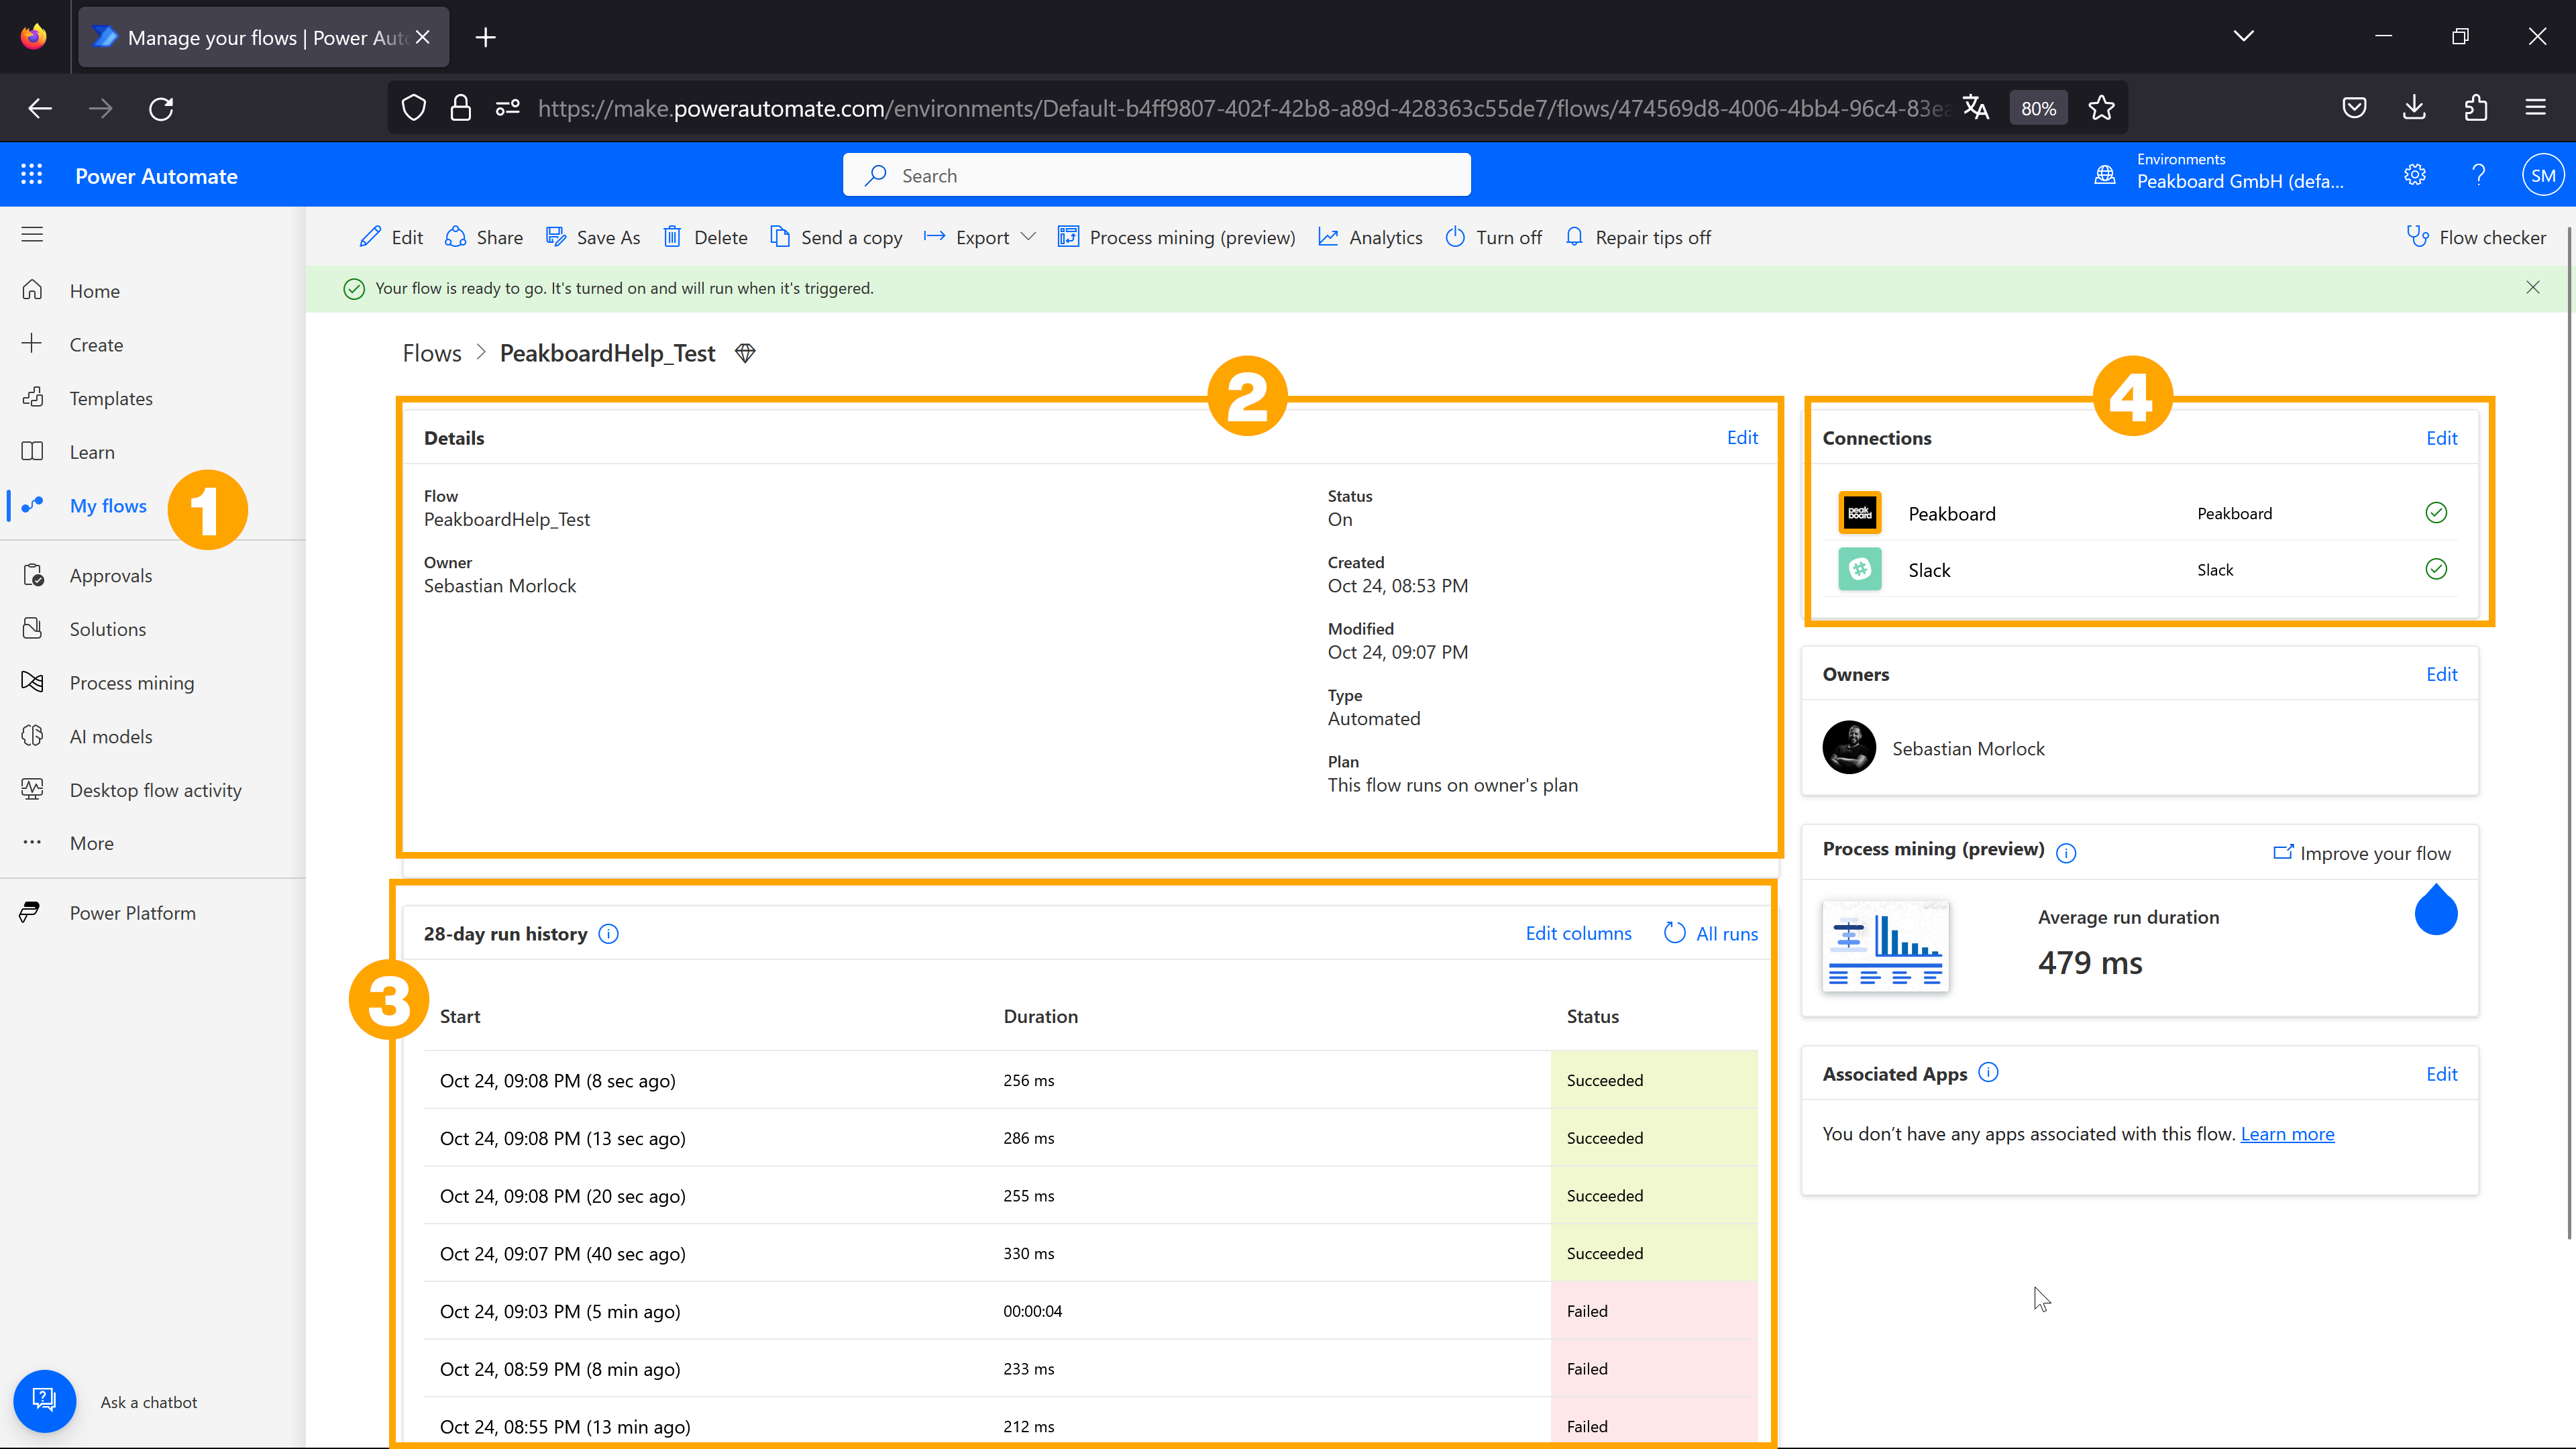
In the [My Flows] (1) section in Microsoft Power Automate, you will find an overview of your flows created so far. By clicking on the desired flow you will get to its detail page. In addition to the general details of your flow (2), you will also find an execution history (3) that allows you to track whether the flow was always triggered properly by sent alerts. In the [Connections] section (4) you can see which connections the flow uses and if they work.
