Data sources
Azure Event Hub
The [Azure Event Hub] data source connects Peakboard to an Azure Event Hub and lets you react to incoming events in real time. This approach is mainly used to integrate Peakboard into an existing landscape that already exchanges events through event hubs: Peakboard subscribes to a specific hub, and the incoming messages can easily be shown in a visualization.
Find out how to create an event hub in Azure in the Microsoft documentation:
https://learn.microsoft.com/azure/event-hubs/event-hubs-create
For a general walkthrough of how to configure external data sources and link them to Peakboard elements, see:
Getting started with external data sources using an XML data source as an example
Add the data source
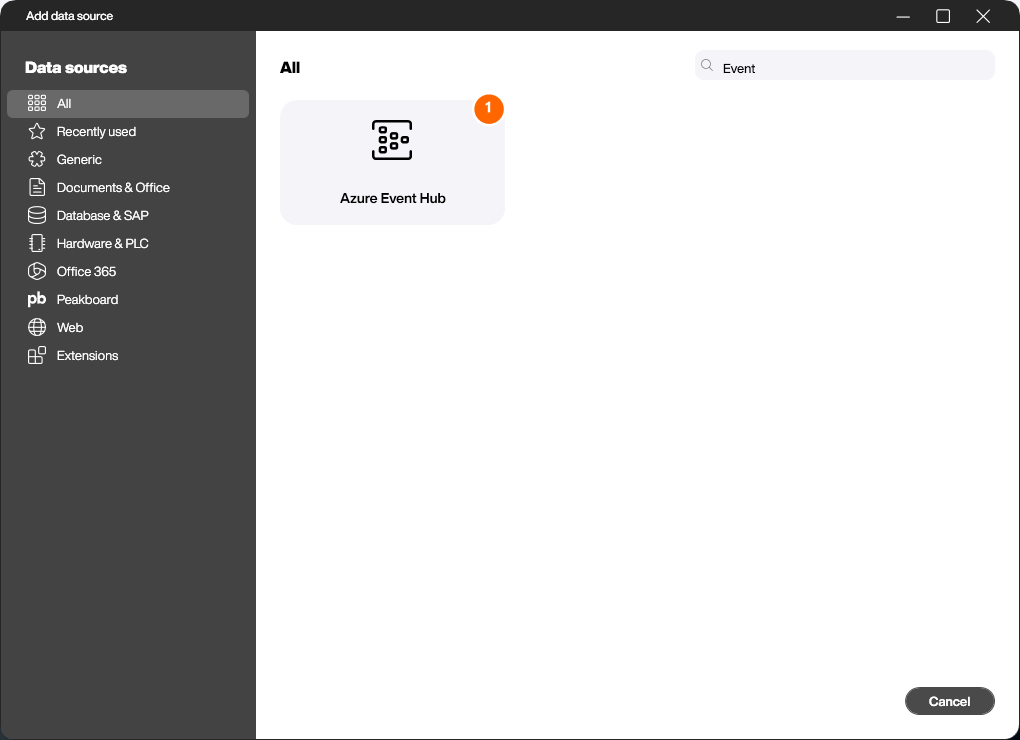
Right-click [Data] or click the […] button and choose [Add data source]. You will find the Azure Event Hub in the [Generic] category – or simply type “Event” into the search box. Then double-click the [Azure Event Hub] tile (1).
Configure the connection
In the following dialog you enter the connection details you know from the Azure portal:
- Data source name (1) – the name under which the data source appears in the Explorer.
- Connection string (2) – the connection string of your event hub namespace (or its shared access policy).
- Entity path (3) – the name of the specific event hub within the namespace (
peakboardhubin the example). - Storage connection string (4) – the connection string of the Azure storage account used for checkpointing.
- Storage container name (5) – the blob container that stores the read positions (checkpoints) (
peakboard-checkpointsin the example). - Script (6) – an optional script that is called for every incoming message (see below).
- Queue size (7) – the maximum number of the most recent messages that are kept in the queue table.
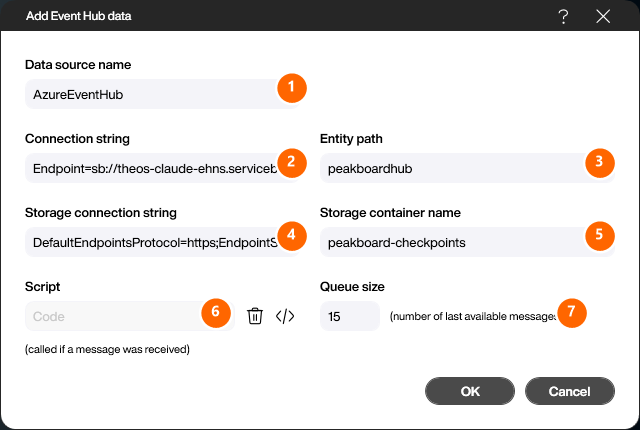
Connection strings contain secret keys. In the screenshot above the
SharedAccessKeyandAccountKeyvalues are masked – enter your real values from the Azure portal here.
Process the messages
You can process incoming messages in two ways.
1. Through the queue table: All incoming messages are written into a table that works just like any other Peakboard data source. So you can attach it directly to a grid or another control. The table has two columns: Timestamp for the timestamp and Message for the raw data of the message. Use [Queue size] to define how many of the most recent messages are kept.
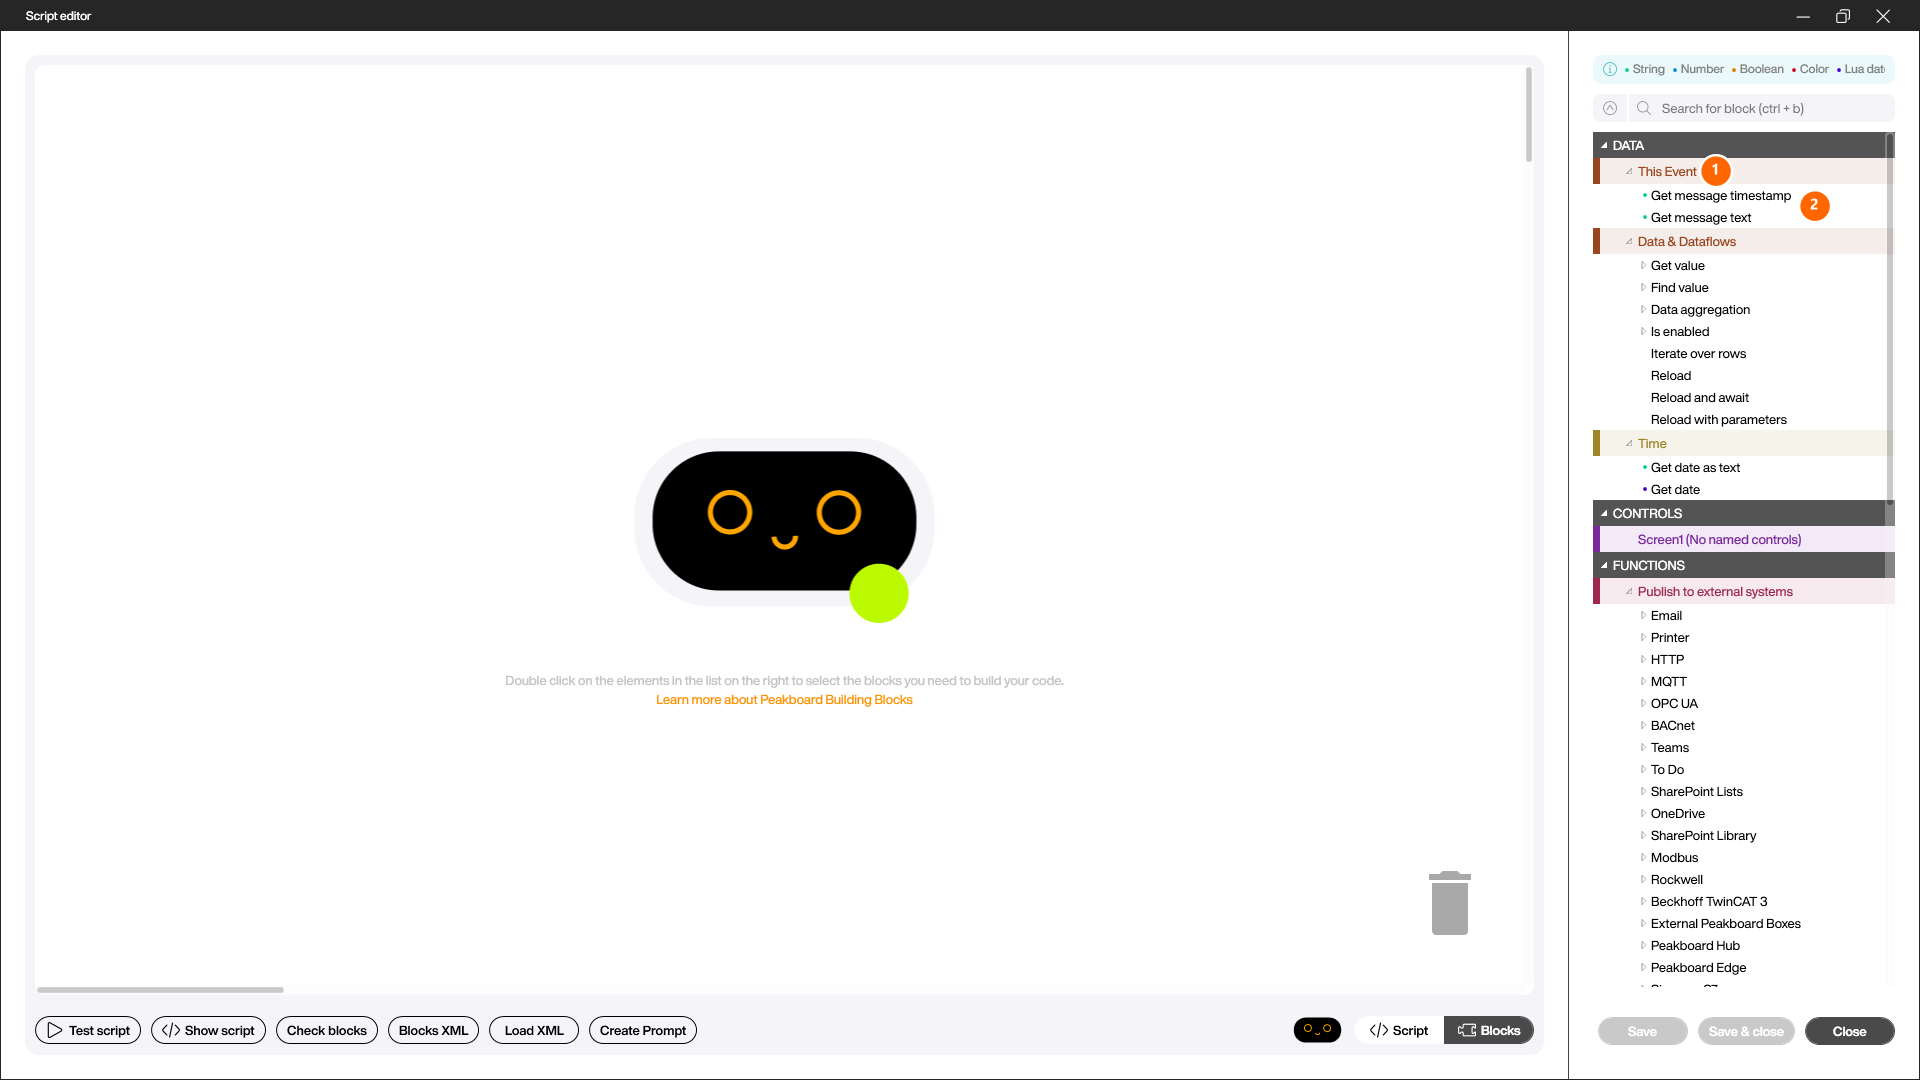
2. Through a script: The script you provide is called exactly once for each incoming message. In the Building Blocks editor, the [This Event] group (1) gives you the blocks [Get message timestamp] and [Get message text] (2) to access the timestamp and the text of the current message. This lets you, for example, write just the latest message into a text field or process incoming values further.