Data sources
Tableau token generator extension
In this article you will learn how to integrate your Tableau dashboards into a Peakboard application. It covers creating a client secret in Tableau, installing the extension, configuring it in Peakboard, setting up variables and integrating an HTML code control. It also explains the steps for creating a refreshed script and testing in the preview.
To connect to Tableau, a token is required with which the Peakboard Designer can then access the various dashboards. This token is generated in the Peakboard Designer with the help of a Peakboard Extension. The desired Tableau dashboard is then integrated into your application via script using an HTML code control.
Preparations in Tableau
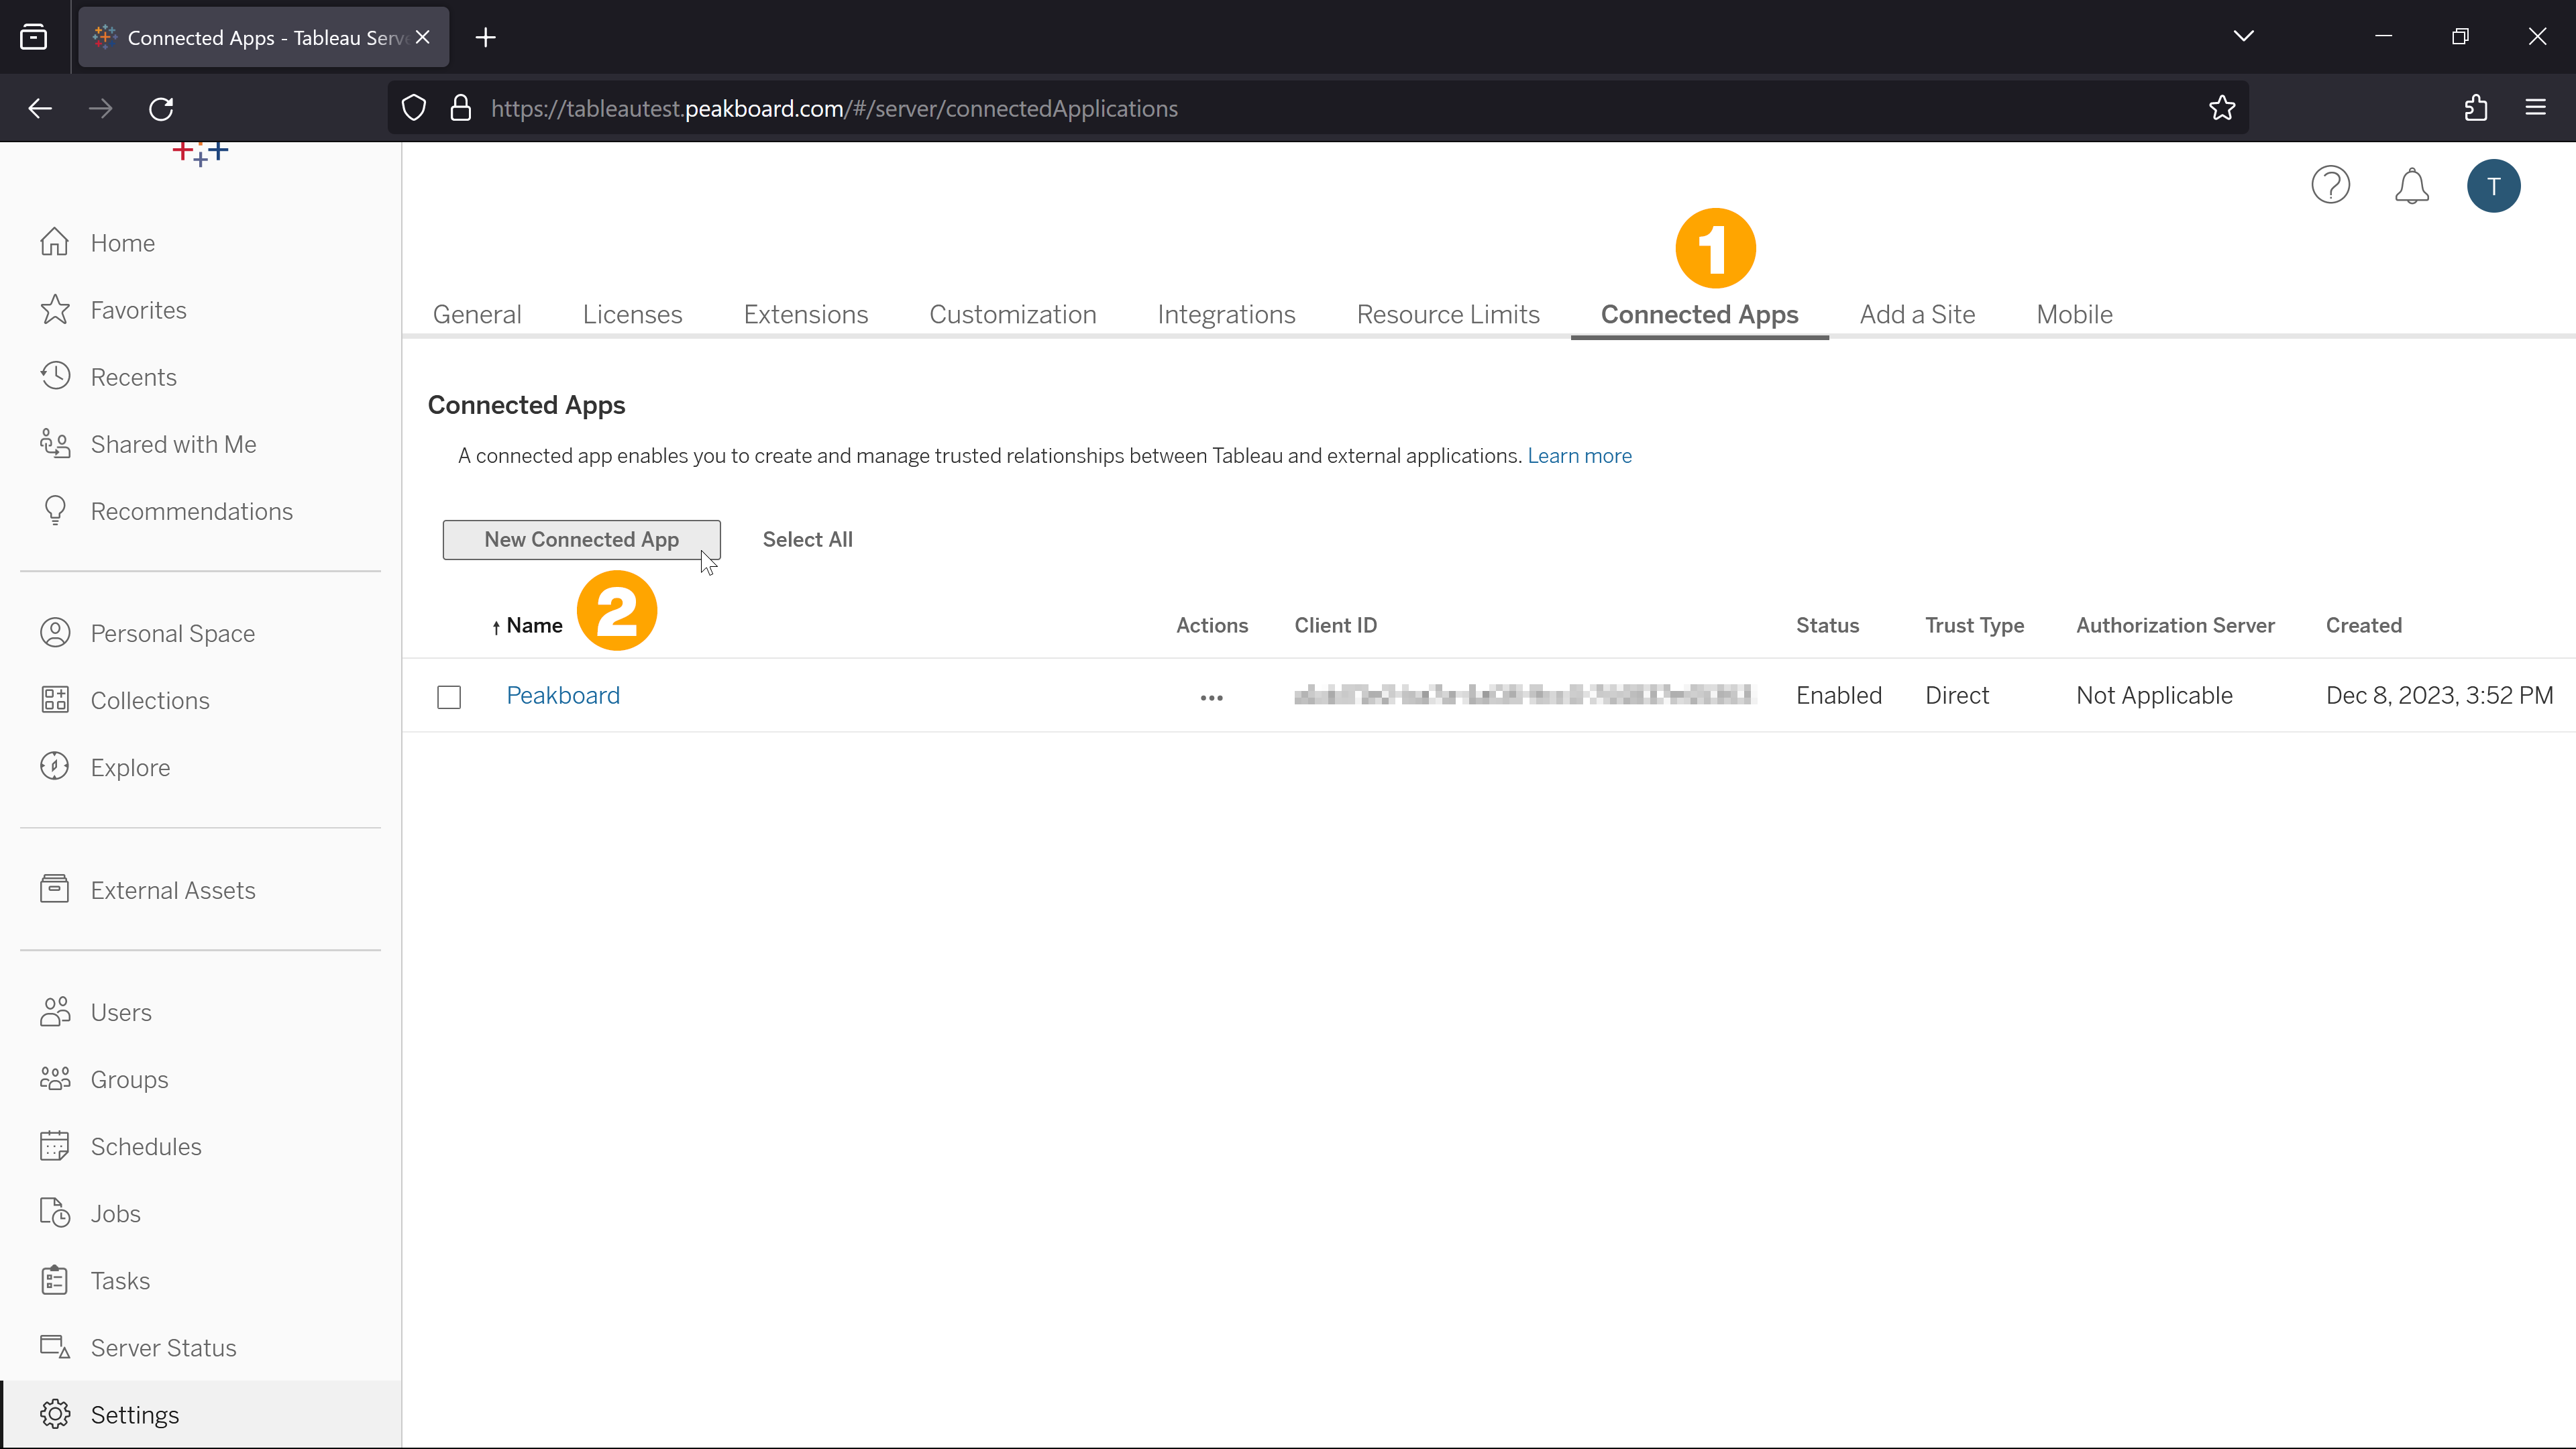
To be able to display your Tableau dashboards in your Peakboard application, you must first make some preparations in Tableau. Open the menu item [Settings] and go to the [Connected apps] tab (1). Click on [New connected app] (2) to add an app.
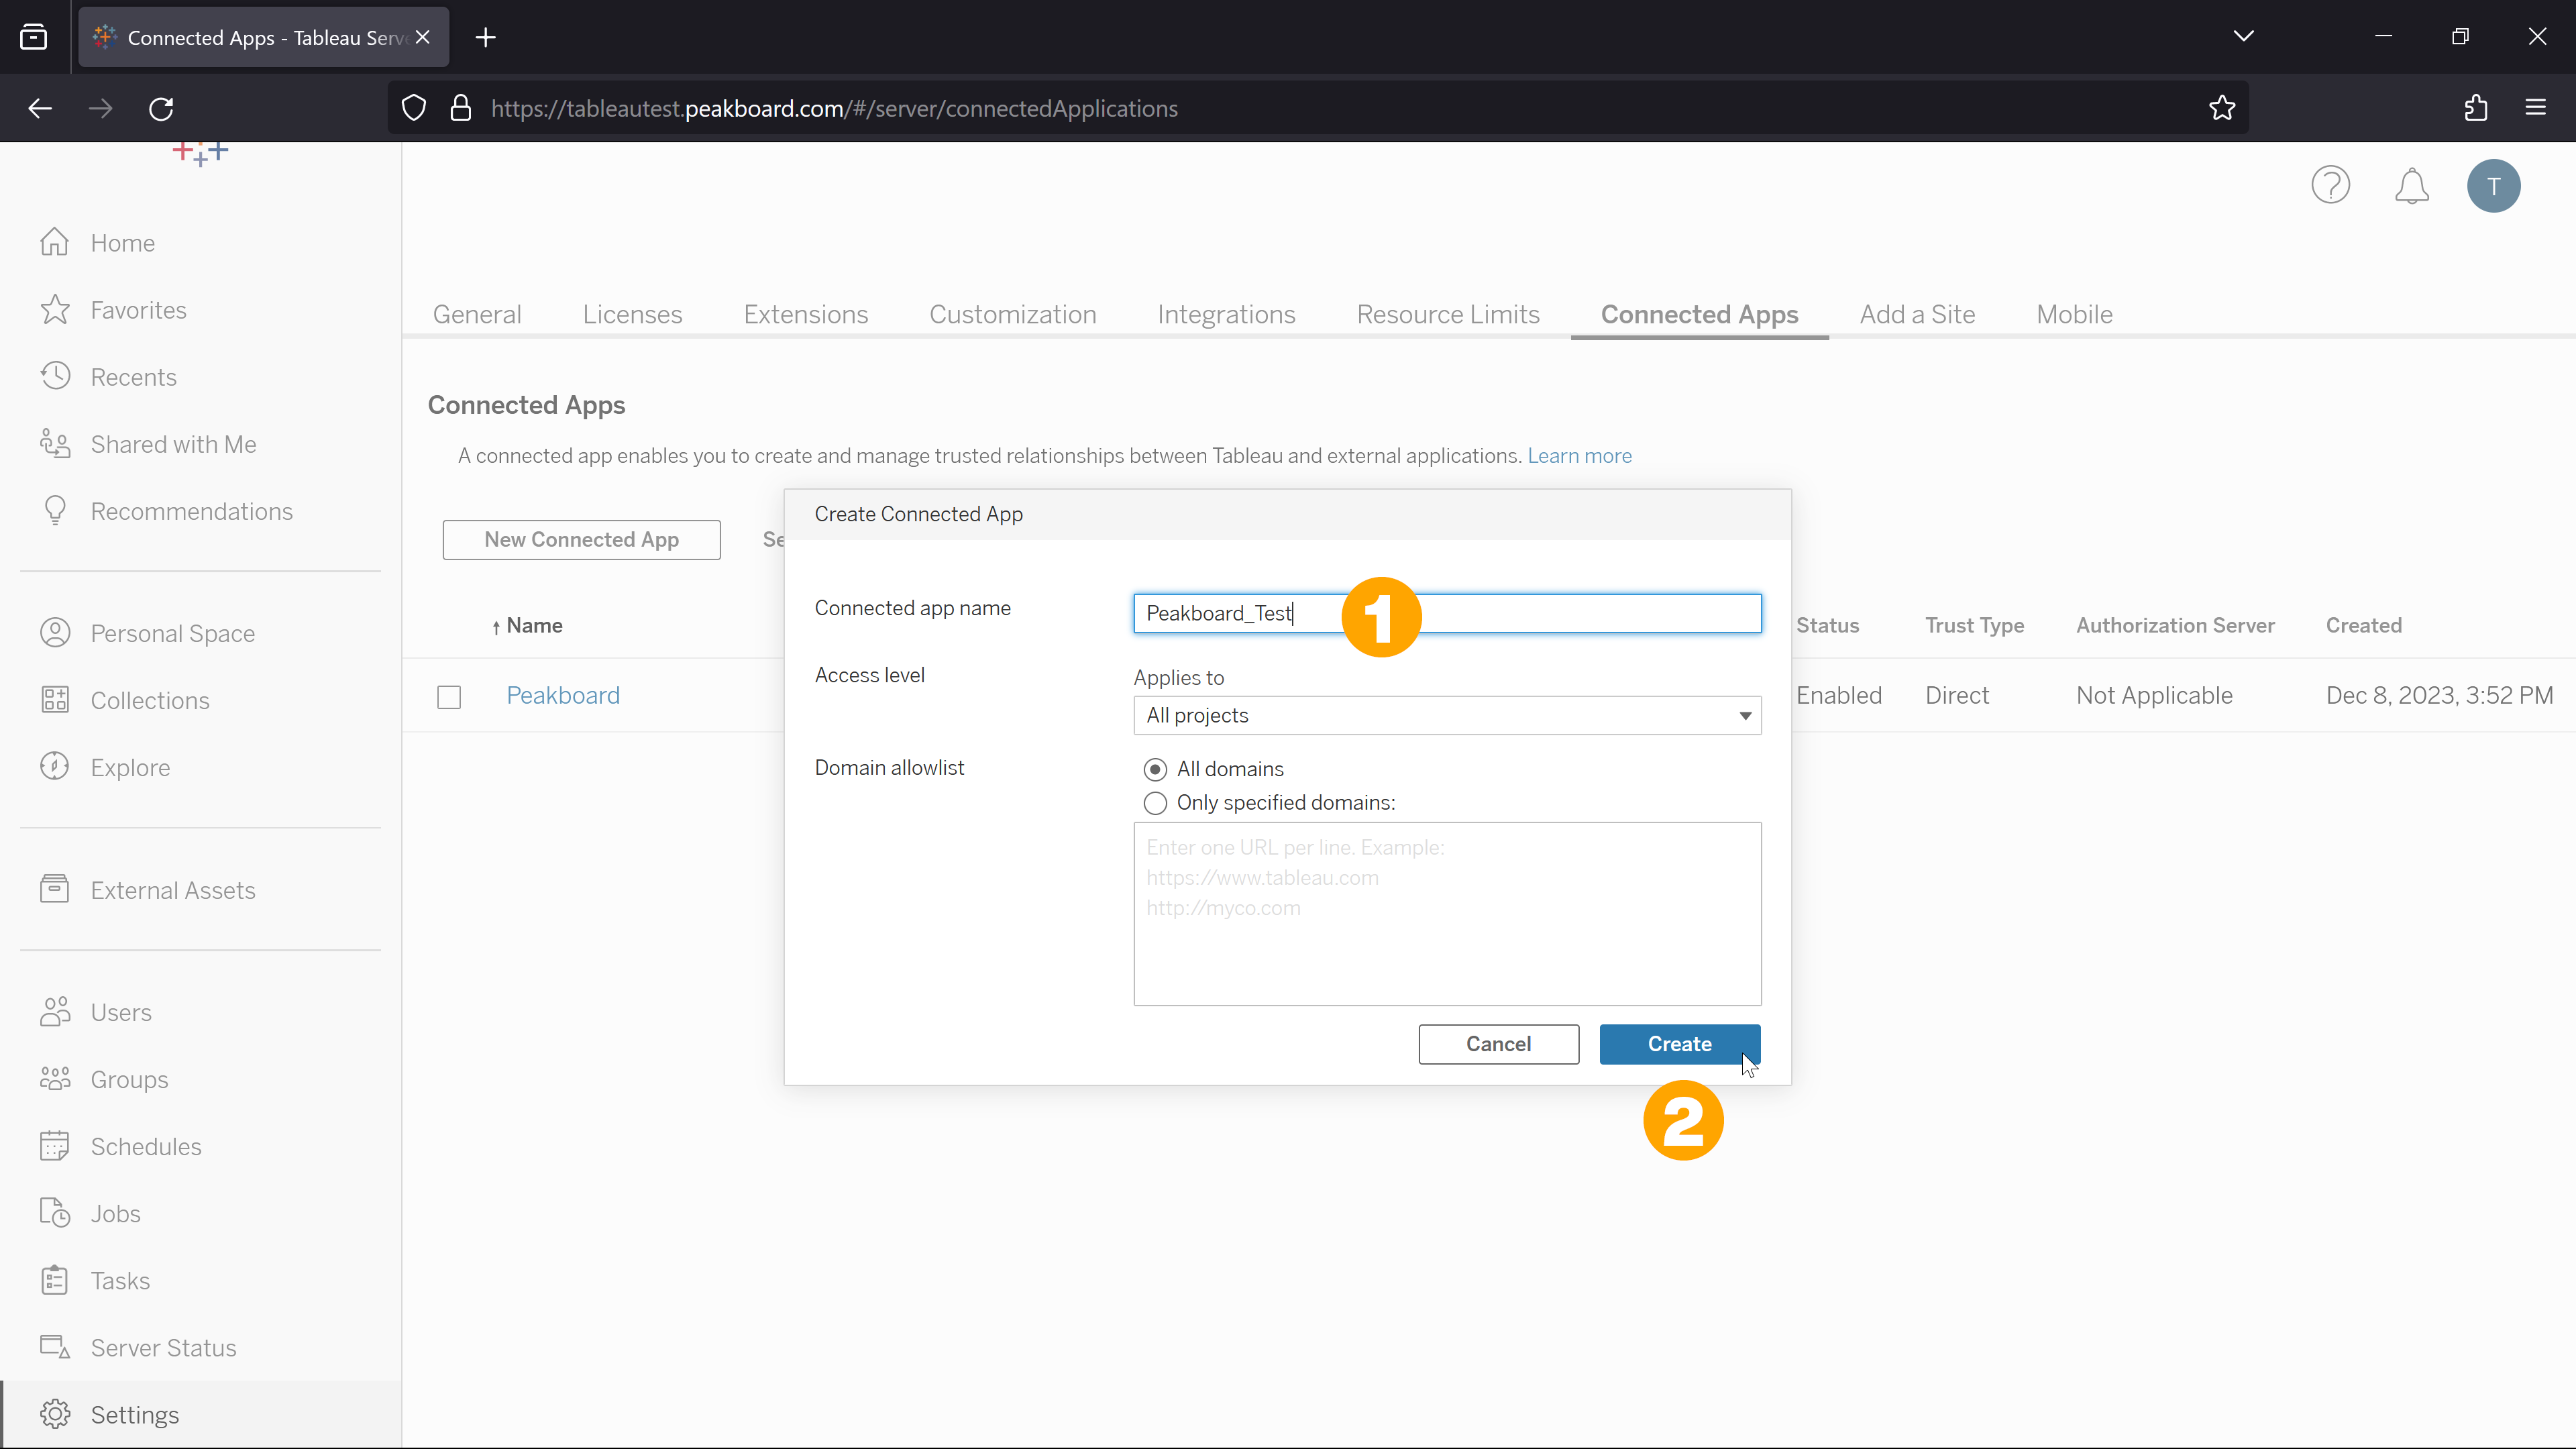
Give the app a name (1), the remaining settings can be kept. Use the [Create] button (2) to add the app.
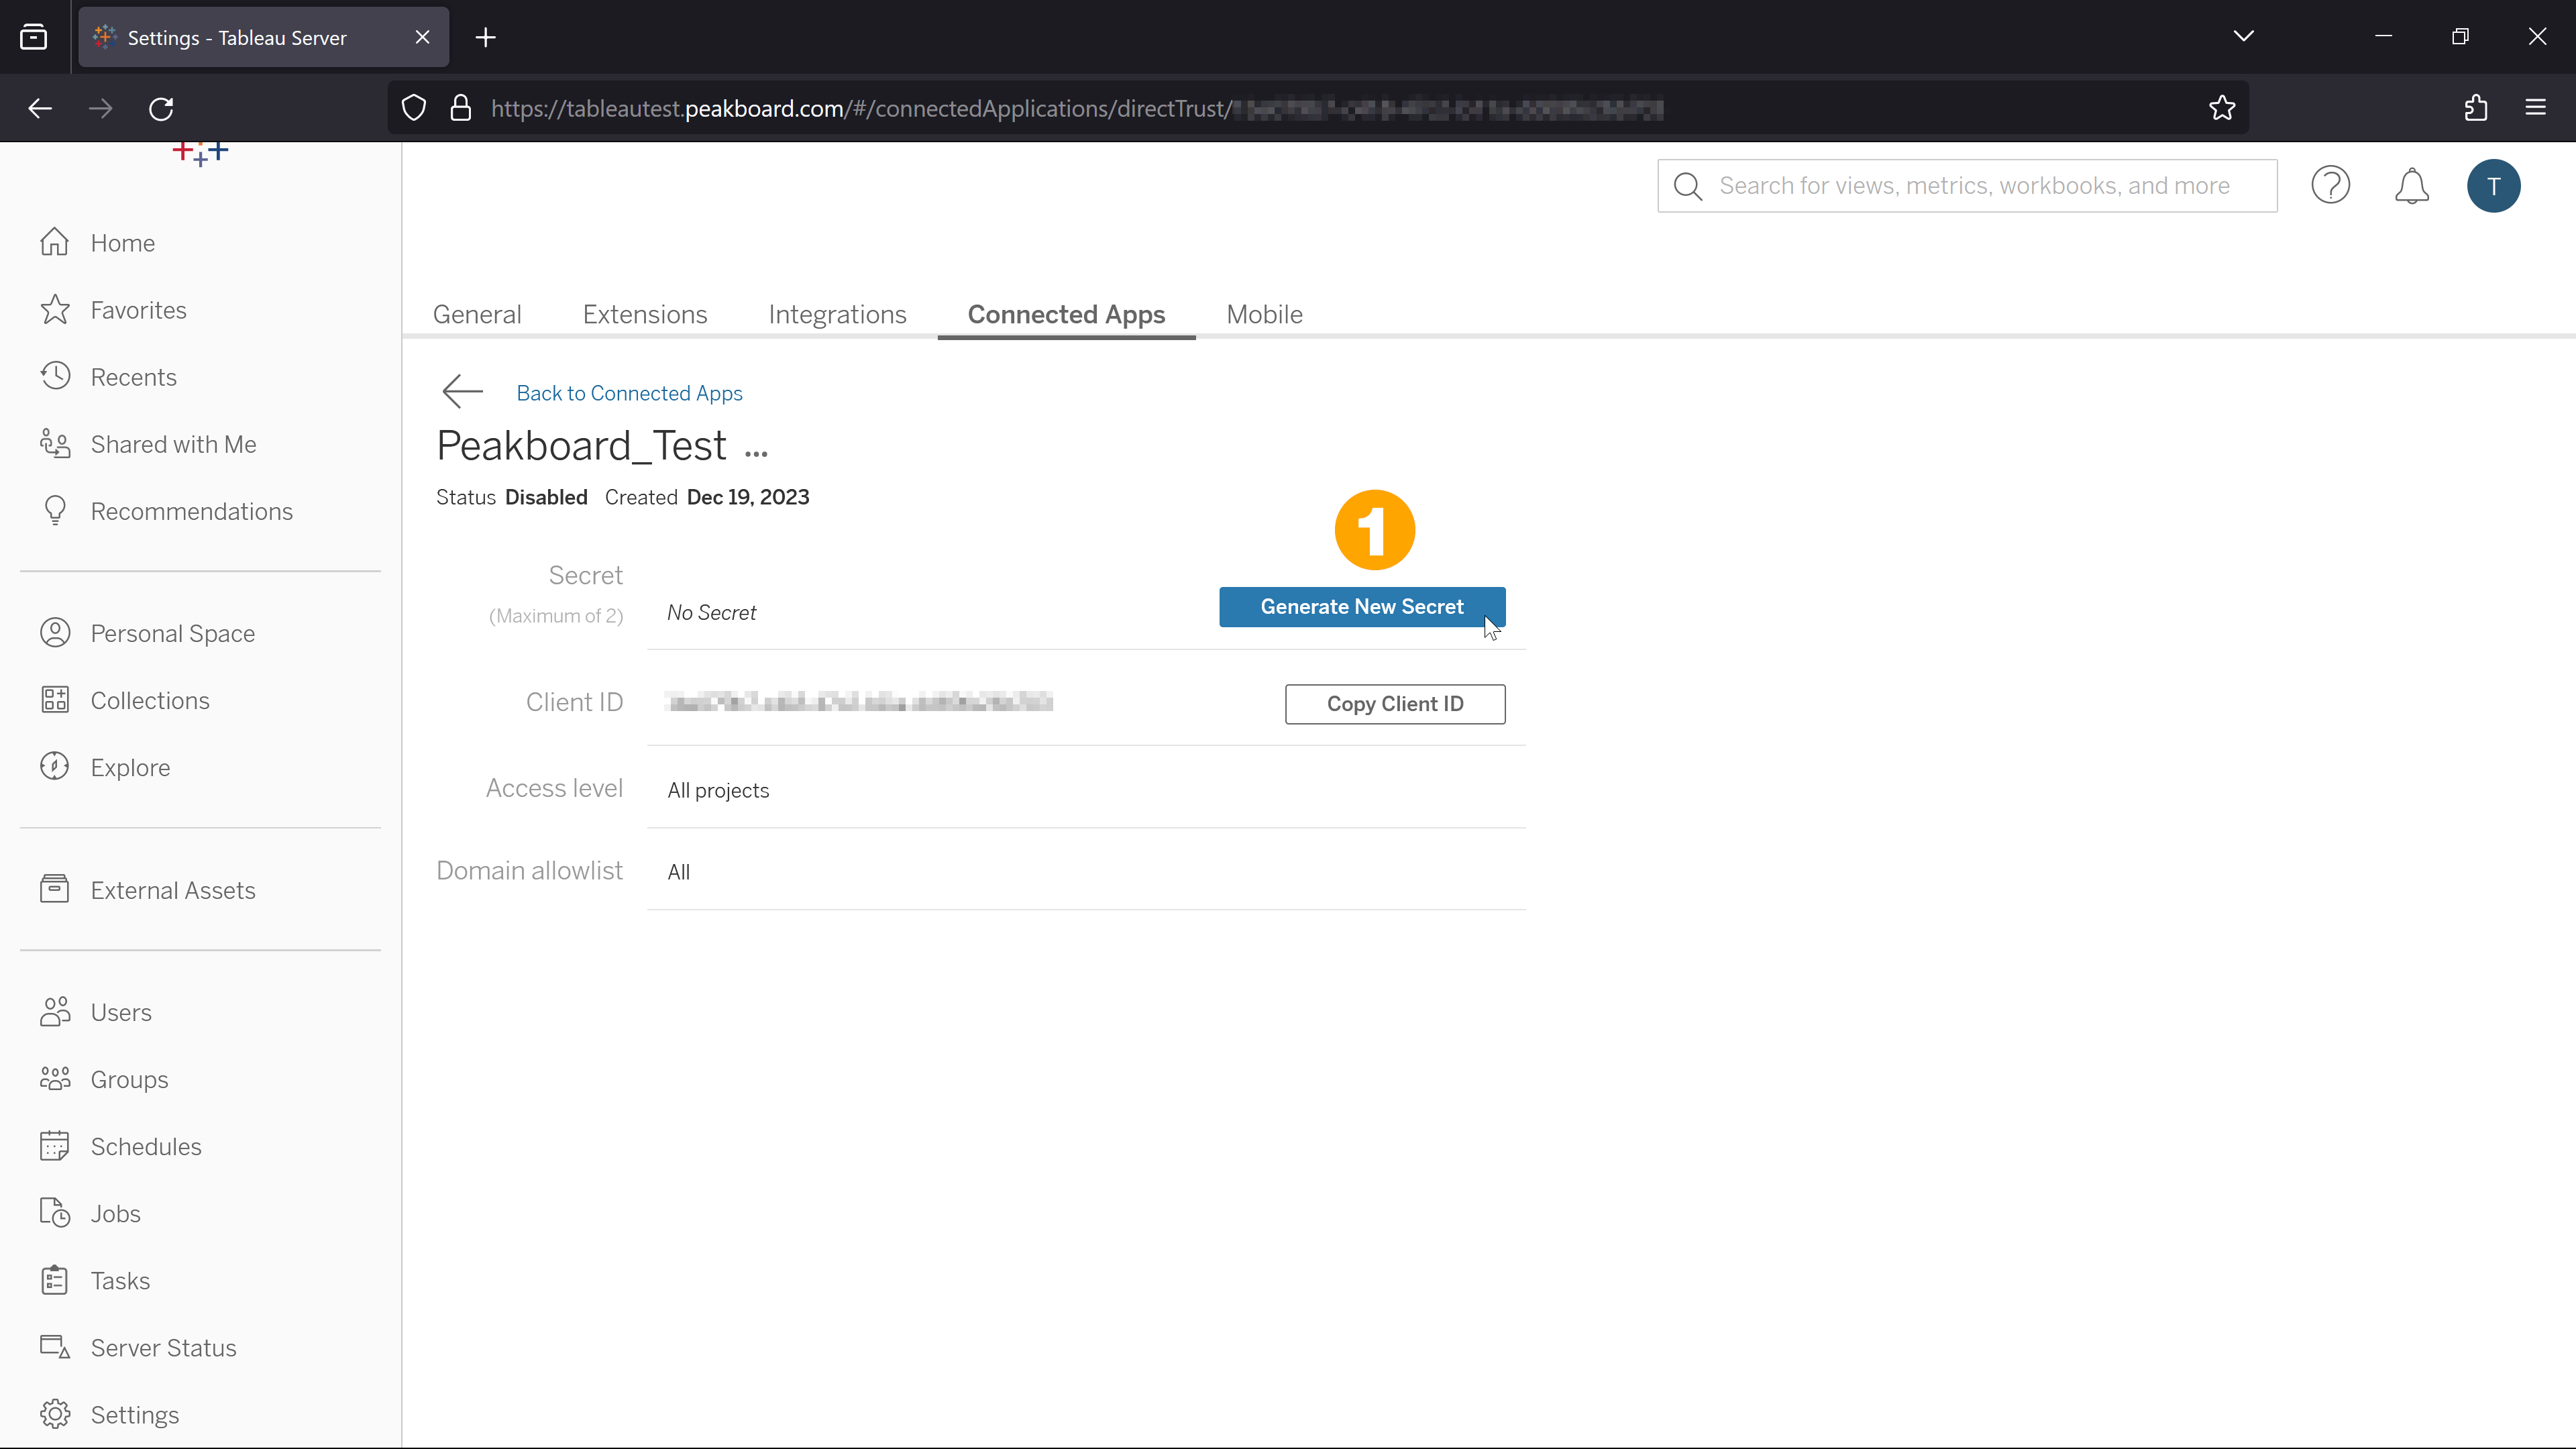
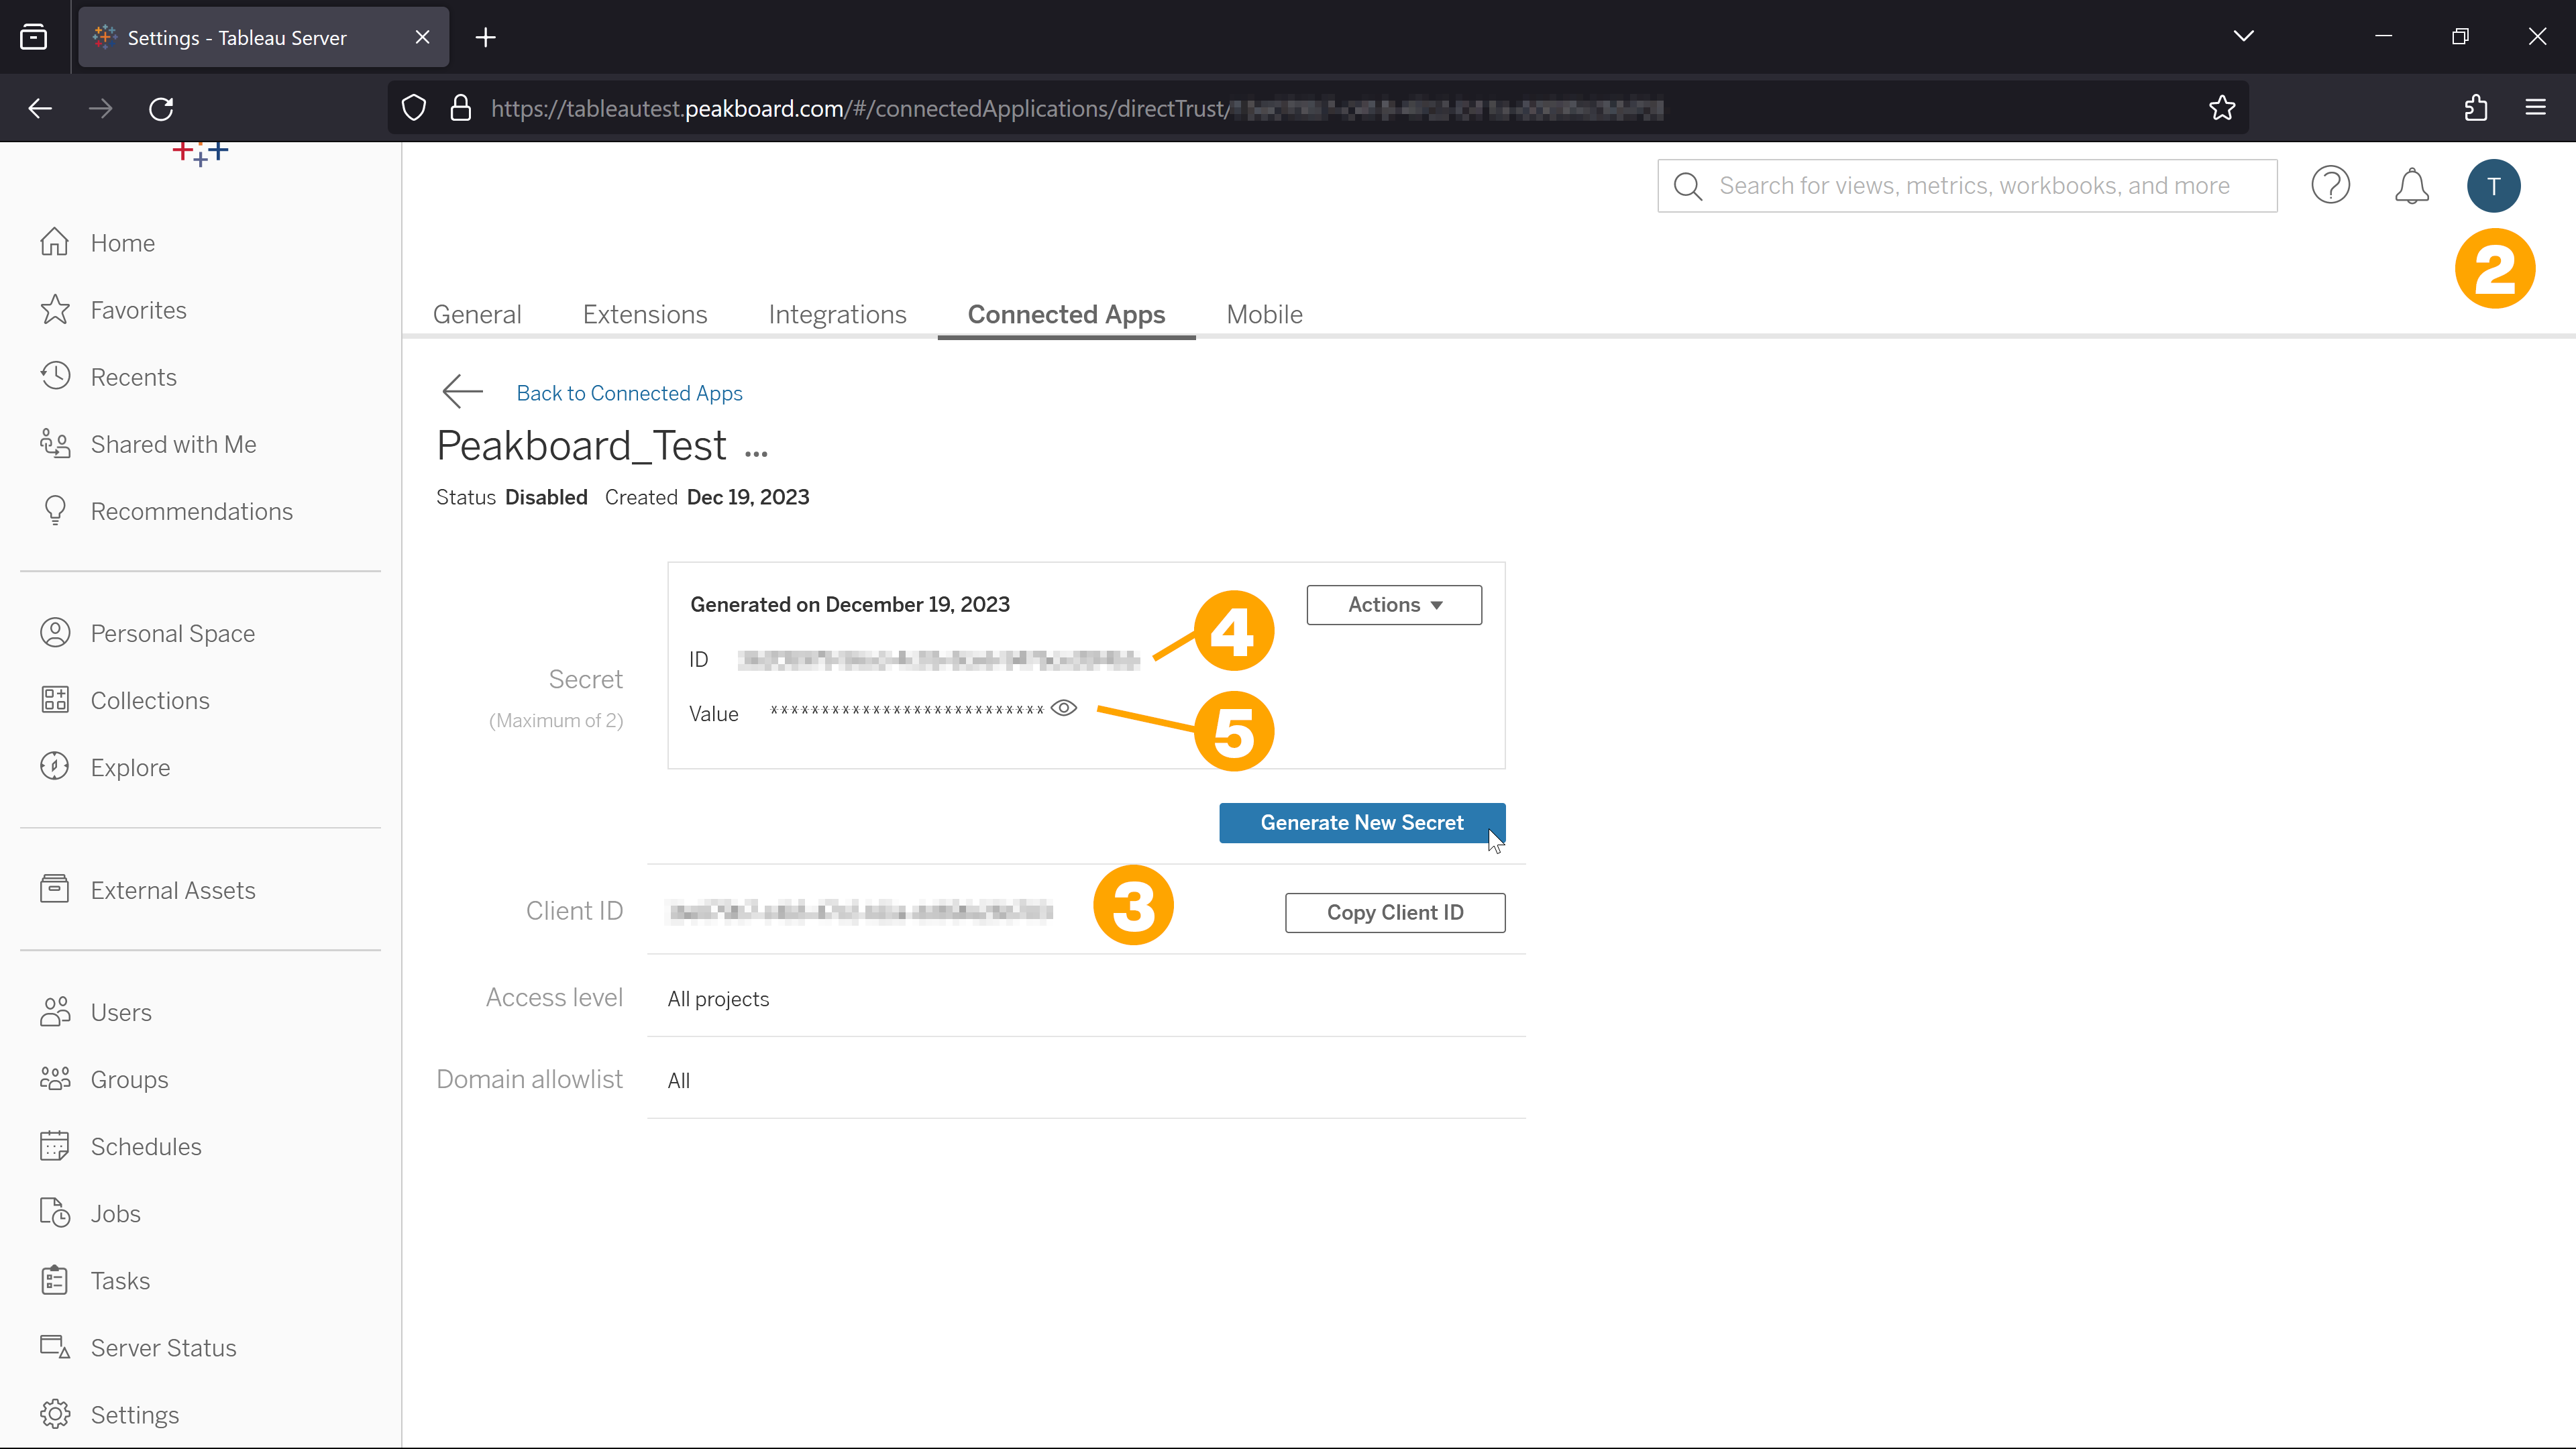
You will automatically be taken to the overview of the newly created app. You will need a client secret to connect to the Peakboard Designer. Click on the [Generate new secret] button (1).
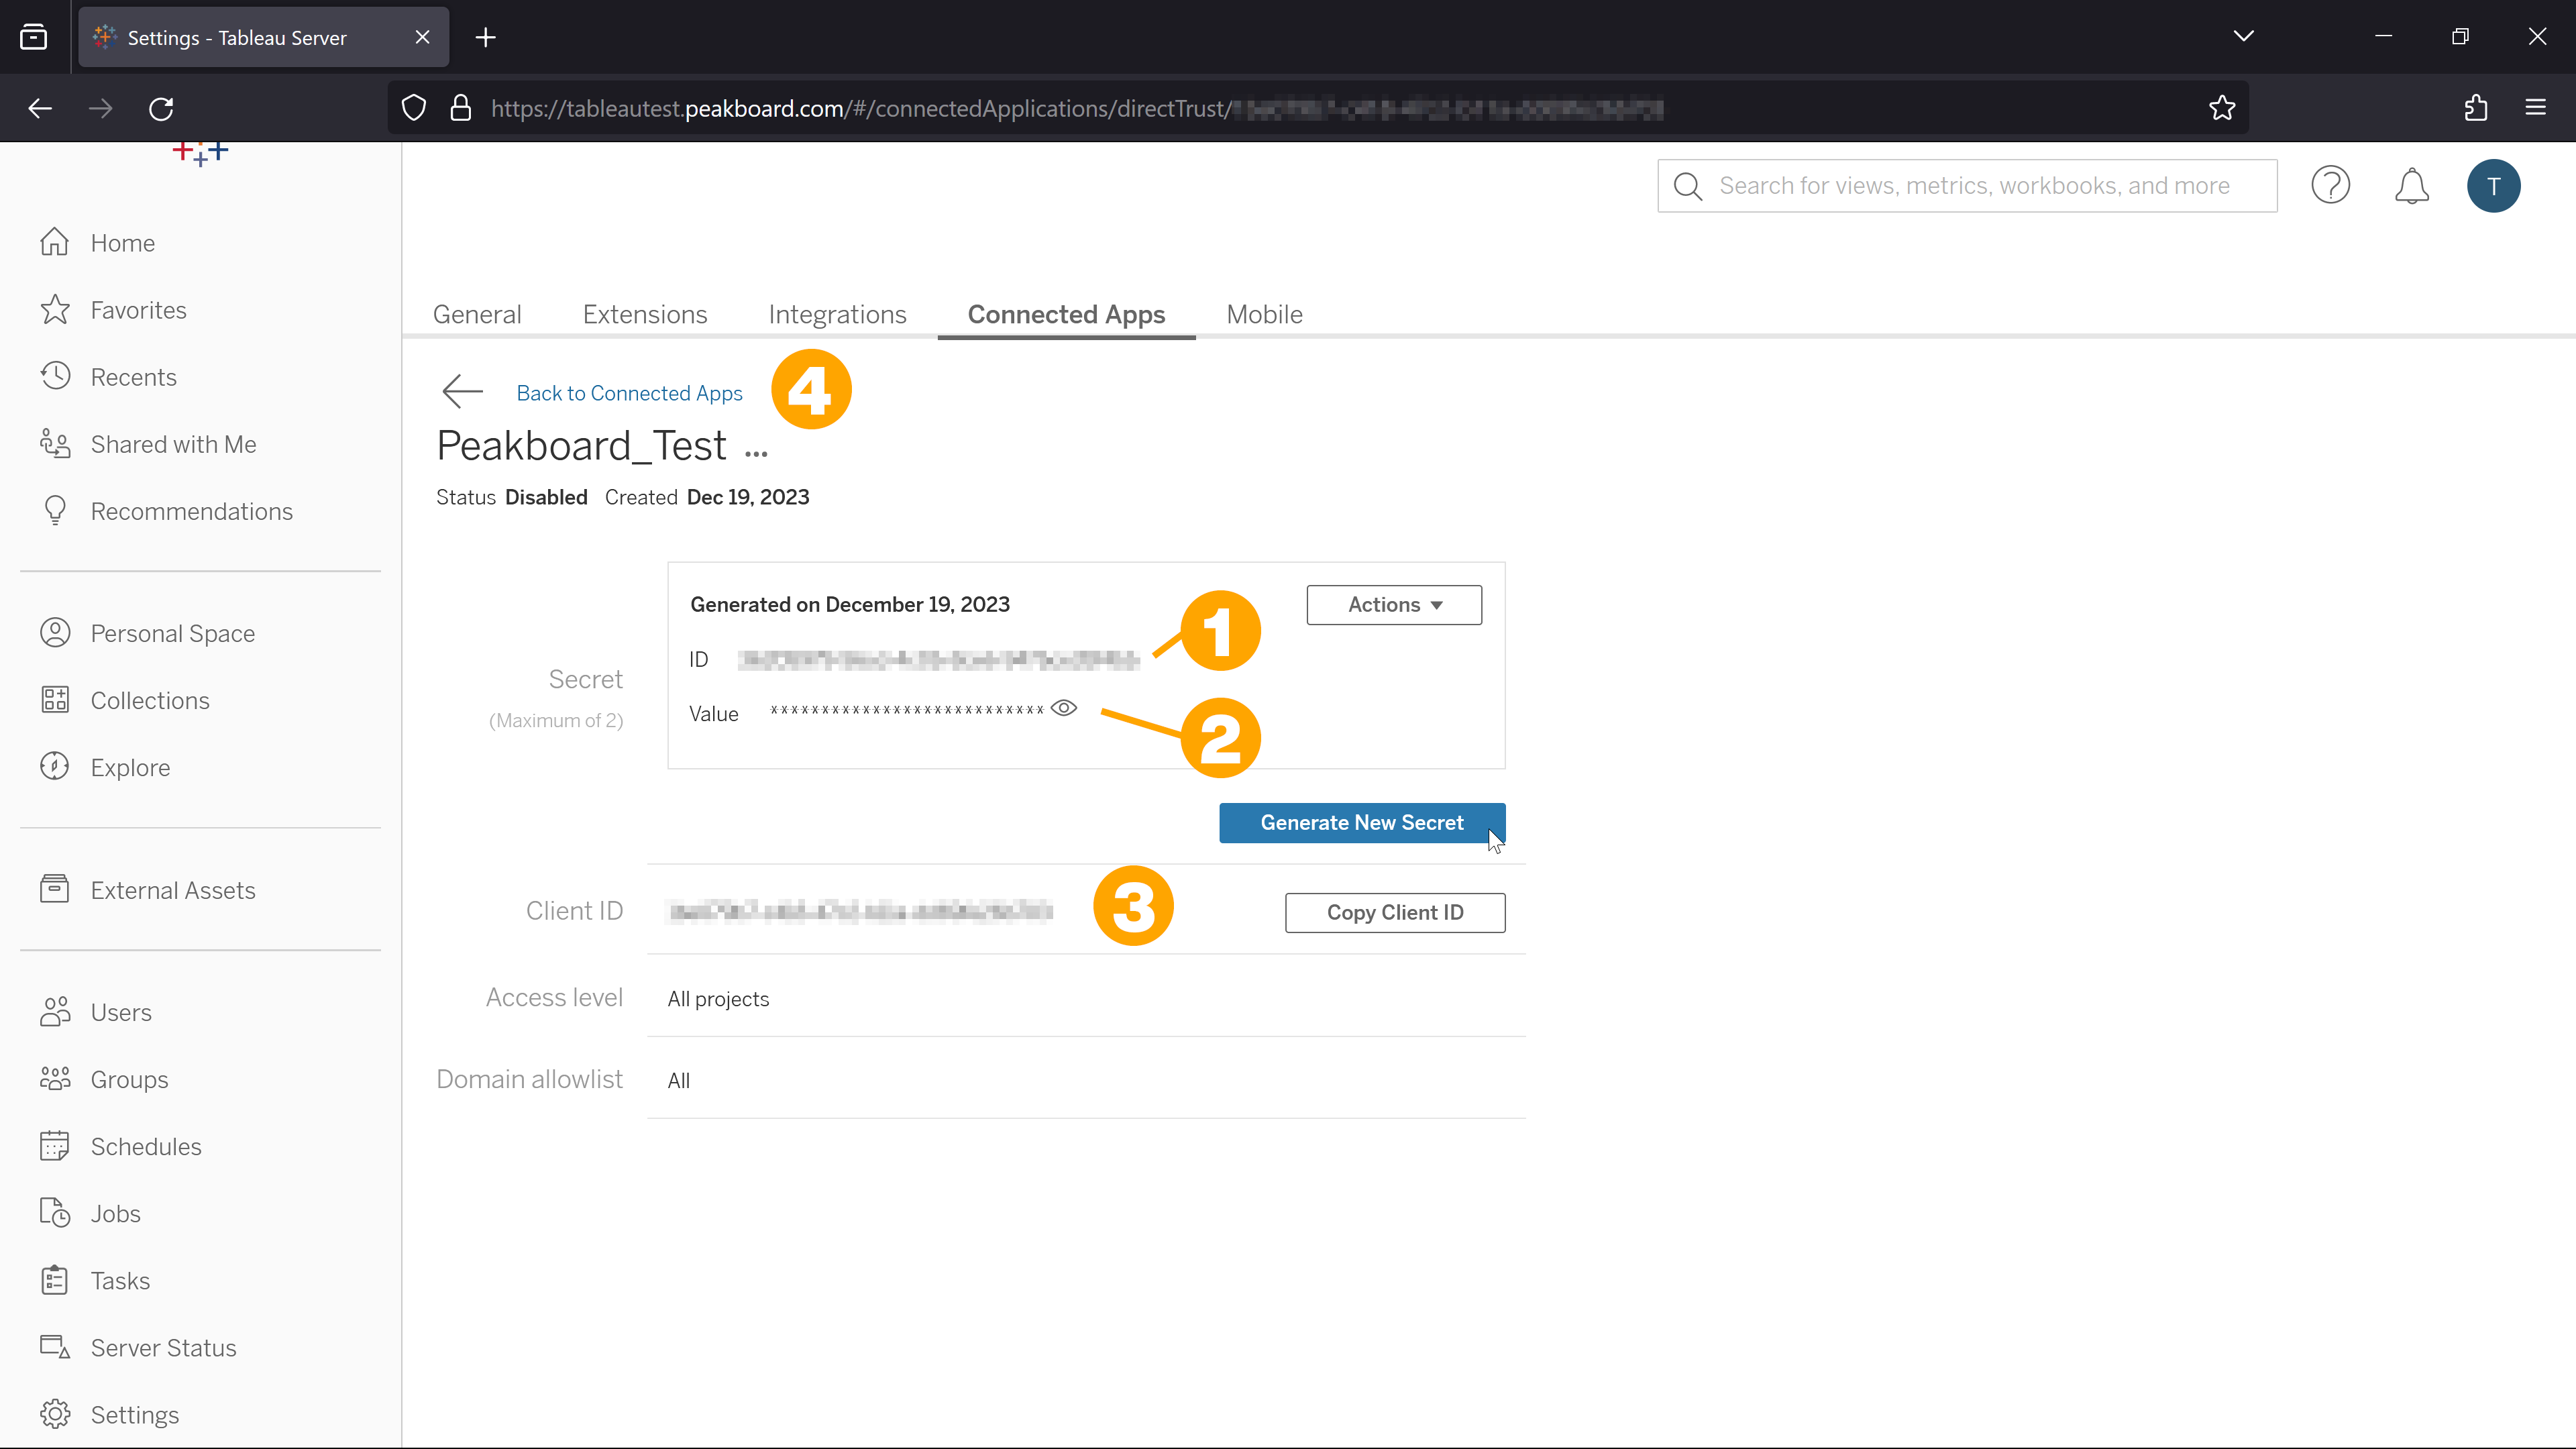
A field appears with the generated ID (1) and the value (2) of the client secret. You will need these values and the client ID (3) below them later. Click on [Back to the connected apps] (4) to return to the overview of the connected apps.
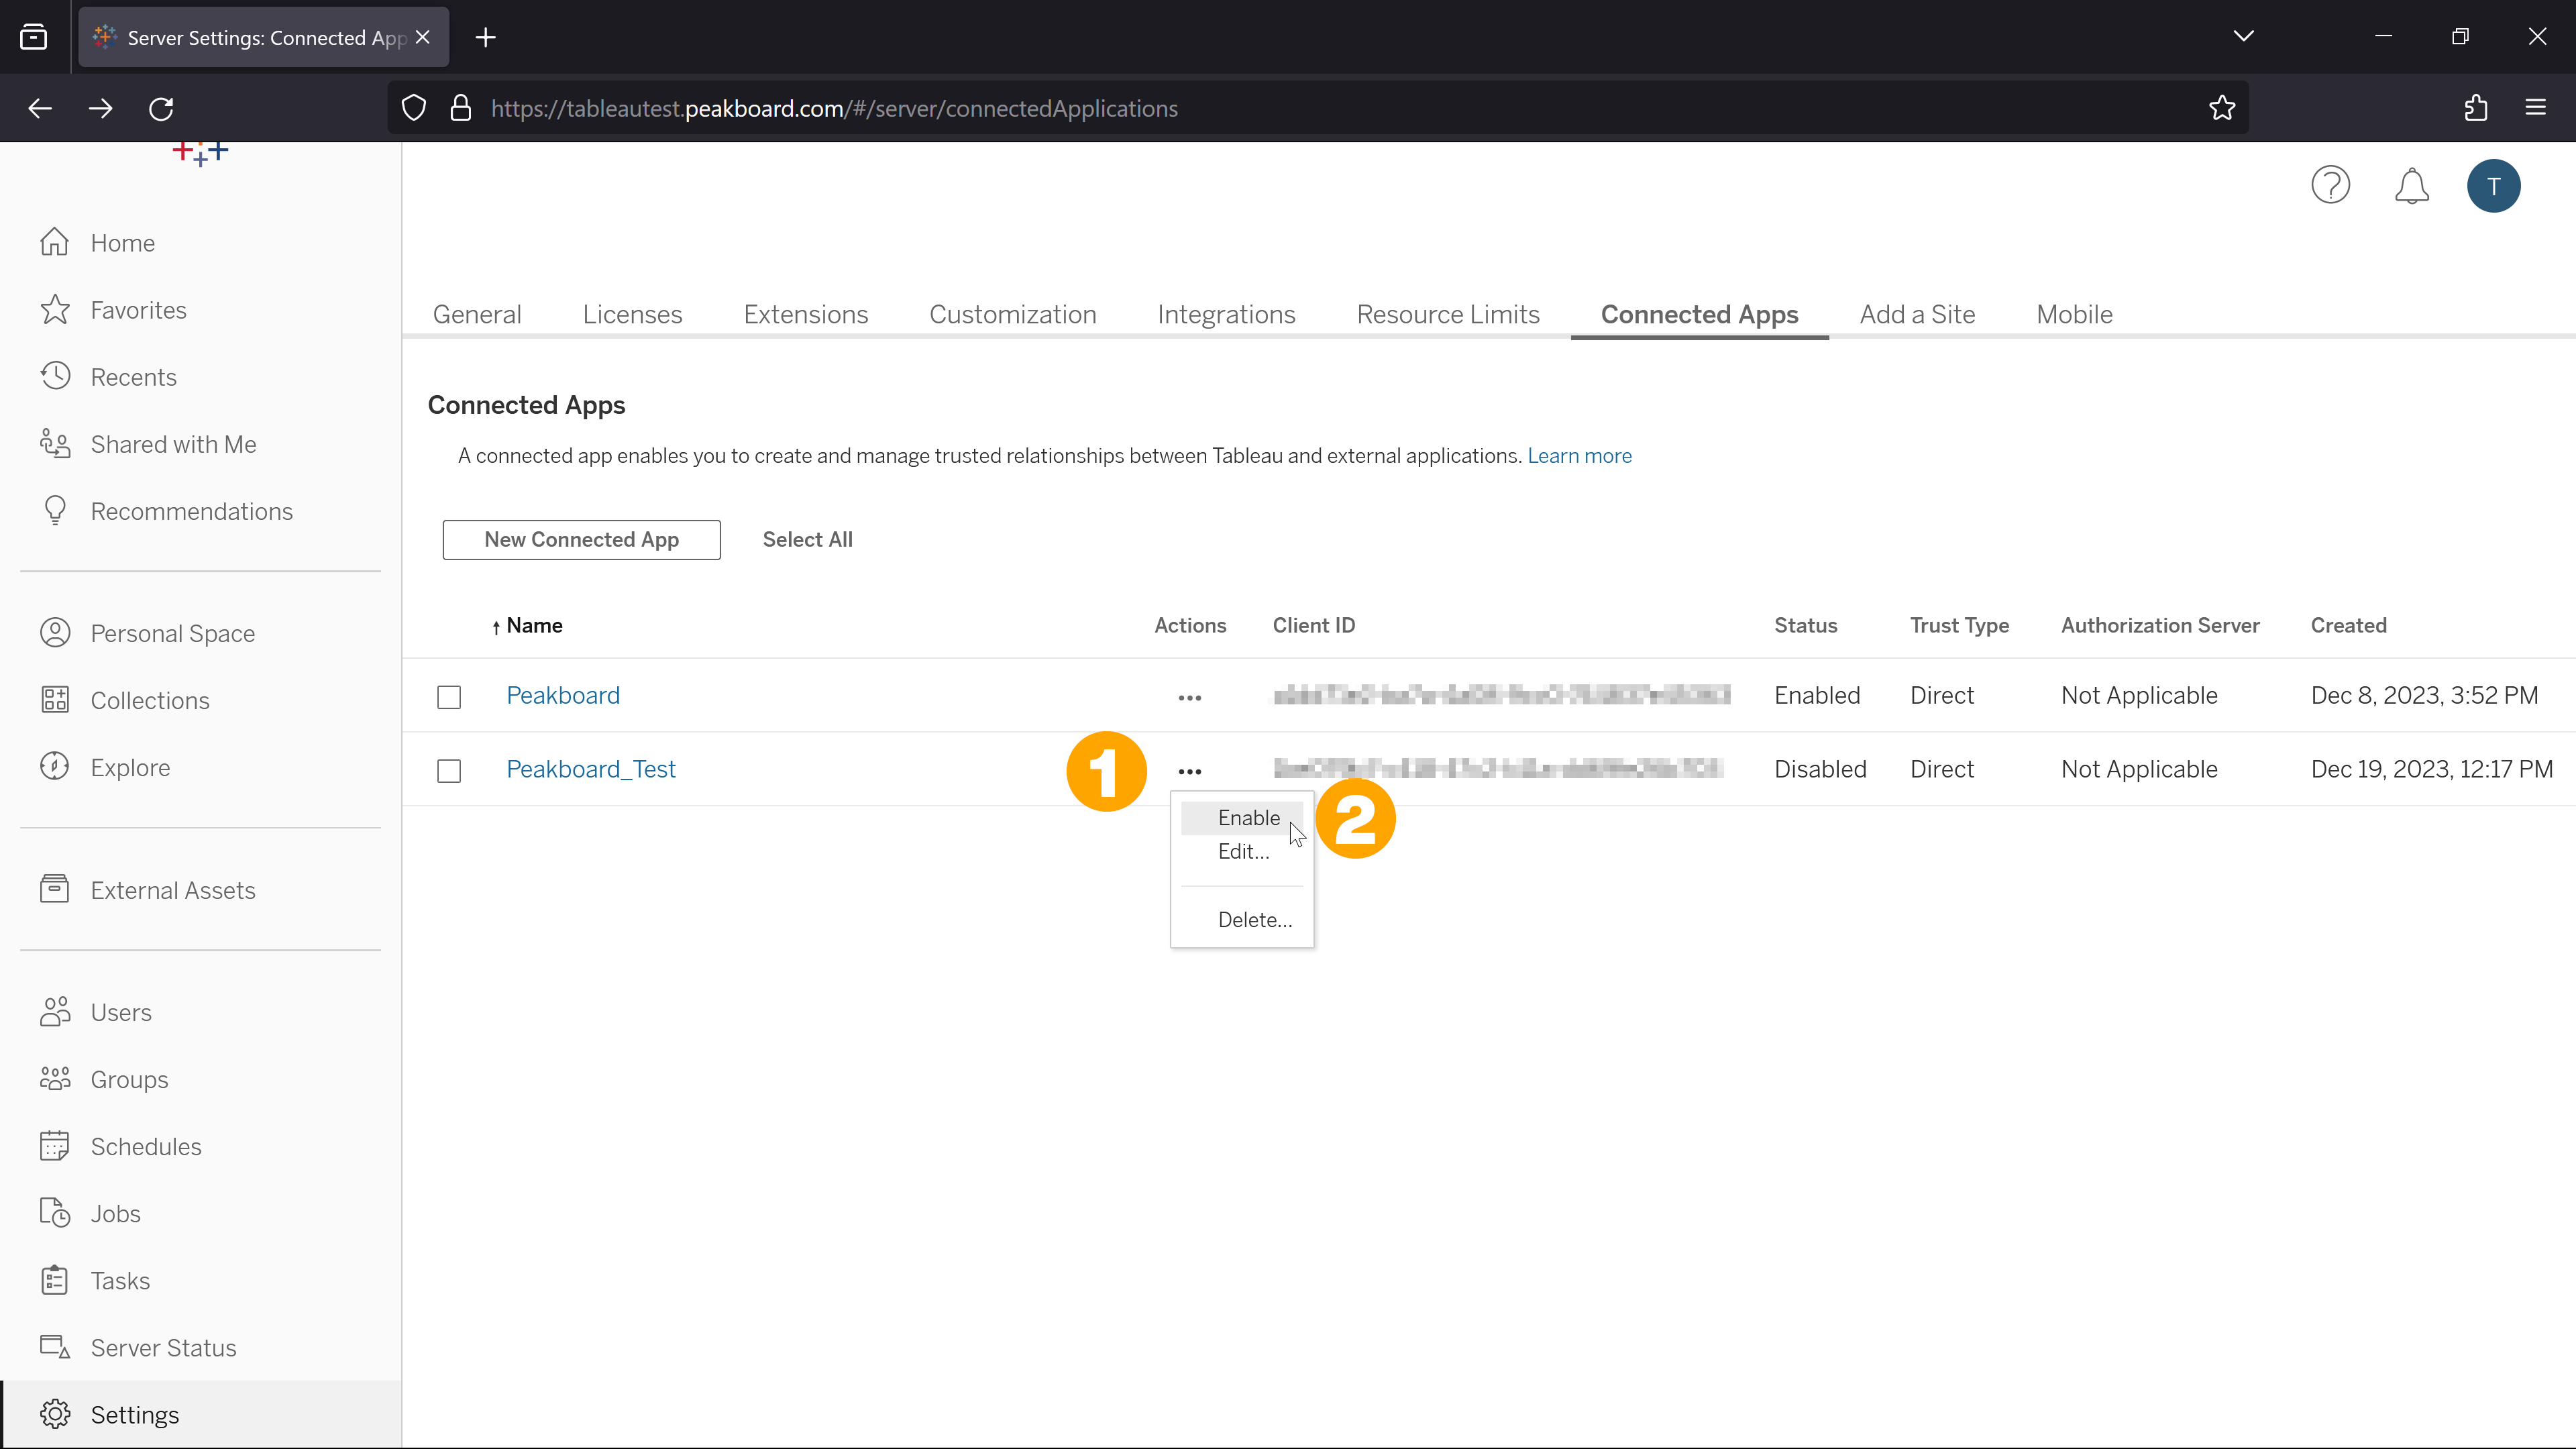
In the [Actions] column, click on the three dots (1) in the row of the app you have just created and select [Activate] (2). You can now use the connected app in the Peakboard Designer.
Connection with the Peakboard Designer
Install the Tableau token generator extension
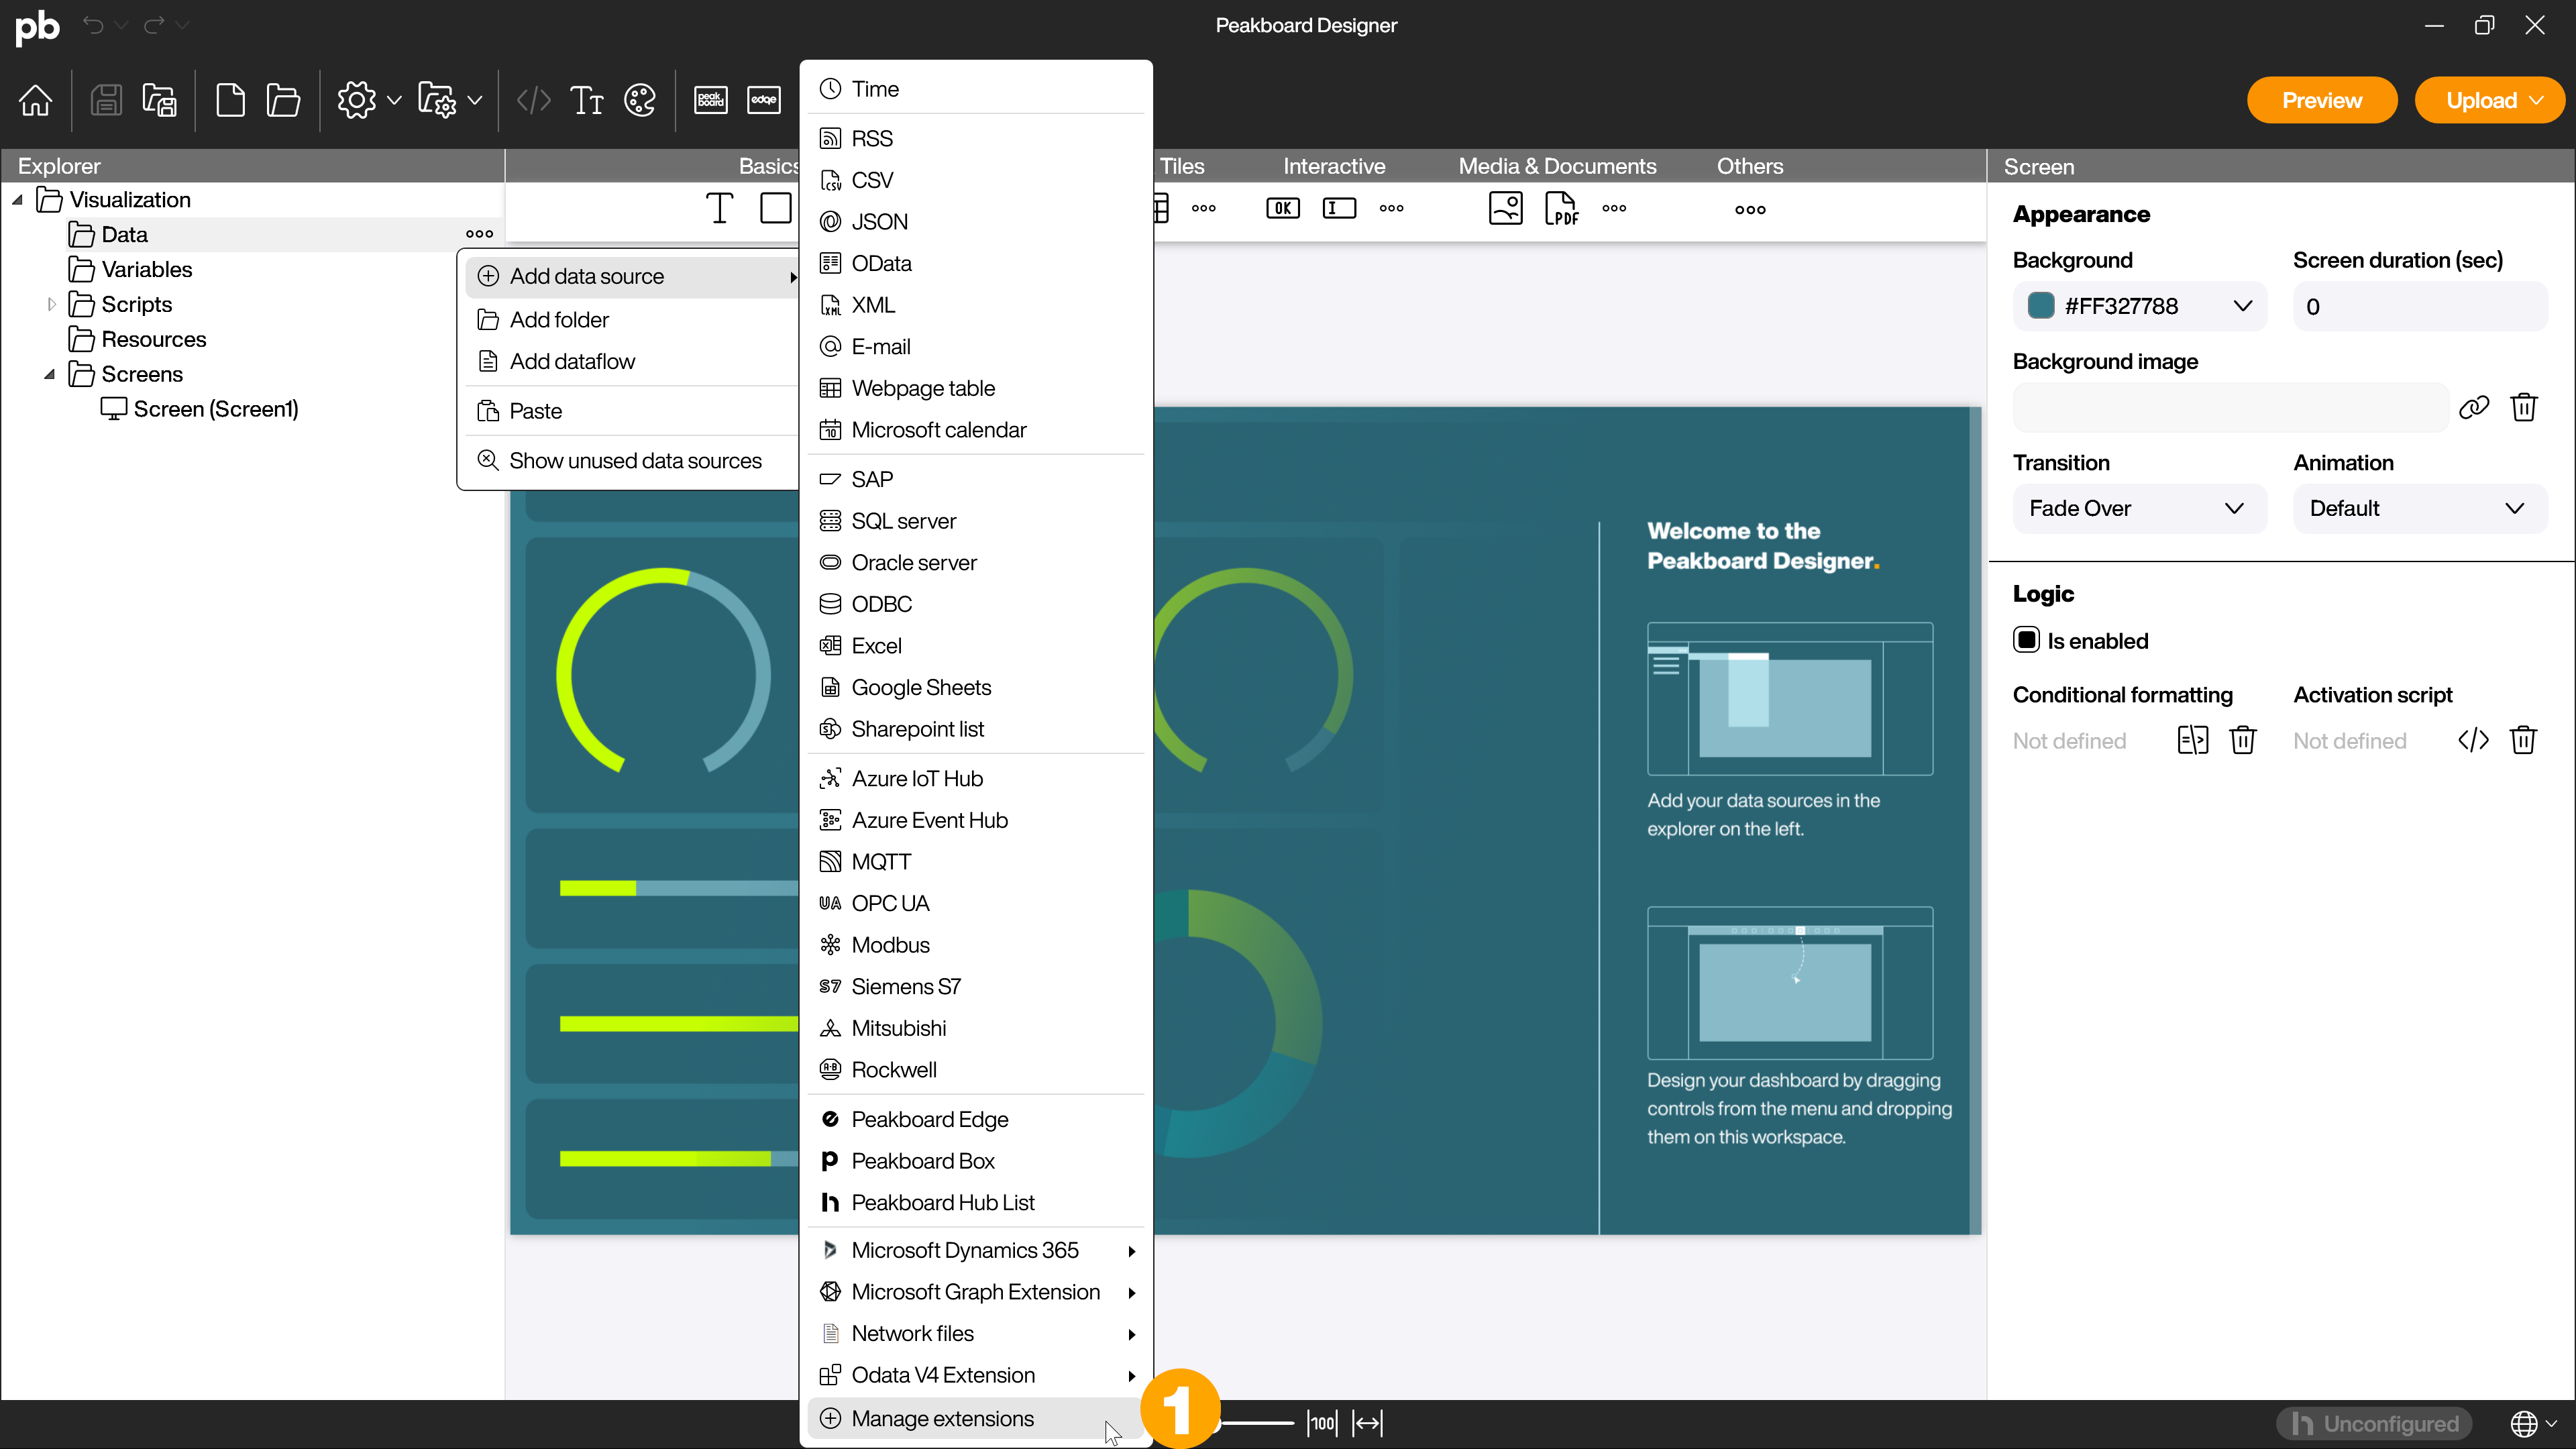
Open the extension manager by right-clicking on [Data], [Add data source] and select [Manage extensions] (1).
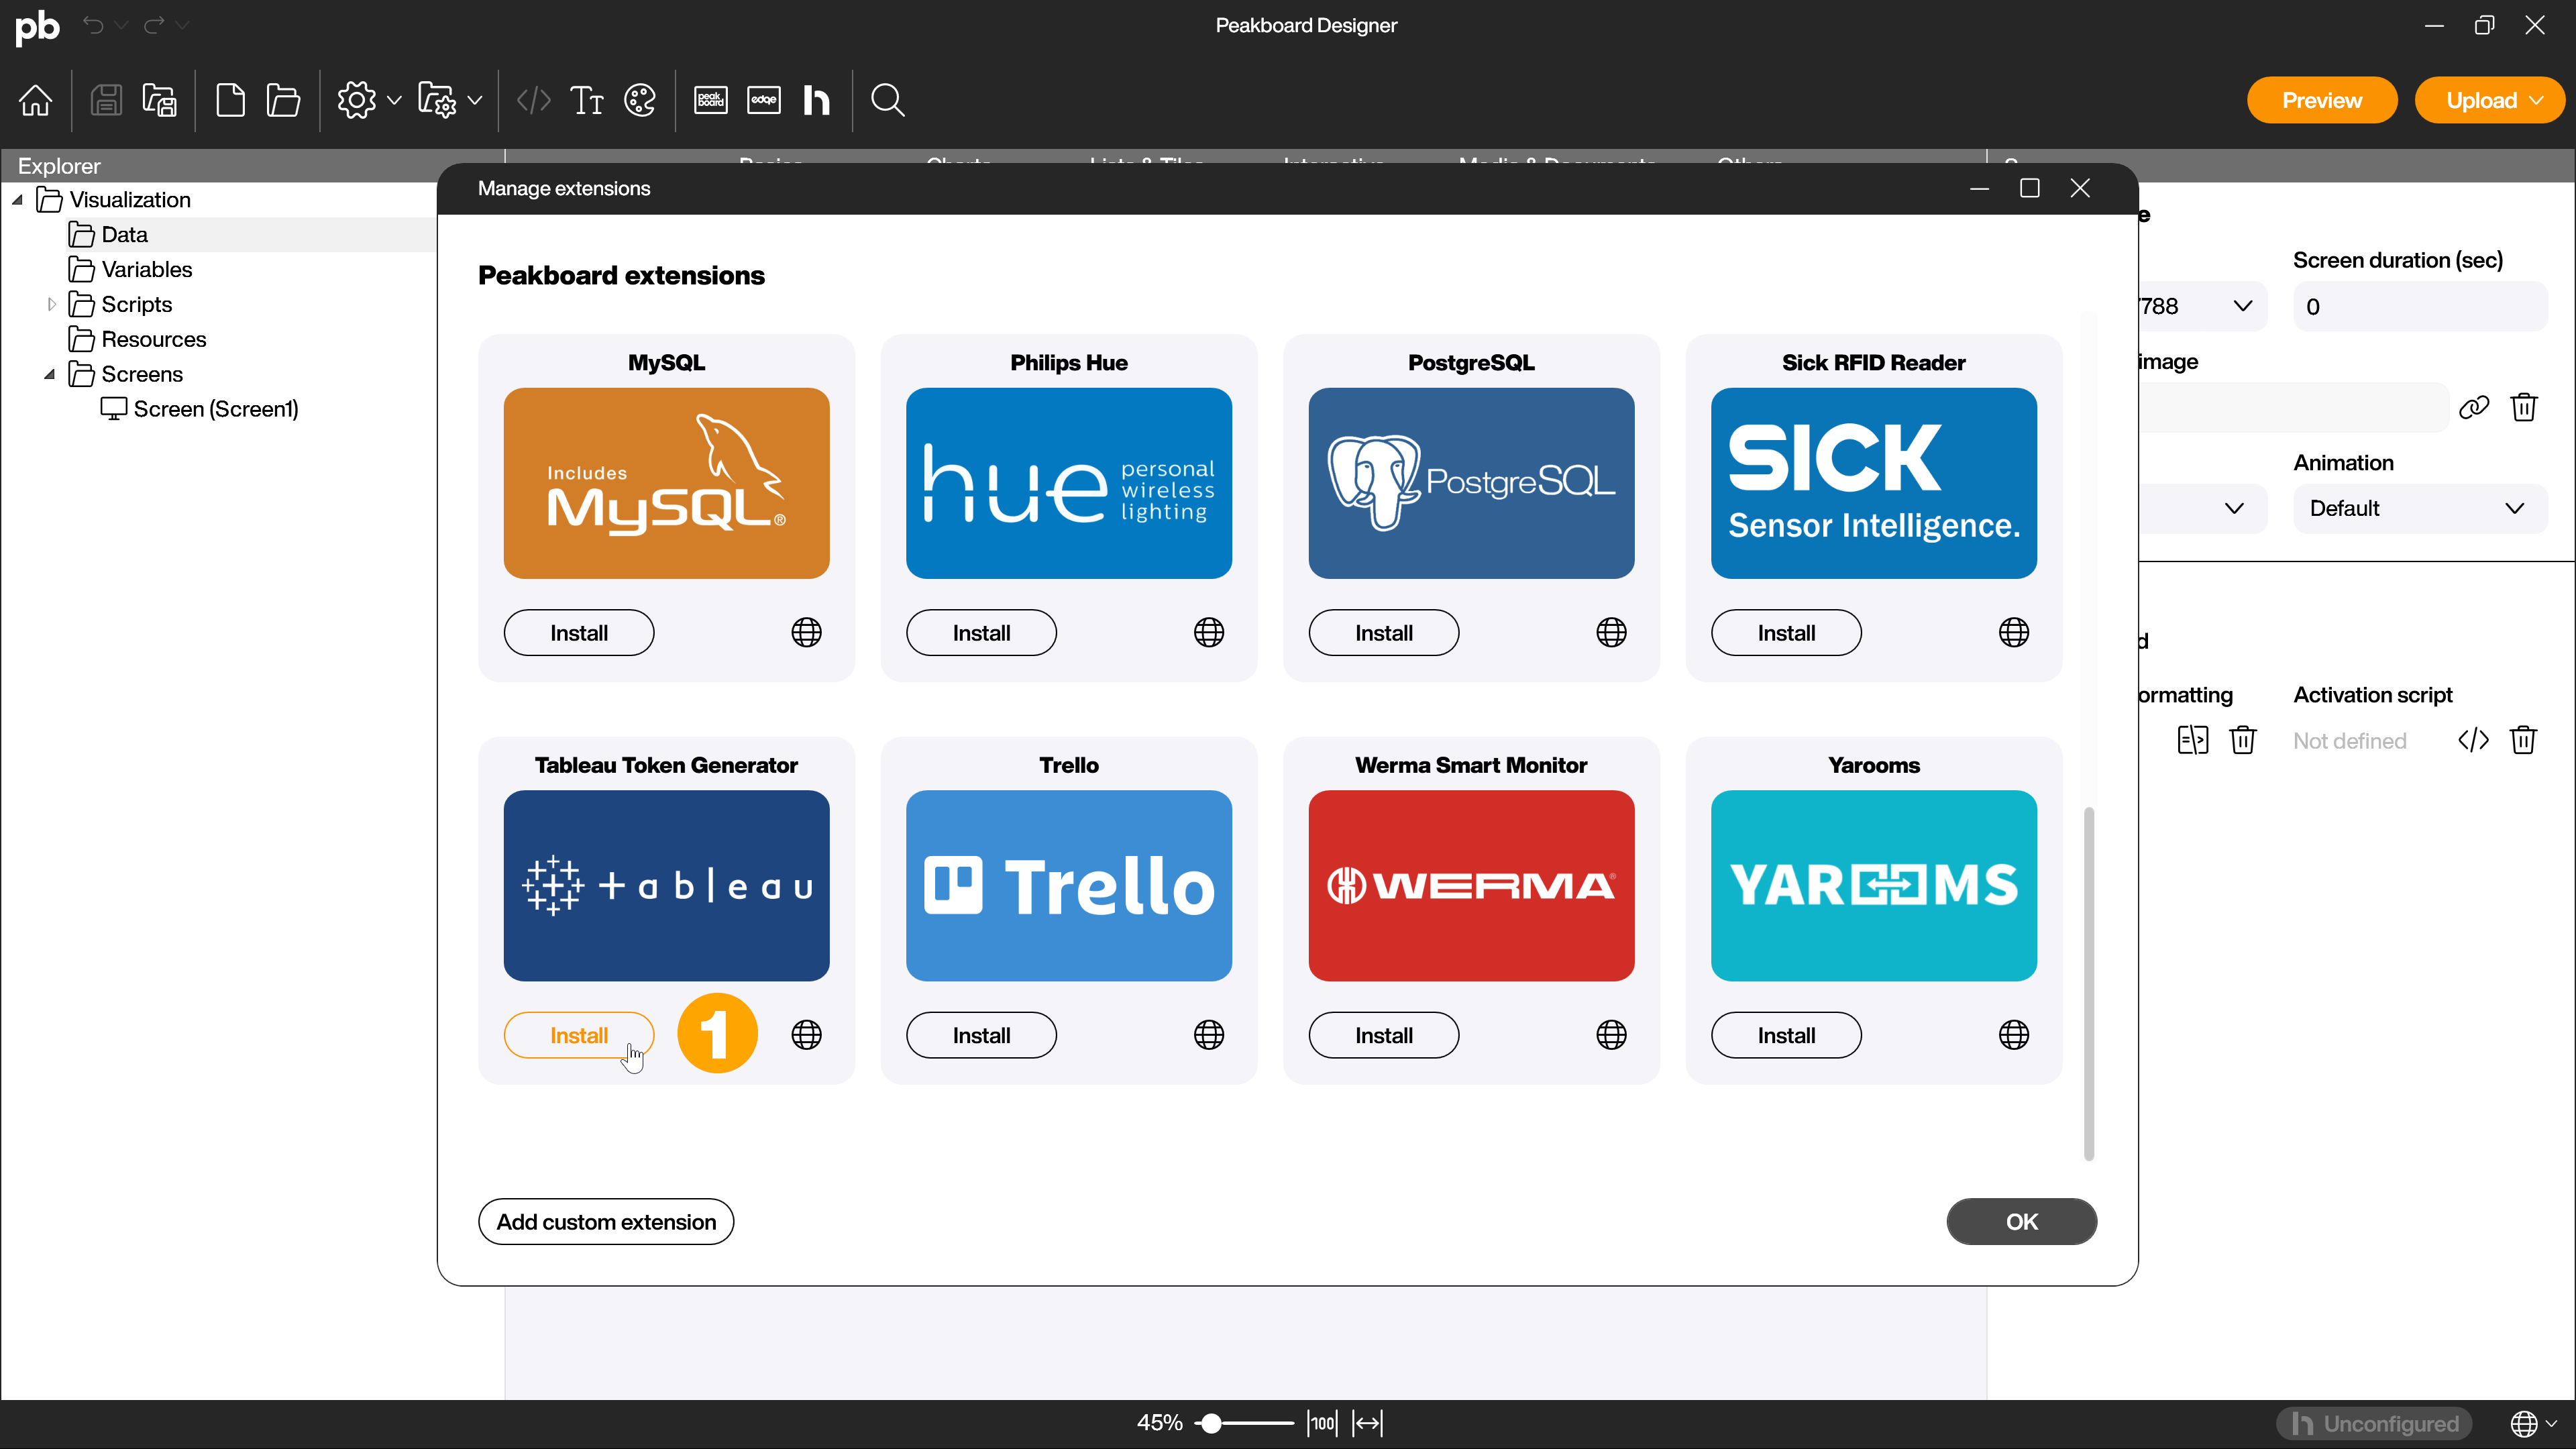
Click on [Install] (1) for the Tableau token generator extension and then restart the Peakboard Designer to activate the extensions.
Set up the extension
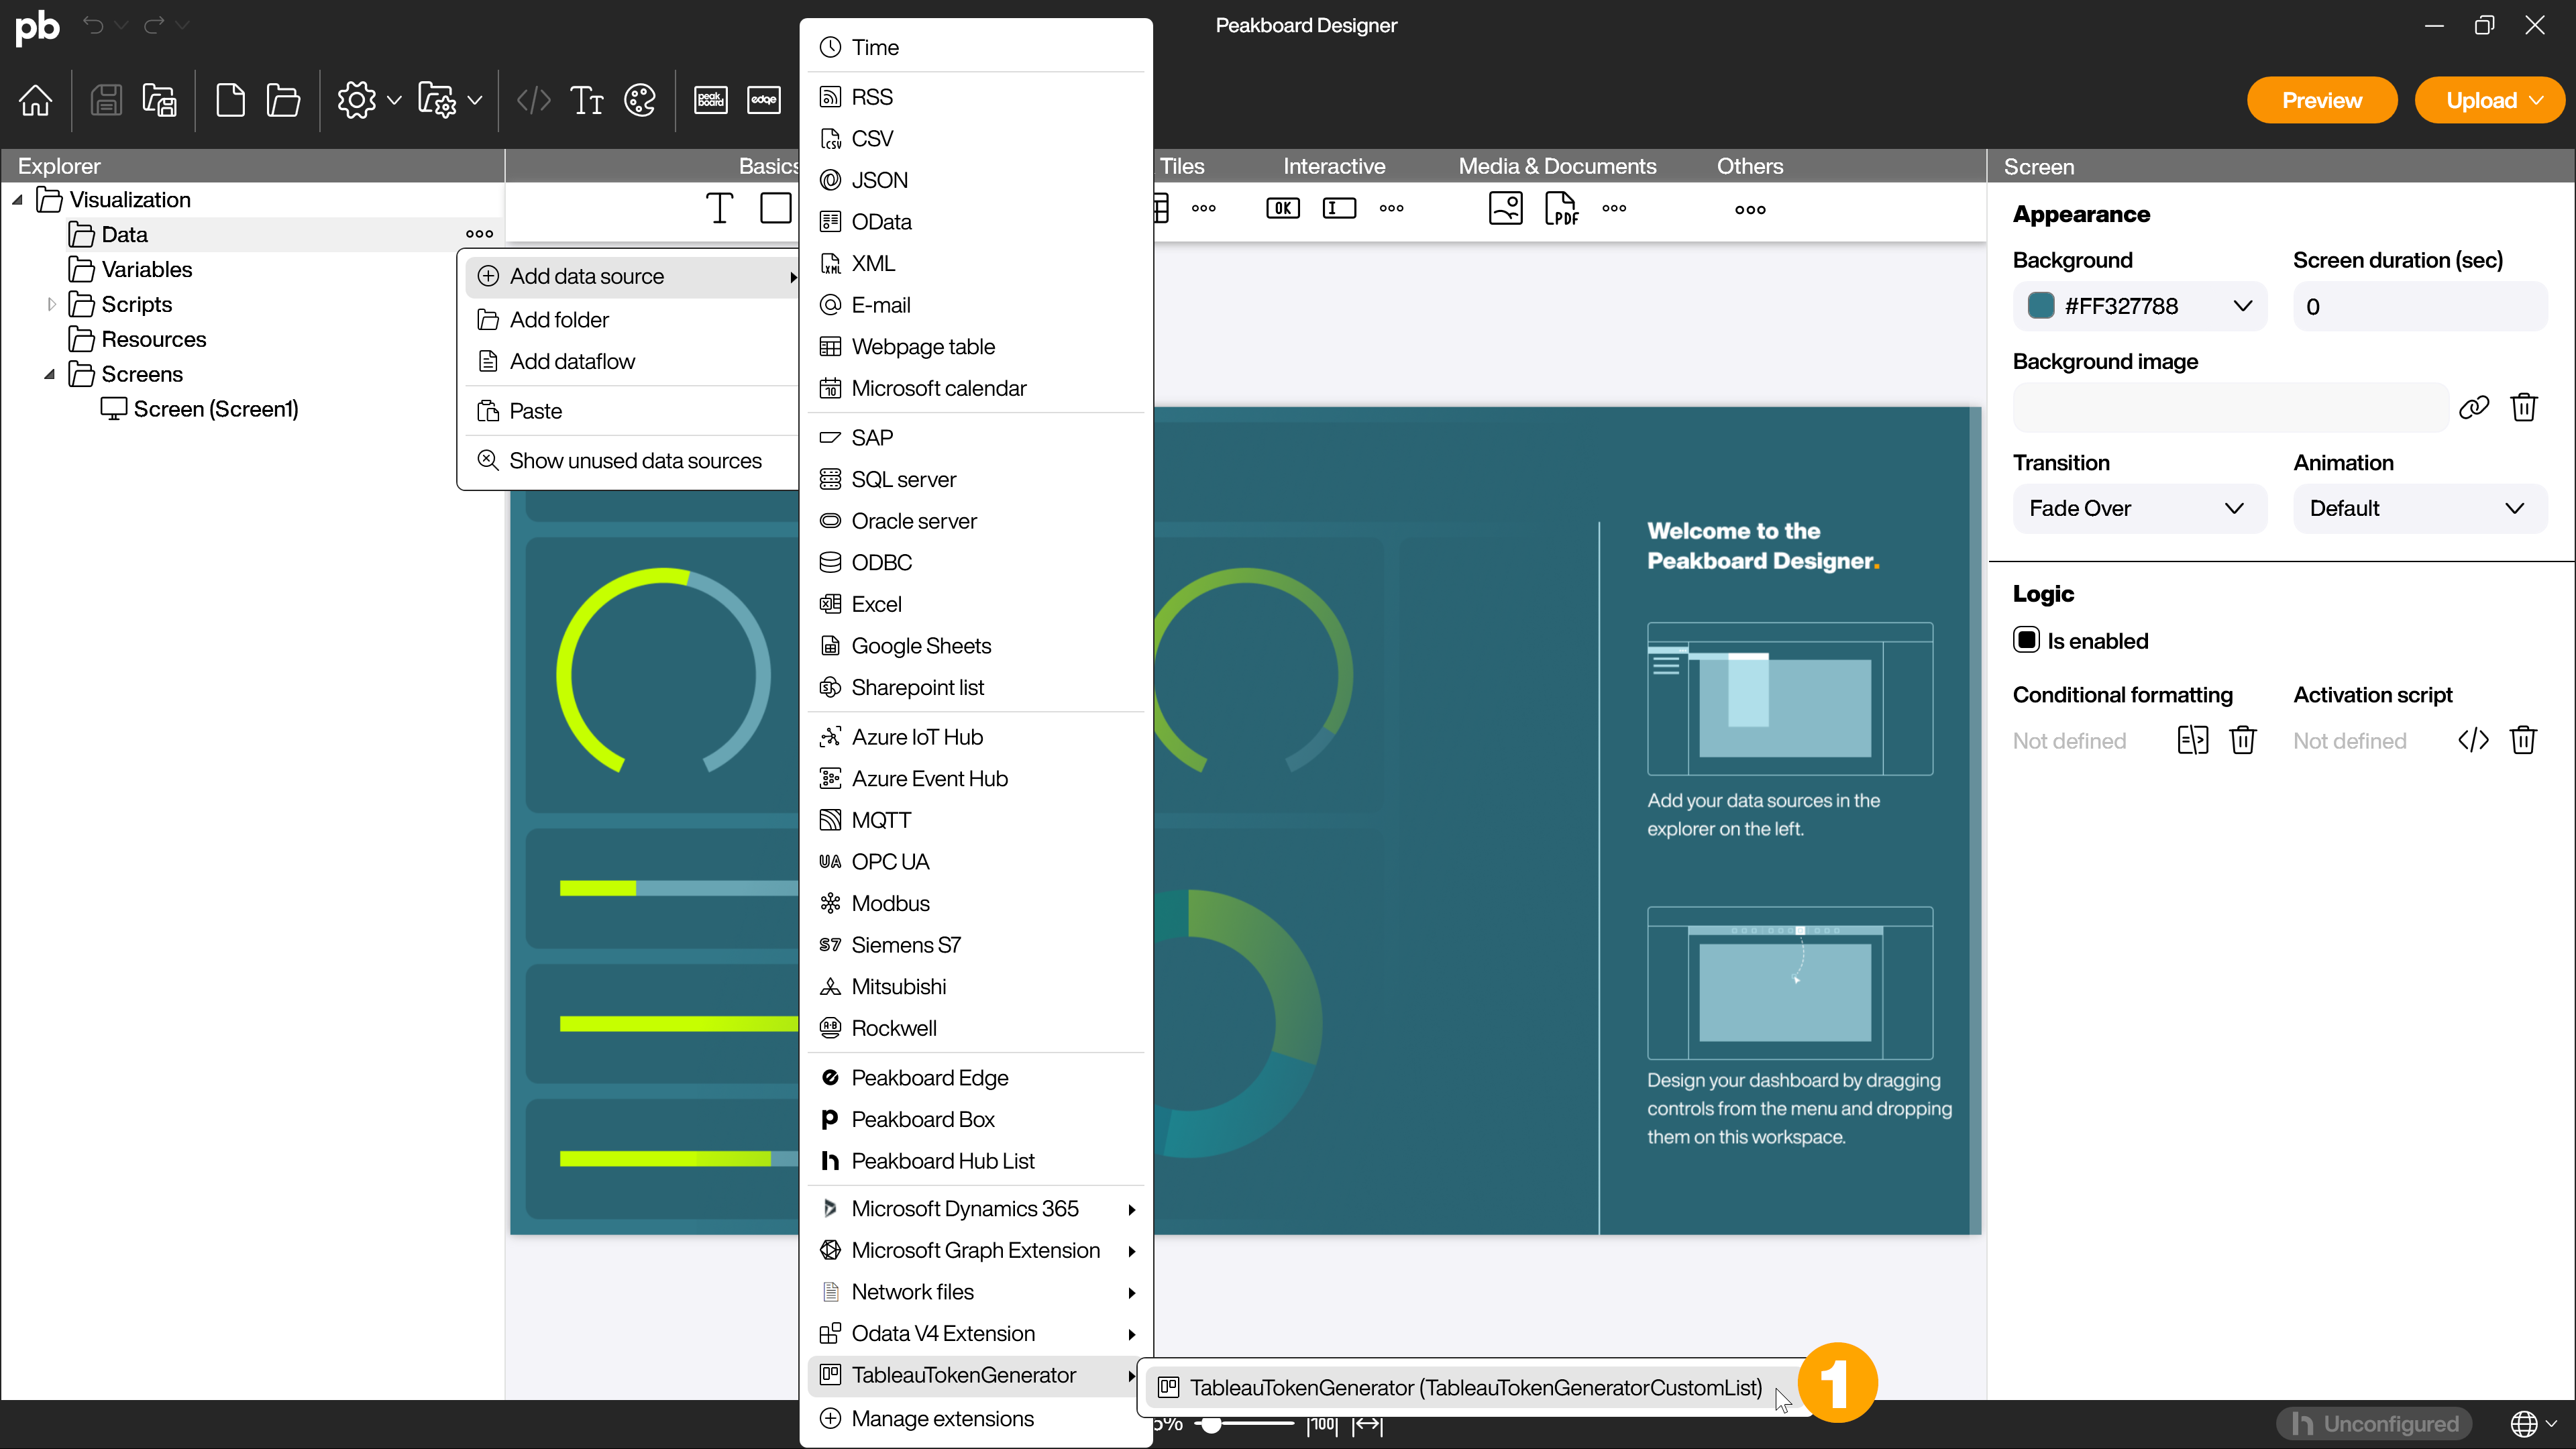
Add the Tableau token generator extension by right-clicking on [Data], [Add data source] and [Tableau token generator] (1).
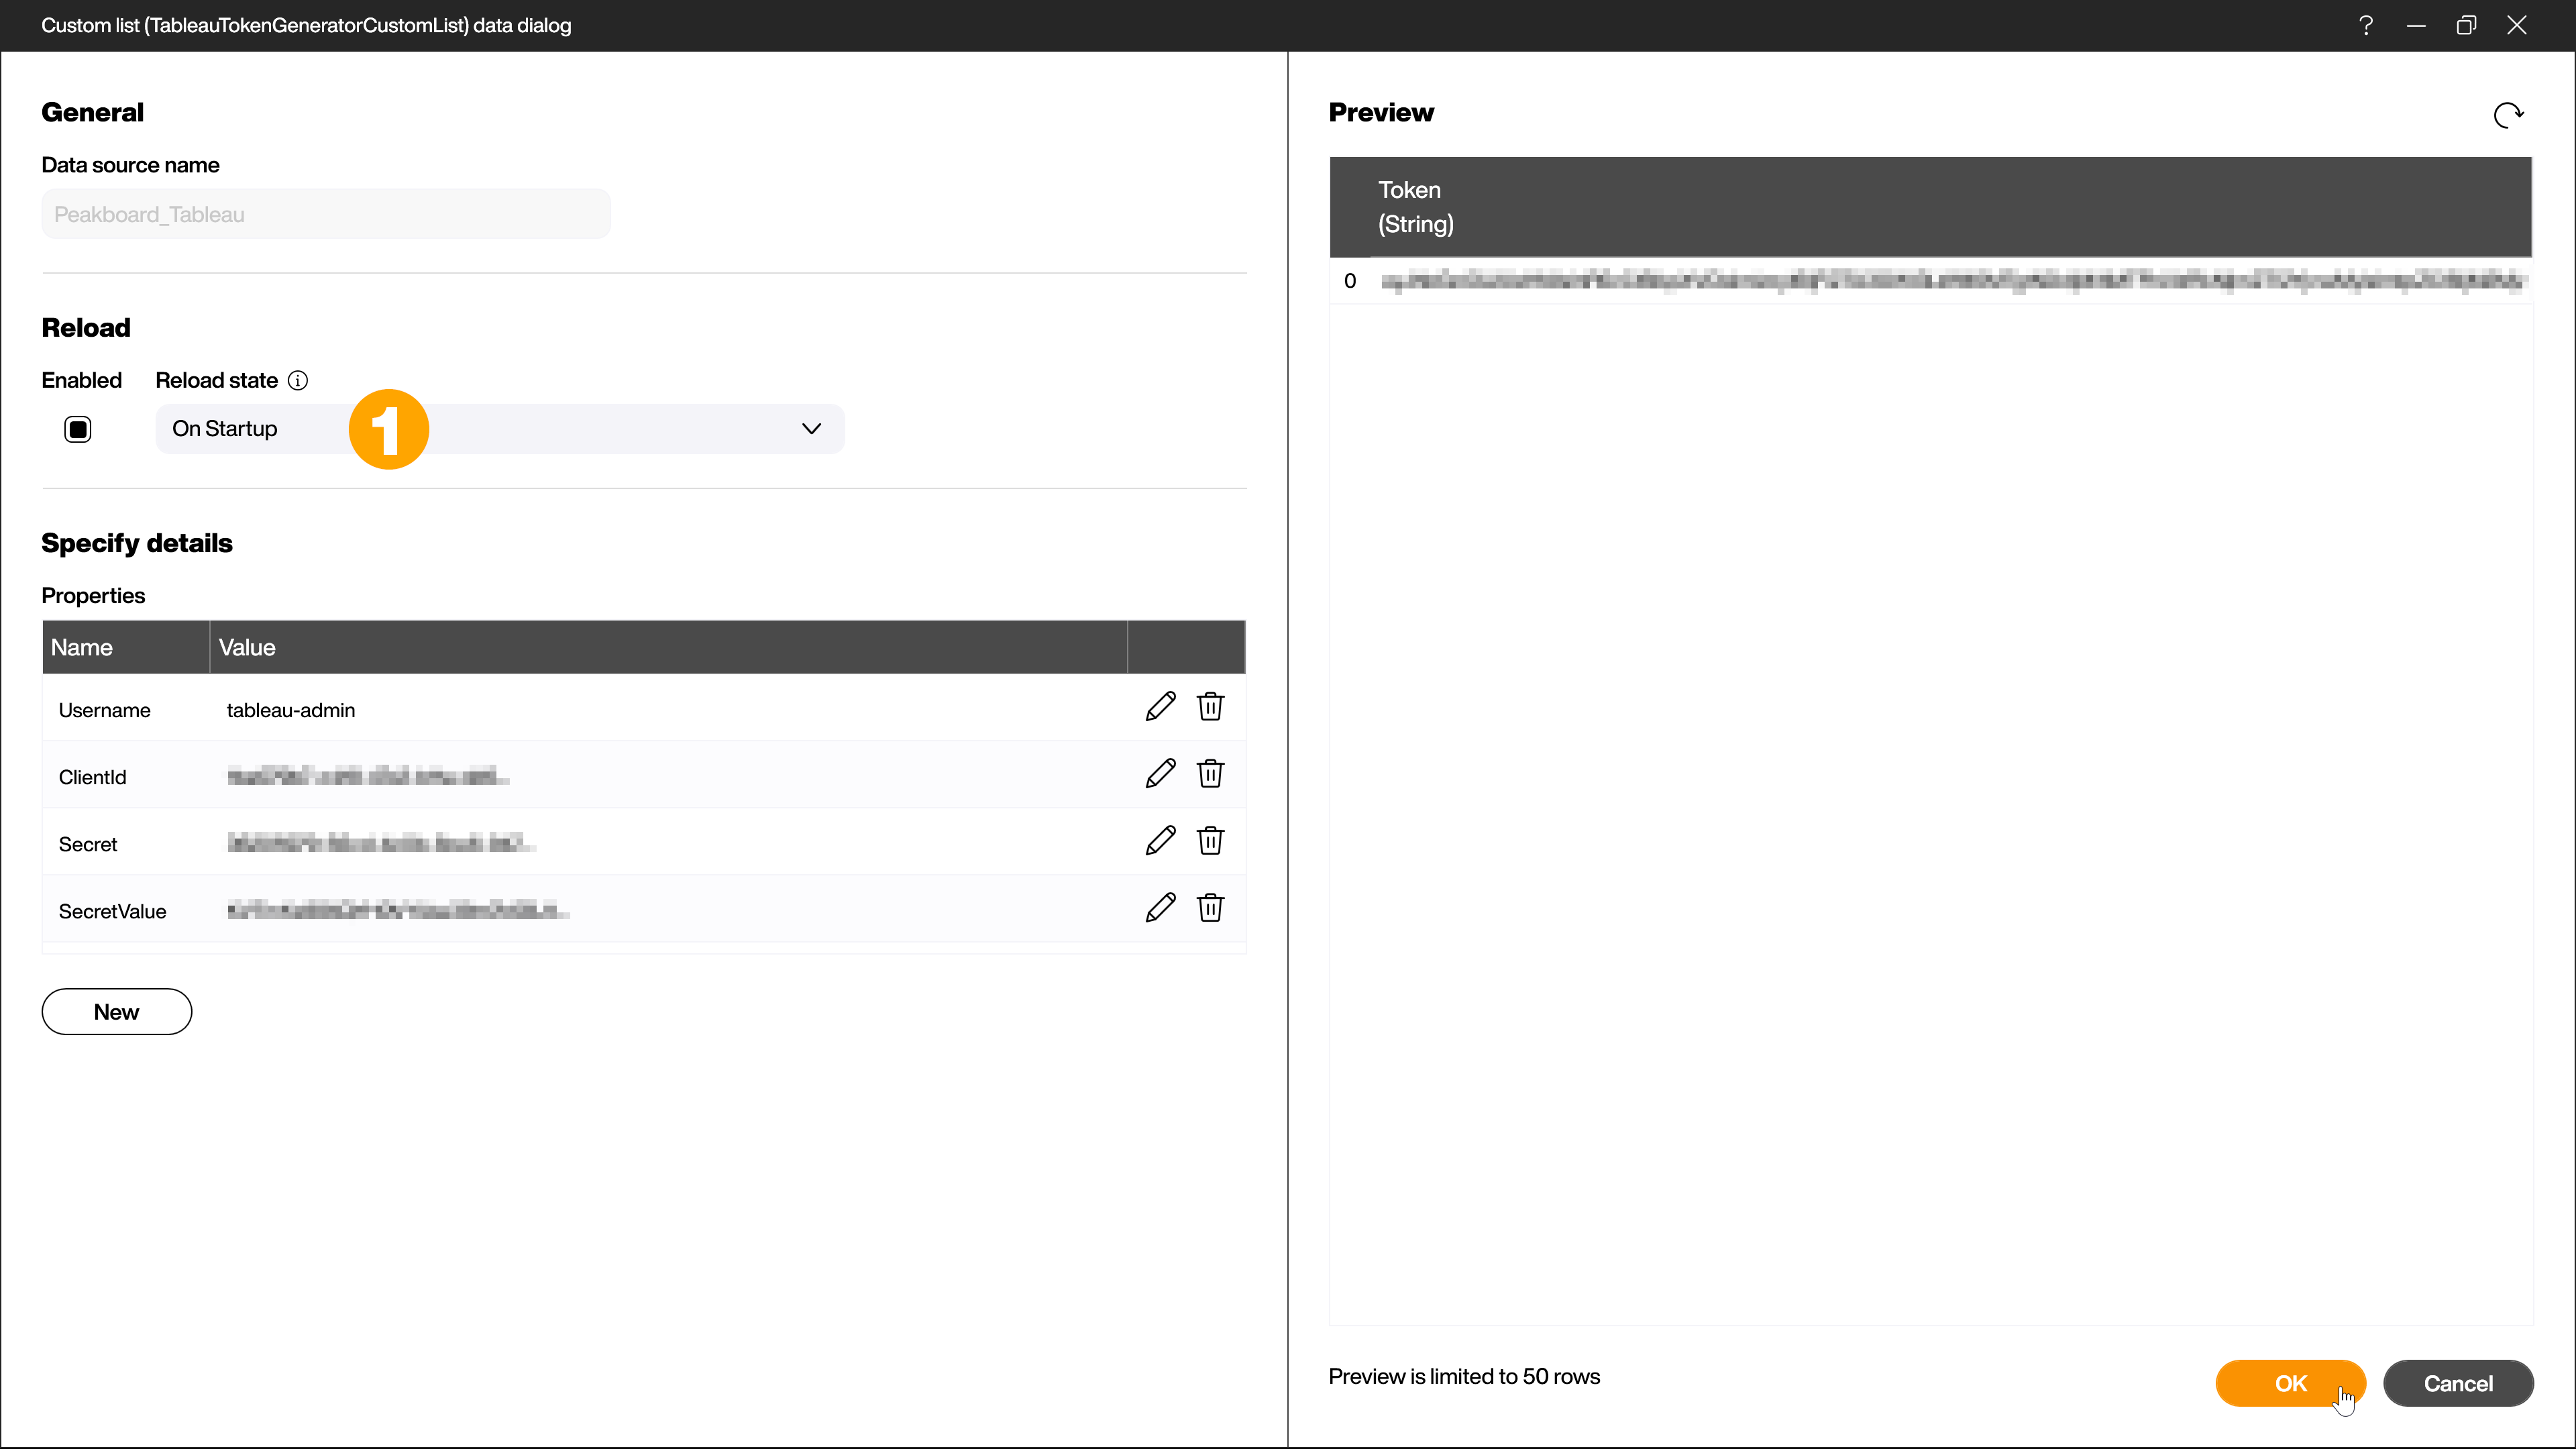
Give the data source a name (1). Then fill the fields in the [Specify details] area with the data from the client secret of the connected app from Tableau as follows.
| Name | Value |
|---|---|
| Username | Username from the Tableau account settings (2) |
| ClientId | Client ID from the overview page of the connected apps in Tableau (3) |
| Secret | Secret ID from the overview page of the connected apps in Tableau (4) |
| SecretValue | Secret value from the overview page of the connected apps in Tableau (5) |
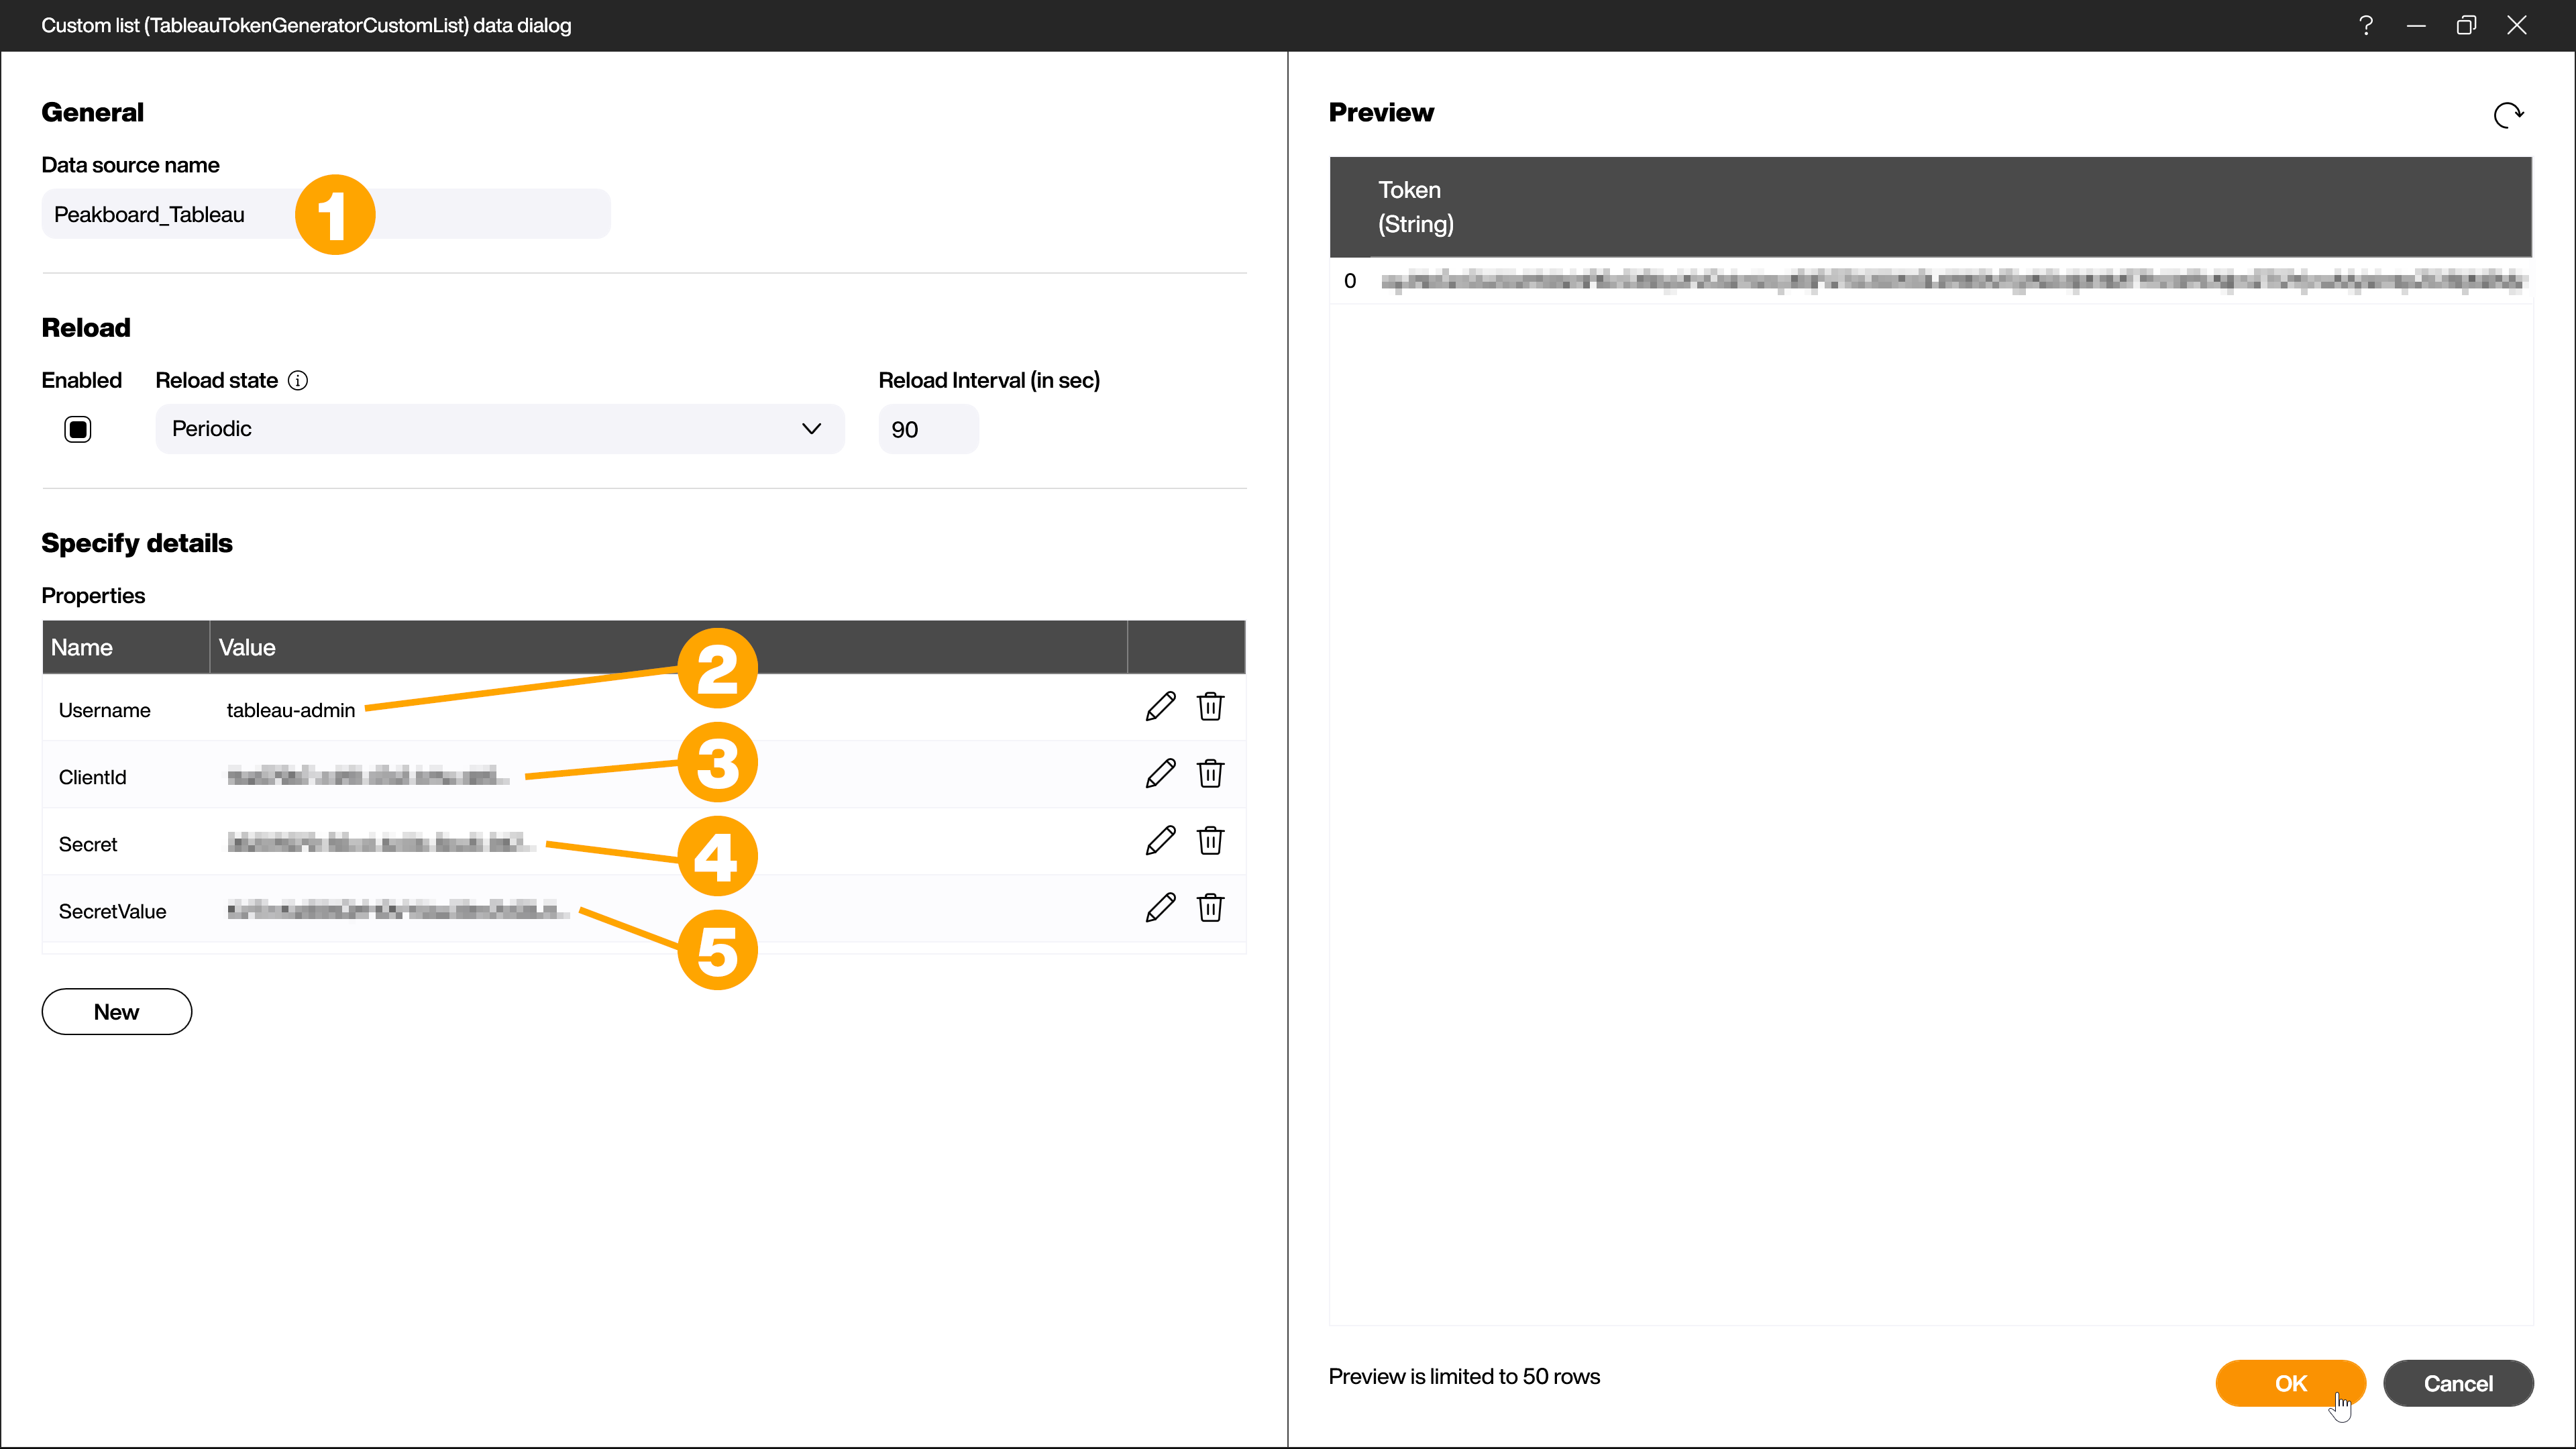
Use [Load data] to generate the token and confirm the creation of the data source with [OK].
Add required variables
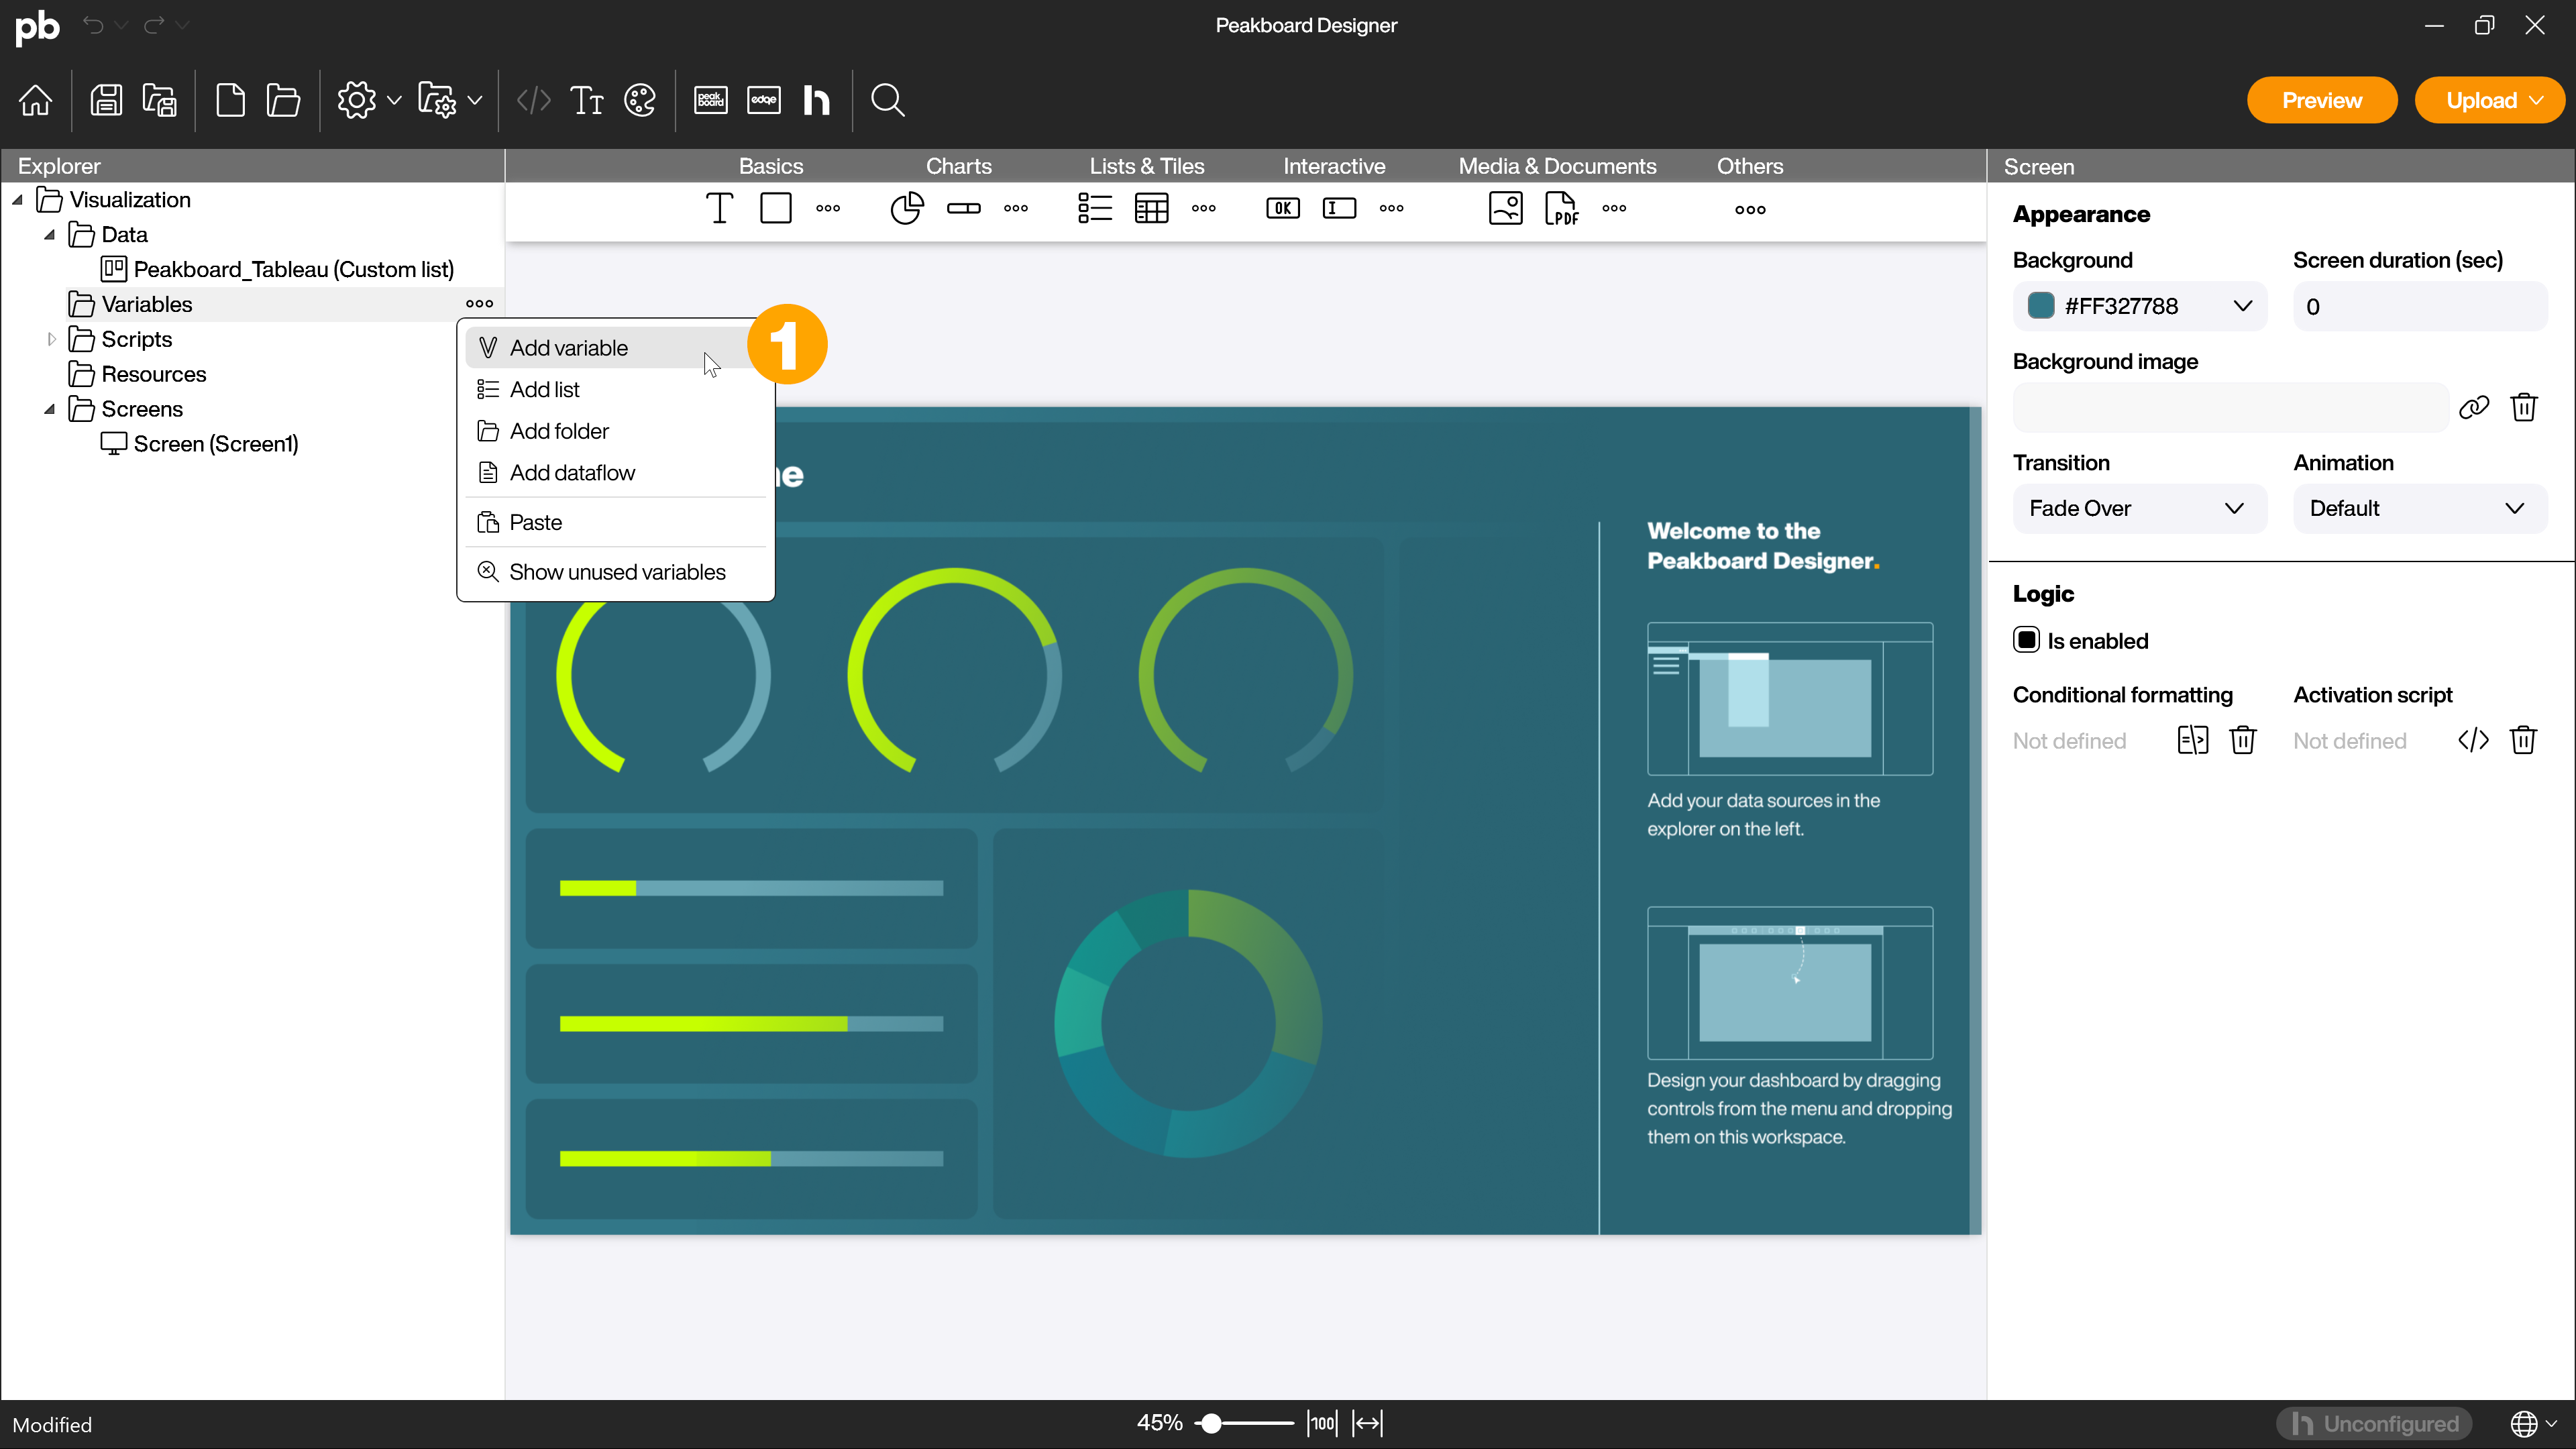
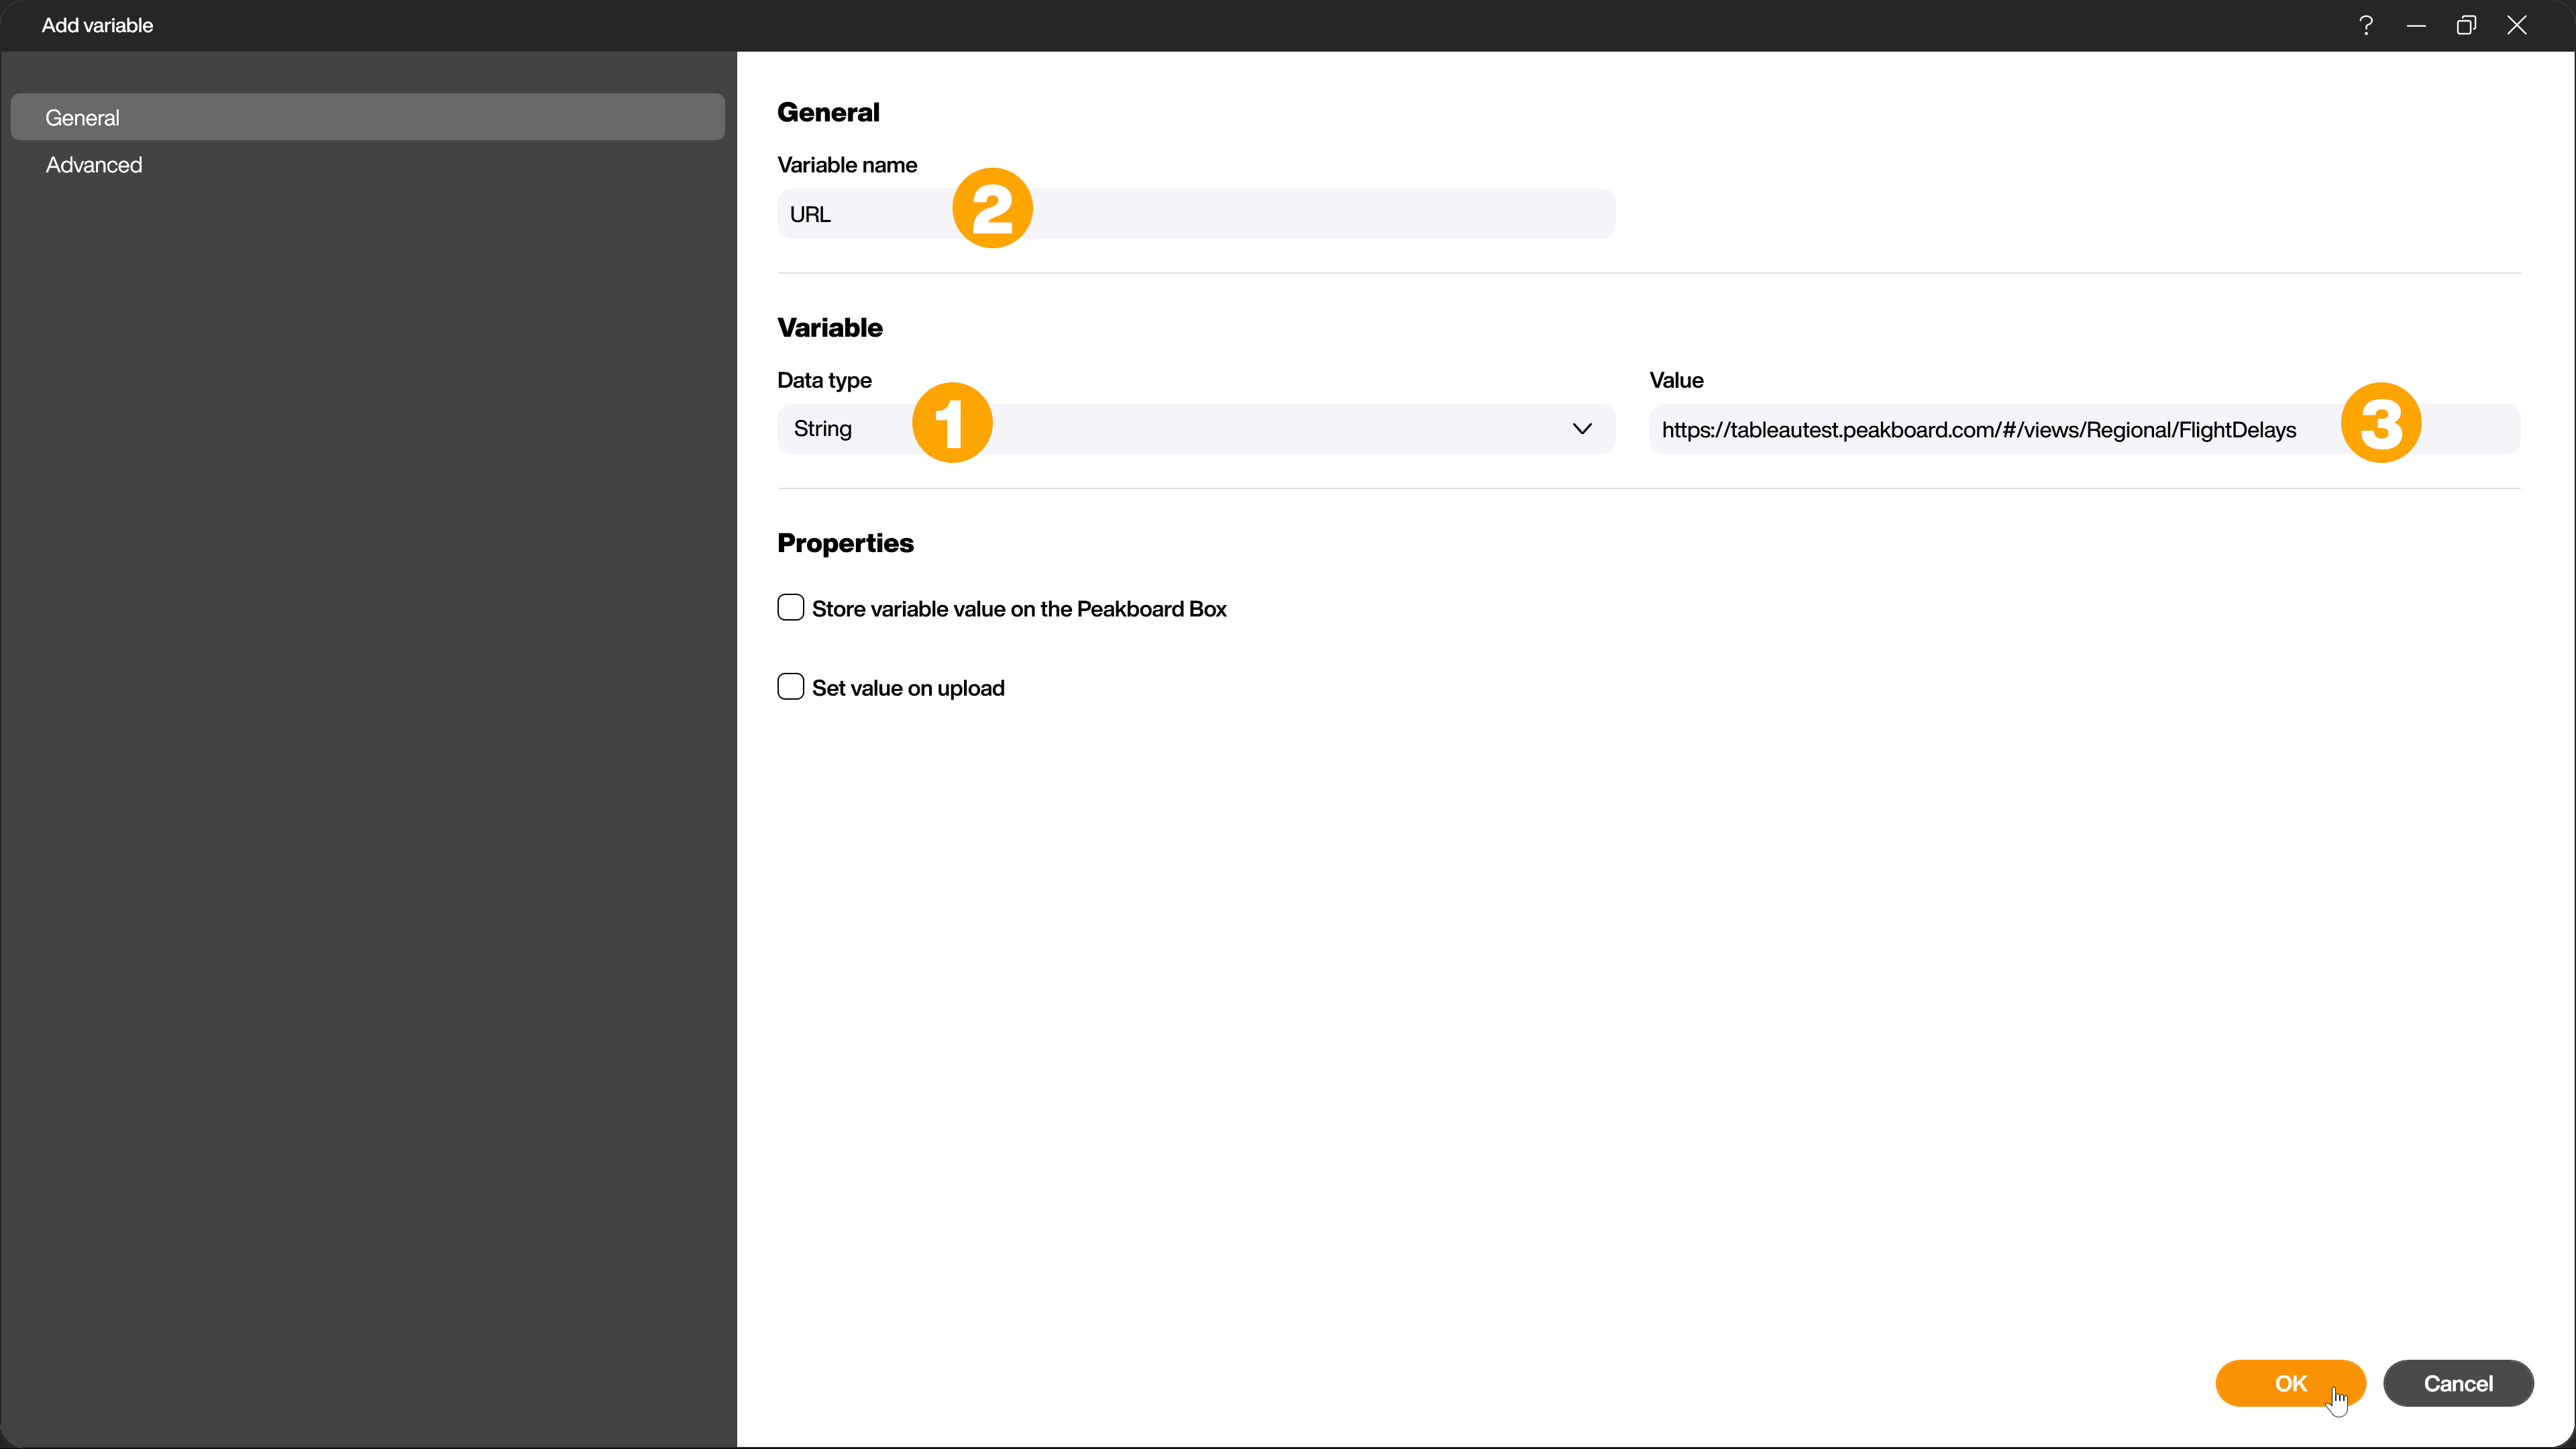
Two global variables are required for the script, the servername and the URL of the desired Tableau dashboard. The variables could also be integrated into the script as fixed elements, but changing them later would be much more complex. Right-click on [Variables] and [Add variable] (1) to add the first variable.
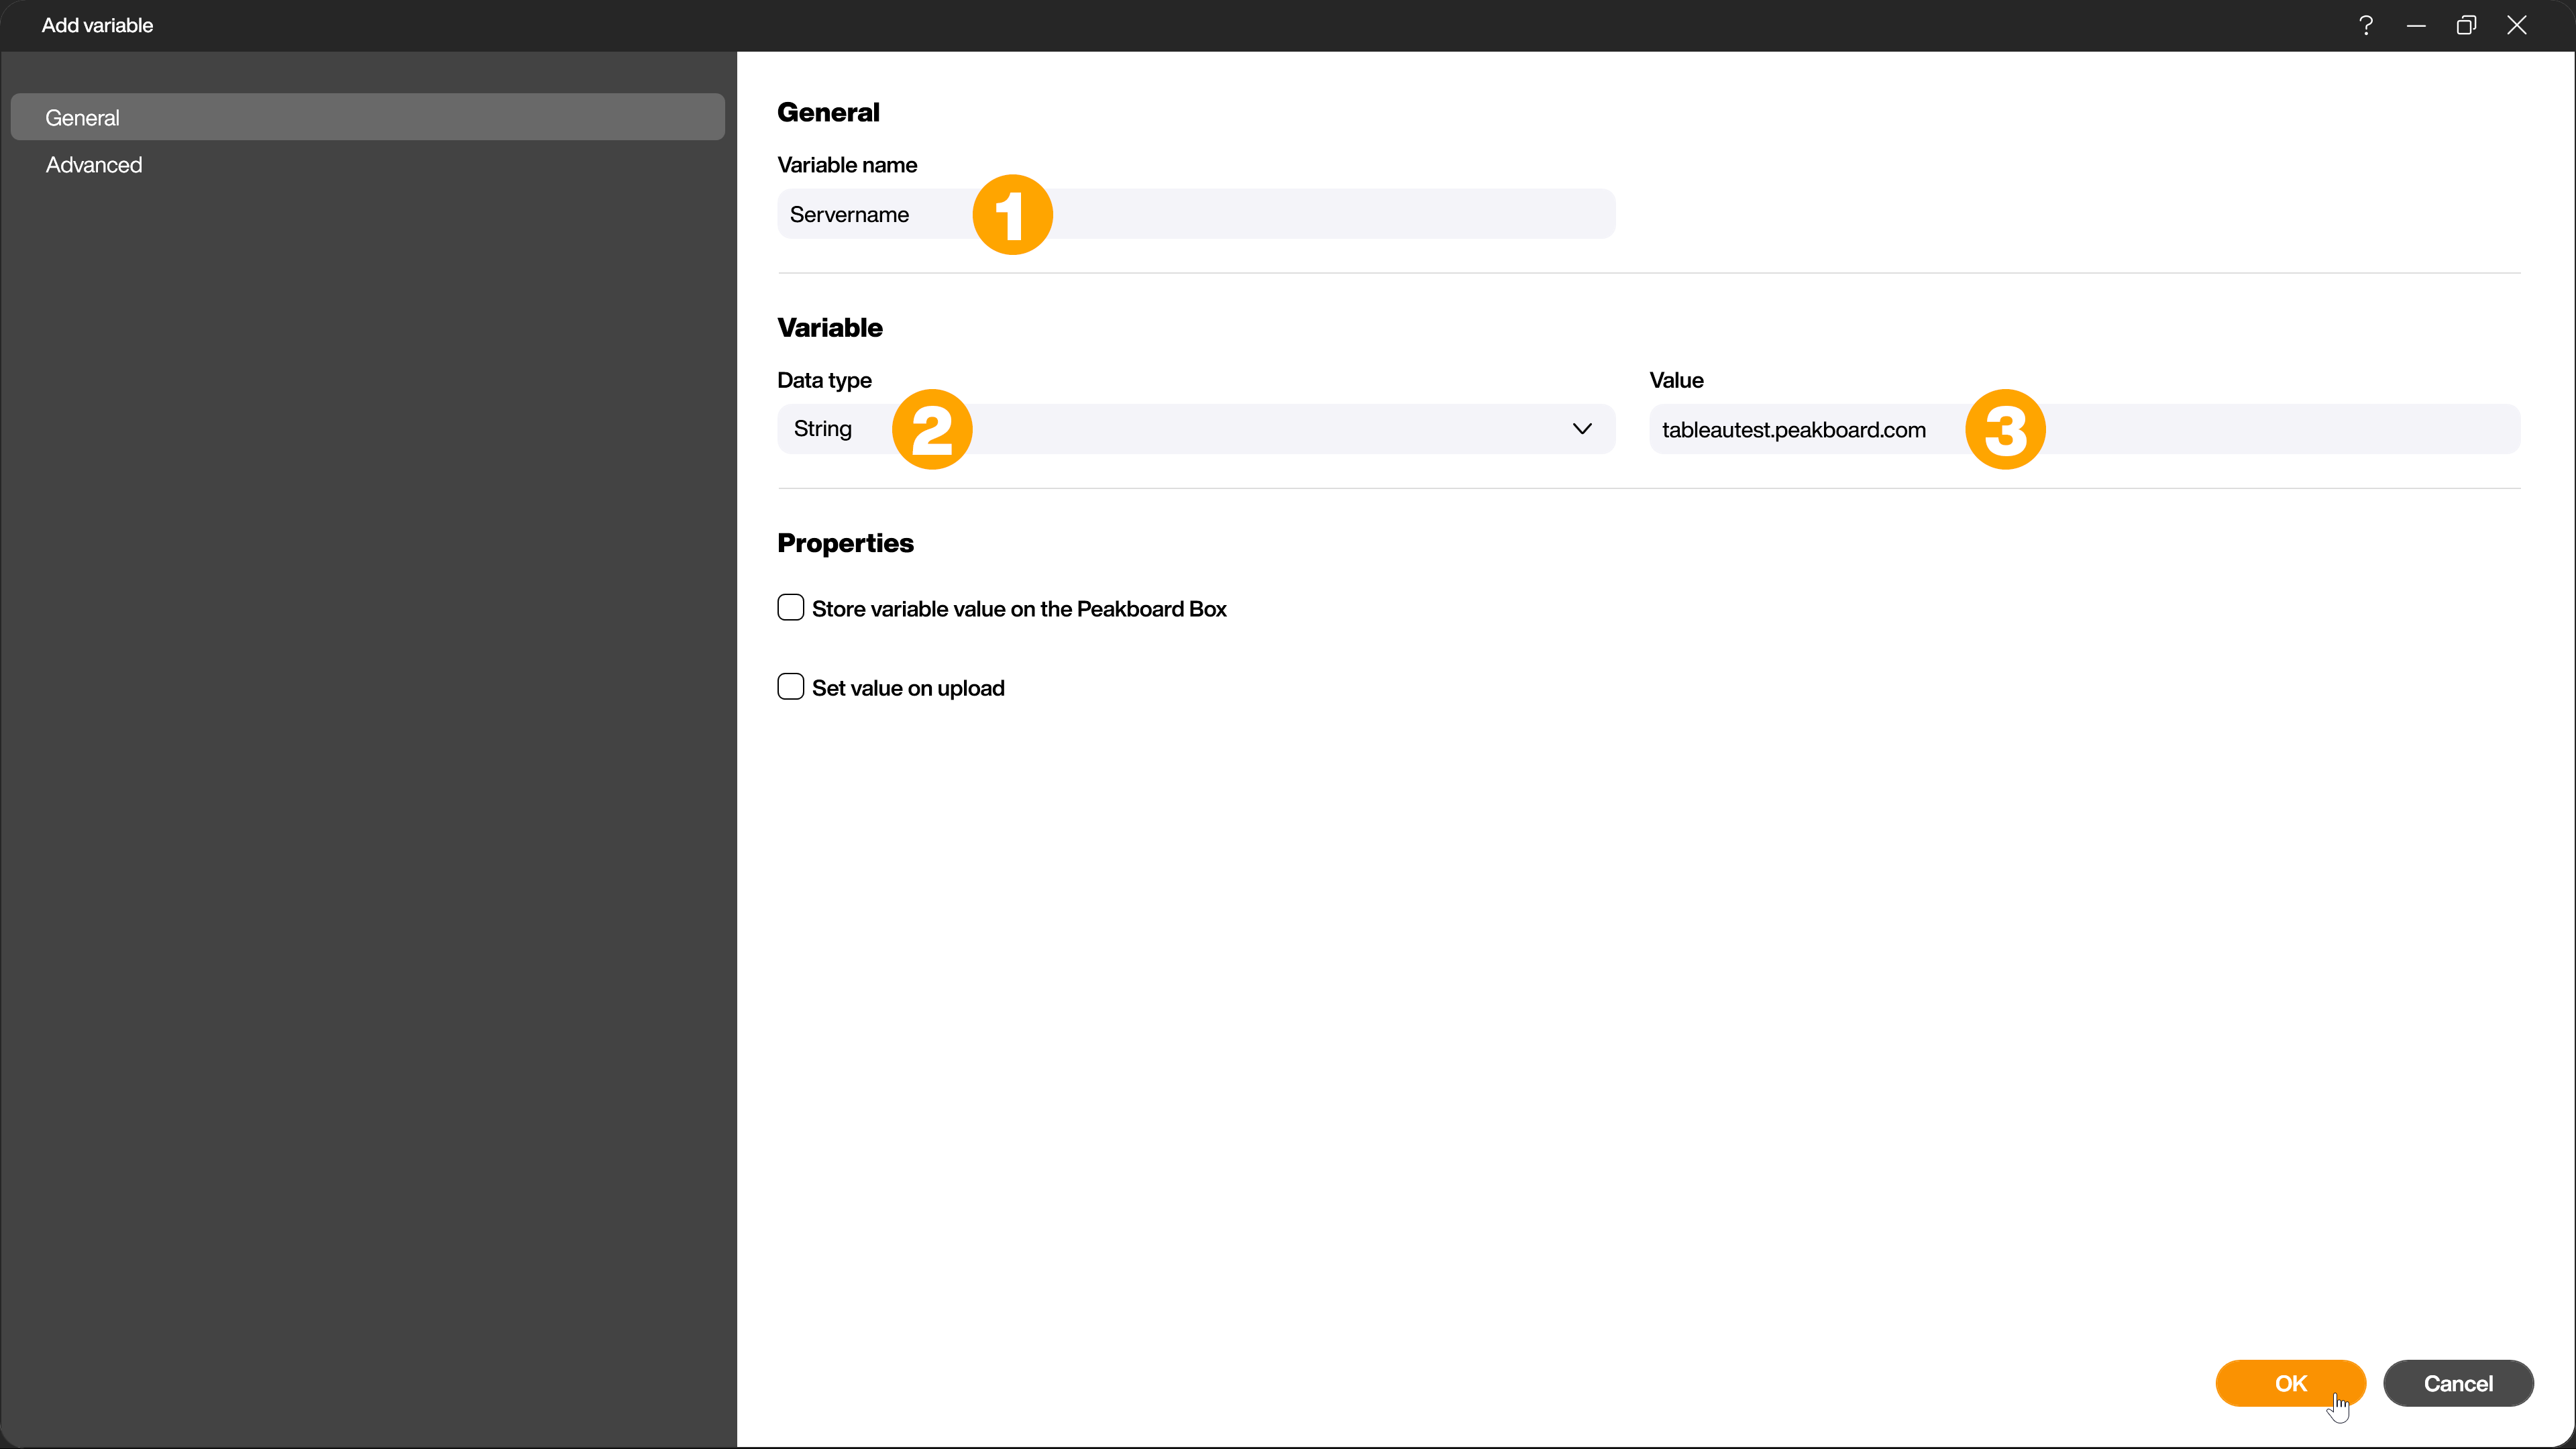
Give it the name [Servername] (1), for example, select the data type string (2) and enter the highlighted part of the URL of the Tableau dashboard as the value (3).

Create another variable of data type string (1). Name the variable [URL] (2) or something similar and give it the full URL of the Tableau dashboard (3) as the value.

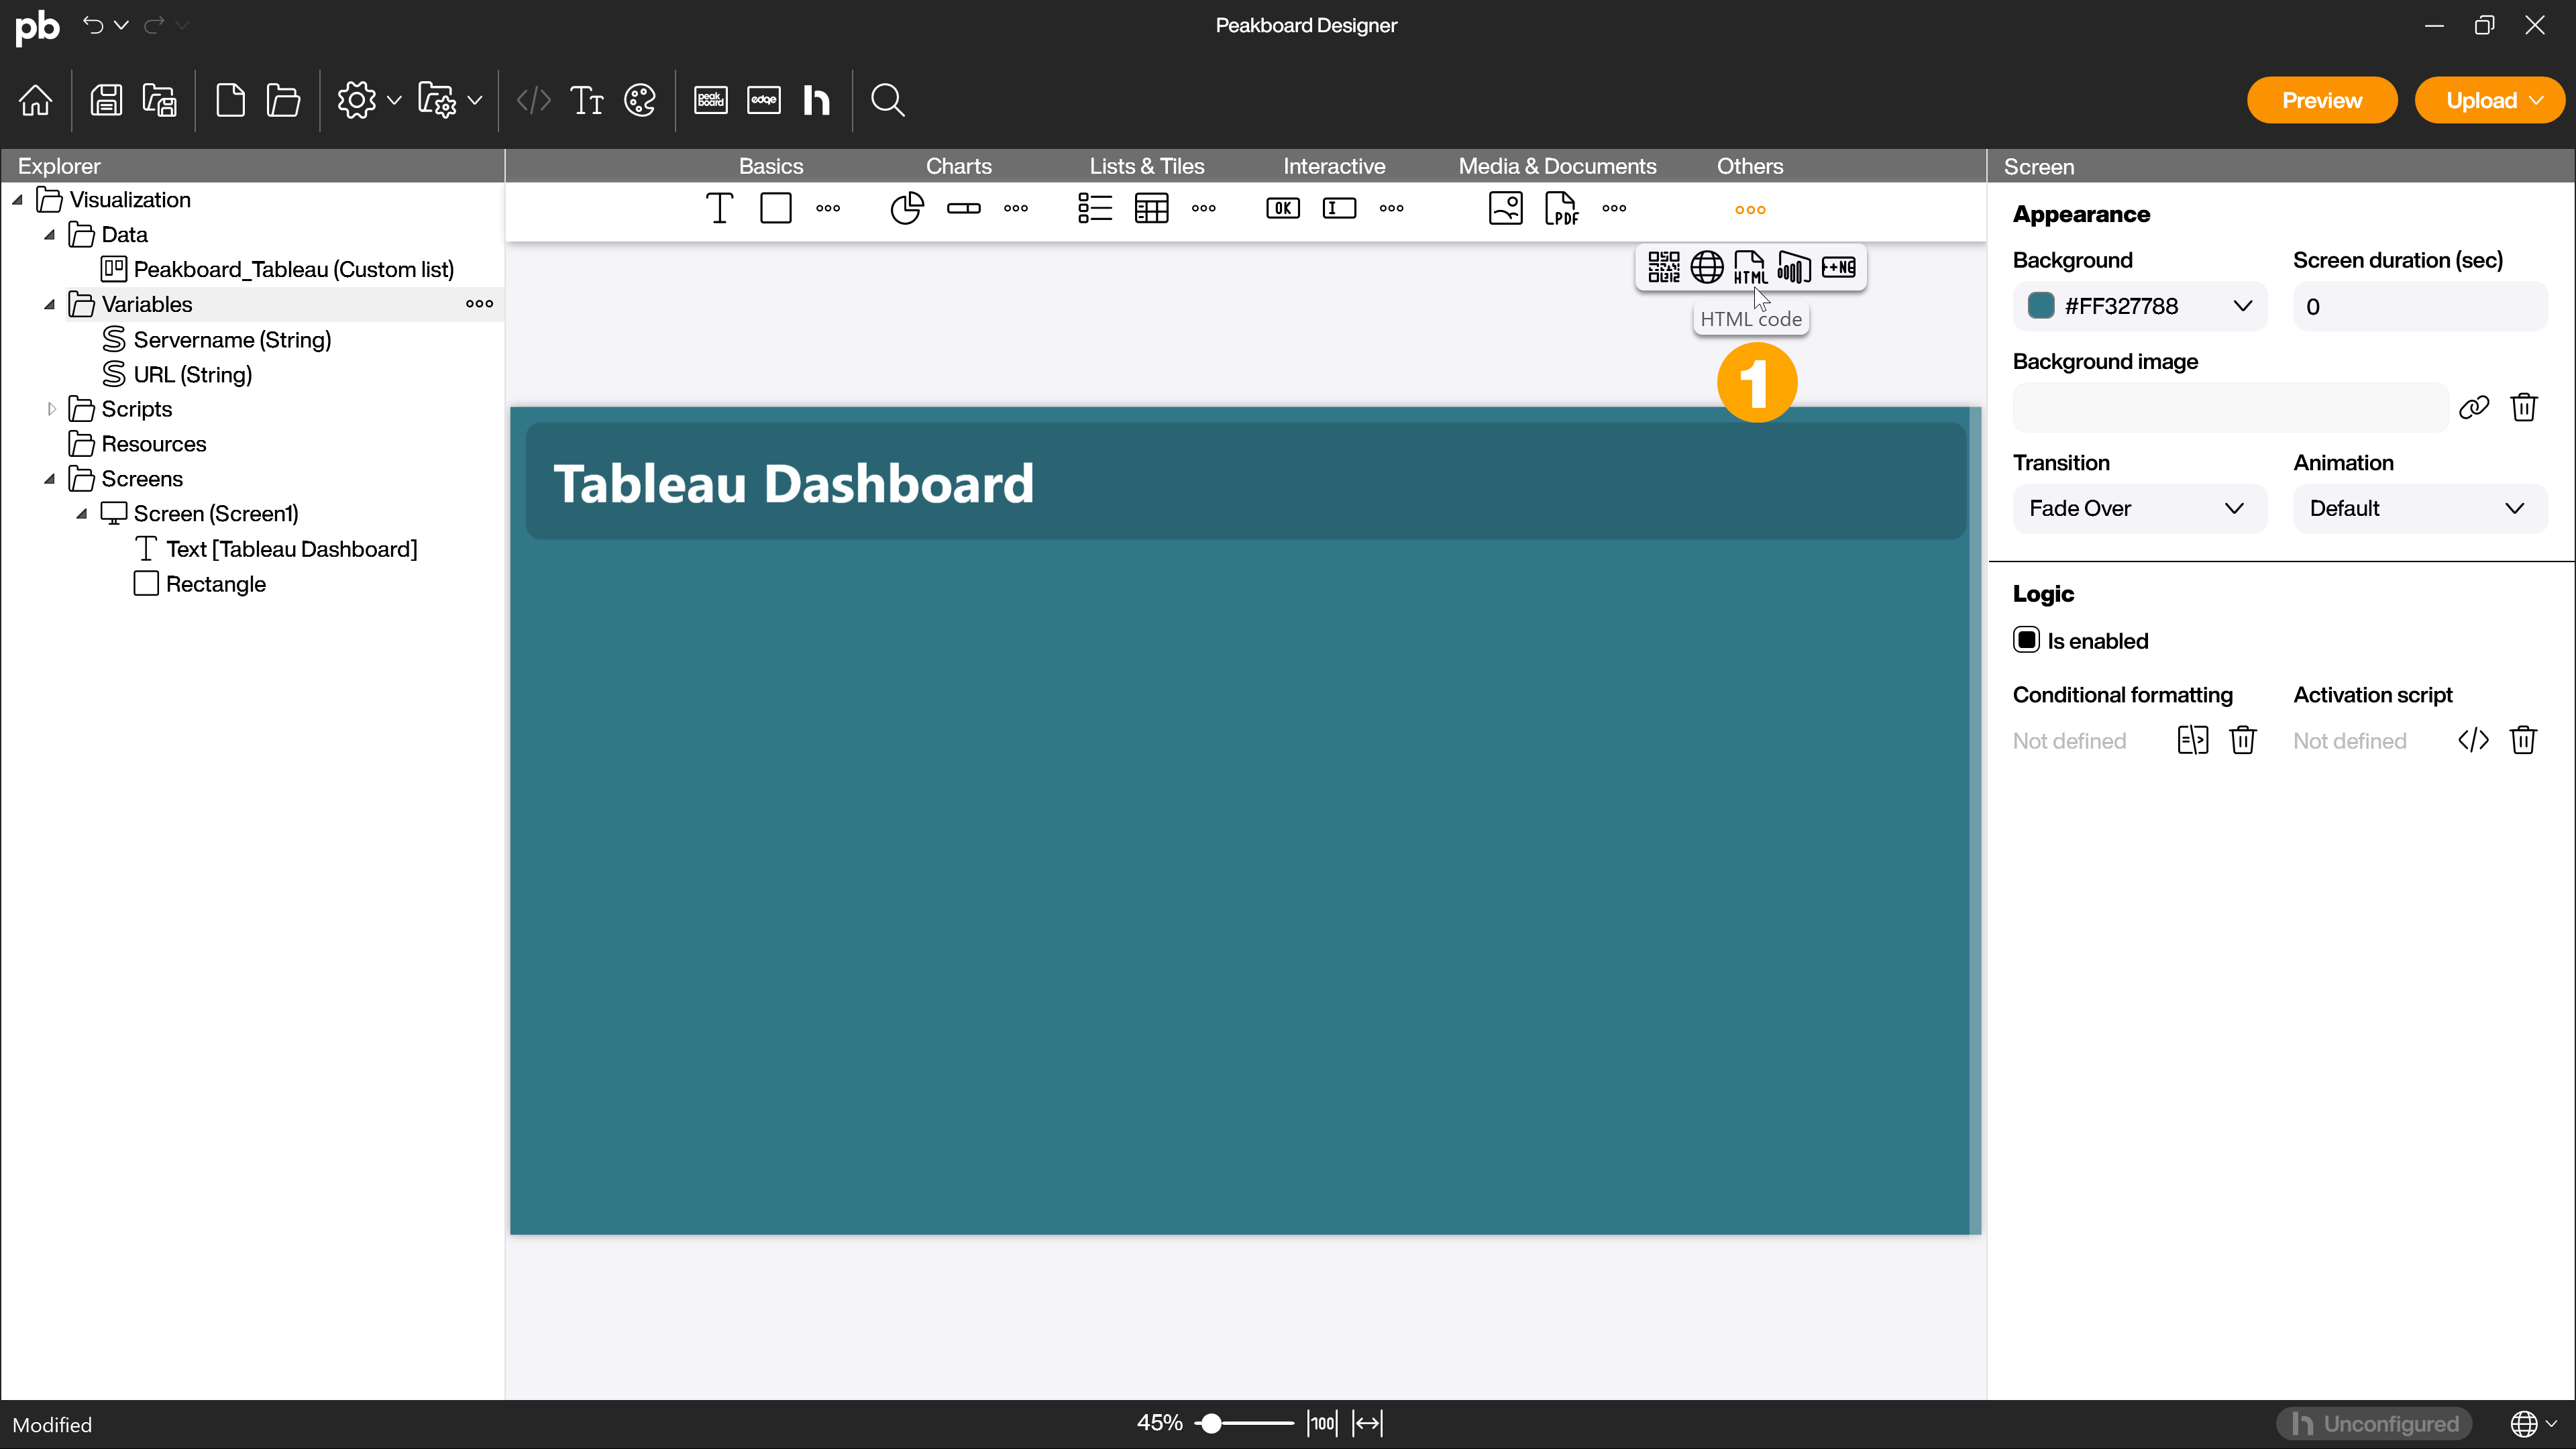
Set up HTML code control
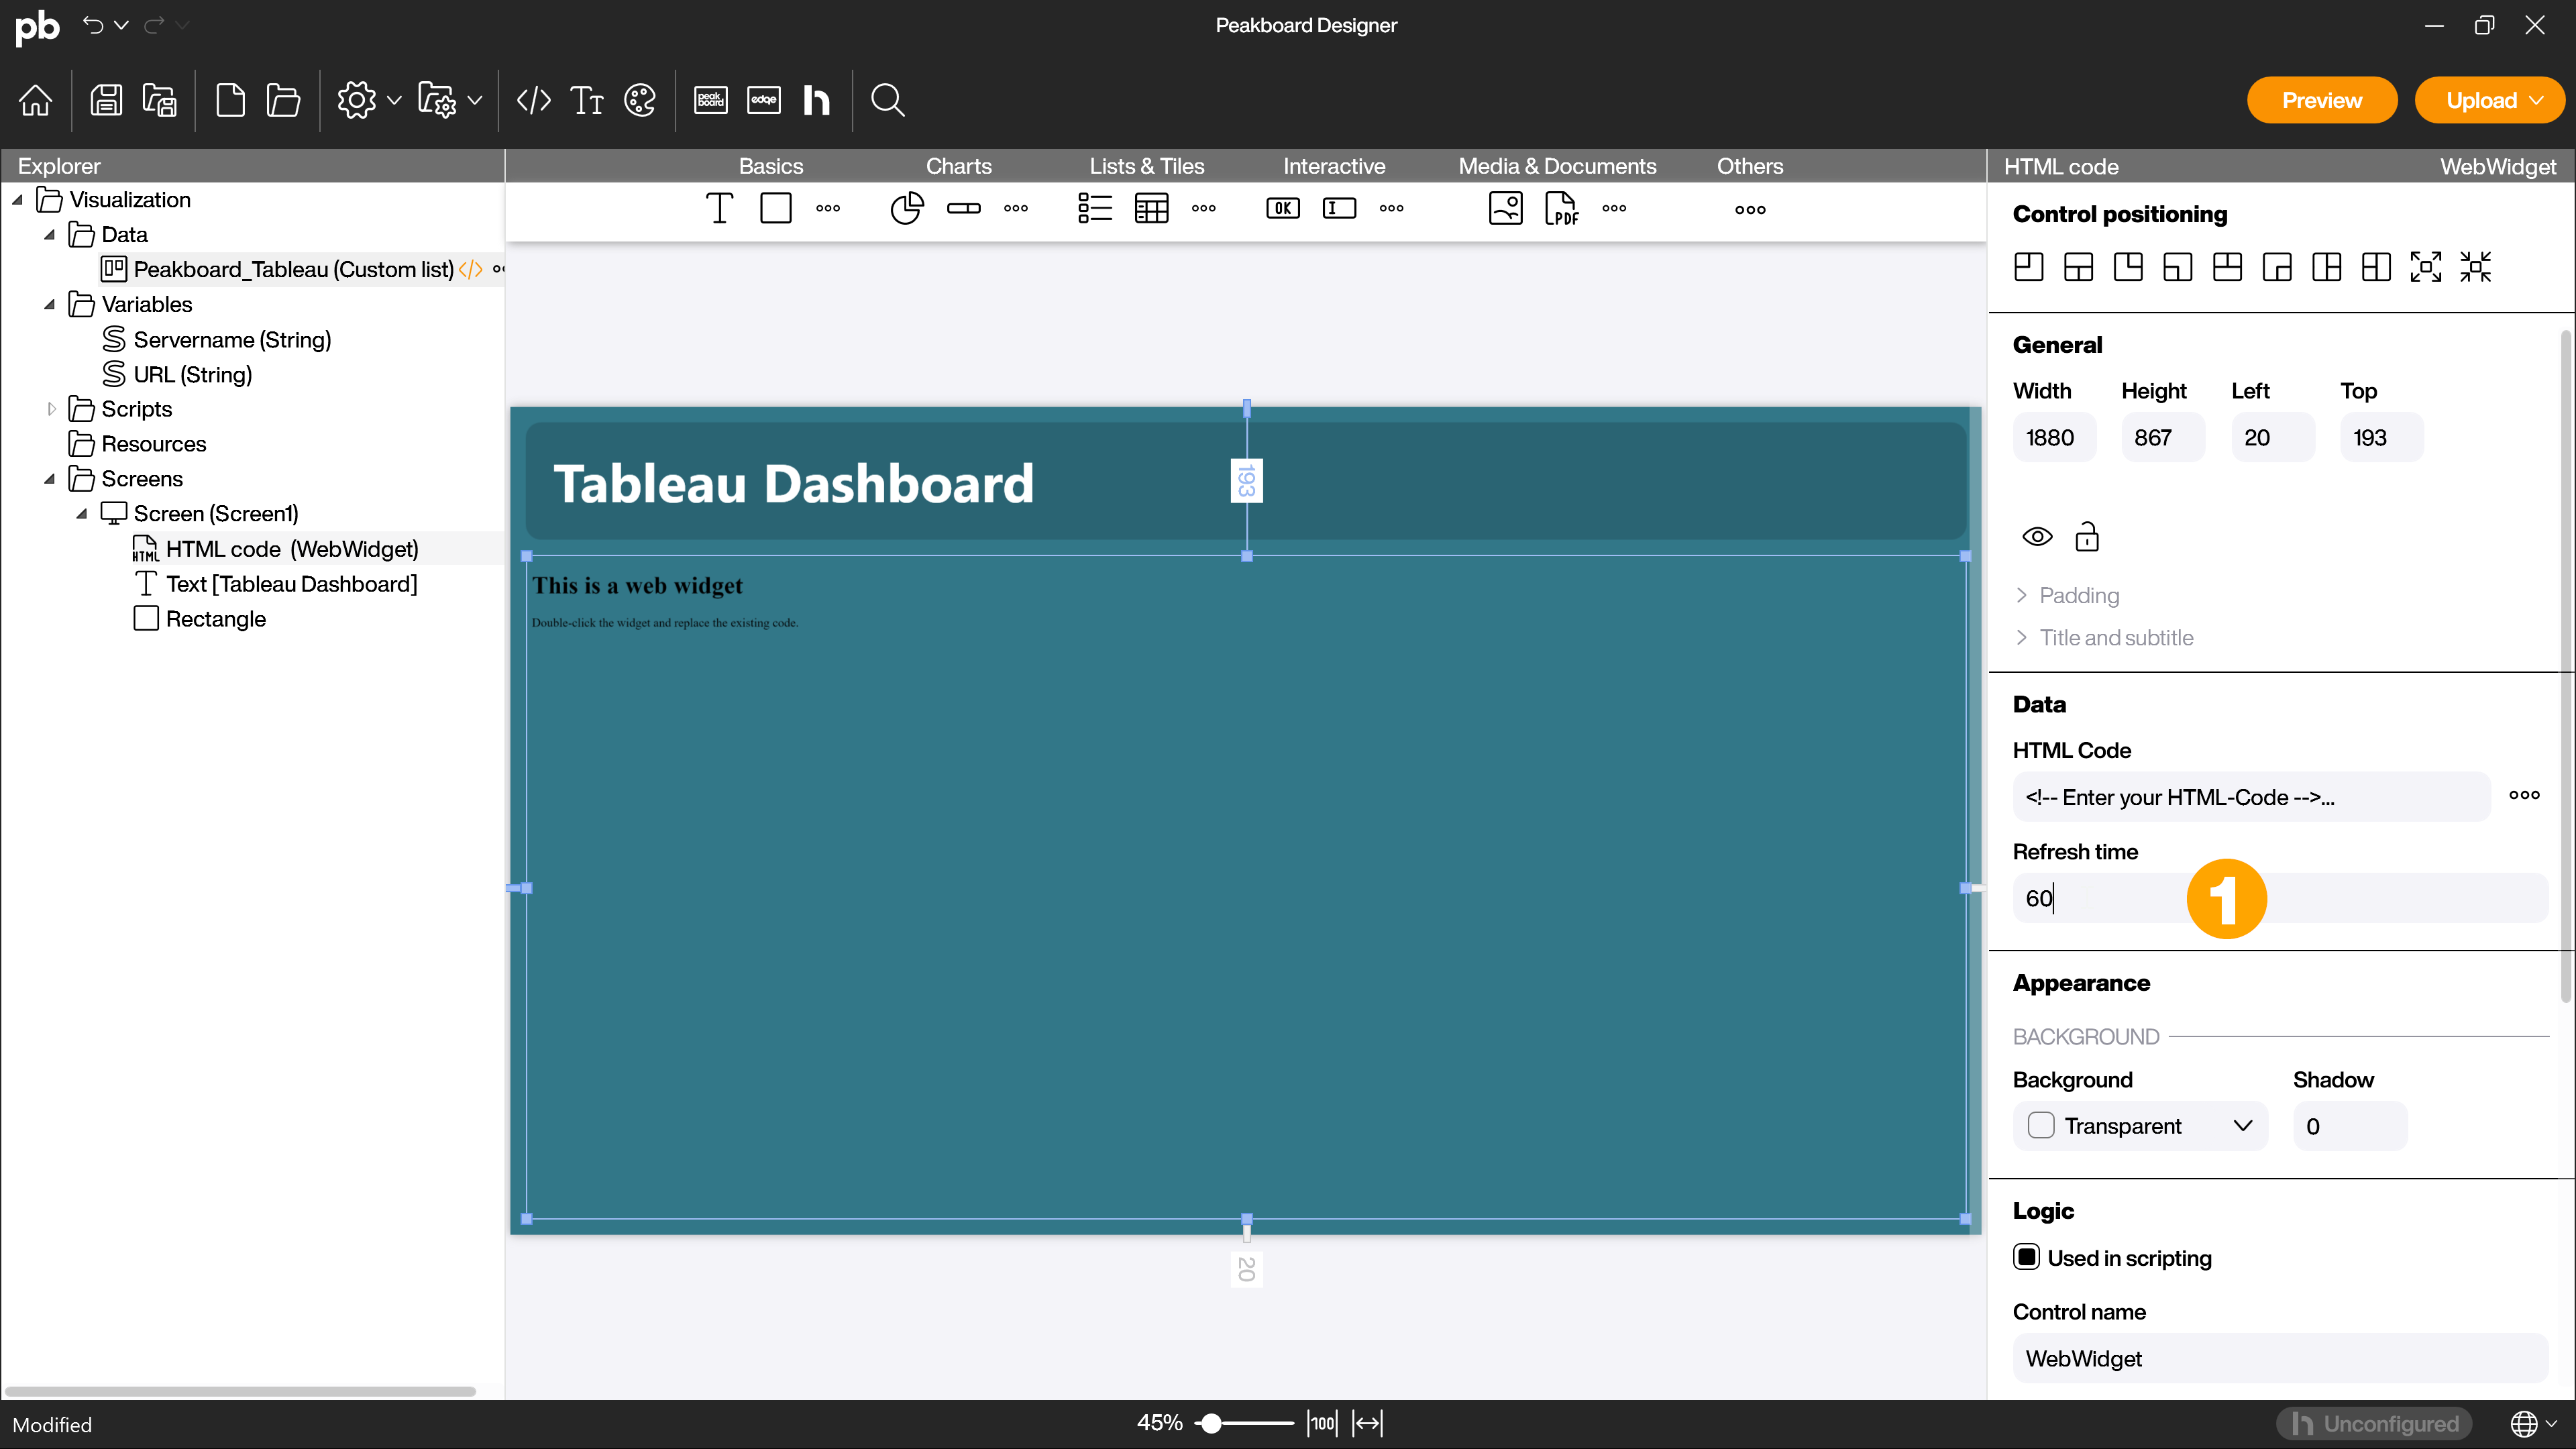
Drag the HTML code control (1) from the [Other] area onto the workspace. You will later insert a dynamic HTML code into this. The control processes this code and displays the HTML-based Tableau Dashboard.
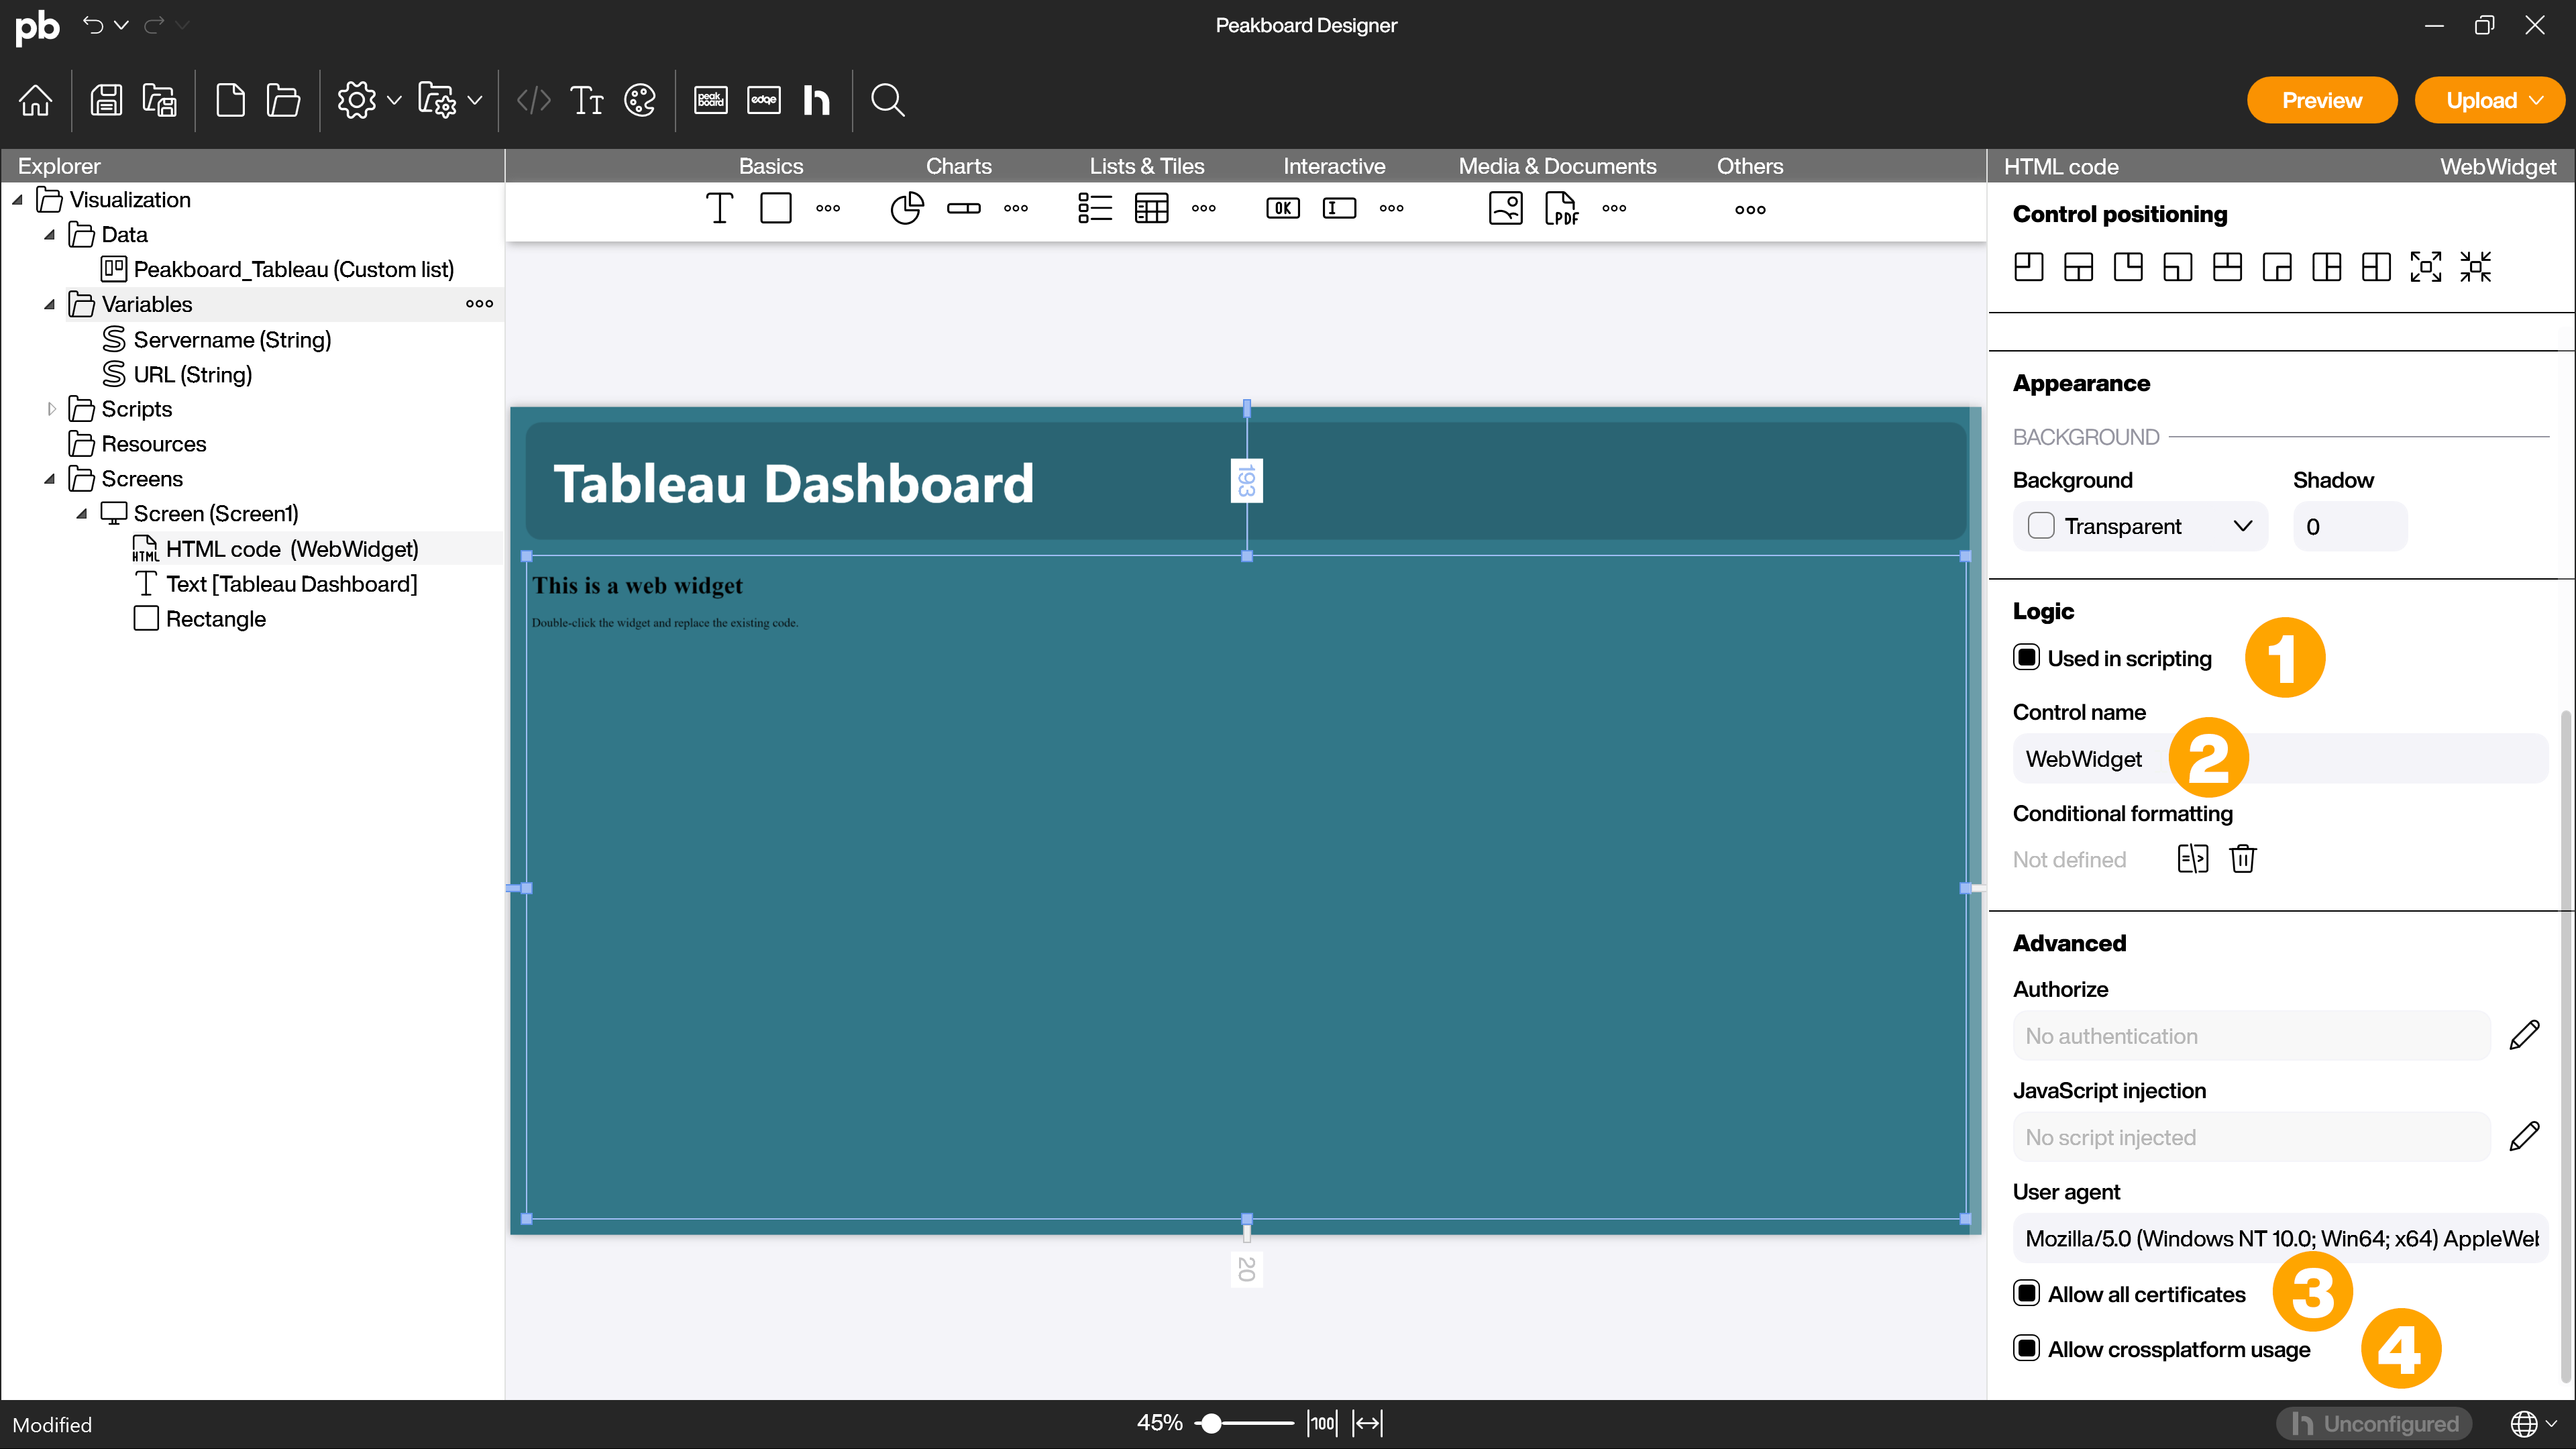
Activate the checkbox [Used in scripts] (1) in the [Logic] area and give the control a unique name (2), for example [WebWidget]. Also activate the checkboxes [Allow all certificates] (3) and [Allow cross-platform usage] (4)
Configure refreshed script
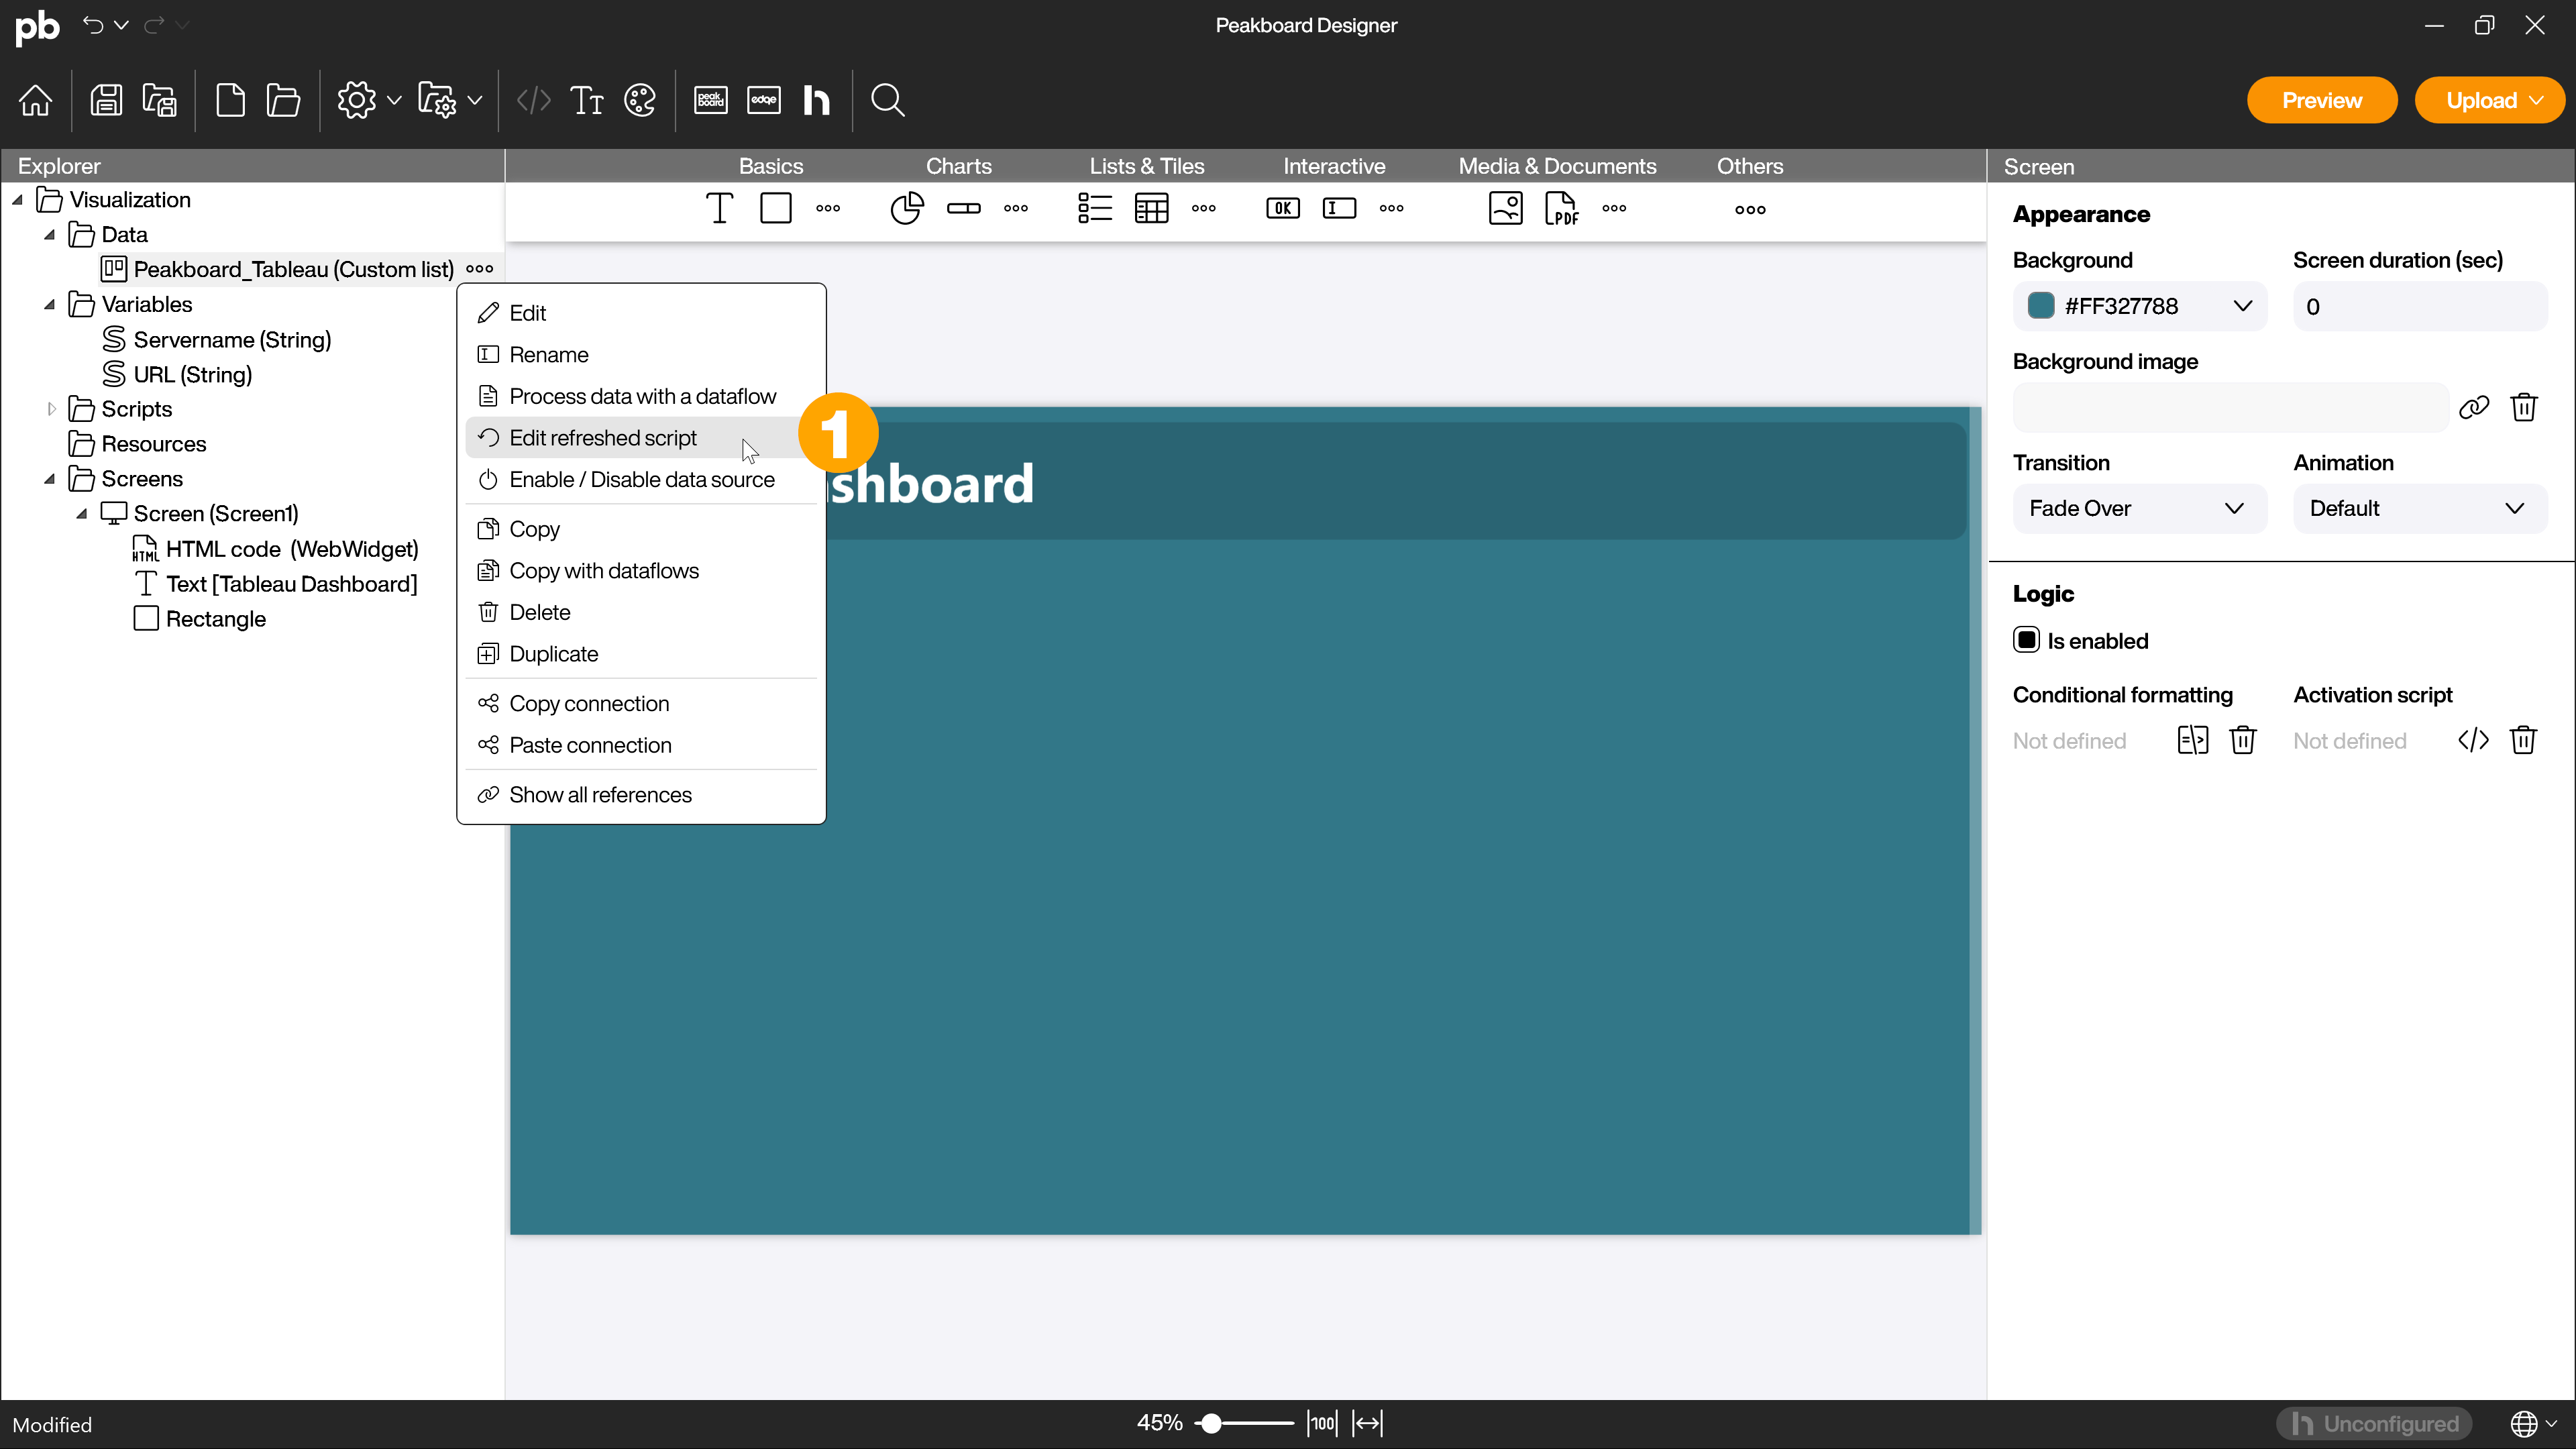
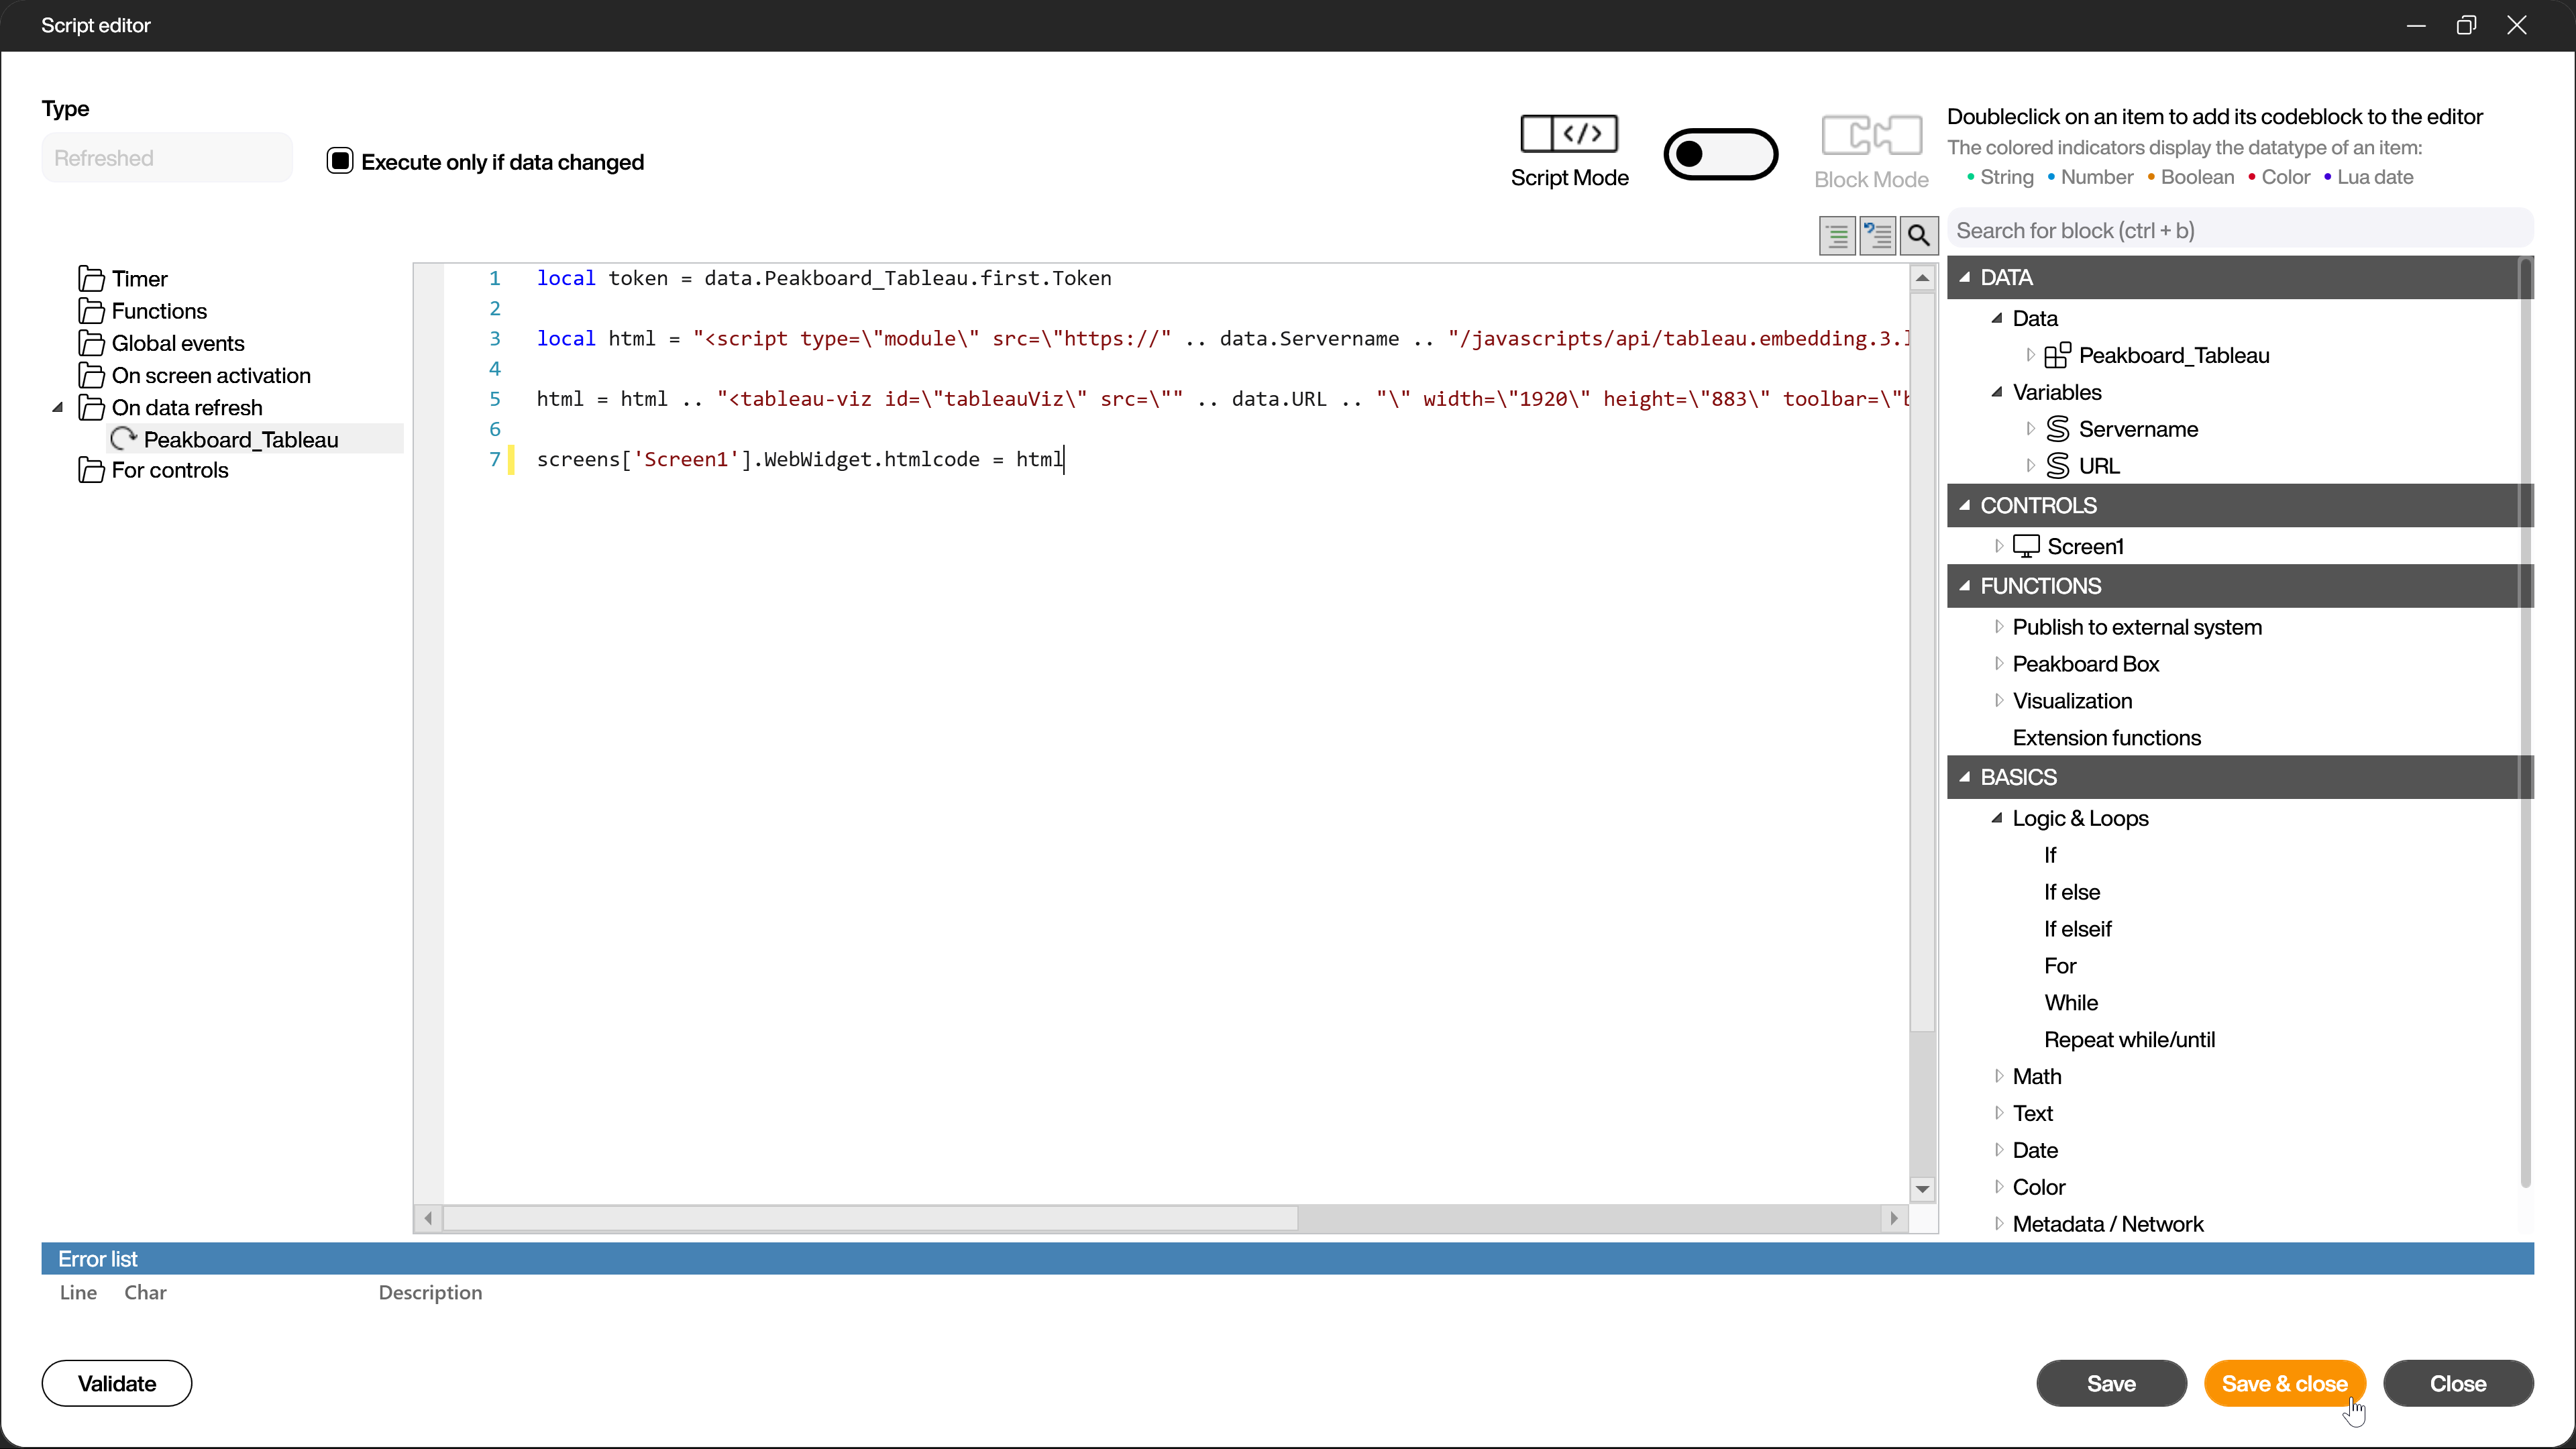
Right-click on the Tableau token generator extension data source and click on [Edit refreshed script] (1).
Insert the following script:
local token = data.Peakboard_Tableau.first.Token
local html = "<script type=\"module\" src=\"https://" .. data.servername .. "/javascripts/api/tableau.embedding.3.latest.min.js\"></script>"
html = html .. "<tableau-viz id=\"tableauViz\" src=\"" .. data.URL .. "\" width=\"1920\" height=\"883\" toolbar=\"bottom\" iframe-auth token=\"" .. token .."\"></tableau-viz>"
screens['Screen1'].WebWidget.htmlcode = html
The script embeds the Tableau dashboard in the HTML code control. The following parameters and variables are used in the code:
local token = data.Peakboard_Tableau.first.Token:- Parameter:
Token - Description: This is the authentication token that is required to access the Tableau Dashboard. The token is obtained from the data source named
data.Peakboard_Tableau.
- Parameter:
local html = "<script type=\"module\" src=\"https://" .. data.servername .. "/javascripts/api/tableau.embedding.3.latest.min.js\"></script>":- Parameter:
data.servername - Description: This is the name of the server on which the Tableau application is hosted. This value is used to create the path to Tableau.
- Parameter:
html = html .. "<tableau-viz id=\"tableauViz\" src=\"" .. data.URL .. "\" width=\"1920\" height=\"883\" toolbar=\"bottom\" iframe-auth token=\"" .. token .."\"></tableau-viz>":- Parameter:
data.URL,width,height,toolbar,iframe-auth,token - Description:
data.URL: The URL of the specific Tableau dashboard to be embedded.widthandheight: The width and height of the embedded dashboard. Here they are set to 1920x883 pixels.toolbar: Position of the Tableau toolbar (here at the bottom). It controls where and whether the toolbar is displayed.iframe-auth token: This is the authentication token defined above and is used to access the dashboard.
- Parameter:
screens['Screen1'].WebWidget.htmlcode = html:- Parameter:
screens['Screen1'].WebWidget.htmlcode - Description: This part of the code assigns the previously created HTML script (
html) to the HTML code control (WebWidget) on the screenScreen1. This displays the Tableau dashboard on this screen.
- Parameter:
Using further parameters in the dynamic HTML, you can restrict the Tableau dashboard and get rid of the toolbars or tabs, you can set up filters or allow or disallow certain levels of interactivity. You can find out what options are available in the Tableau documentation.
Replace the names of the referenced data source [Peakboard_Tableau], the HTML code control [WebWidget] and the variables [Servername] and [URL] with the names you used and save the script.
In the settings of the Tableau token generator extension data source, adjust the reload state to [On Startup] (1) so that the token is only generated once.
Set the refresh time of the HTML code control in the attributes to 60 seconds (1) so that the tableau dashboard is reloaded once a minute.
Test the application in the preview
To test whether everything works, open the [Preview]. The application now displays the selected Tableau dashboard and updates it once a minute
