Scripting
Detecting Table Interactions
The table element comes with two events that can be used to respond to interactions:
DataRowLoadedCellTapped
These events allow for creating dynamic and interactive tables.
DataRowLoaded Event
The DataRowLoaded event is triggered when a new row is loaded into the table. This event is perfect for performing actions during the table’s loading process, such as coloring rows based on specific criteria.
To use a DataRowLoaded event, first select the table element for which you want to add the event. In the control panel on the right side of the Peakboard Designer, you will find the option to add the DataRowLoaded event in the Logic section.
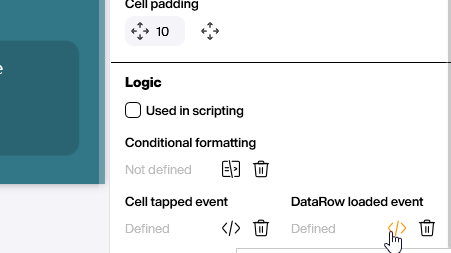
After adding the event, a new window opens where you can insert the script that will be executed when the event is triggered.
In the script, you can access the data of the currently loaded row and perform various actions using the following building blocks:
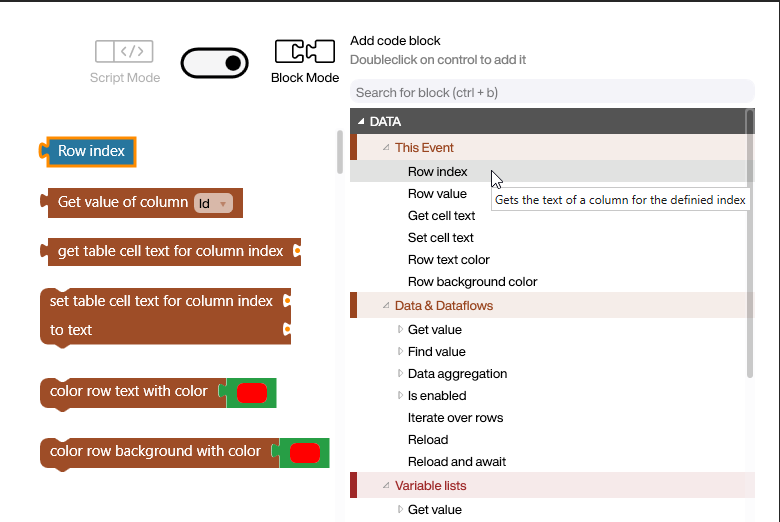
-- Row index
local _ = e.index

-- Value of the cell in the 'Id' column
local _ = e.datarow["Id"]

-- Value of the cell in the column with index 0
local _ = table.getcelltext(e, 0)

-- Set the text in the cell in the column with index 0
table.setcelltext(e, 0, '')

-- Color the text in the entire row with the color '#ff0000'
table.colorrowtext(e, brushes.fromhex('#ff0000'))

-- Color the background of the entire row with the color '#ff0000'
table.colorrow(e, brushes.fromhex('#ff0000'))
The following script colors each row green if the IsChecked column has the value True. Additionally, a counter is incremented to count the number of green-colored rows.
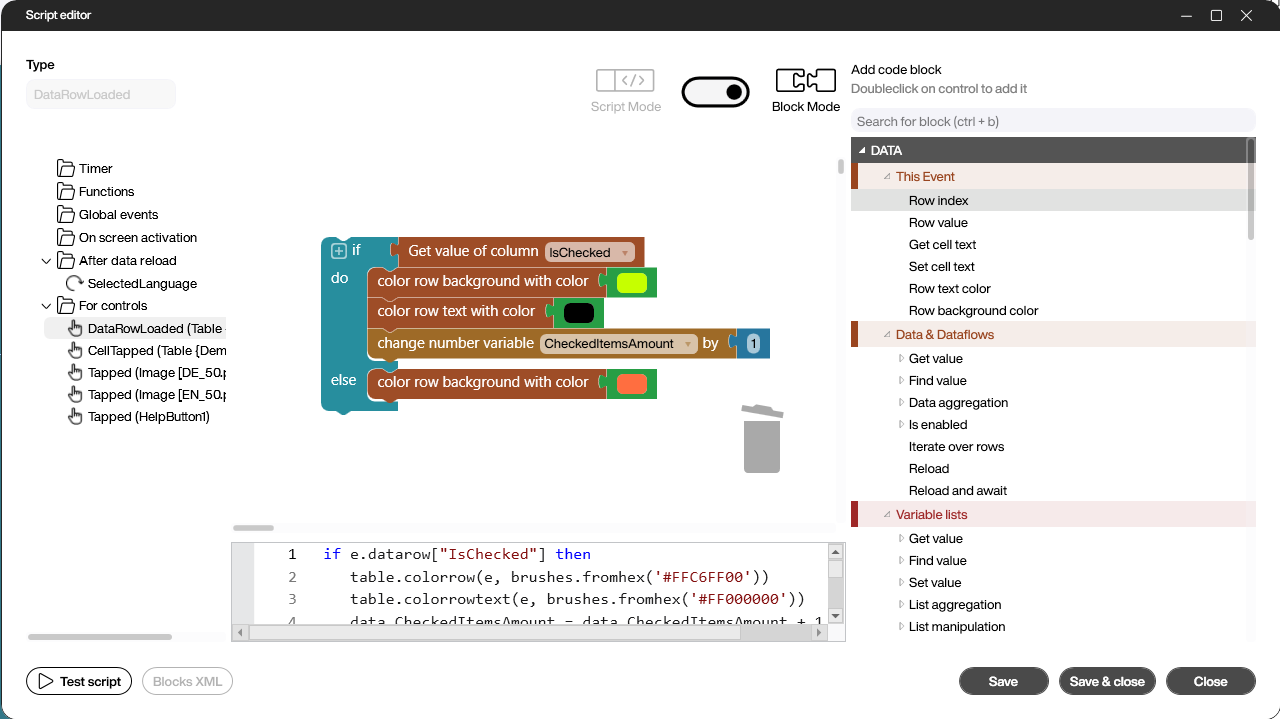
if e.datarow["IsChecked"] then
   table.colorrow(e, brushes.fromhex('#FFC6FF00'))
   table.colorrowtext(e, brushes.fromhex('#FF000000'))
   data.CheckedItemsAmount = data.CheckedItemsAmount + 1
else
   table.colorrow(e, brushes.fromhex('#FFFF6E40'))
end
CellTapped Event
The CellTapped event is triggered when a cell in a table is clicked. This event allows you to respond to clicks and perform actions such as opening a detailed view or executing a task linked to the cell.
To use a CellTapped event, first select the table element for which you want to add the event. In the control panel on the right side of the Peakboard Designer, you will find the option to add the CellTapped event in the Logic section.
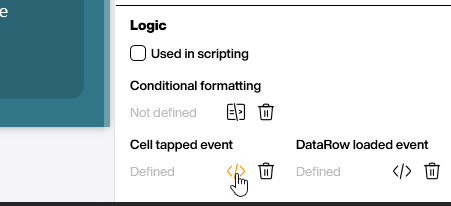
After adding the event, a new window opens where you can insert the script that will be executed when the event is triggered.
In the script, you can access the data of the clicked cell and perform various actions:
-- Row index
screens['Screen1'].RowIndexText.text = string.tostring(e.row)

-- Column index
screens['Screen1'].CellIndexText.text = string.tostring(e.column)

-- Cell value
screens['Screen1'].DataValueText.text = data.Demo_List[e.row][e.column]