Data sources
Peakboard Hub List
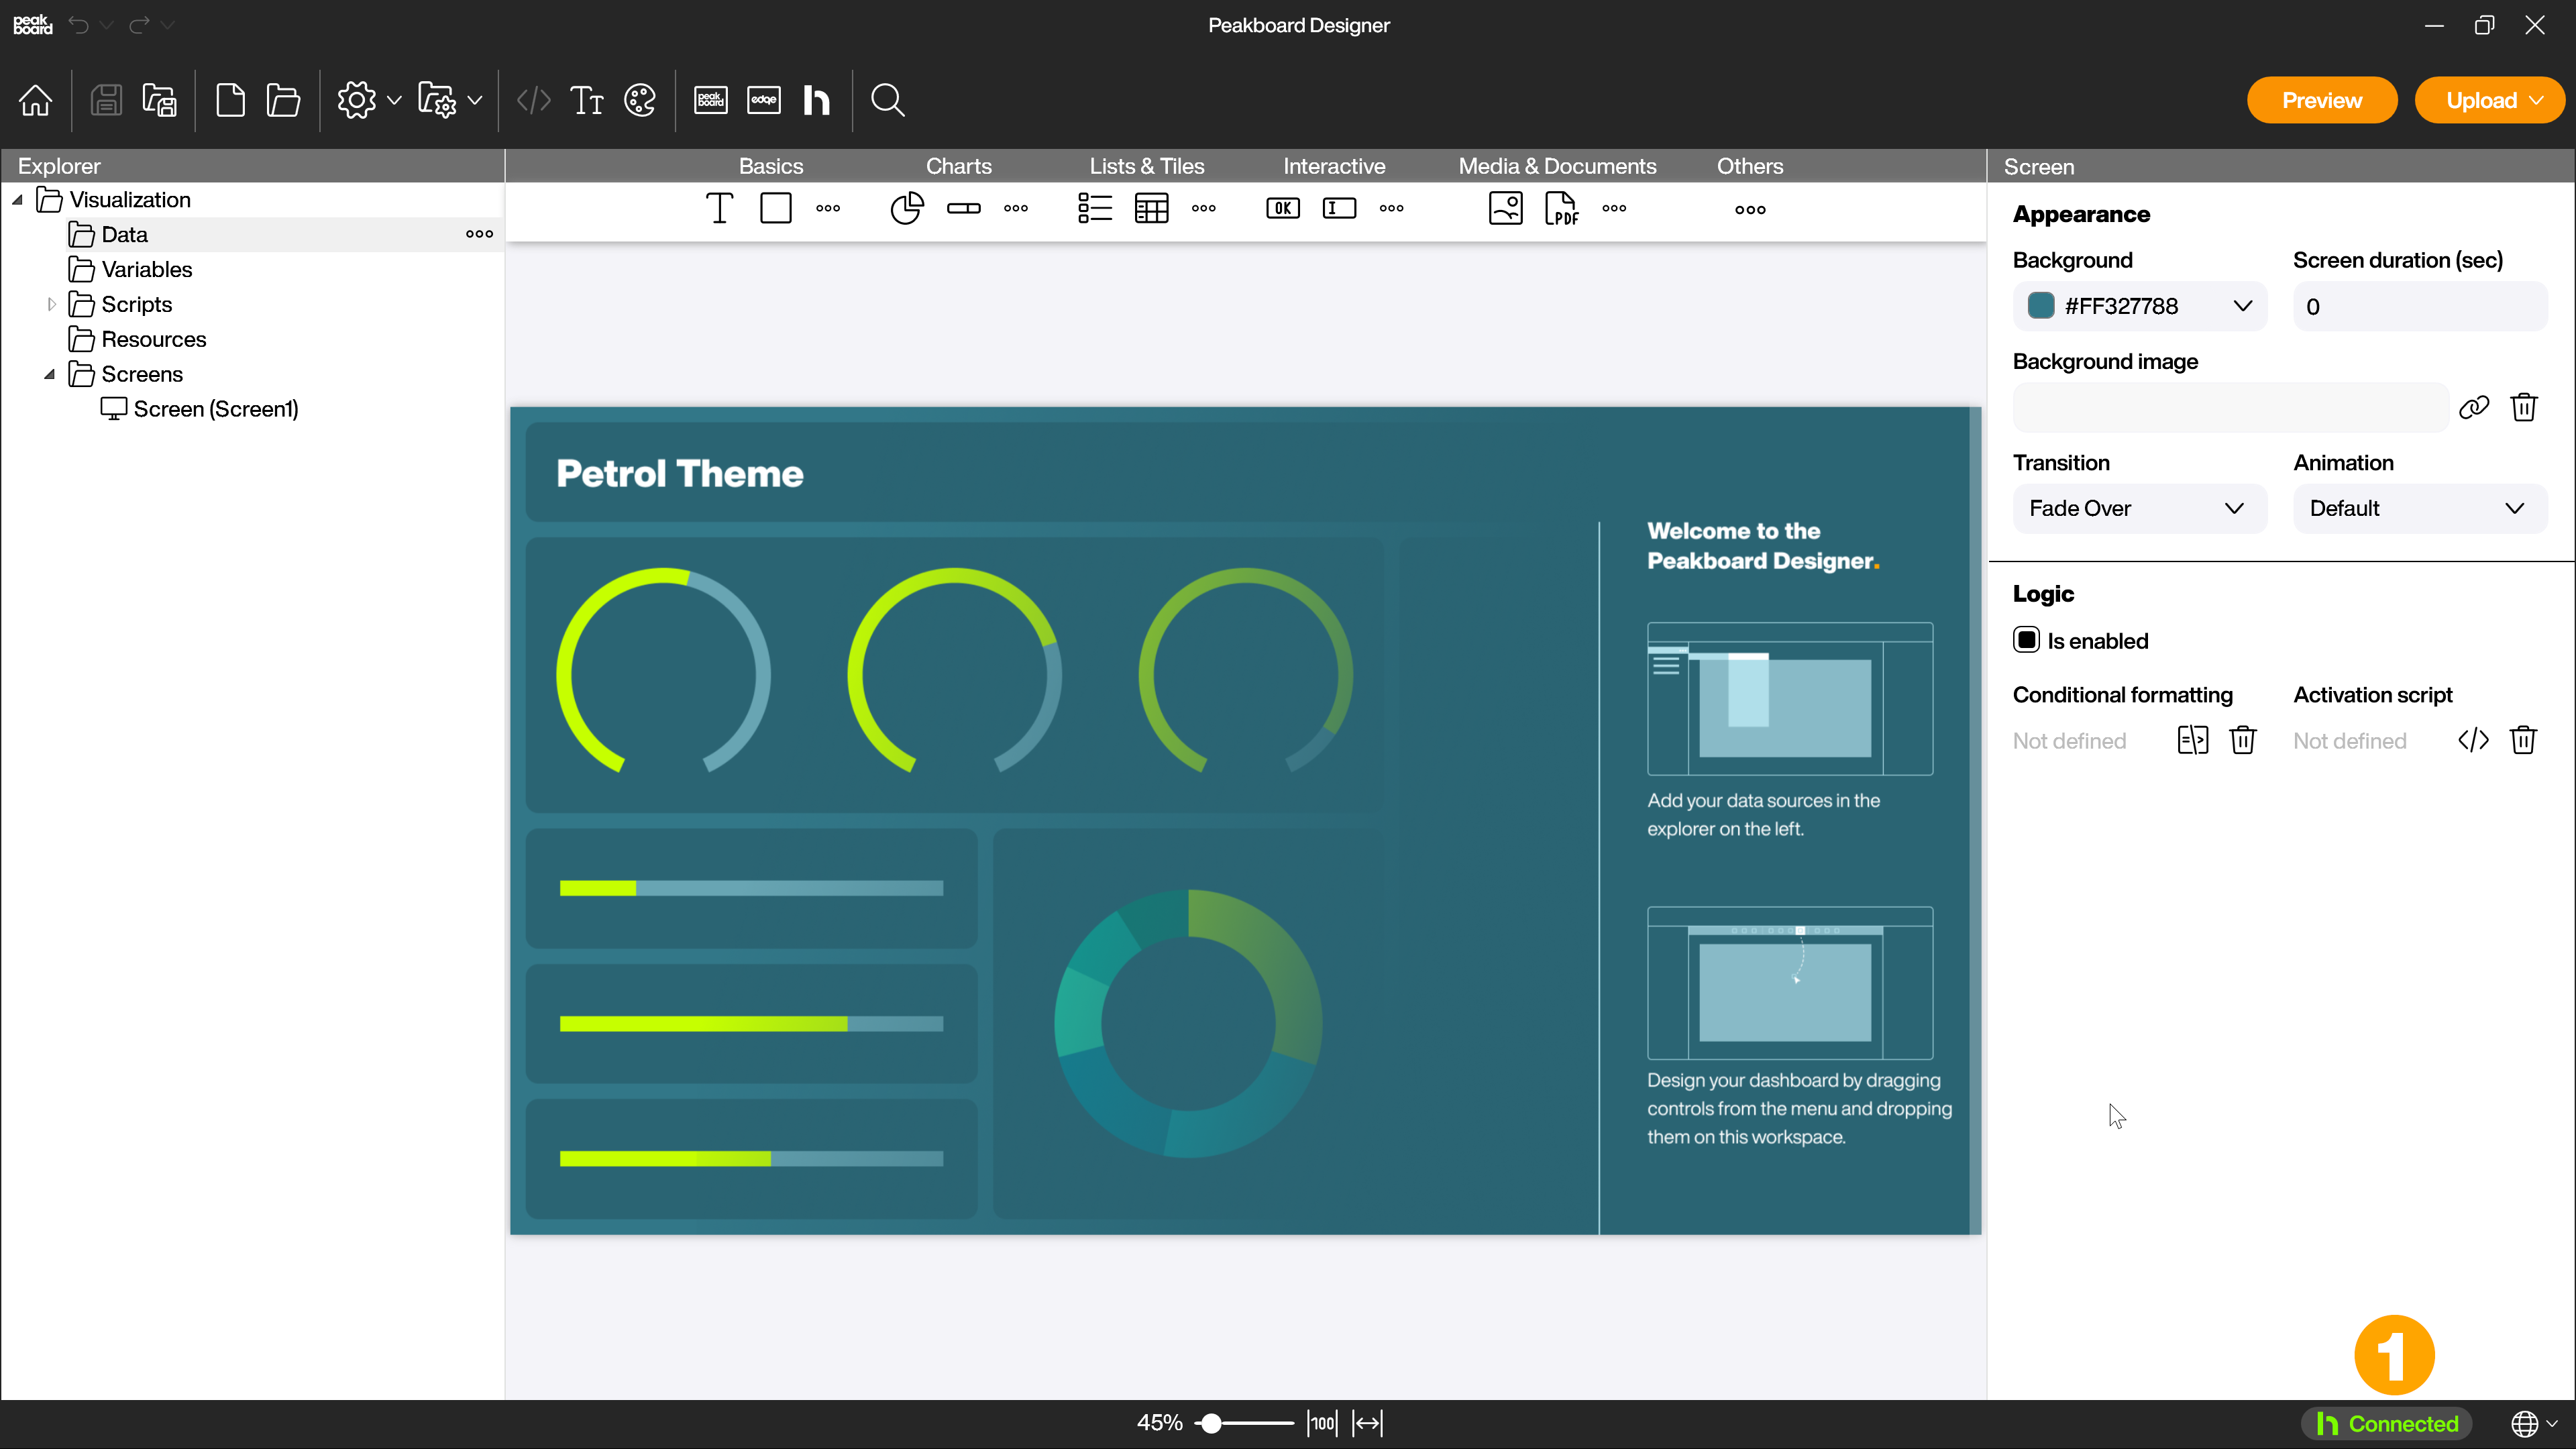
The condition for using the Peakboard Hub list data source is an existing connection to the Peakboard Hub. You can connect to a Peakboard Hub on premise or to a Peakboard Hub online and create a list, which you can then use in the next steps. You can see if the connection is established in the Peakboard Designer by the Peakboard Hub status indicator (1).
Add Peakboard Hub list data source and read data
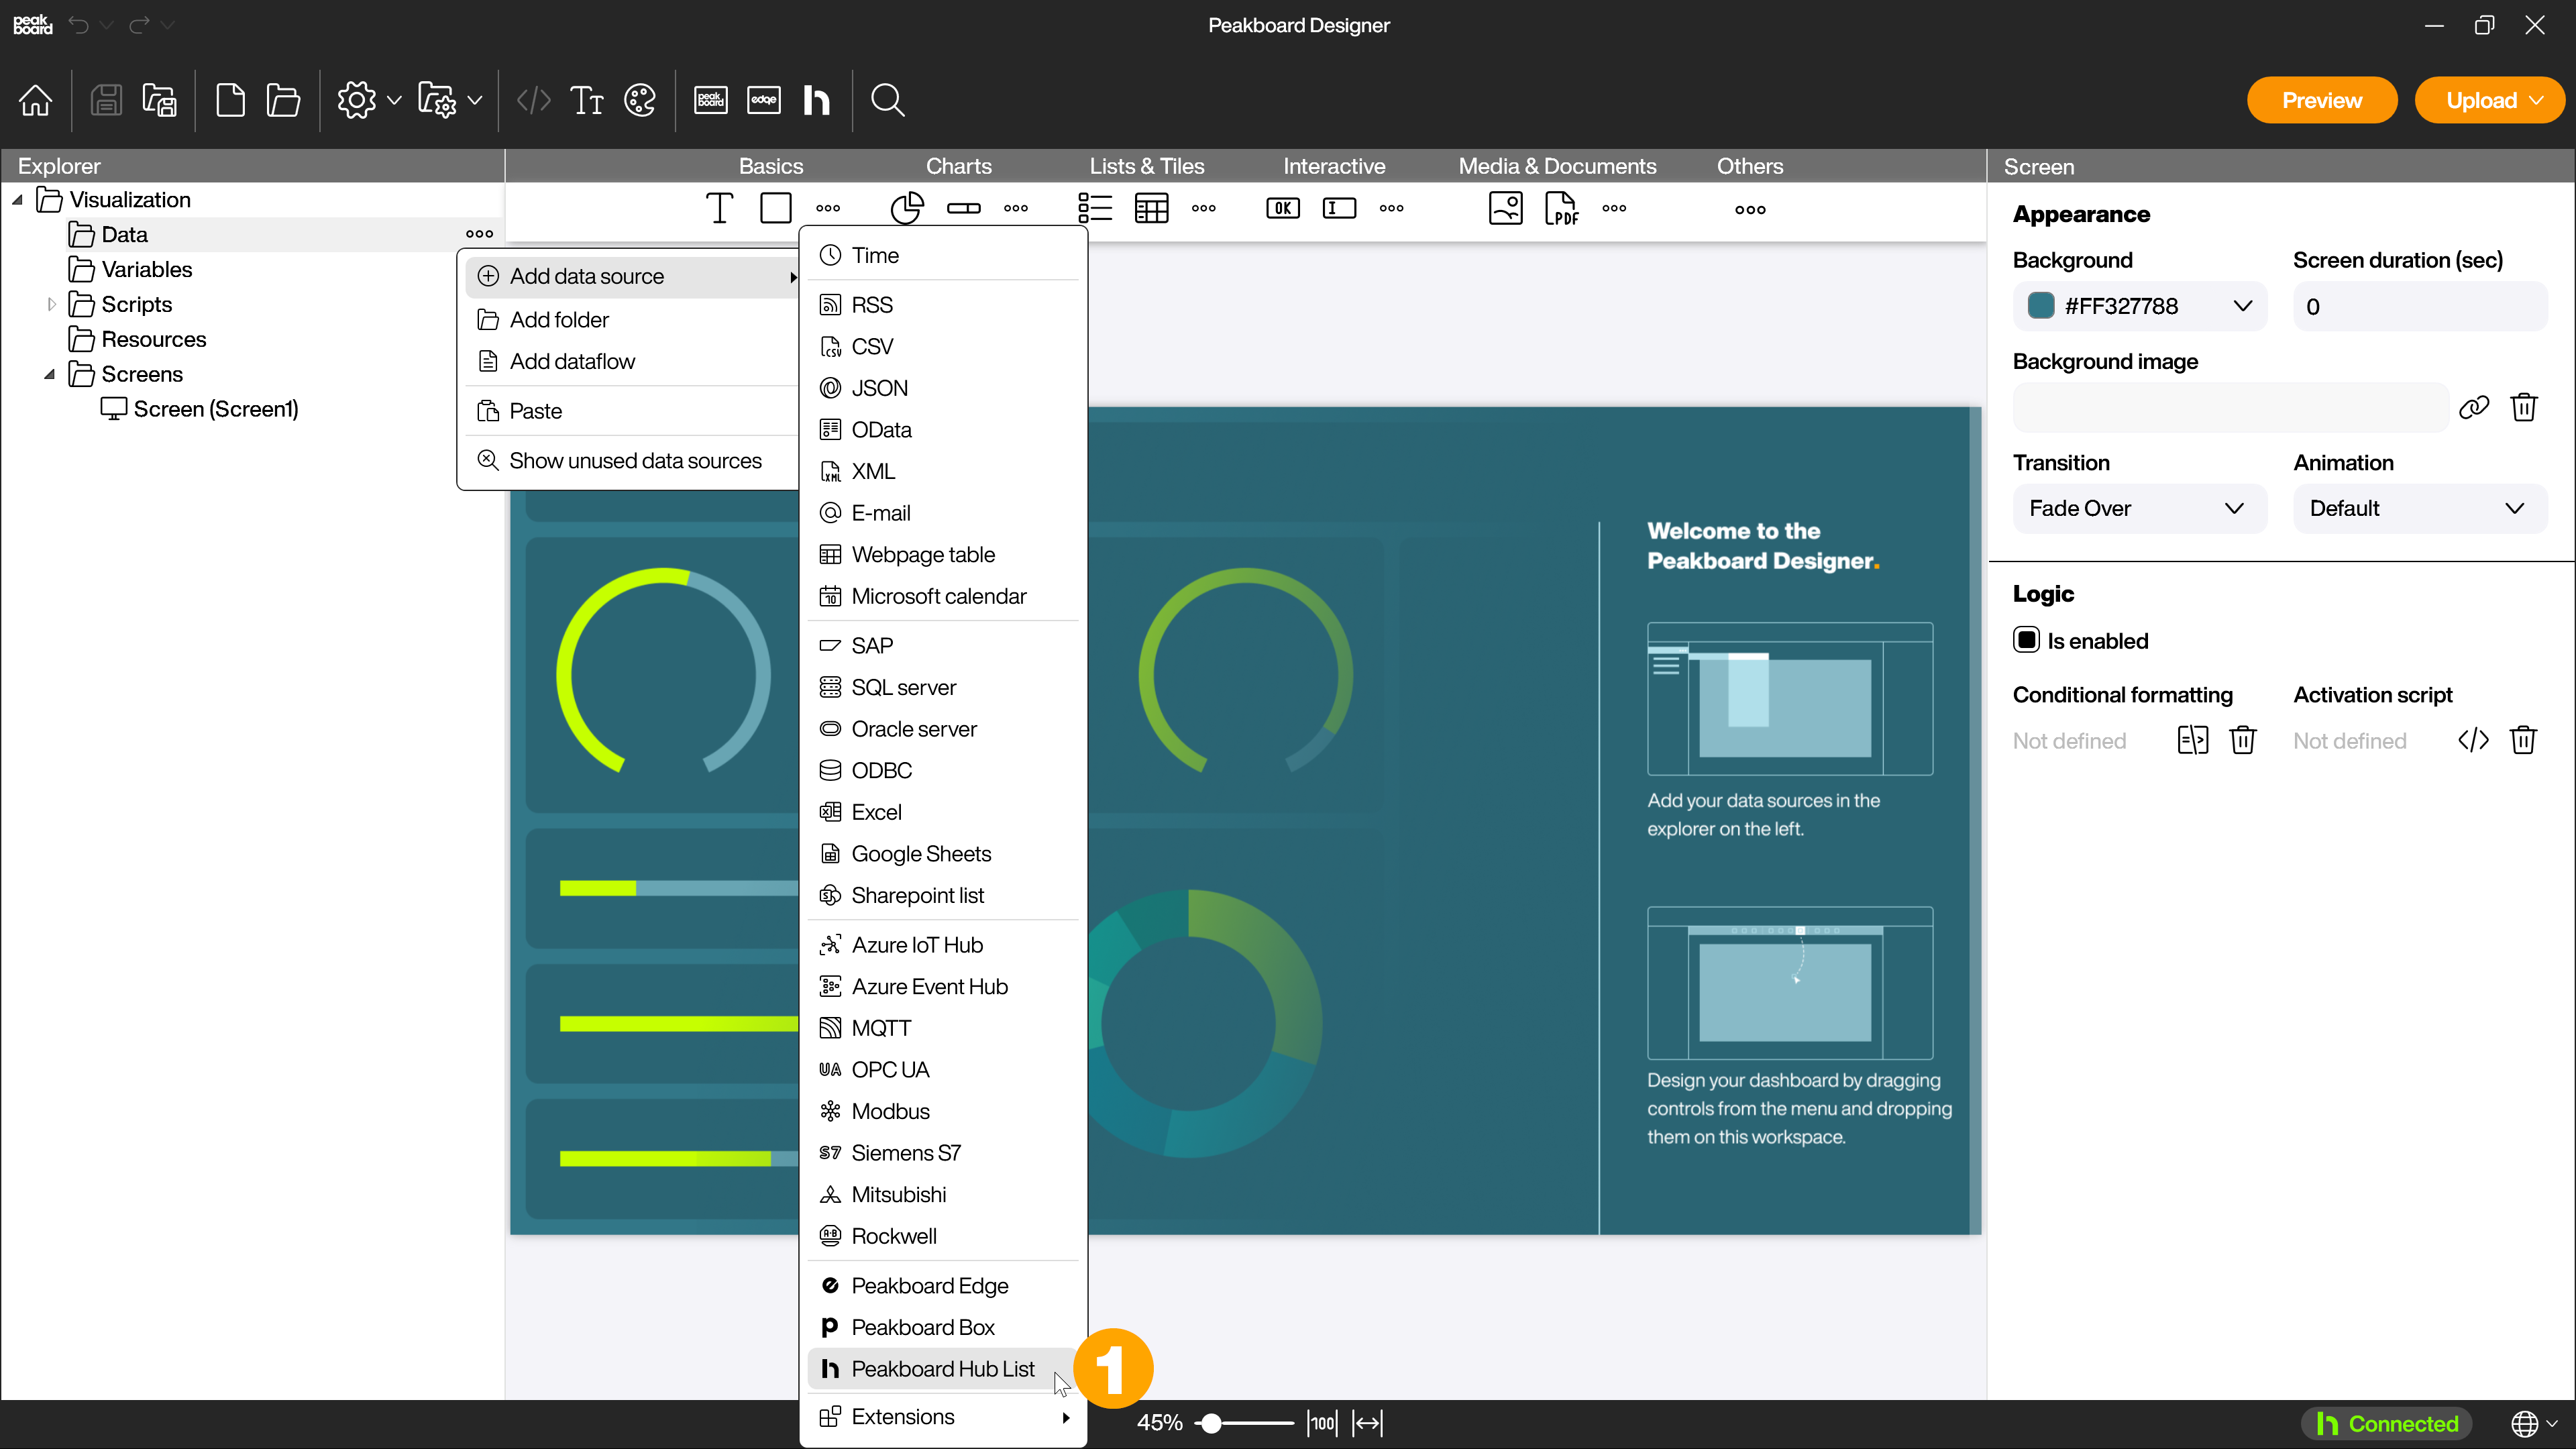
To add the Peakboard Hub list data source, right click on [Data] in the explorer, then select [Add Data Source] and [Peakboard Hub List] (1) to open the dialog.
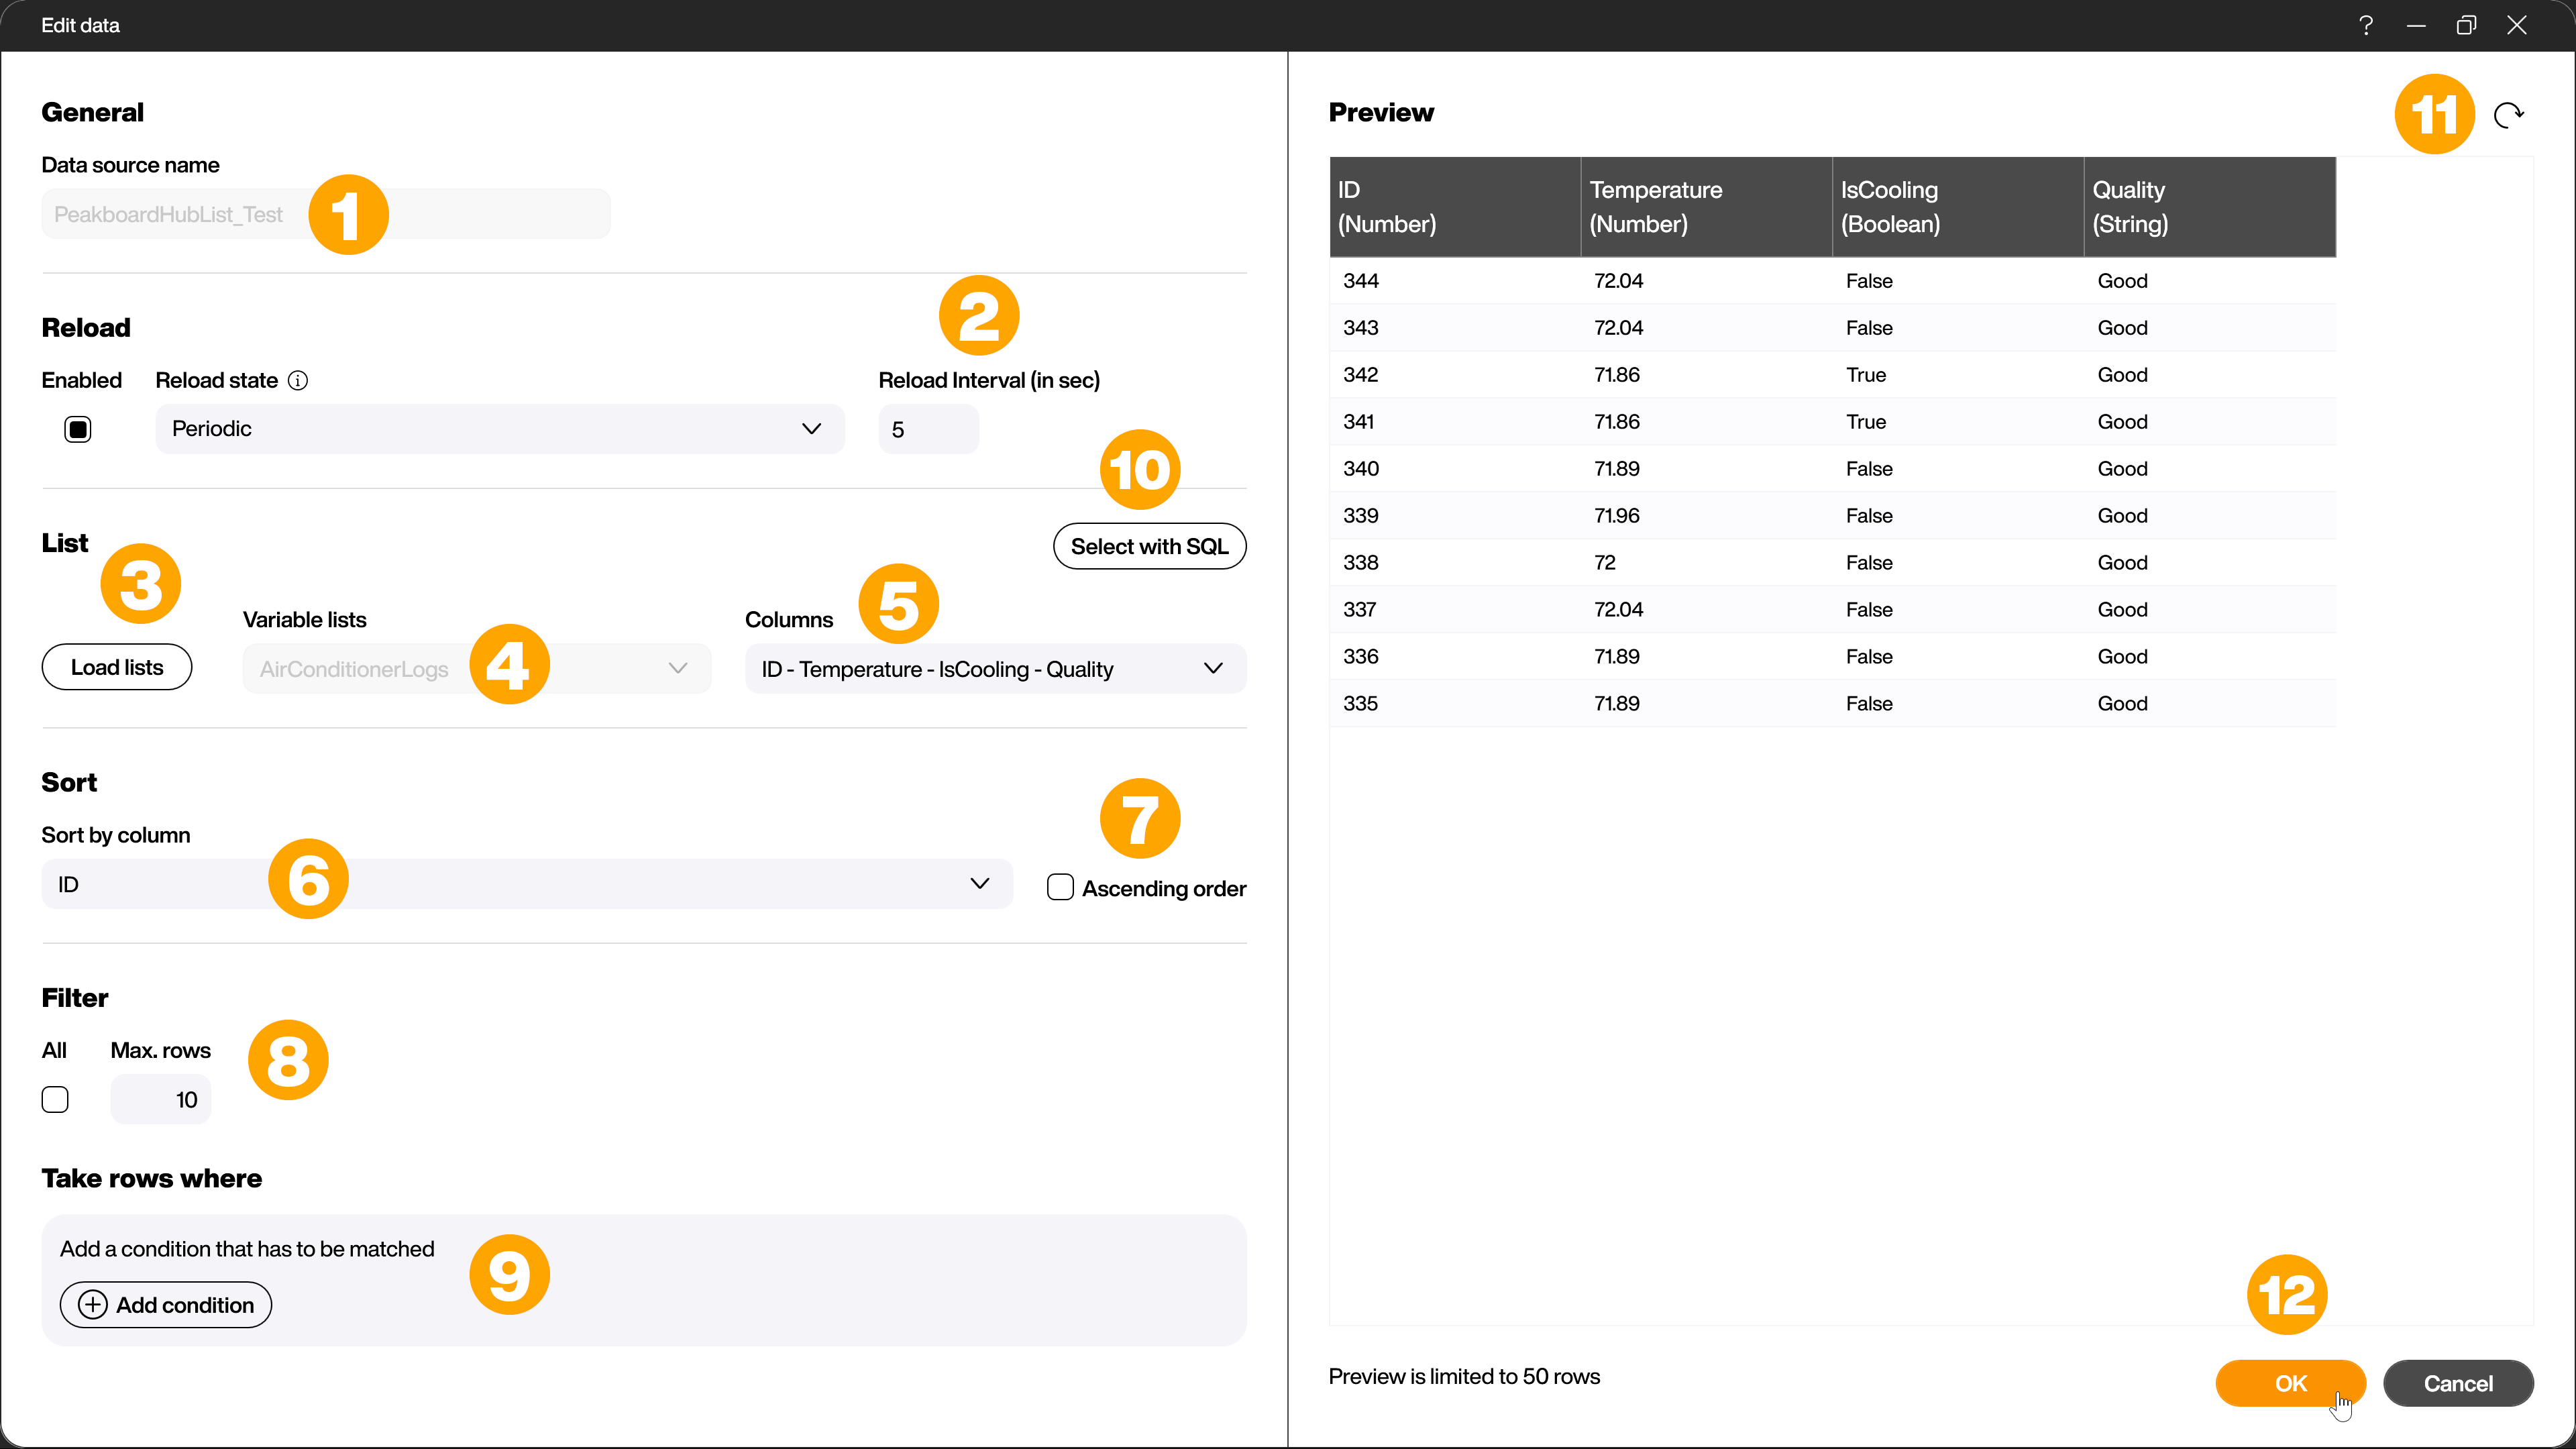
Give the data source a unique name (1) and specify an interval at which the data source should be reloaded (2).
Then click the [Load Lists] button (3) in the [List] area to load all lists created in the Peakboard Hub user group you are connected to. Select the desired list in the [Variable lists] drop-down menu (4) and specify which columns to load in the [Columns] drop-down menu (5).
In the [Sort] area you can specify by which column (6) and whether in ascending or descending order (7) the data should be sorted. In the area [Filter] (8) you can define if the whole list or only a part of it should be loaded. To specify even more precisely which data of your list should be loaded, you can define conditions for filtering in the [Advanced filters] (9) area.
Alternatively to these predefined sorting and filtering options you can switch the view with the button [Select SQL] (10) and define your filter conditions as an SQL statement yourself.
Finally click on [Load data] (11) to display a preview of the list. With [OK] (12) you create the data source.
Write data to the Peakboard Hub list
If you want to write data to the Peakboard hub list, this is done by a script. The data can for example come from an additional data source.
For the creation of such a script we provide prefabricated blocks in the Building Blocks in the block mode and also in the script mode, with which you can create the script according to your needs. Of course you can also create the script manually.
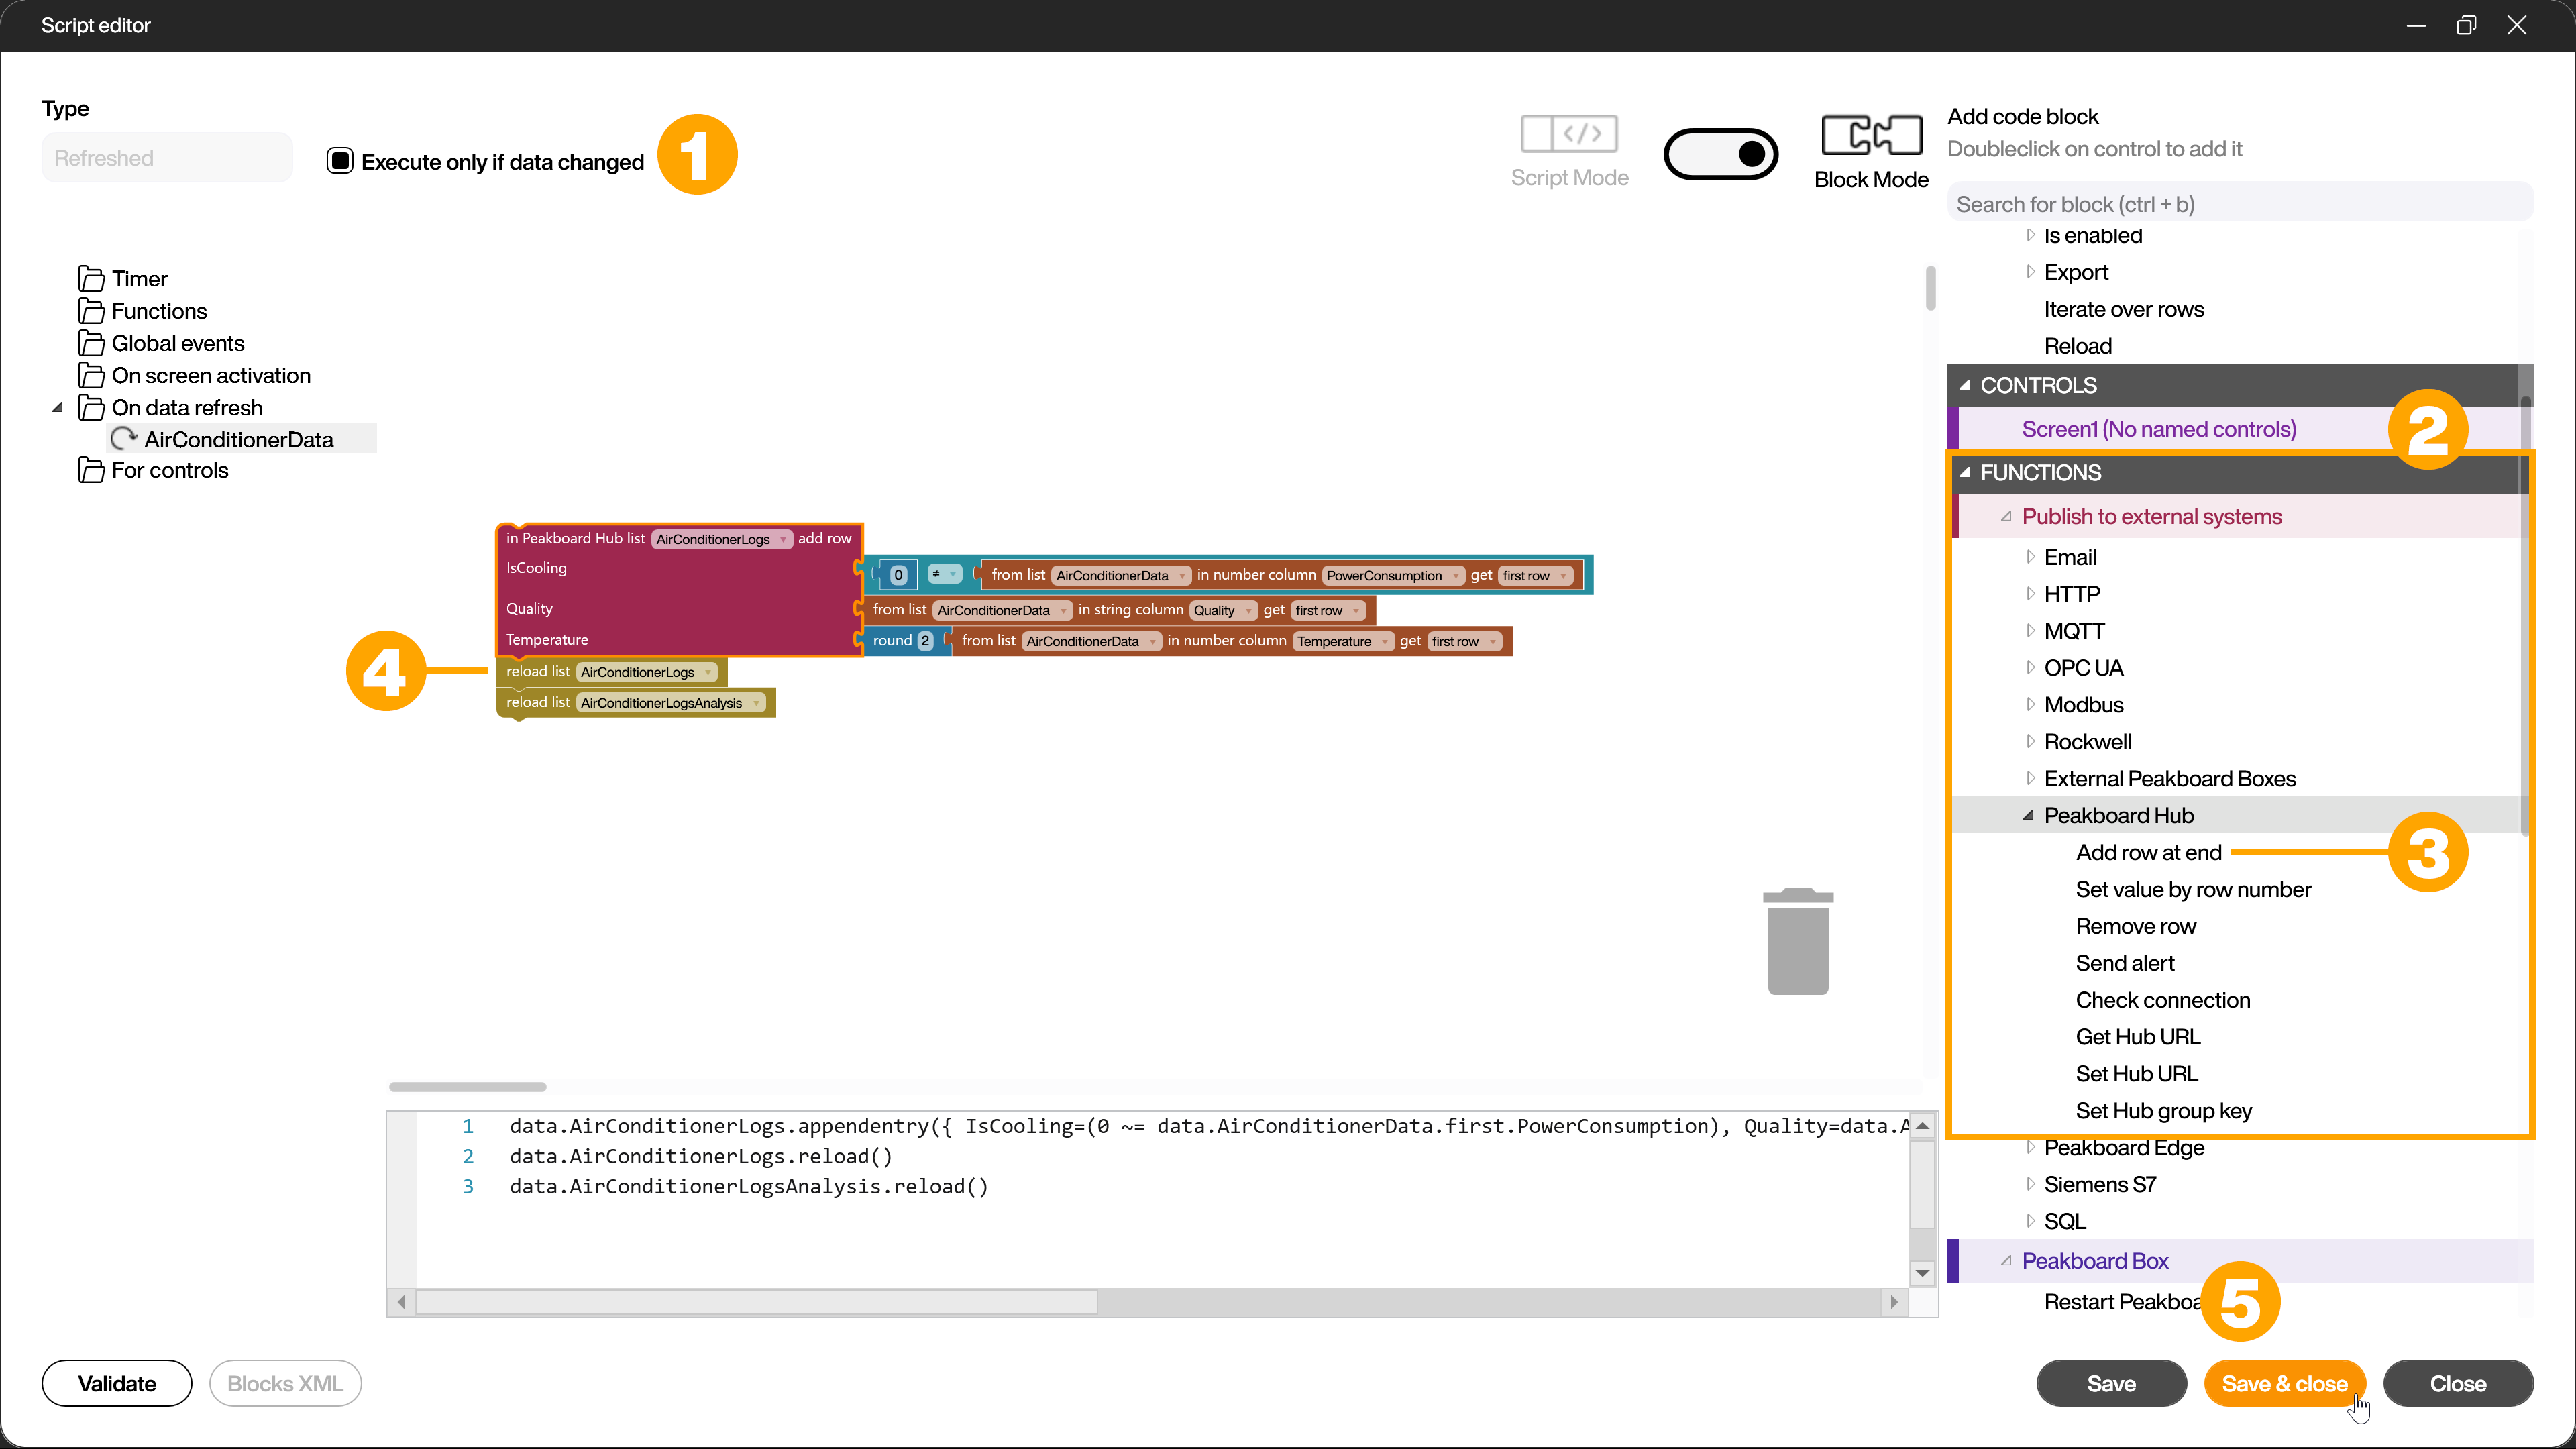
For the above mentioned case that the data originates from an additional data source, you can create a refreshed script on this data source. Check the box [Only execute if data has been changed] (1). This will capture the data when something has changed. There is also the possibility to capture data at certain intervals or when a certain event occurs. For this you can use script types like timer or tapped scripts. In the [FUNCTIONS] (2) section of the Script Editor, under [Publish to external systems] and [Peakboard Hub] in block mode, you will find the option [Add row at end] (3). Drag this block to the workspace of the script editor and complete it according to your needs with the data to be written to the list. In the example shown, another block has been added at the end (4) to reload the Peakboard Hub list so that it can be displayed live in, for example, a table. After clicking [Save & close] (5), the script is finished and new incoming data from the additional data source is automatically written to the Peakboard Hub list.

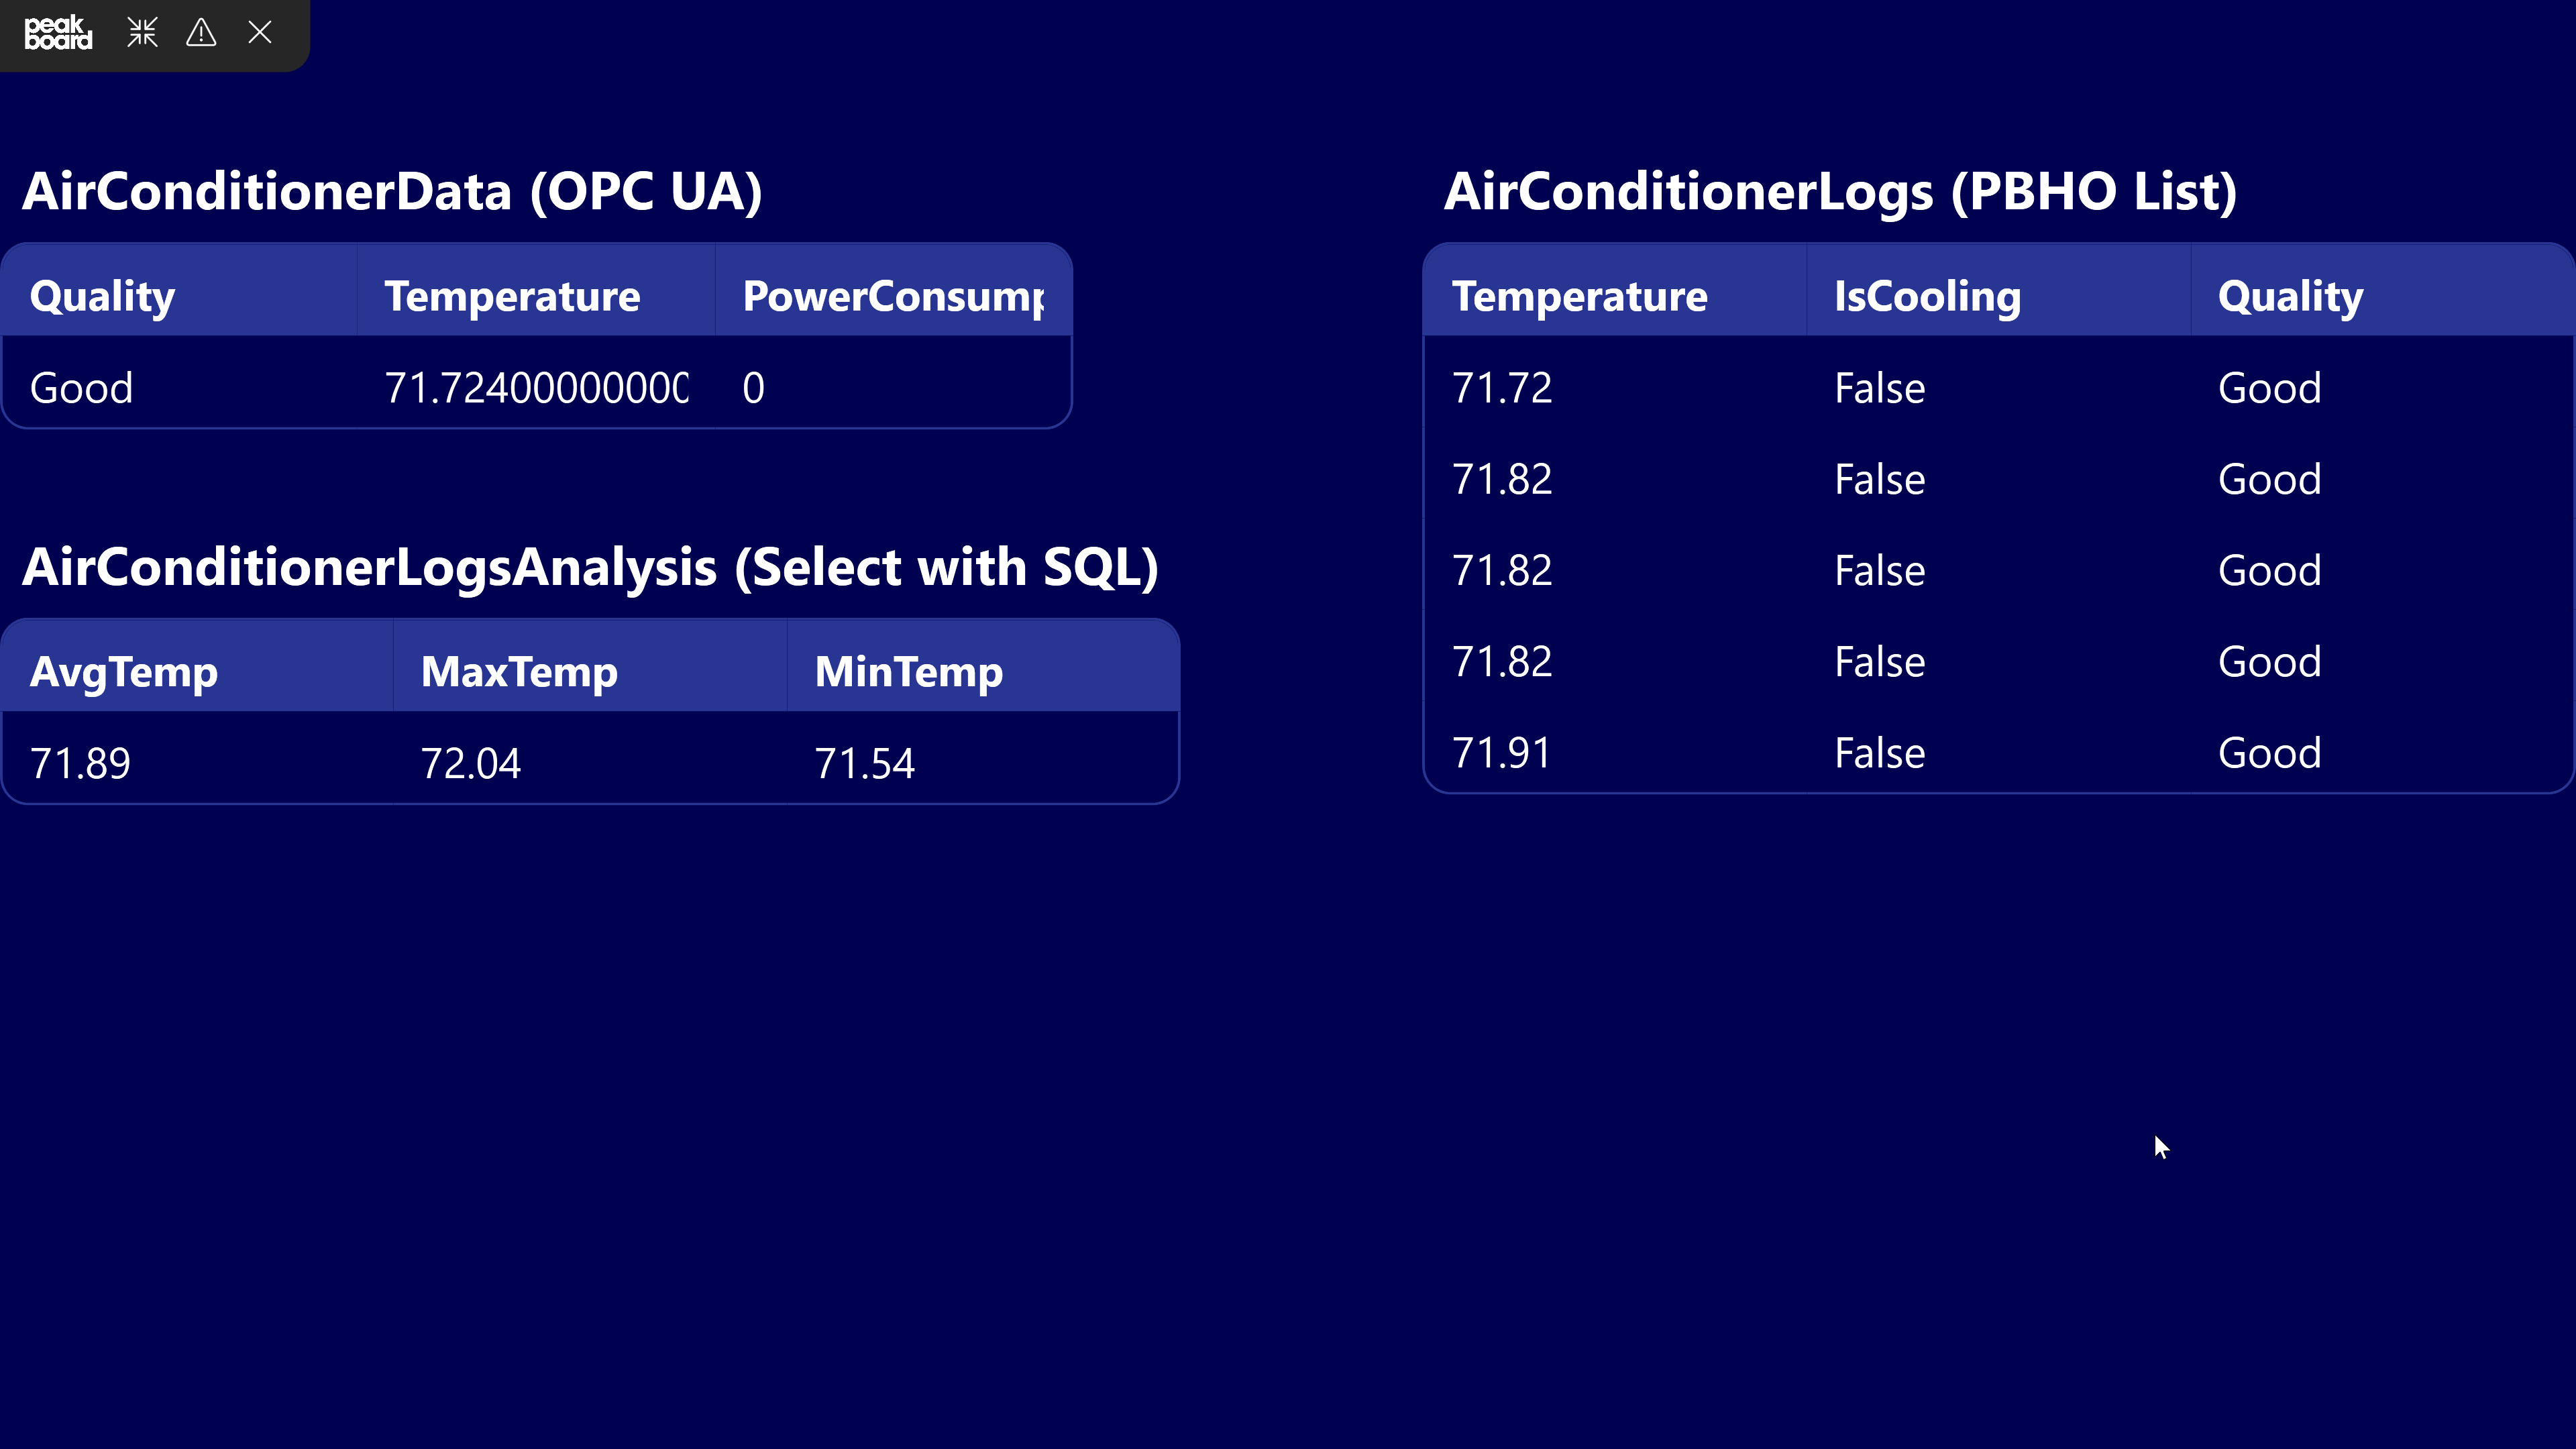
To then visualize the Peakboard Hub List data source, drag and drop it from Explorer onto the workspace and you can, for example, display it as a table or further process it using other methods such as Dataflows.