Data sources
Connecting applications via OAuth with Peakboard
Learn how to use OAuth authentication for your apps with Peakboard. OAuth is used by many web APIs (e.g. Spotify, Slack, Google) to authorize access to protected data without storing a username and password directly.
1. On the side of the application to be connected
- Open the API management of the service to be connected.
- If necessary, create a new project/application/clientID.
- Add the Callback URL (Redirect URL)
https://www.peakboard.com/oauth2-callback/to the created project (the stored callback URL must match the one from Peakboard Designer in every character).
2. Add the data source in Peakboard Designer
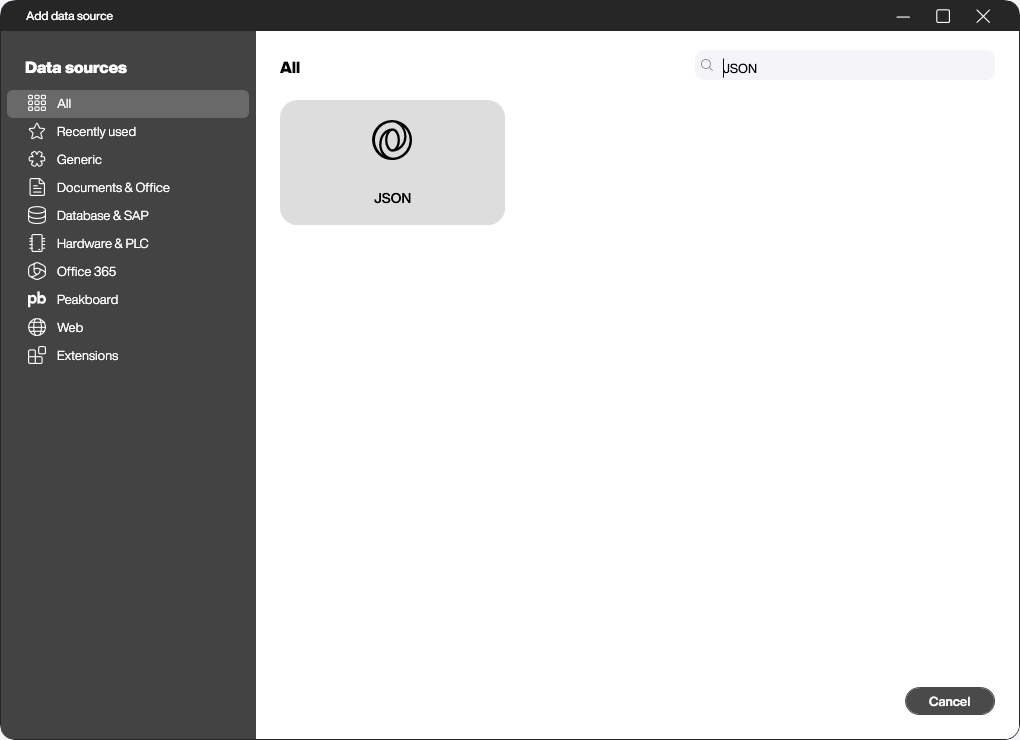
Create a new data source with the data format in which the application to be addressed returns data – usually JSON. Open [Add data source] and select the appropriate data source (here: [JSON]).
3. Select OAuth as the authentication type
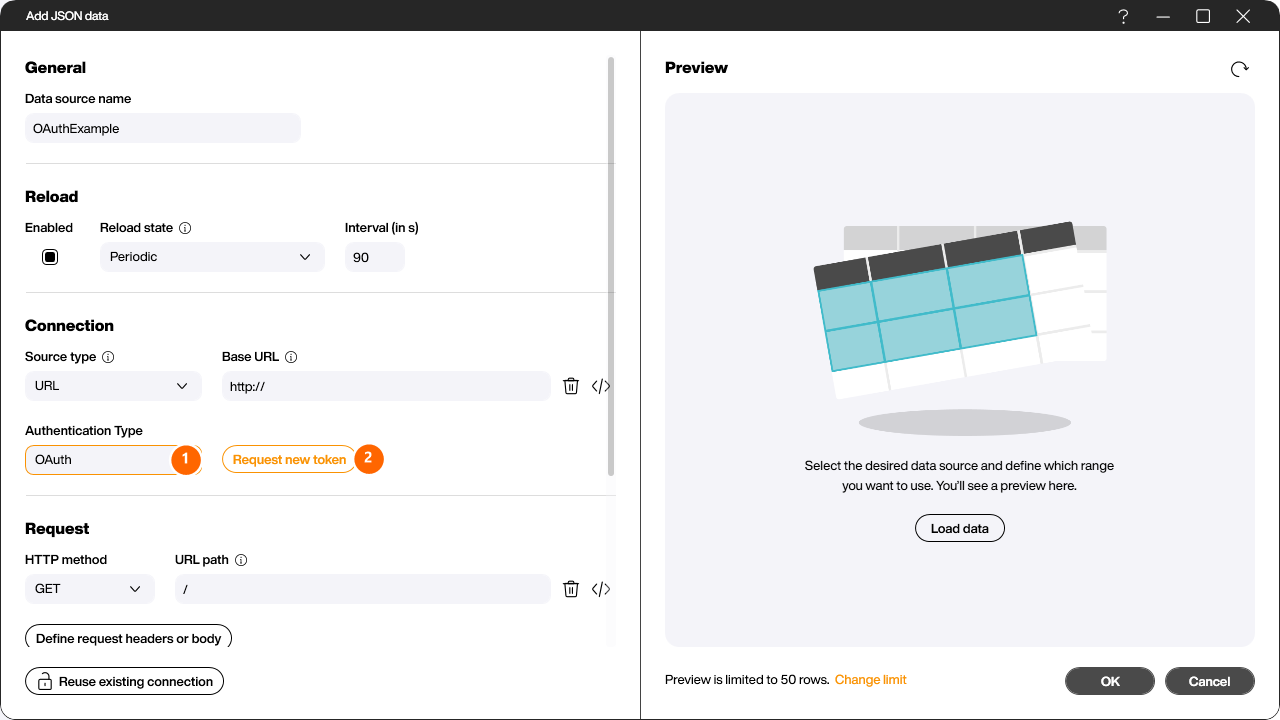
In the data source configuration dialog, open the [Authentication Type] dropdown and select [OAuth].

As soon as [OAuth] is selected (1), the [Request new token] button (2) appears next to it. This button opens the OAuth configuration window.
4. Configure OAuth without a preset
If you do not use a preset, configure the connection manually in the [OAuth configuration] window.
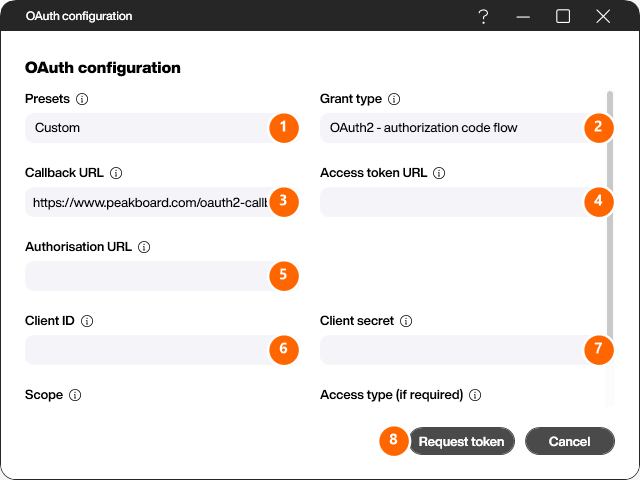
- For [Presets] (1), select [Custom].
-
For [Grant type] (2), select the grant type used by the service to be connected:
- OAuth2 - Authorization Code Flow: the most commonly used grant type for OAuth2
- OAuth2 - Password Grant: should only be used for security reasons if the application does not offer an alternative
- OAuth1: used for applications that only support OAuth1 and not yet OAuth2
- The [Callback URL] (3) is already prefilled and must exactly match the redirect URL stored in step 1.
-
Depending on the selected grant type, look up the [Access token URL] (4) and [Authorisation URL] (5) with the application provider and enter them:
- Access token URL (OAuth1+OAuth2, URL to request/renew the access token)
- Authorisation URL (OAuth1+OAuth2, URL of the authorization server)
- Enter the [Client ID] (6) and [Client secret] (7) obtained in step 1.
- If the planned request requires certain scopes, enter all required scopes in the [Scope] field. Multiple scopes are separated by a space.
- If required, specify the [Access type]. This is usually not needed (exception: Google Cloud Platform).
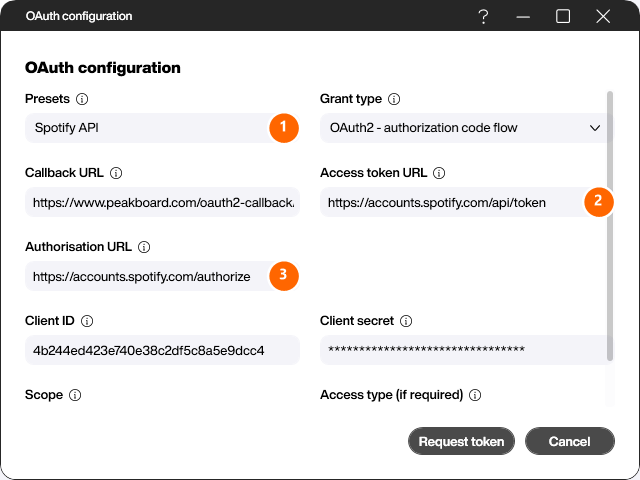
5. Configure OAuth with a preset
A preset is available for many well-known services. Open the [Presets] dropdown and select the matching service.
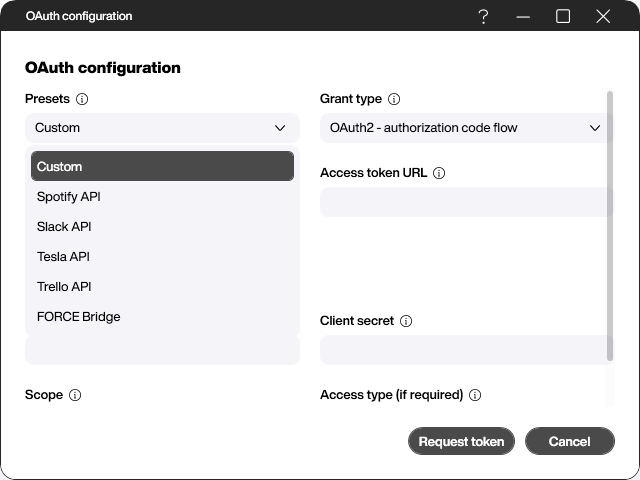
After selecting a preset (1), the grant type, [Access token URL] (2) and [Authorisation URL] (3) are filled in automatically. You only need to add the [Client ID] and [Client secret] of the service.
6. Authorize Peakboard against the application
- Press the [Request token] button (8). A browser window will open automatically.
- In the newly opened browser window, perform the application’s login process.
- If the login was successful, the browser window closes and the [Request new token] button is now labeled [Authorized - Update Token].
- This completes the authorization process.
7. General information about further procedures
- The URL of the new data source is now executed with authorization. Requests to the API can be made here. The exact URL must be determined with the respective application. Currently only HTTP-GET requests are possible.
- Via the [Authorized - Update Token] button, the existing authorization can be adjusted.
- If desired, the authorization for Peakboard can be removed via the API management of the application (if not specified otherwise by the application).