Get started
Peakboard Bring-Your-Own-Device (BYOD) - Introduction
In this article you will learn how to use your own device with Peakboard BYOD instead of a Peakboard Box.
Preparation and minimum requirements
First, download the setup and transfer it to the device you want to use for Peakboard BYOD.
The minimum hardware requirements depend heavily on your use case. The following specifications are only the minimum system requirements. For a smooth user experience, you should at least double the values. If you are unsure contact Peakboard Support for recommendations for your specific project.
Minimum hardware requirements
- 1 GHz CPU with 2 cores
- 4 GB RAM
- 64 GB disk space
Minimum operating system requirements
- Windows 10 (from version 20H1), any edition, x64 (x86/ARM is not supported)
- Windows 11, any edition, x64 (x86/ARM is not supported)
Attention
x86 and ARM processors are not supported!
Peakboard BYOD setup
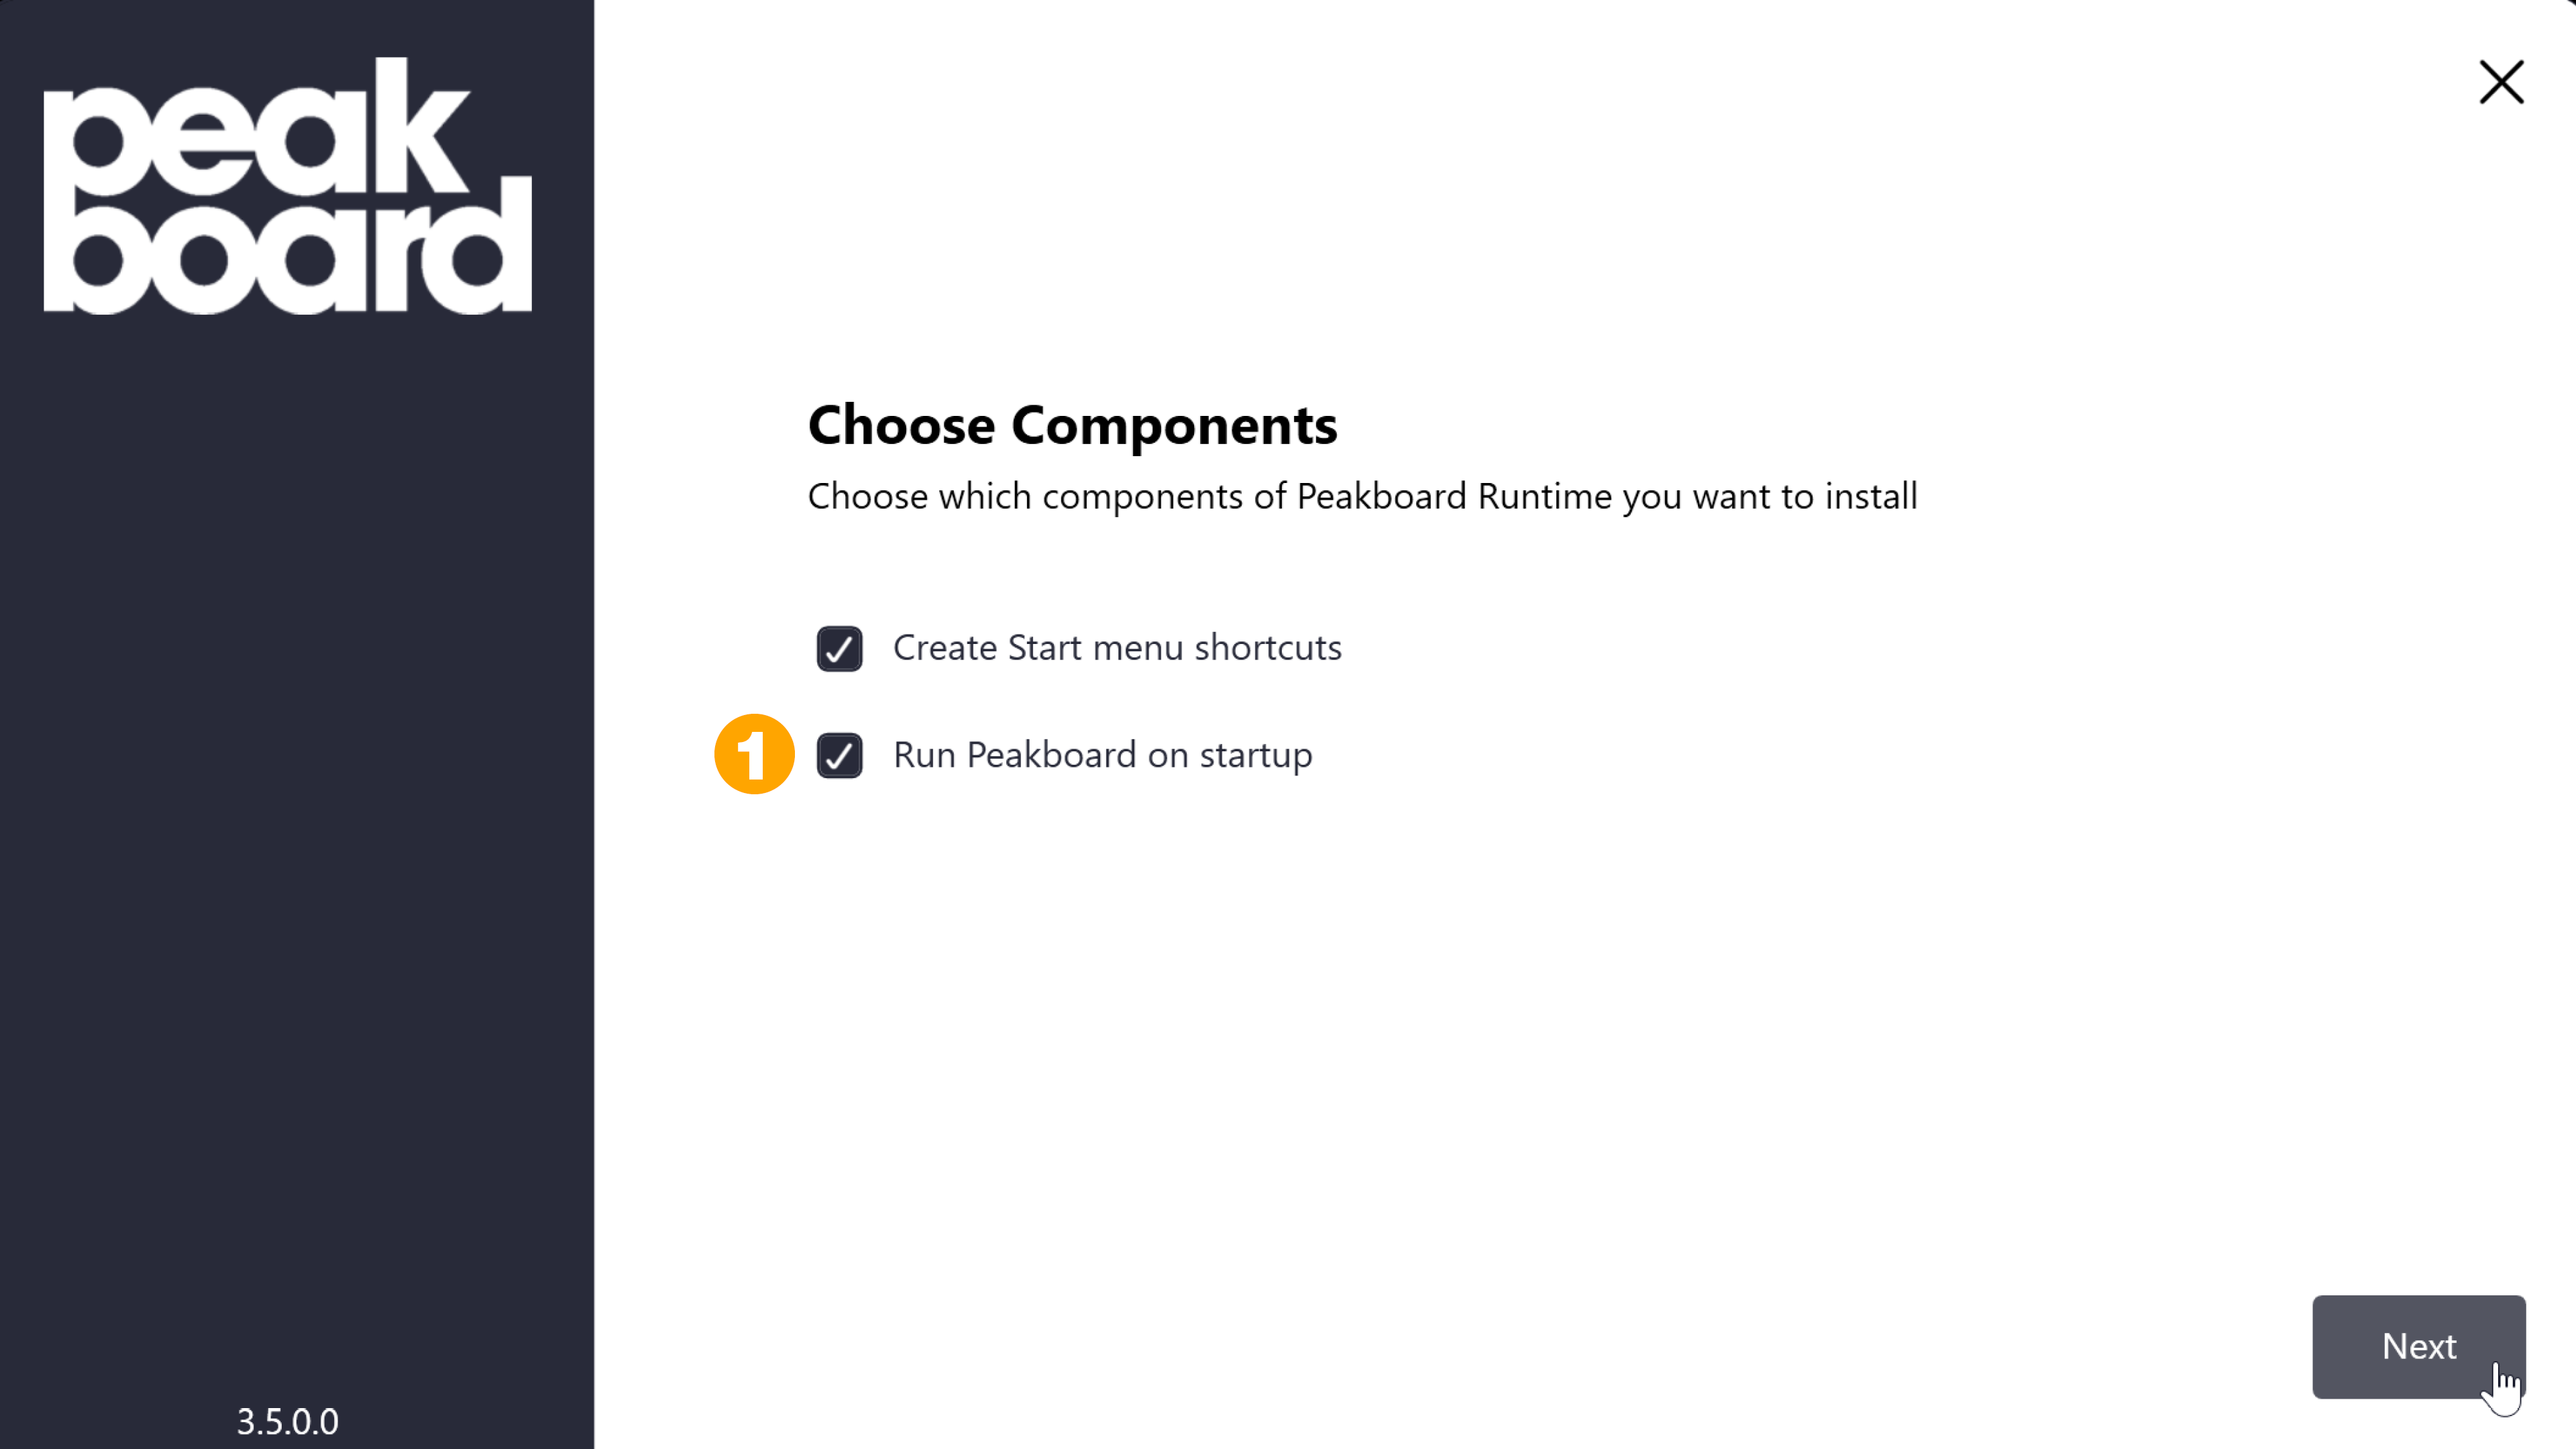
The setup automatically guides you through the installation process. It offers the option to start Peakboard BYOD automatically on startup (1). This is usually the desired behavior. The user currently logged in and running the setup is used for the automatic start.
Required writing permissions
To ensure that all functions of the BYOD instance can be executed without errors, the logged-in user requires writing permissions for the folder C:/ProgramData/Peakboard.
Add and license a Peakboard BYOD instance in the Peakboard Designer
Make sure that the Peakboard BYOD instance is running properly.
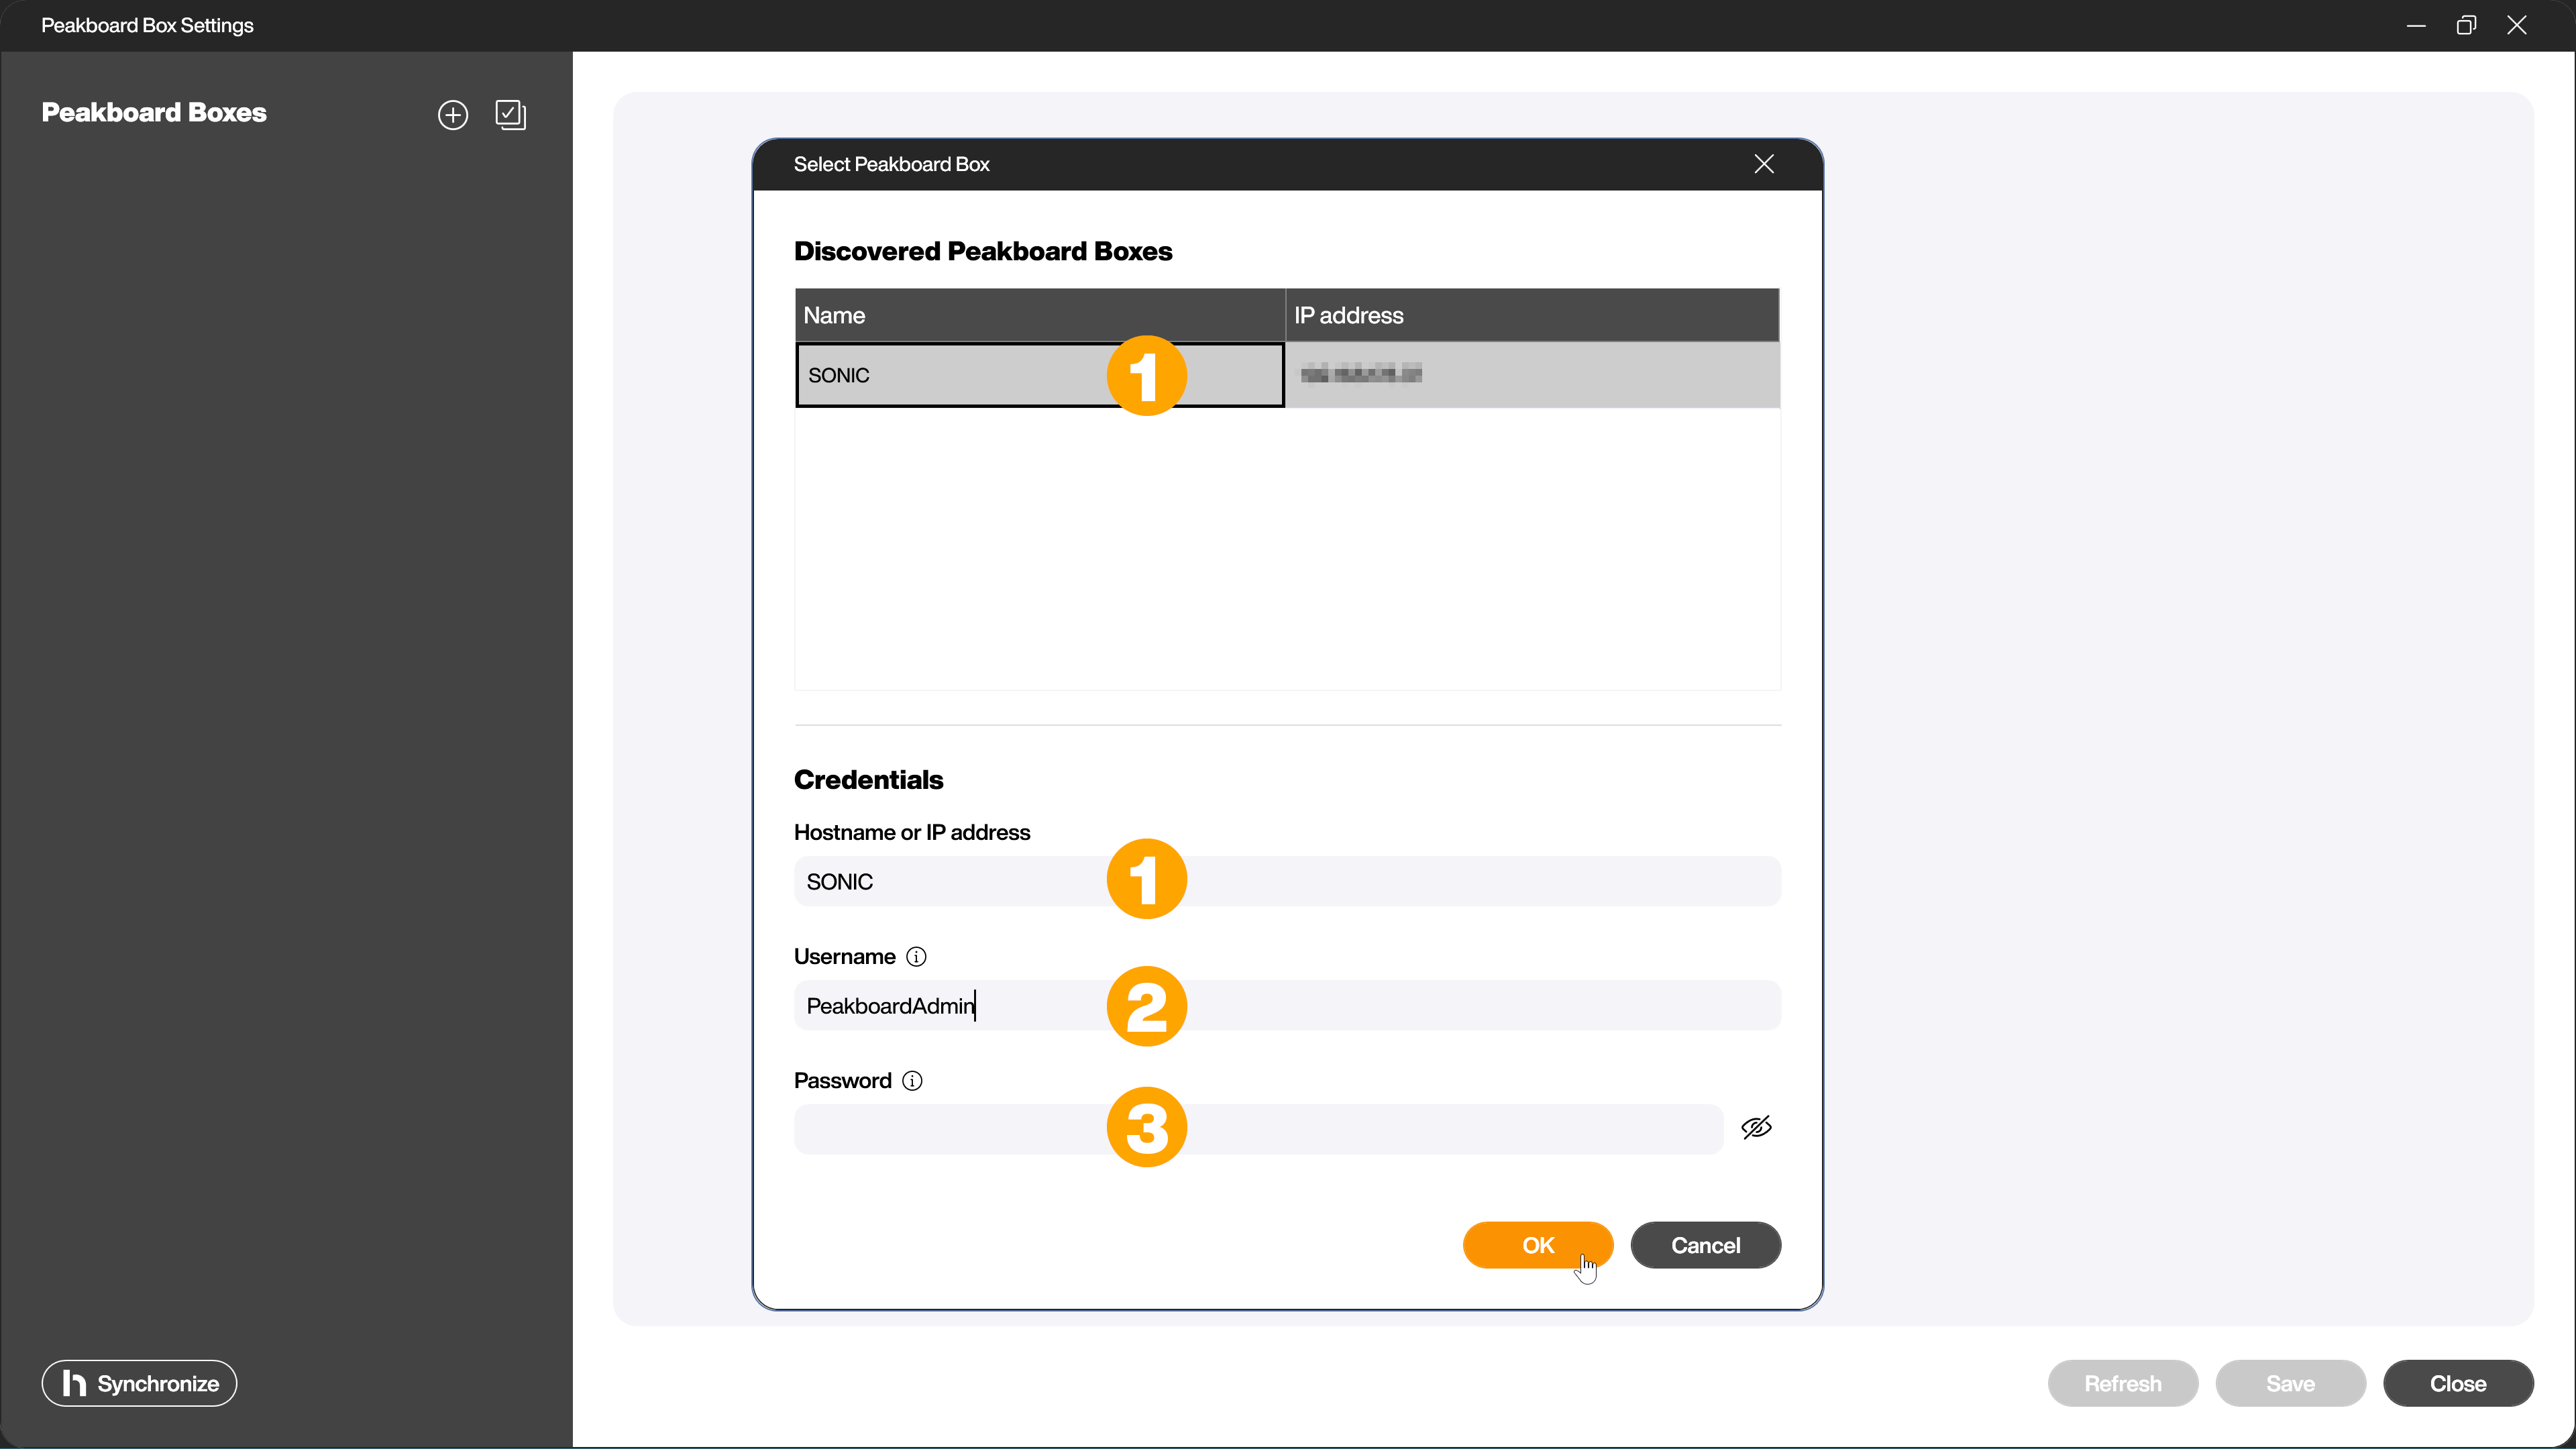
Now you can add the instance like a Peakboard Box in the Peakboard Designer. Select your Peakboard BYOD instance from the list (1) and enter the default user name (2) PeakboardAdmin. Leave the password (3) blank.
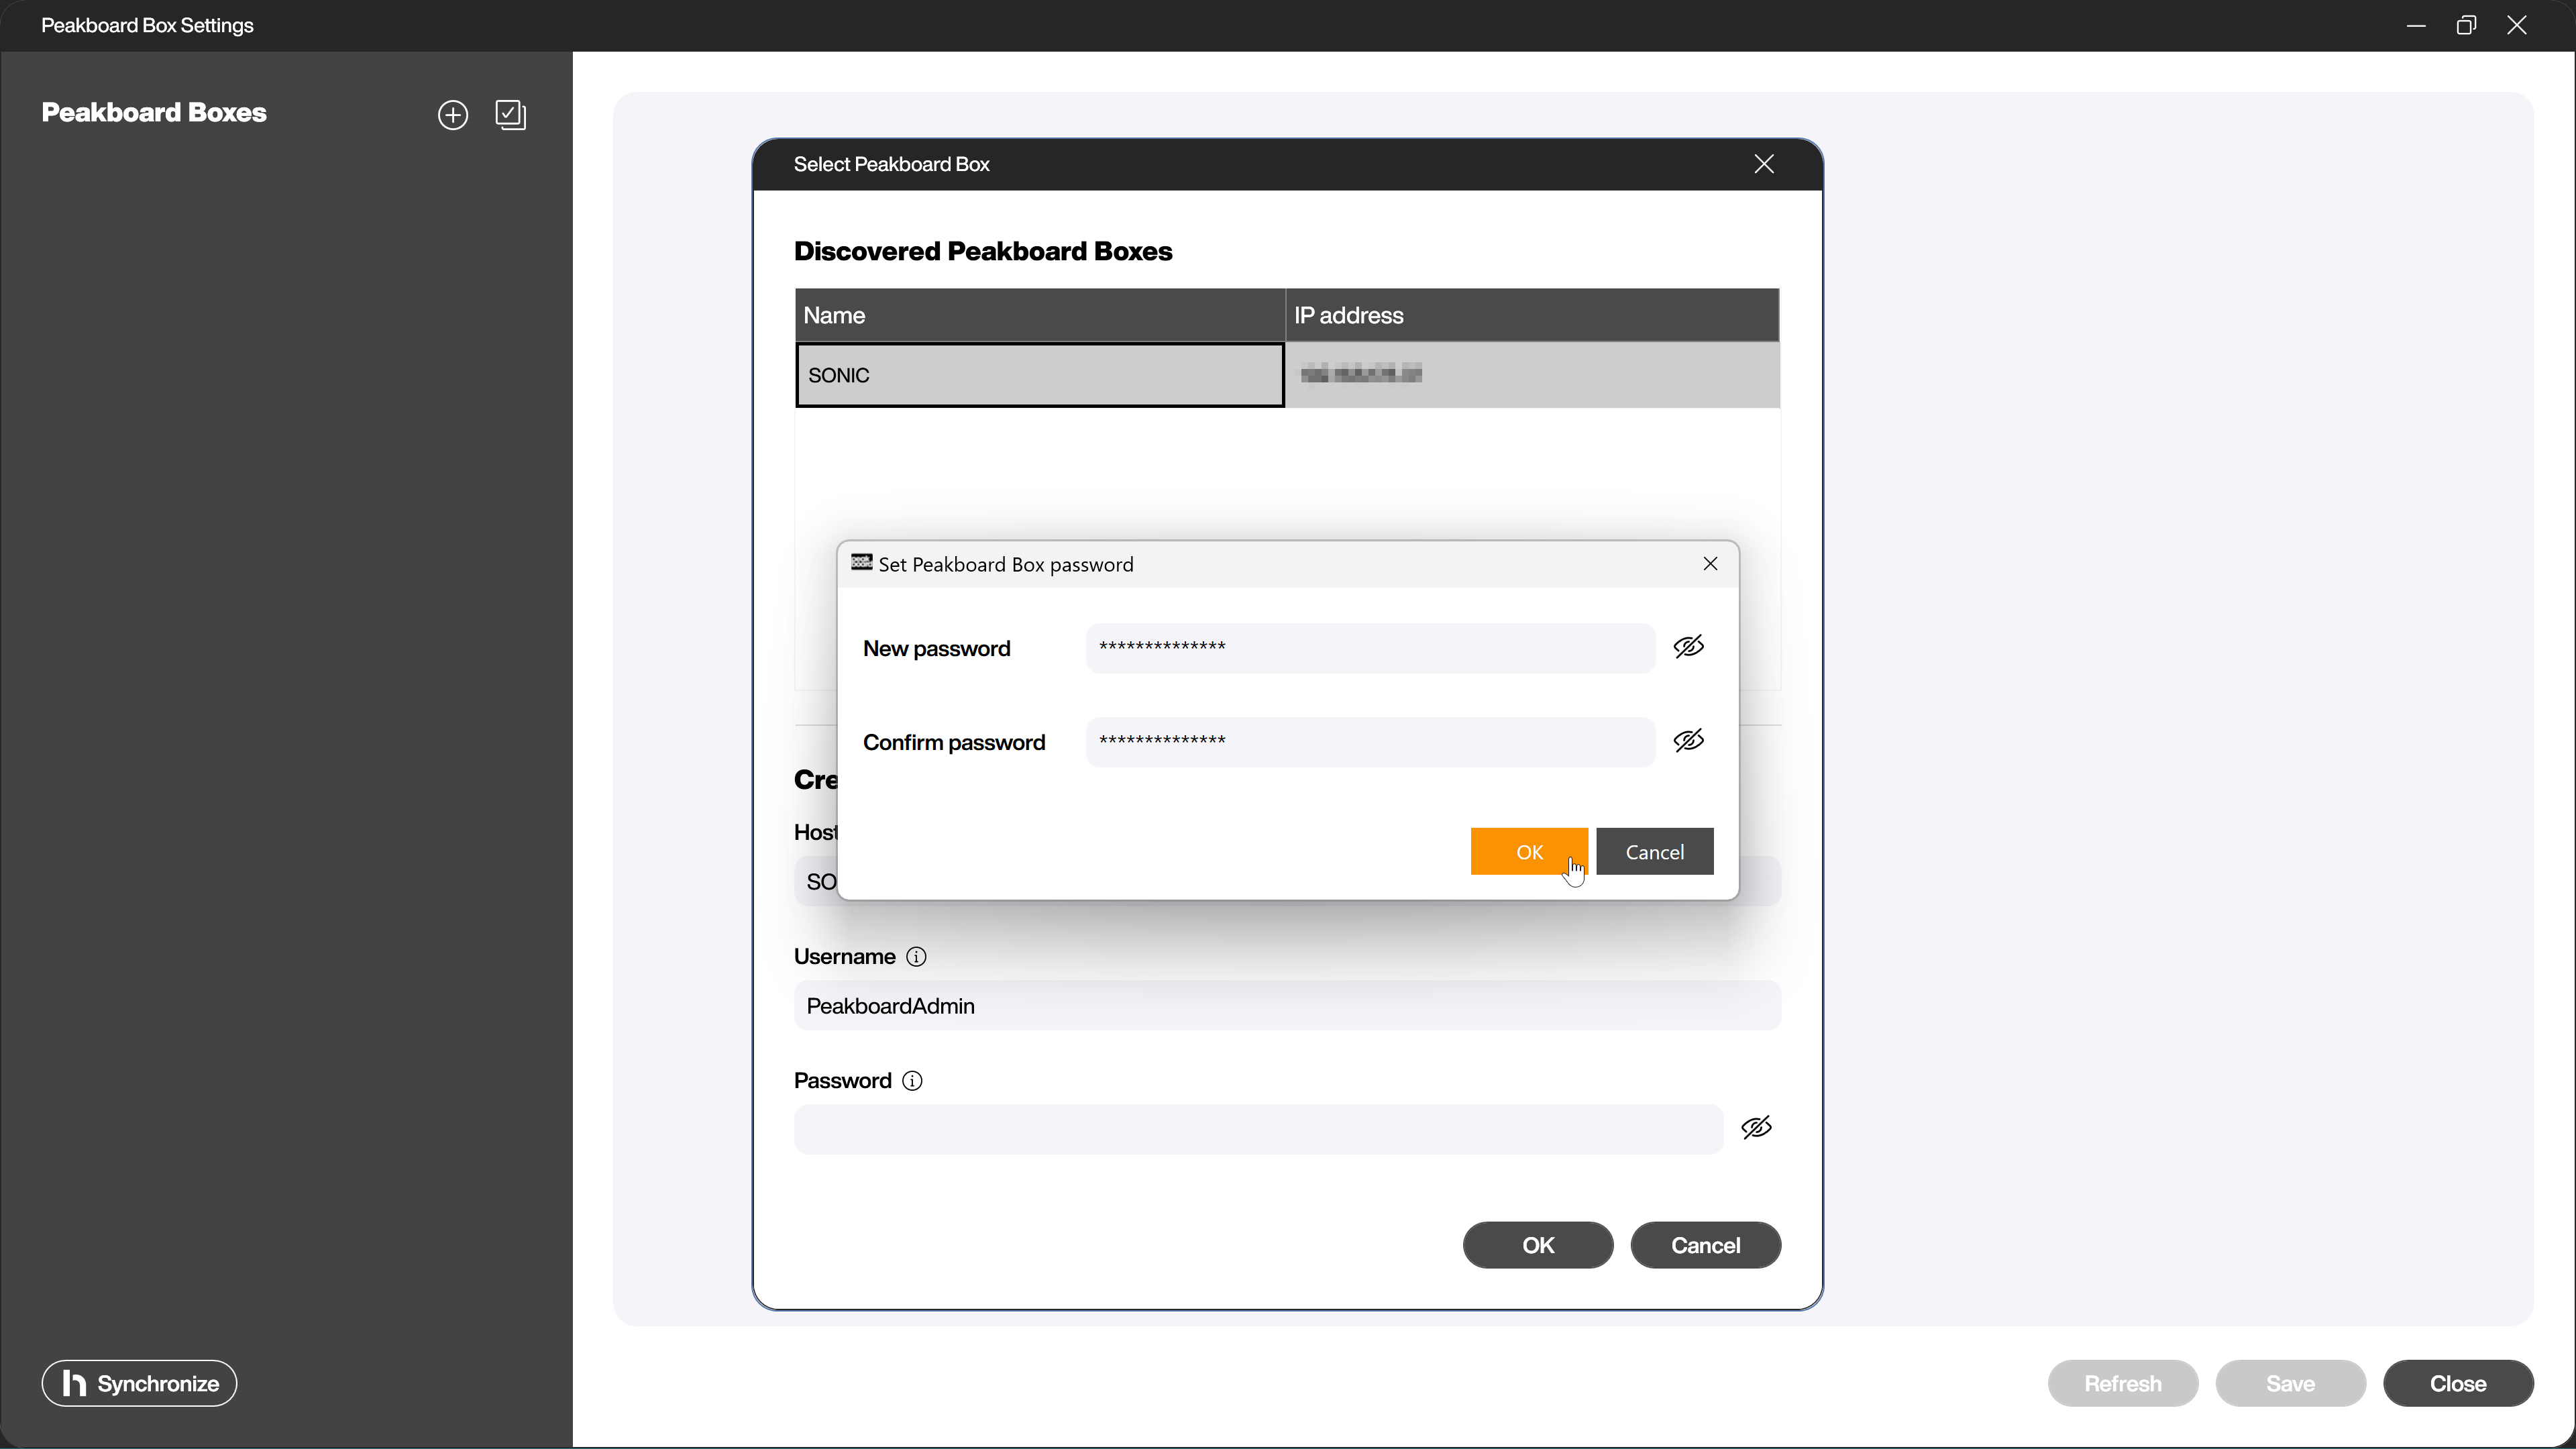
You will now be asked to assign a new password for the default user of the Peakboard Boxes. You can change the password later or add additional users.
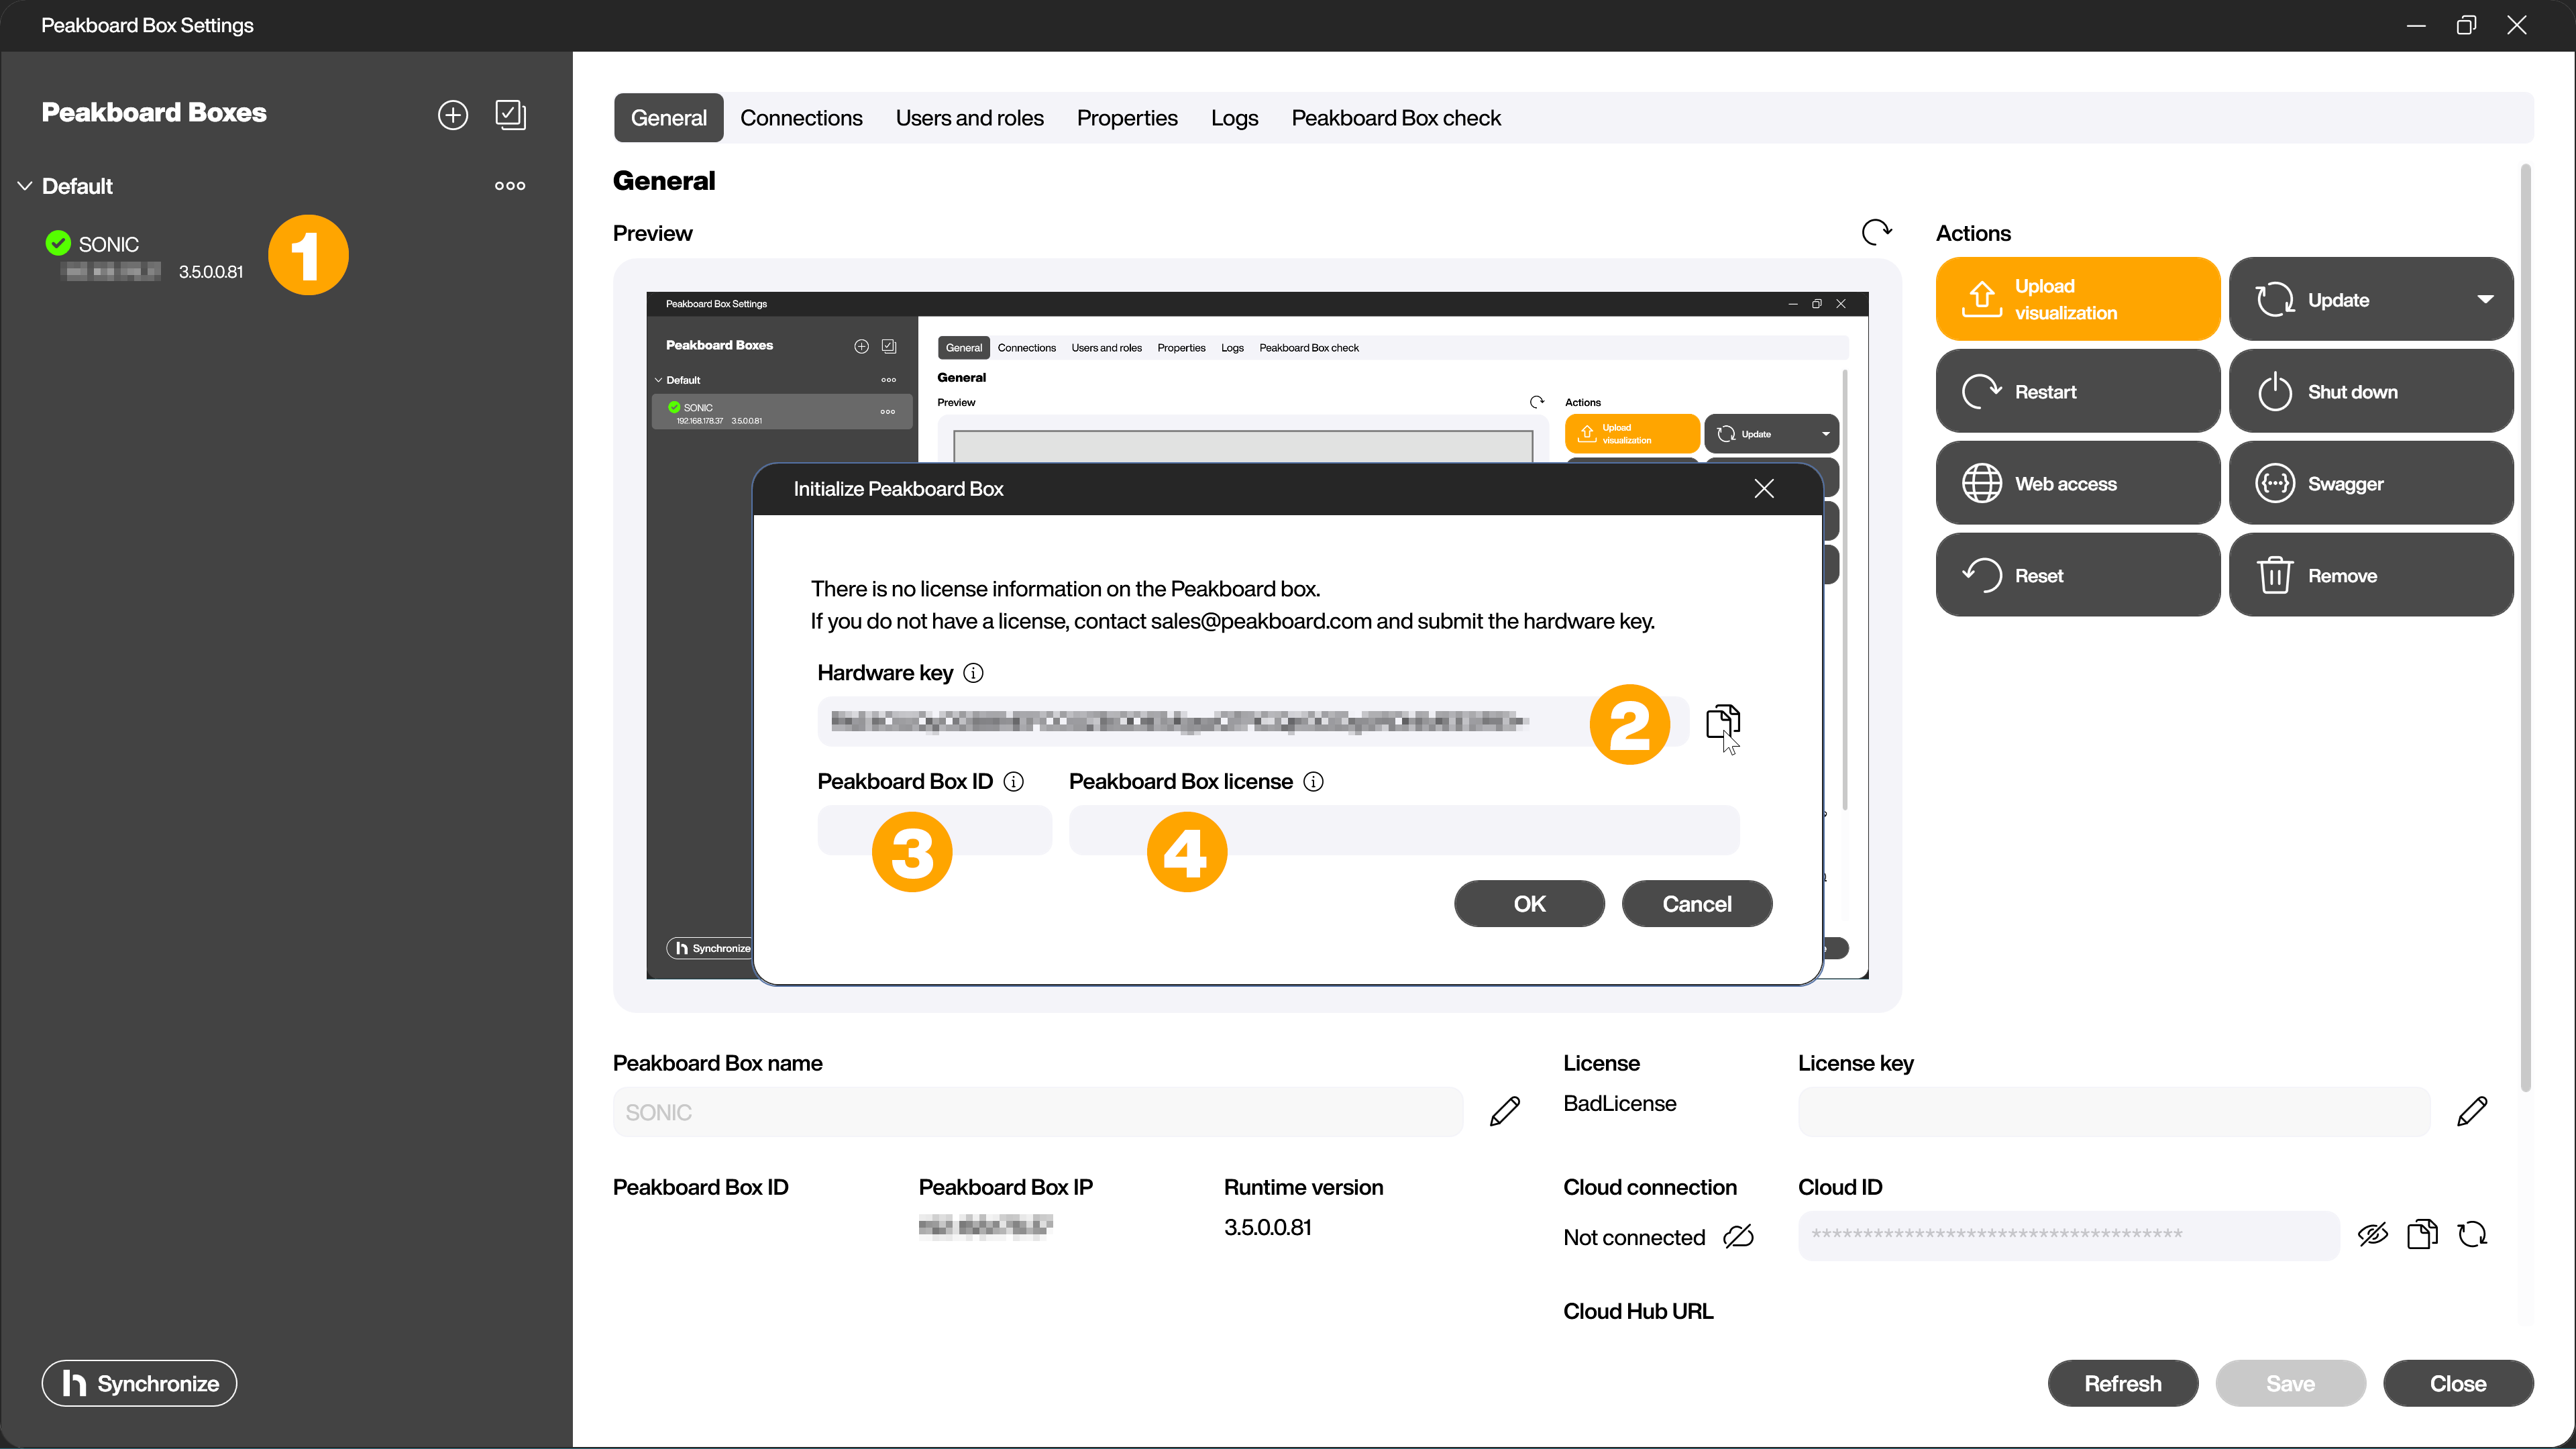
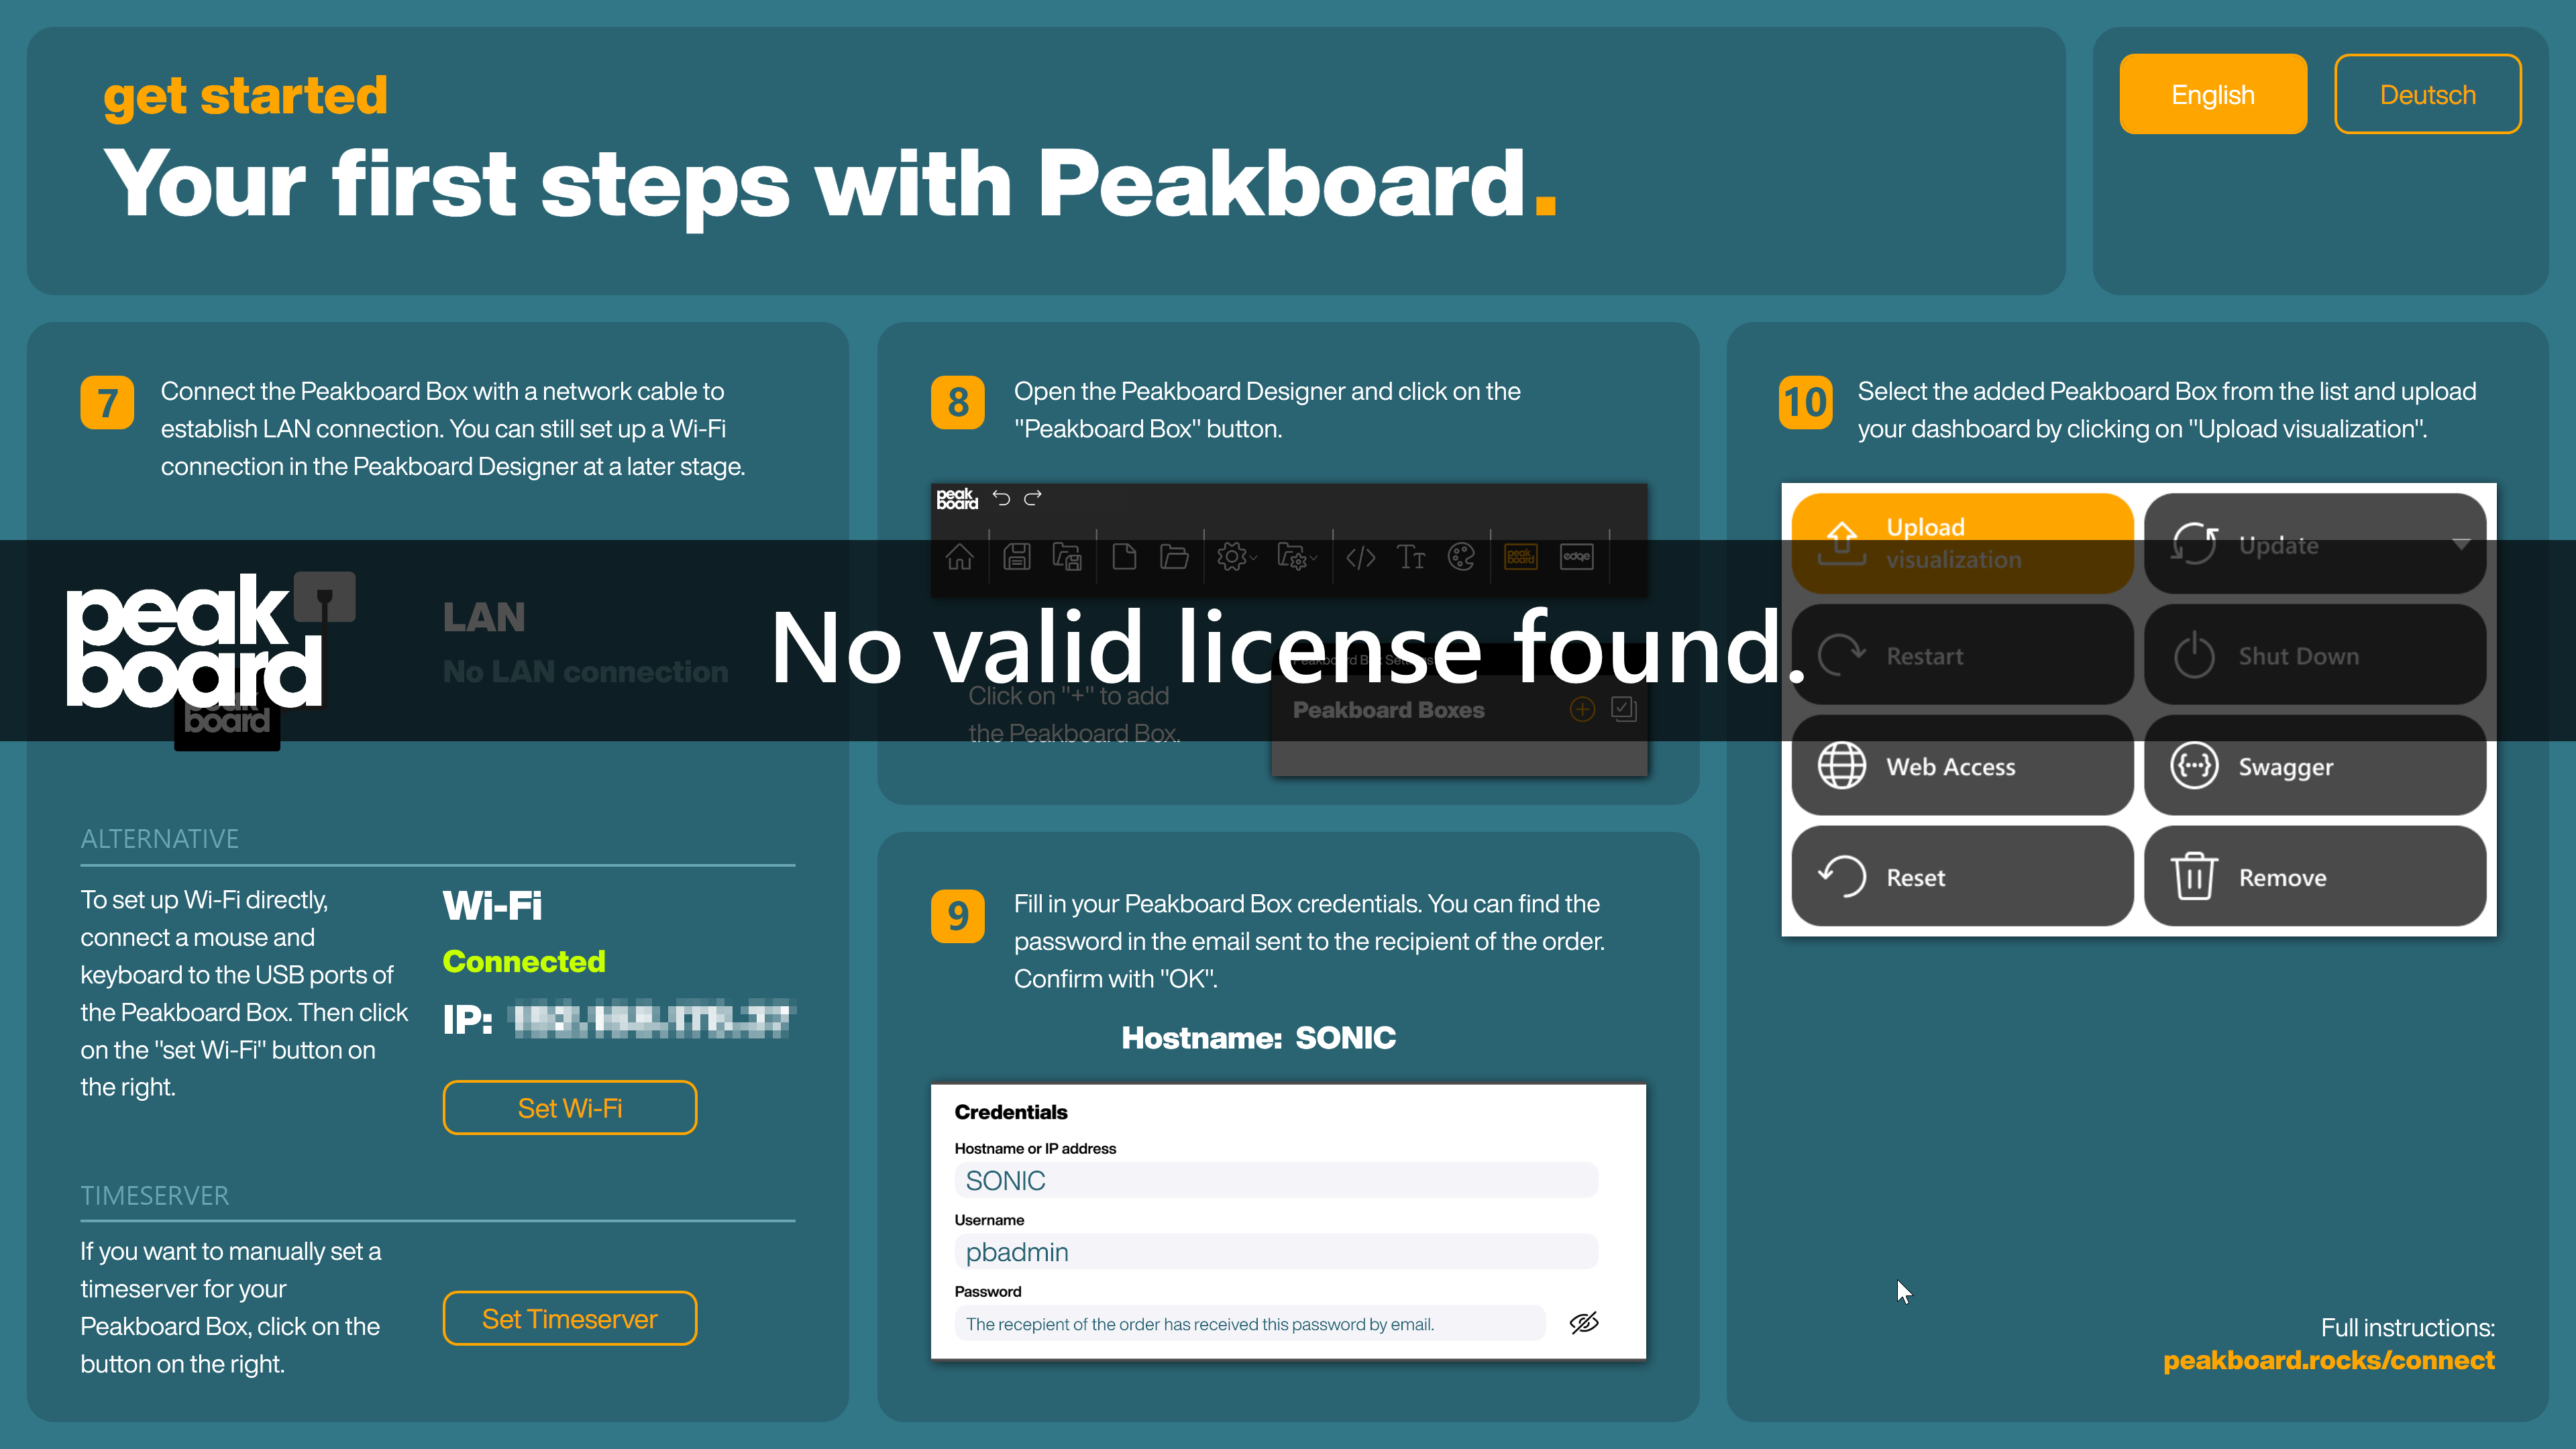
The Peakboard BYOD instance is now displayed in the list of Peakboard Boxes (1). As the instance is not yet licensed at this point, the input field for entering the license data appears. To request a license from the Peakboard sales team, please send the hardware key (2) by e-mail. You will then receive a Peakboard Box ID (3) and a corresponding license key (4). The license key is a cryptic key (approx. 20-30 characters long), and the Peakboard Box ID has the format [PBRXXXXX], where XXXX is a random number.
If you only want to use the instance for test purposes, you can skip this step and leave the instance unlicensed. An unlicensed Peakboard BYOD instance works without any restrictions. Only a banner will appear indicating the missing license.
Automatic login and automatic start
In many use cases, the Peakboard BYOD instance should be started automatically after the device is switched on without the end user having to interact with the Windows interface.
The first step in setting up this behavior is to automatically perform a Windows logon after booting. This is done via a registry key. Ideally, there is a local Windows account on the computer that is used for the automatic logon. Run the following powershell script to set the registry key for automatic logon. Replace the user name and password.
$Username = Read-Host 'Enter username for auto-logon (f.e. domain\peakboard)'
$Pass = Read-Host "Enter password for $Username"
$RegistryPath = 'HKLM:\SOFTWARE\Microsoft\Windows NT\CurrentVersion\Winlogon'
Set-ItemProperty $RegistryPath 'AutoAdminLogon' -Value "1" -type String
Set-ItemProperty $RegistryPath 'DefaultUsername' -Value "$Username" -type String
Set-ItemProperty $RegistryPath 'DefaultPassword' -Value "$Pass" -type String
To start Peakboard BYOD automatically after the automatic login, create a shortcut for the Peakboard.Runtime.Wpf.exe in the user directory of %appdata%\Microsoft\Windows\Start Menu\Programs\Startup, for example C:\Users\username\AppData\Roaming\Microsoft\Windows\Start Menu\Programs\Startup.
If you selected this item during the installation, the setup has already done this step for you.
Further tips and tricks
The steps described above are the most important steps to get Peakboard BYOD up and running on a device. If you want to make the user experience even smoother and further hide Windows from the end users, here are some ideas to achieve this:
- Use a solid color, black desktop background
- Remove all shortcuts on the desktop
- Hide the taskbar
- Use a monochrome, black profile picture for the account under which the Peakboard BYOD instance is running
- Adapt the Windows energy settings to your use case. This usually means deactivating the screen saver, automatic sleep mode, etc.