Peakboard edge
Manage Peakboard Edge
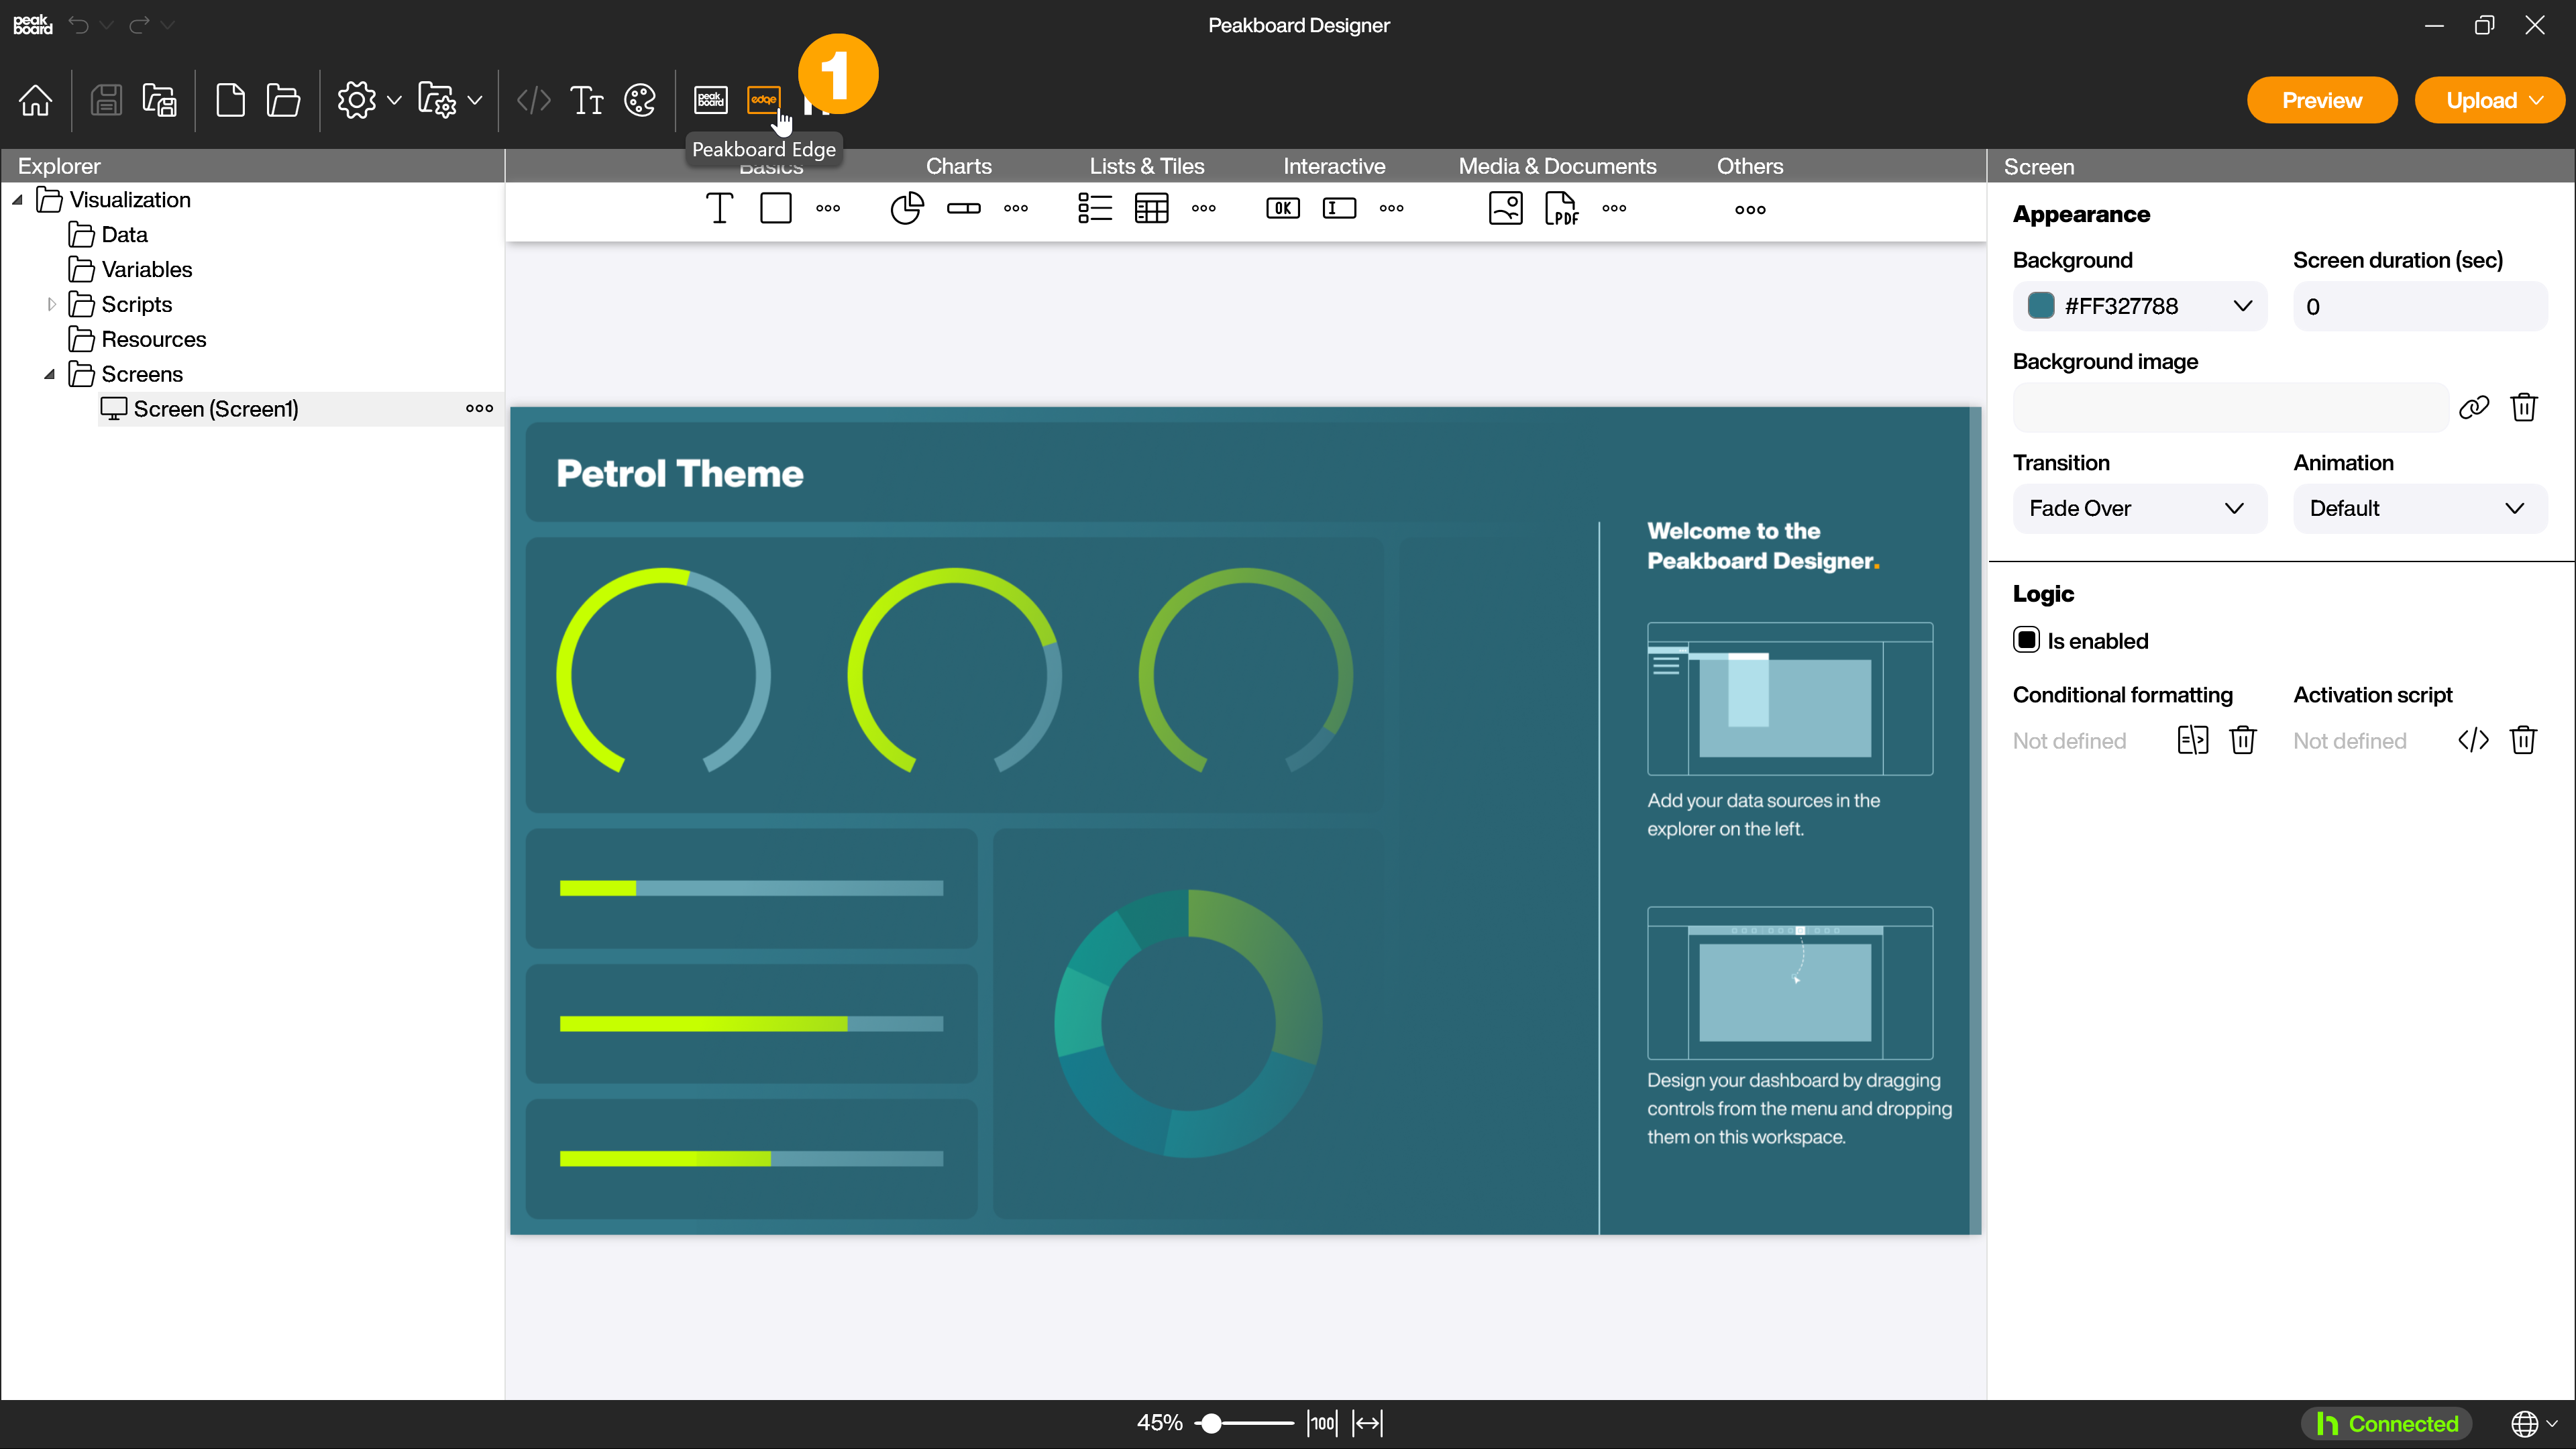
To add a new Peakboard Edge or to manage your existing Peakboard Edge click on the Peakboard Edgde icon (1) in the menu bar to open the Peakboard Edge settings.
The Peakboard Edge settings are very similar to the Peakboard Box settings.
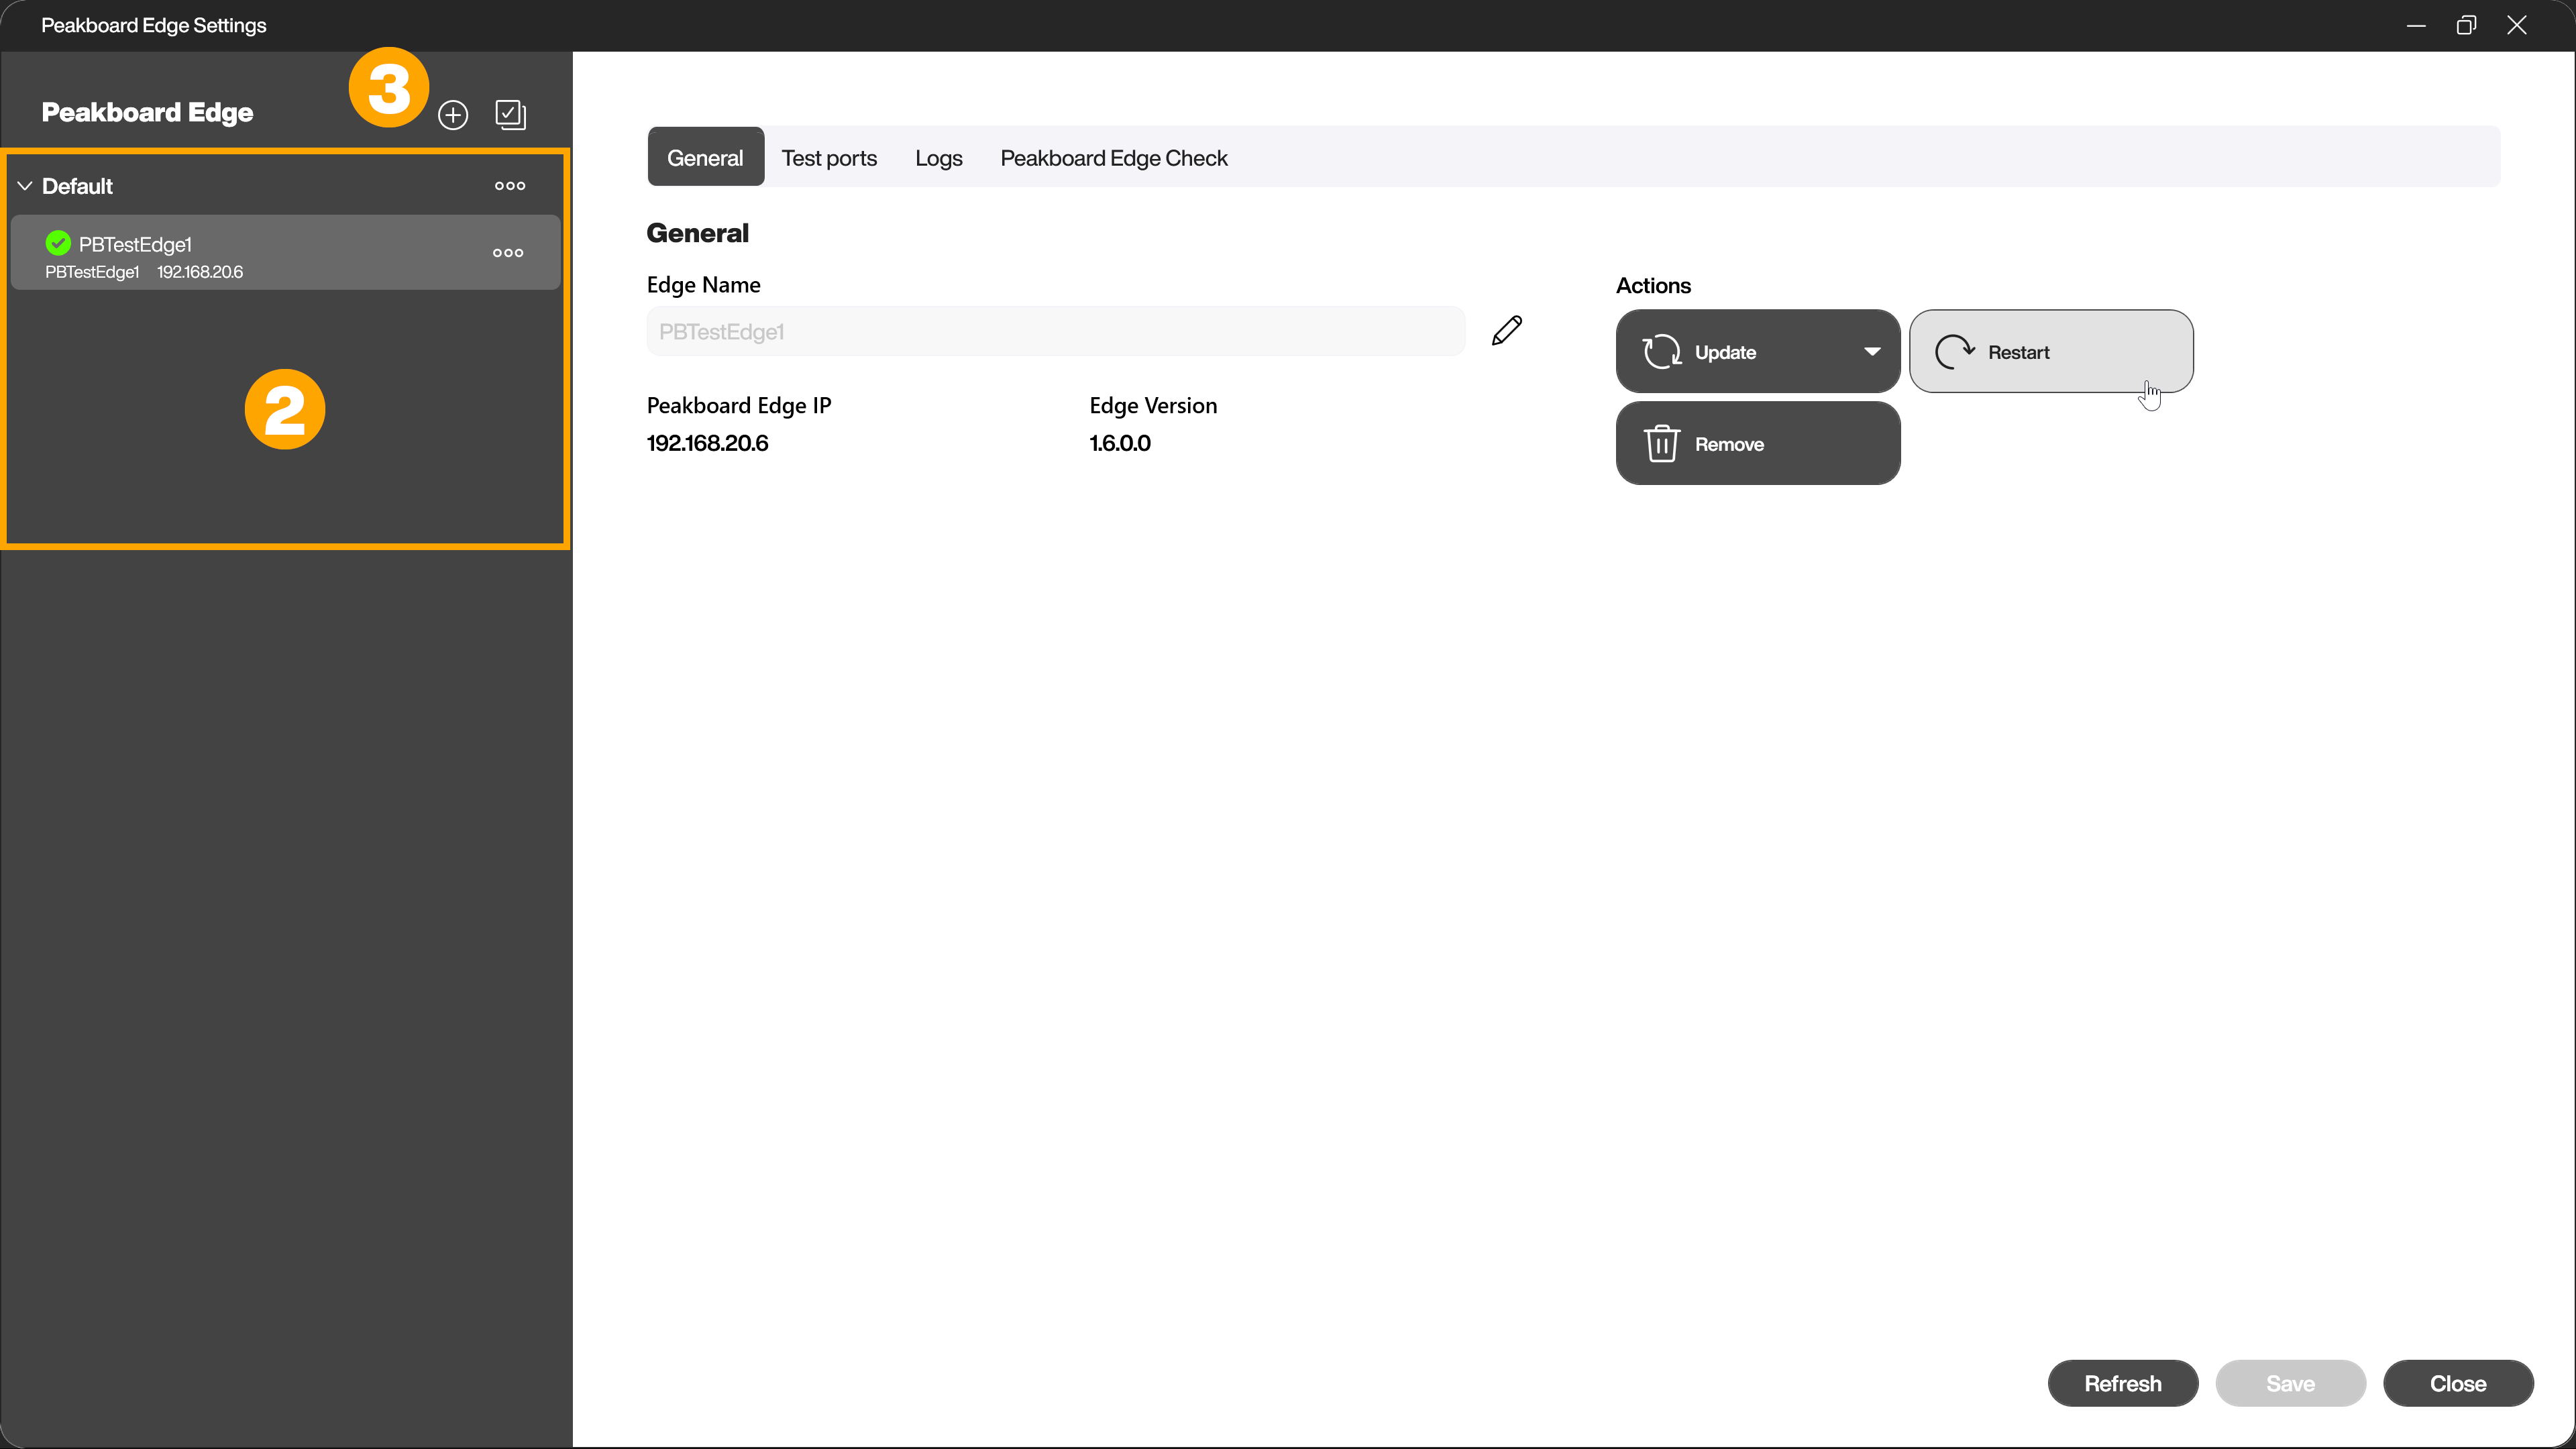
In the left pane you will find a list of your already added Peakboard Edge (2). With the [+] symbol (3) you can add a new Peakboard Edge. In the right area you will find different tabs with which you can manage the respective Peakboard Edge. If you select multiple Peakboard Edge, you can perform the displayed actions with multiple Peakboard Edge at the same time.
Add Peakboard Edge
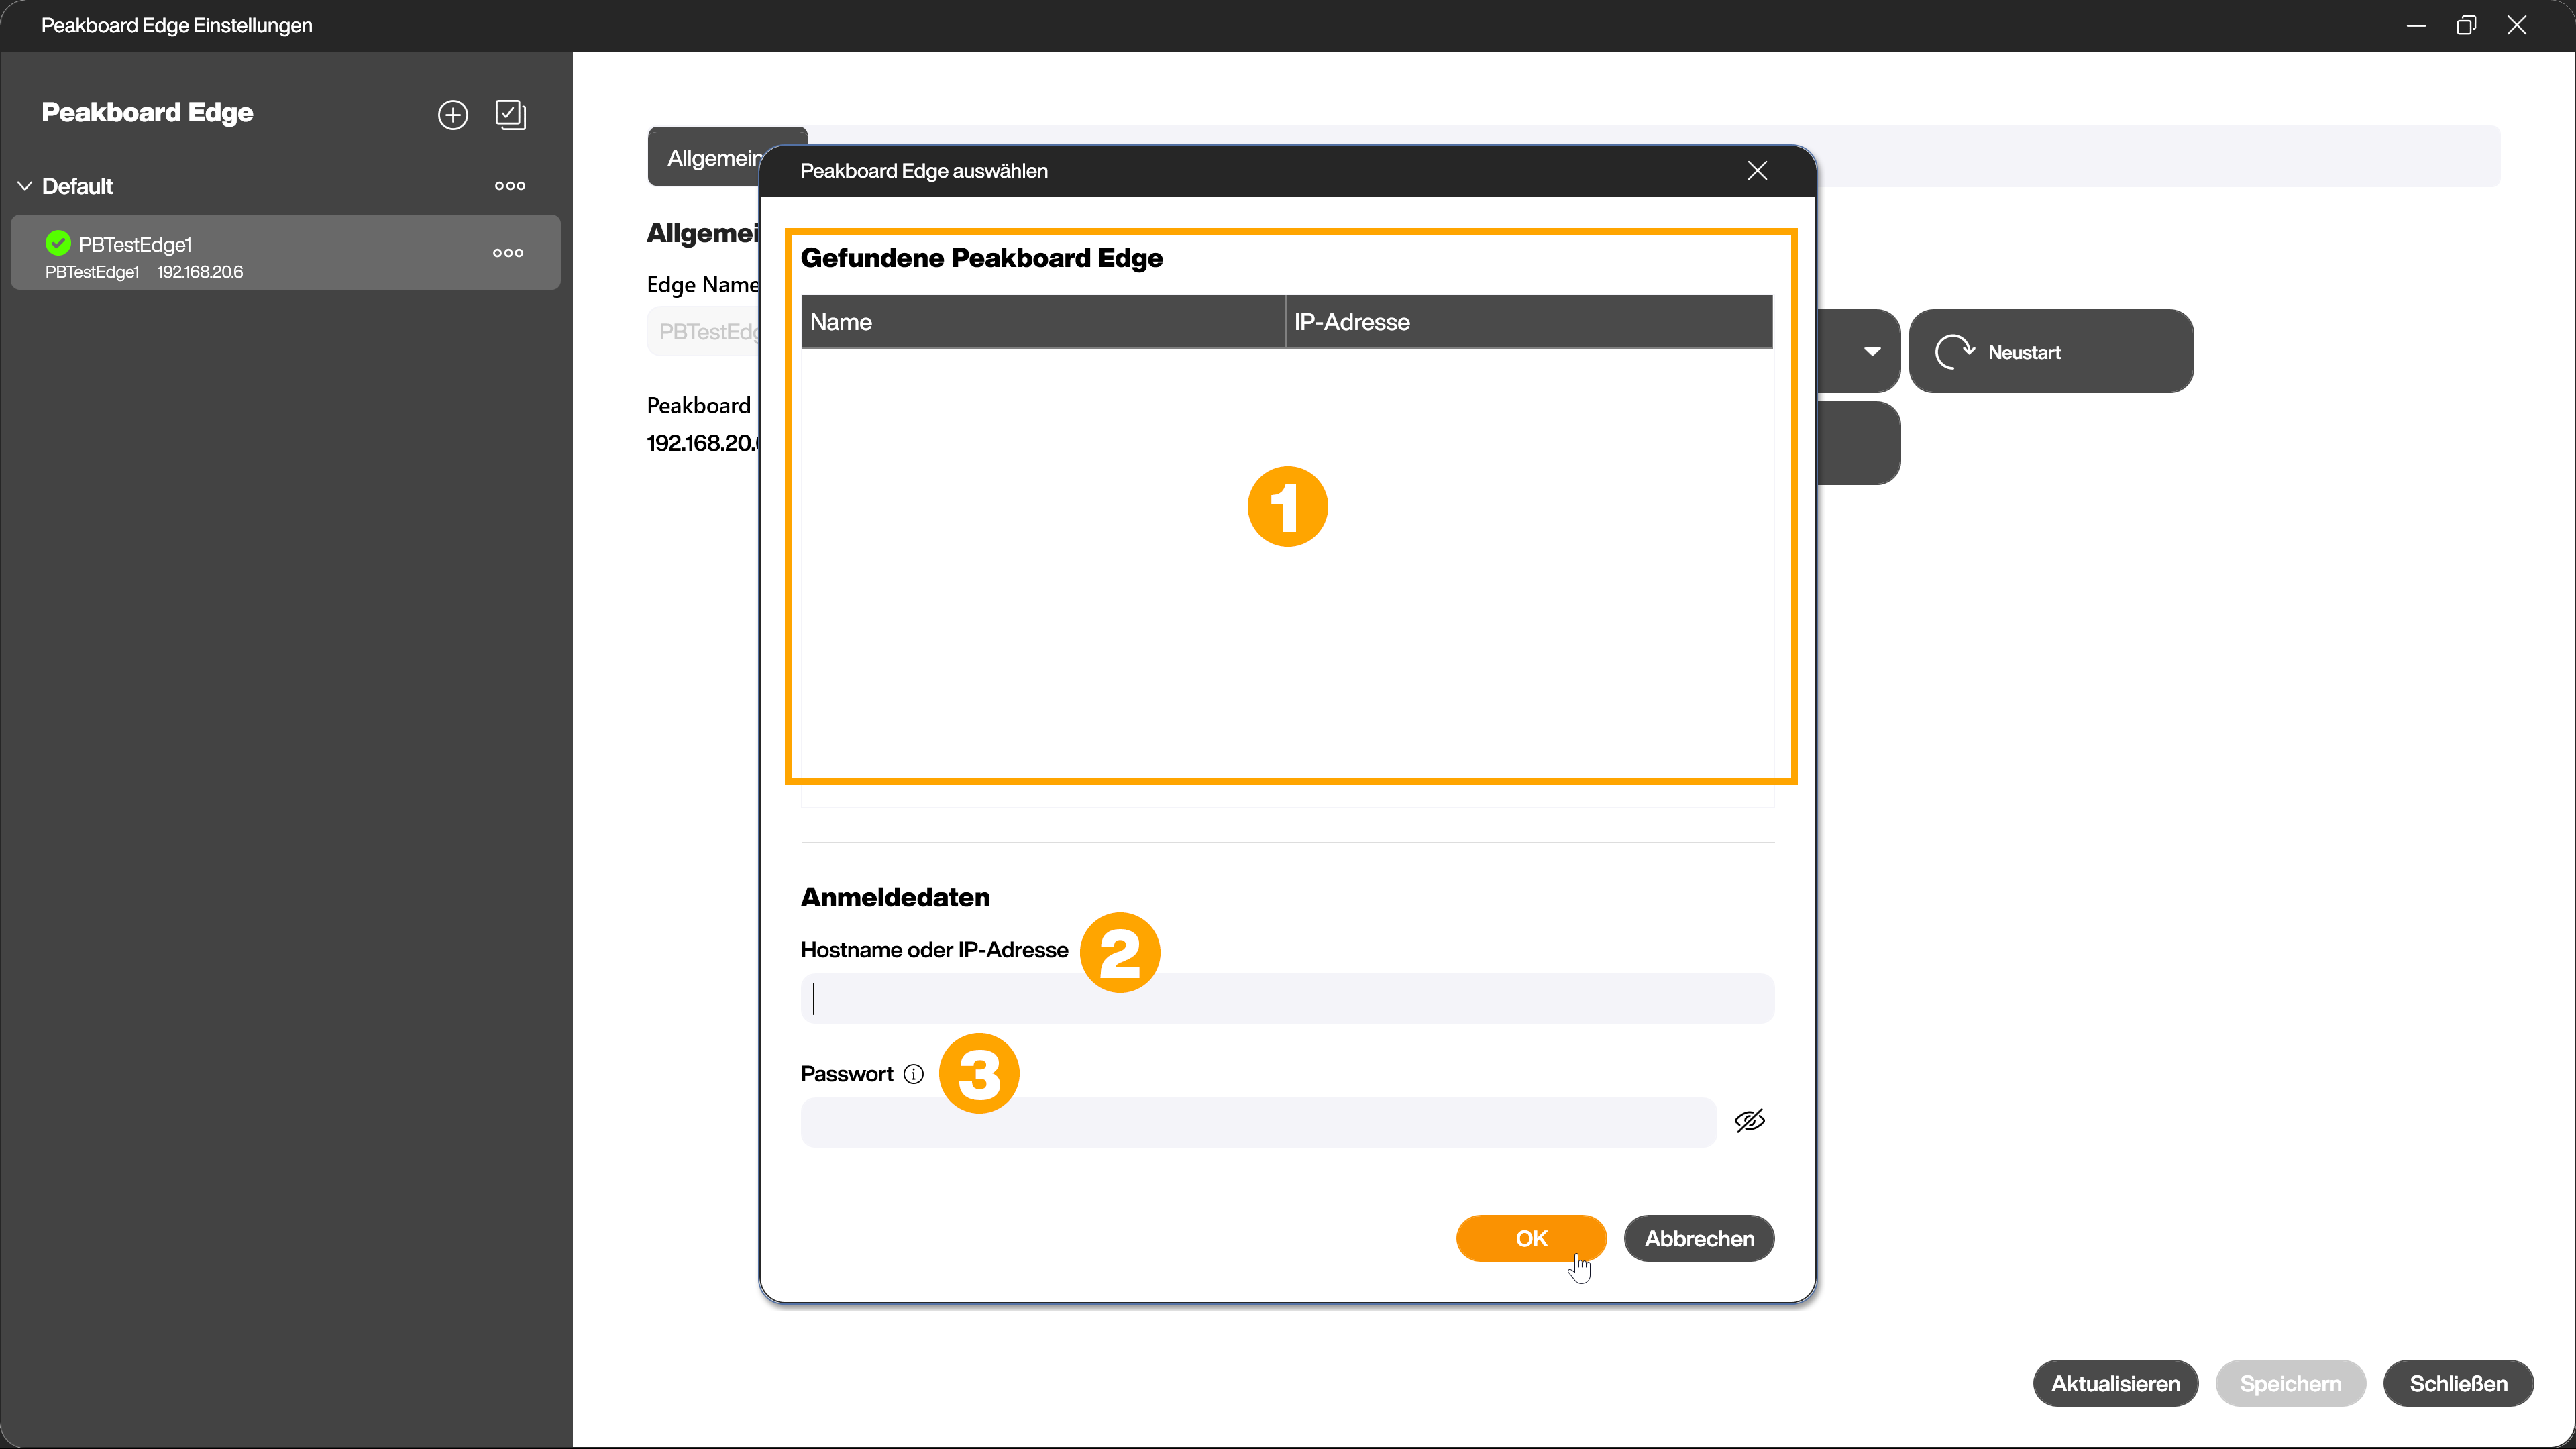
After clicking on the [+] symbol, the dialog for adding a new Peakboard Edge opens.
You can select an automatically detected Peakboard Edge (1) or add a Peakboard Edge manually by entering the IP address (2) and the corresponding password (3).
Peakboard Edge settings
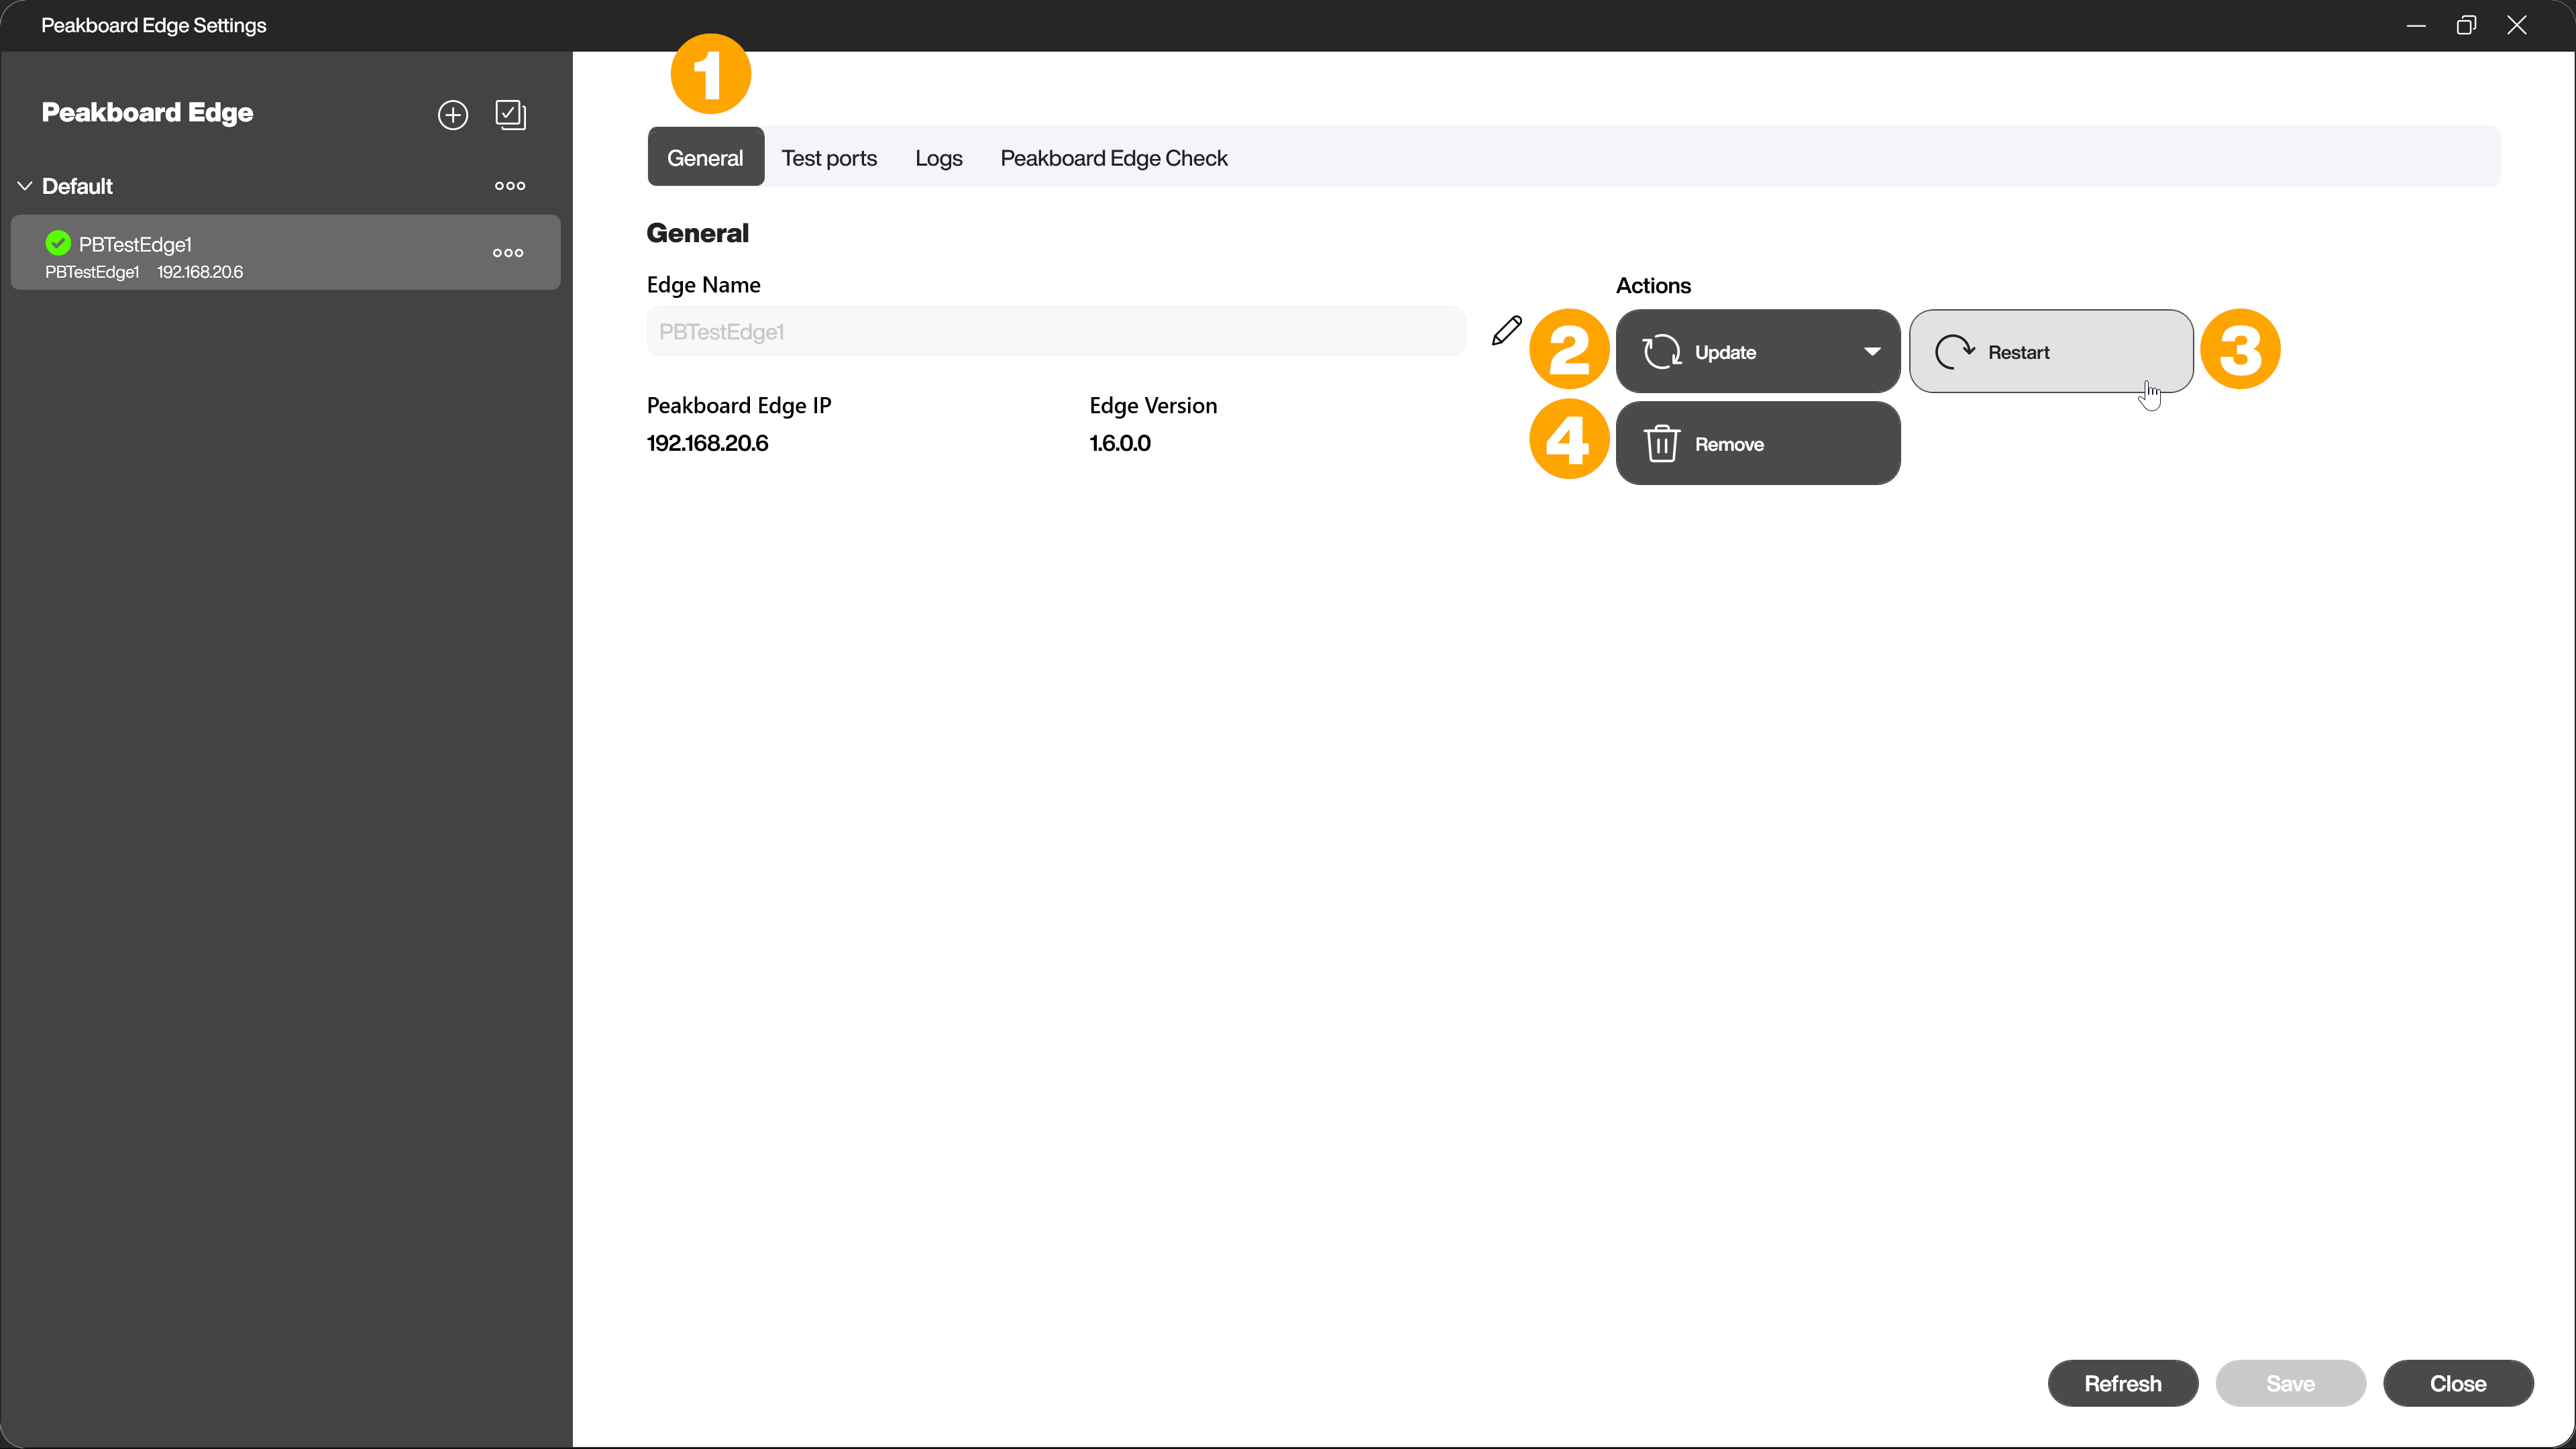
In the tab [General] (1) you have the option to update (2), restart (3) or delete (4) the Peakboard Edge. You will also see the name of the Peakboard Edge, the IP address and the current version.
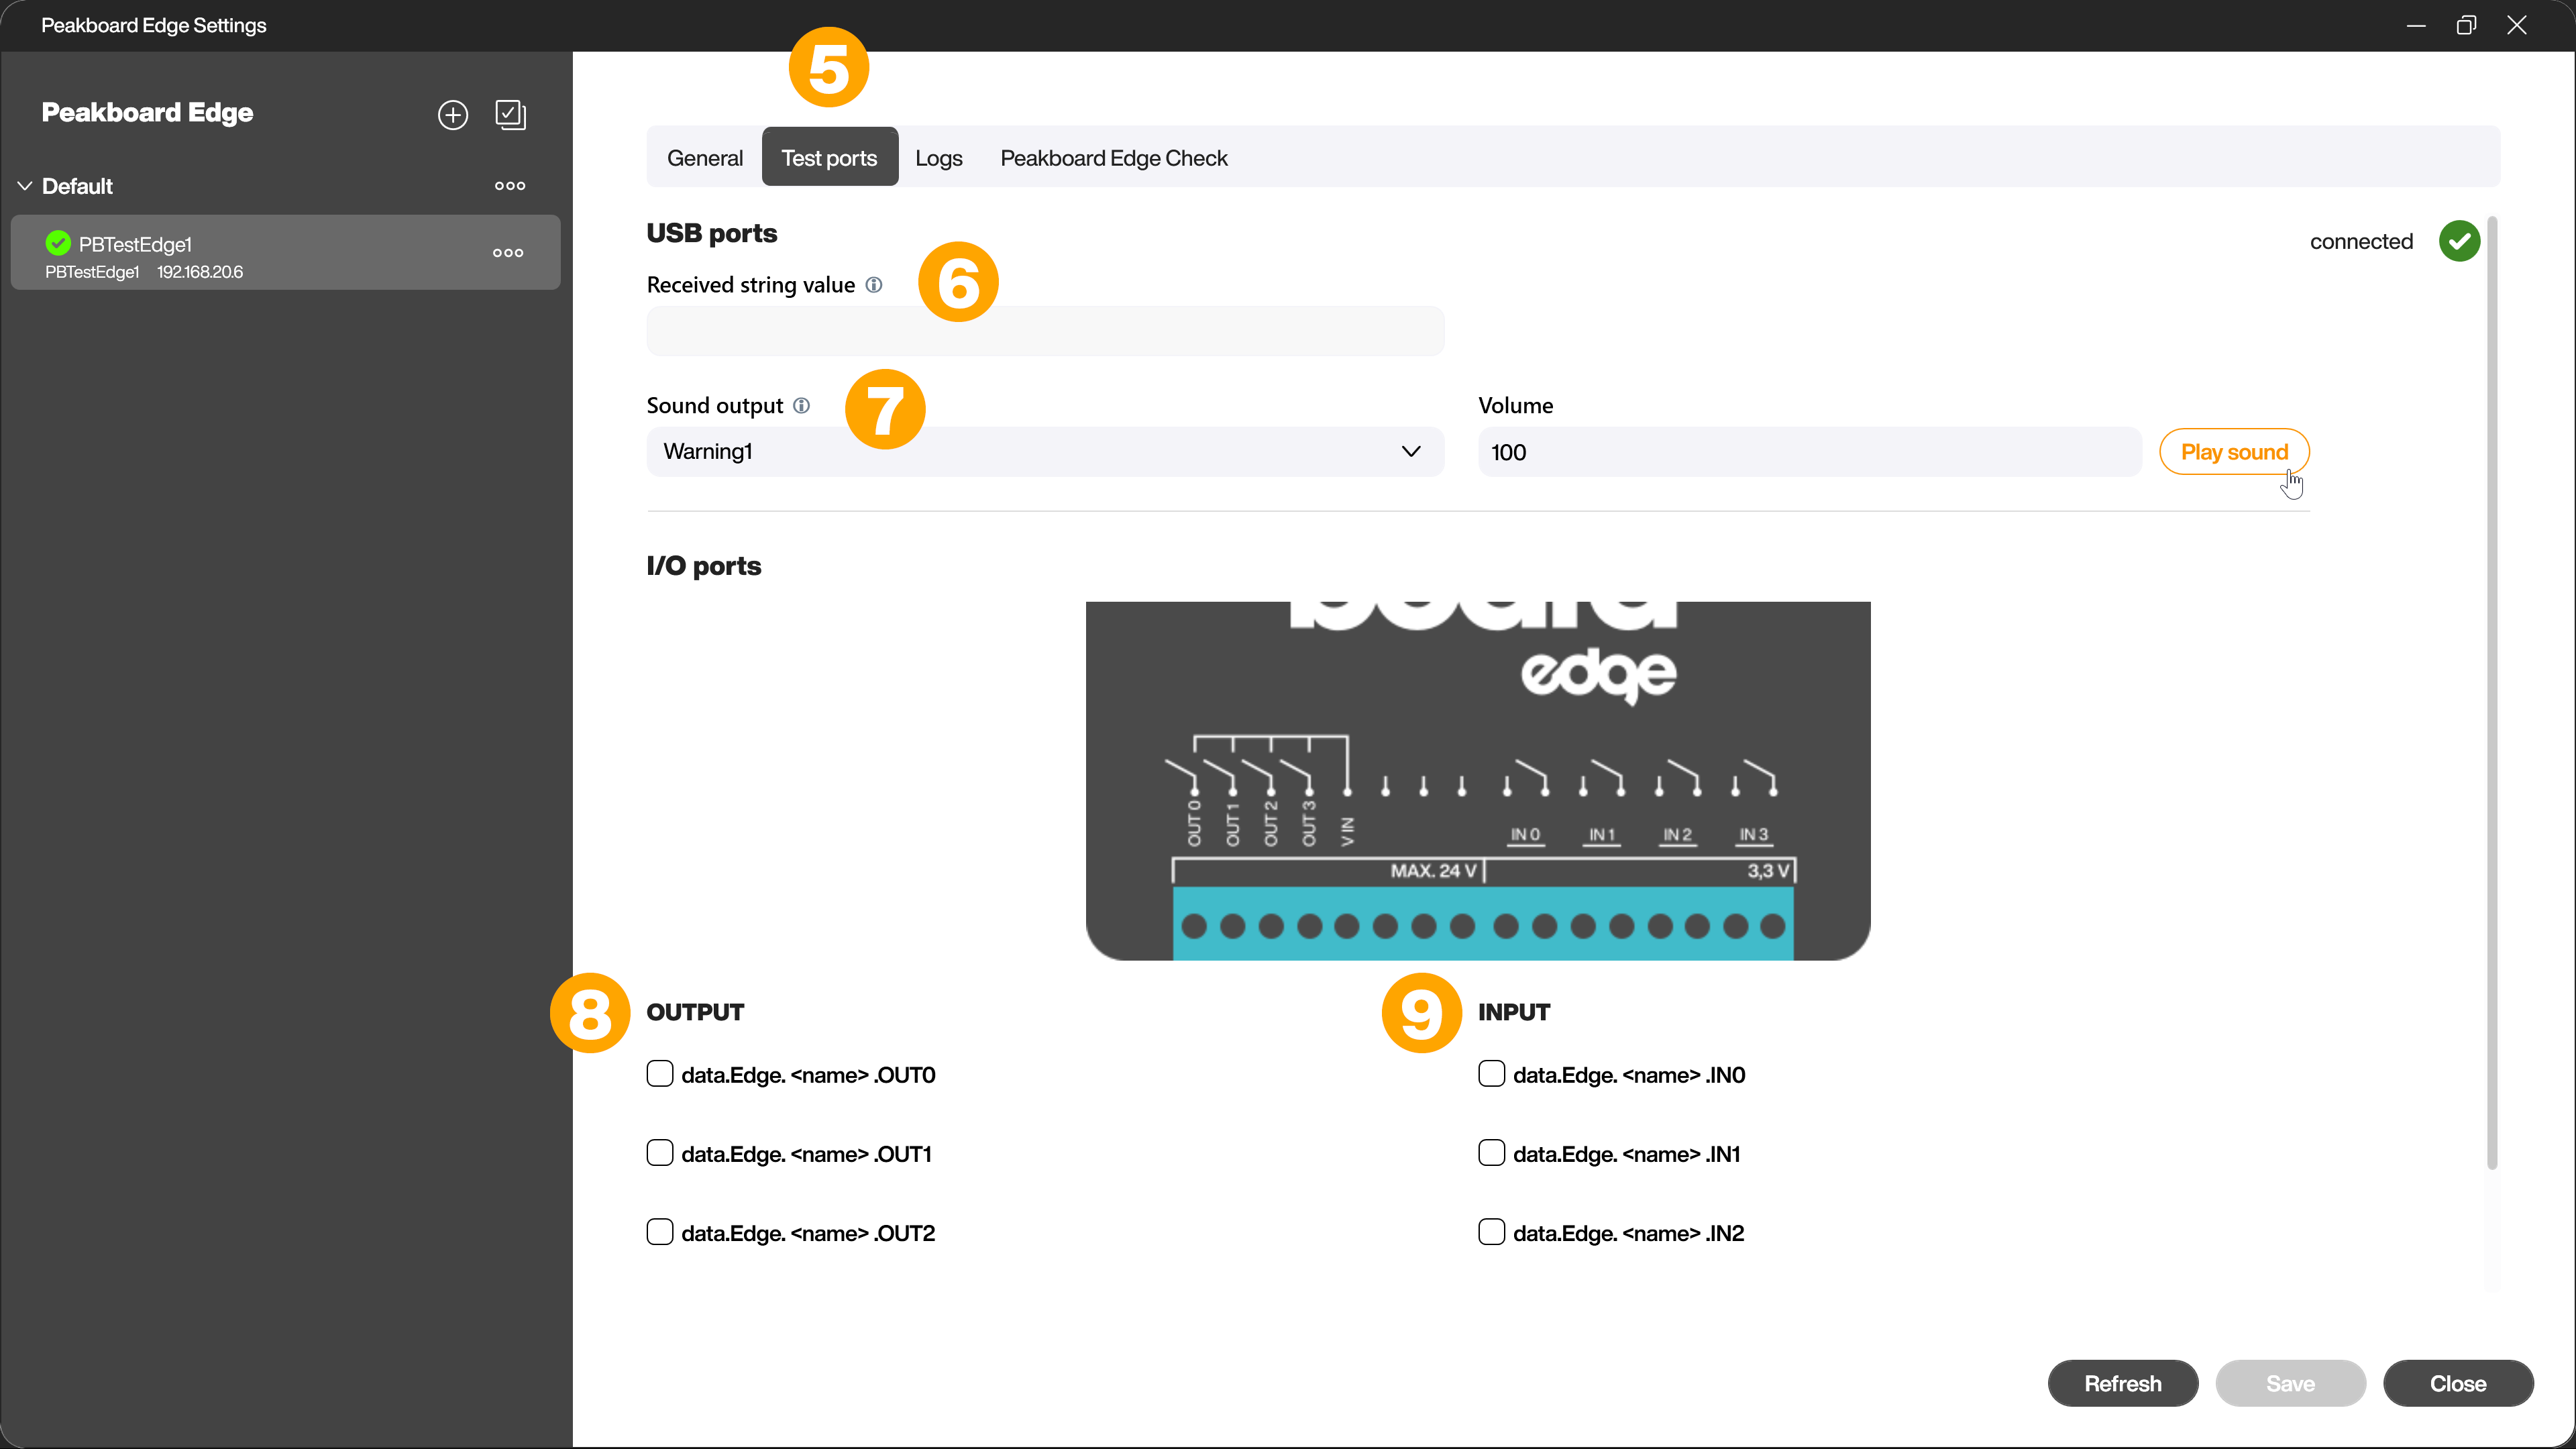
In the tab [Test ports] (5) you can check if the devices connected to the Peakboard Edge are working and connected correctly and if the connection to the Peakboard Designer is working correctly. In the upper right corner, [connected] is displayed when the connection has been successfully established. If it takes more than a few seconds for the status to display, there is probably a problem.
[Received string value] (6) shows the last text value read by the Peakboard Edge. For this, a barcode scanner, a keyboard, an RFID reader or similar must be connected via USB.
[Sound output] (7) can be used to play a sound on the Peakboard Edge if you have connected a USB speaker.
Via the [OUTPUT] check boxes (8) you can switch the relays on the Peakboard Edge. Correctly working relays can be heard by a clicking sound. This simulates the switching of a connected signal light or similar.
The [INPUT] check boxes (9) represent the values of the input pins of the terminal strip. You can change their status for example by connecting a switch.
In the tab [Logs] (10) you will find an overview of the existing log entries. You can filter and export them.

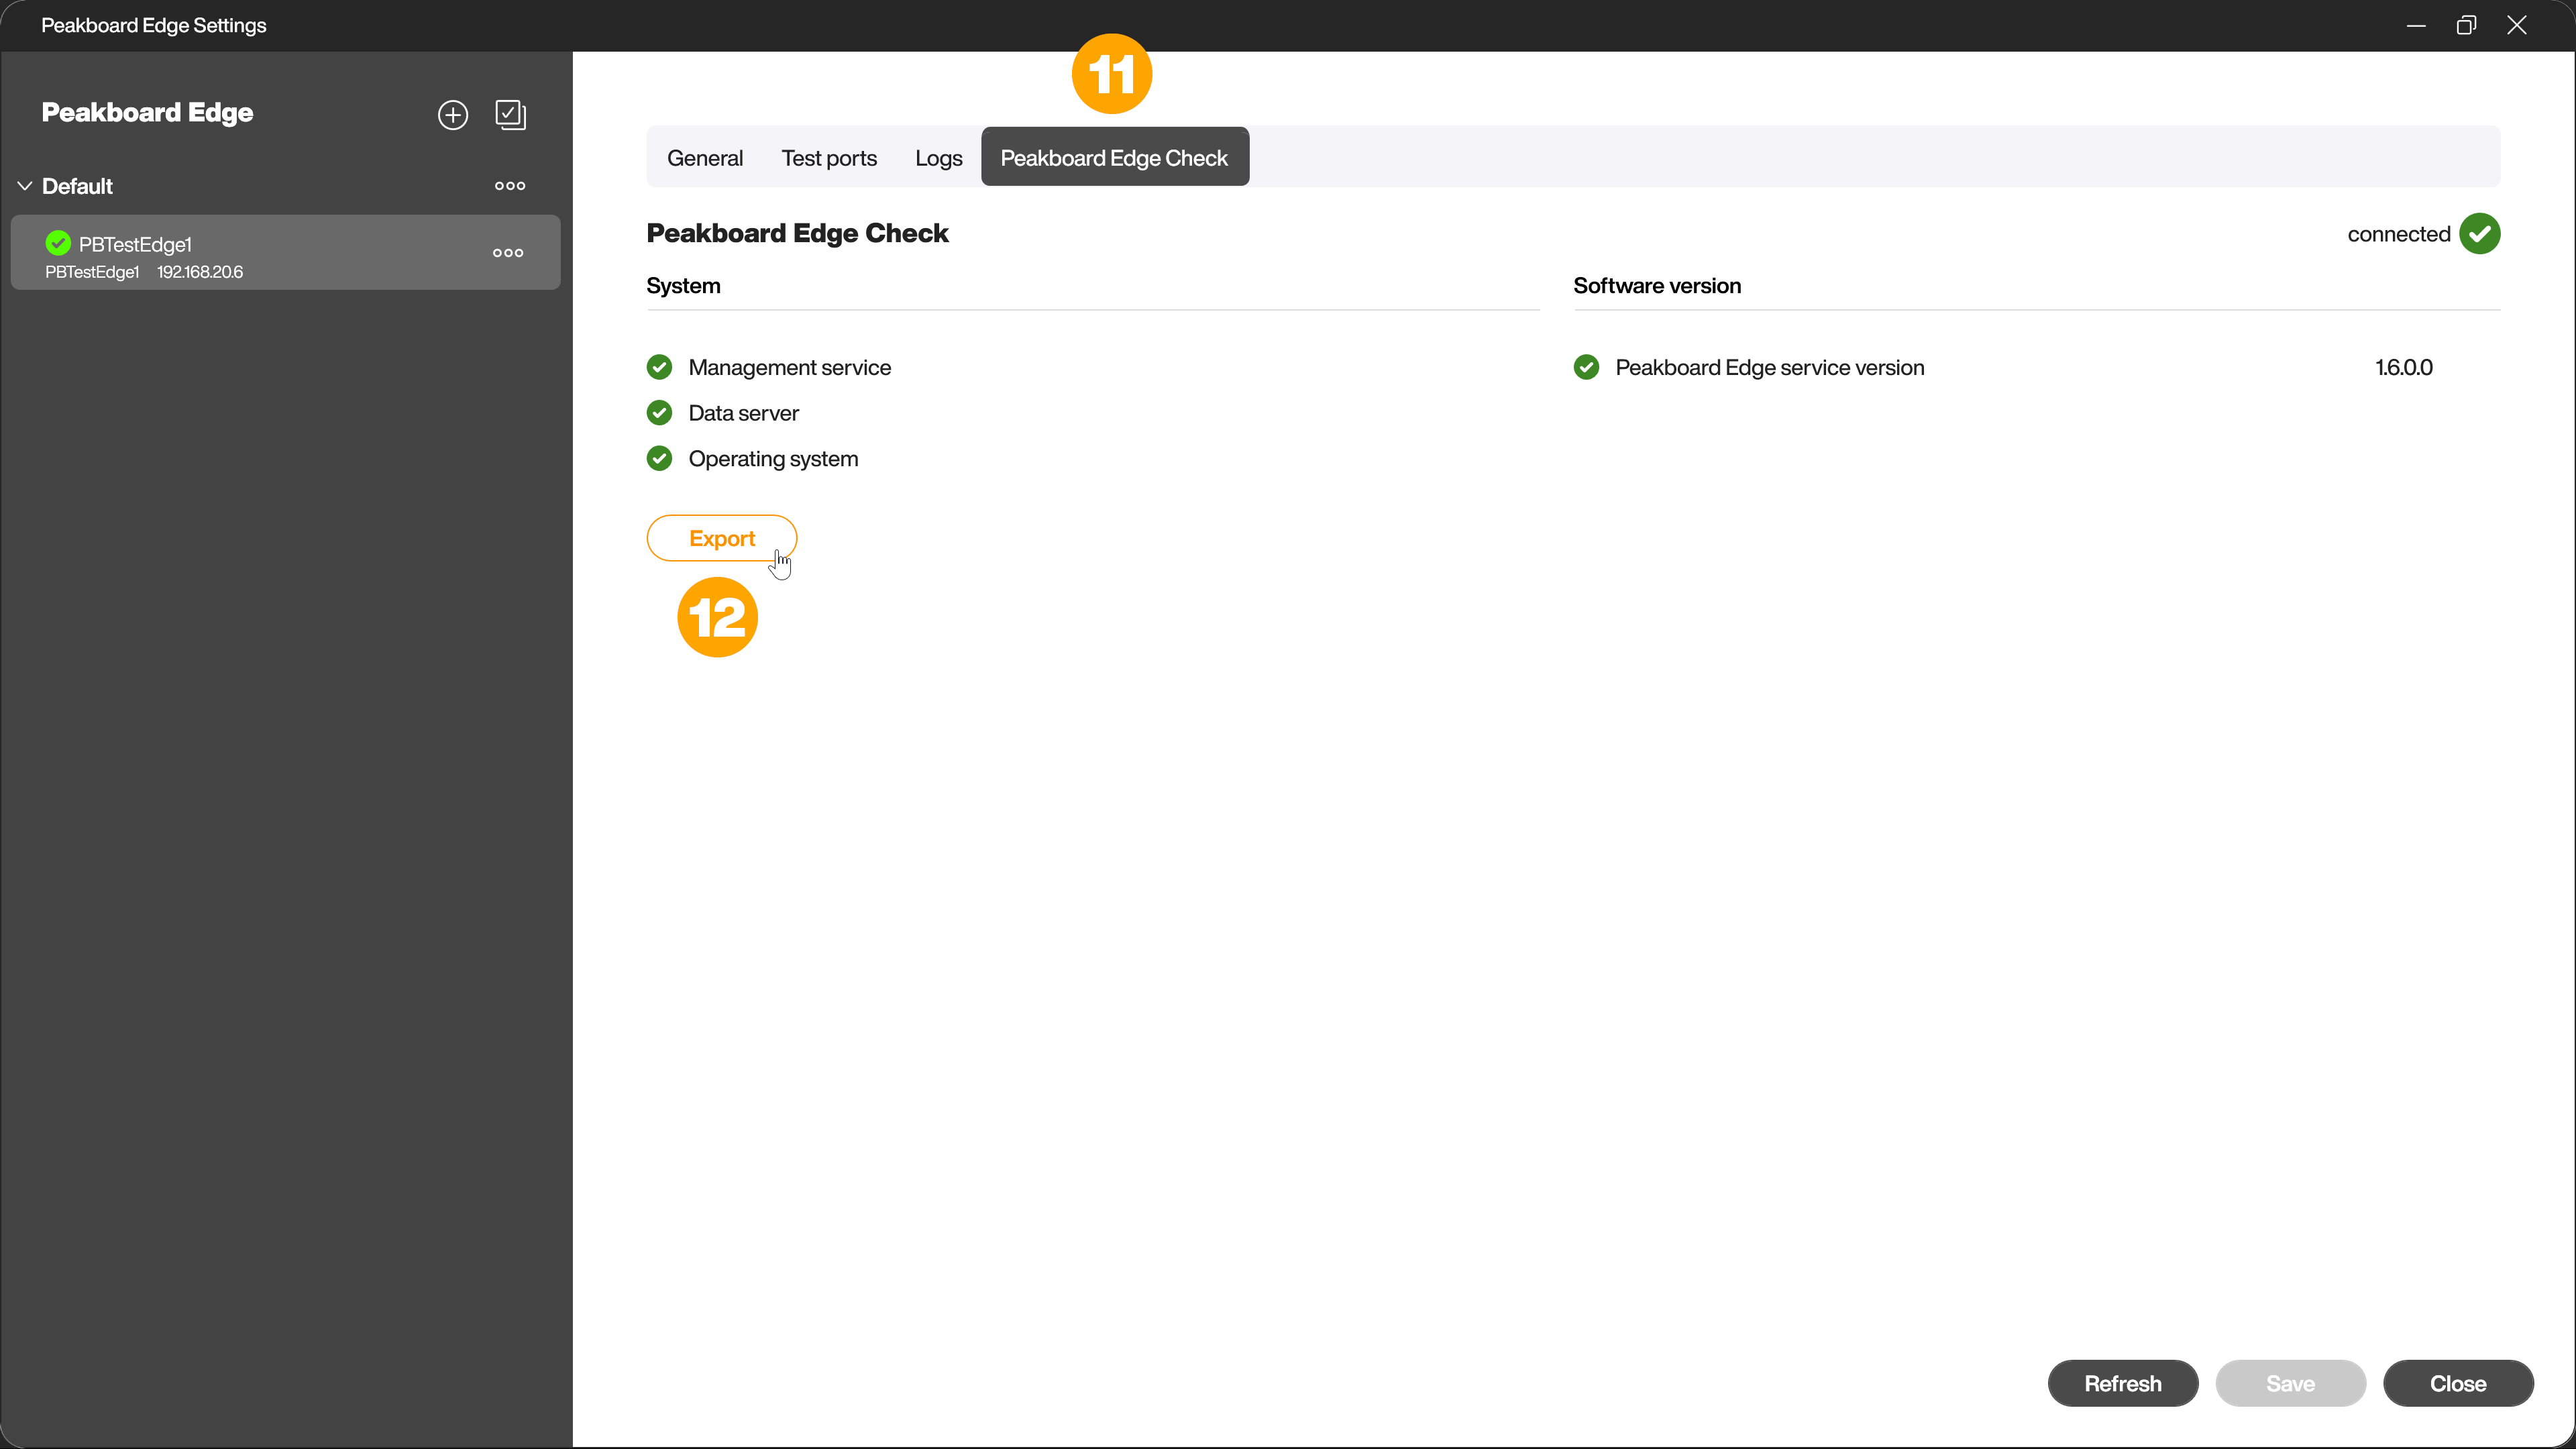
In the tab [Peakboard Edge check] (11) you will find an overview of the state of the Peakboard Edge with corresponding status indicators. You can export them (12).