Controls
Slider
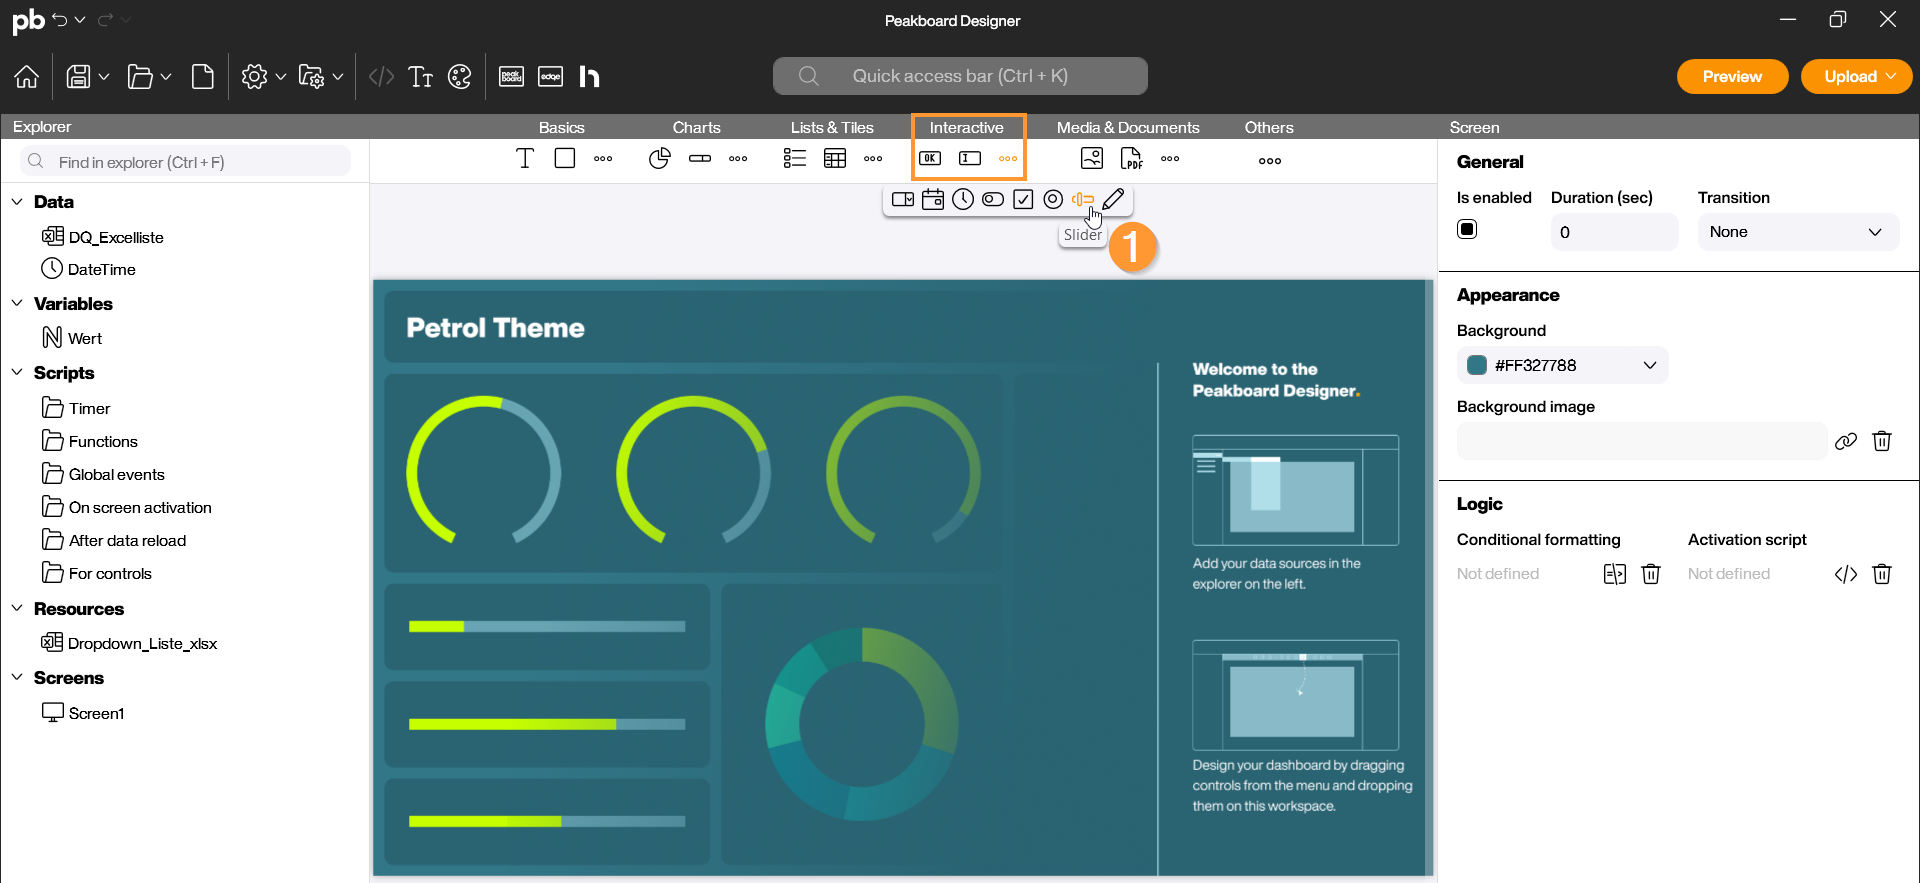
The Slider is an interactive control that allows the user to set a numerical value within a predefined range by sliding a handle. It is particularly suitable for the intuitive control of setpoints, brightness, thresholds, or capacities. You can find the Slider in the Peakboard Designer in the Interactive group (1). Simply drag and drop the control into the designer or double-click the icon to place it on your workspace.
Configuration and Properties
1 General and Data Binding
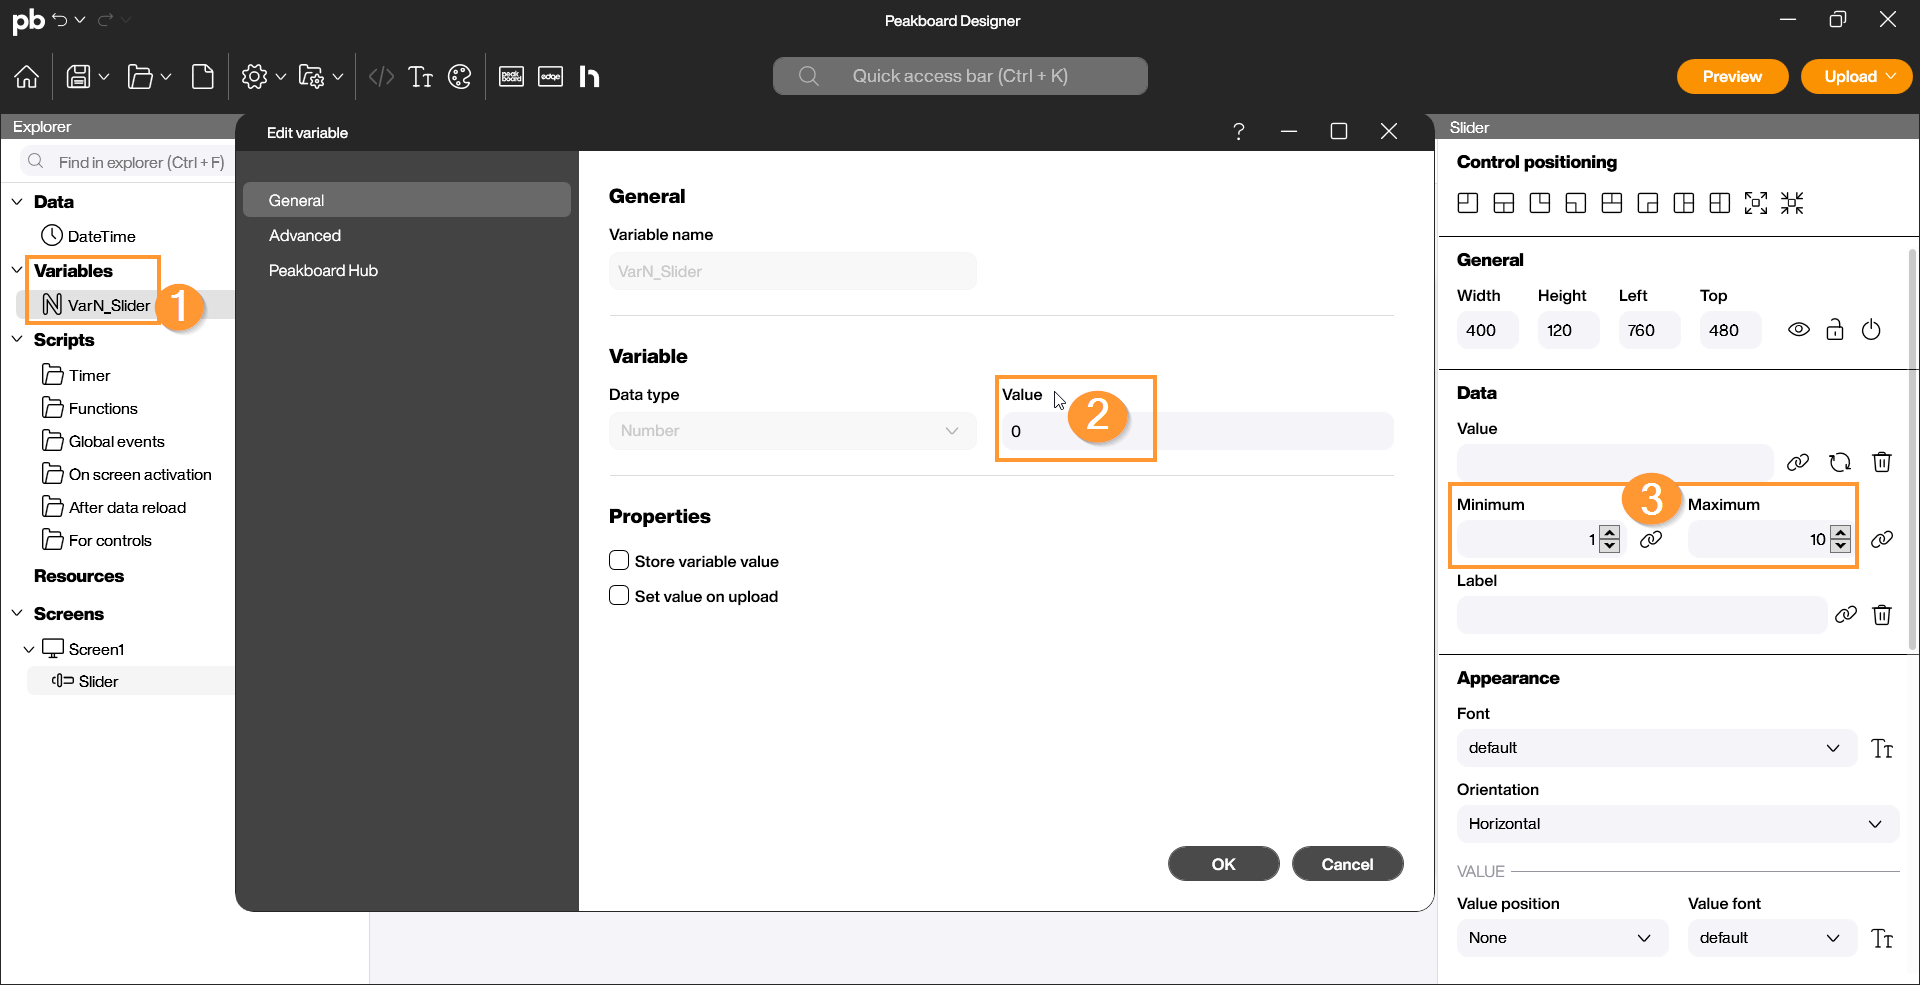
For the slider to function correctly, you must define its working range. Click on the control to configure the following:
- Data Source / Variable: Link the slider to a variable of type Number. Every movement of the slider immediately writes the current value back to this variable (1).
- Initial Value: Determine the position of the handle when the visualization starts. Ideally, you should set this value within the linked variable (2).
- Minimum / Maximum (Data): Define the start and end points of the scale (e.g., 0 to 10) (3).
- Label (Data): Assign an individual label to your slider.
Scripting
The slider offers a specific event to react to changes in real-time:
- ValueChanged: This script is executed every time the handle is moved and the numerical value changes.
Example 1: Output value in the log
Often, a threshold value needs to be monitored. In this example, we write the current value of the slider to the log.
Steps in the Script Editor:
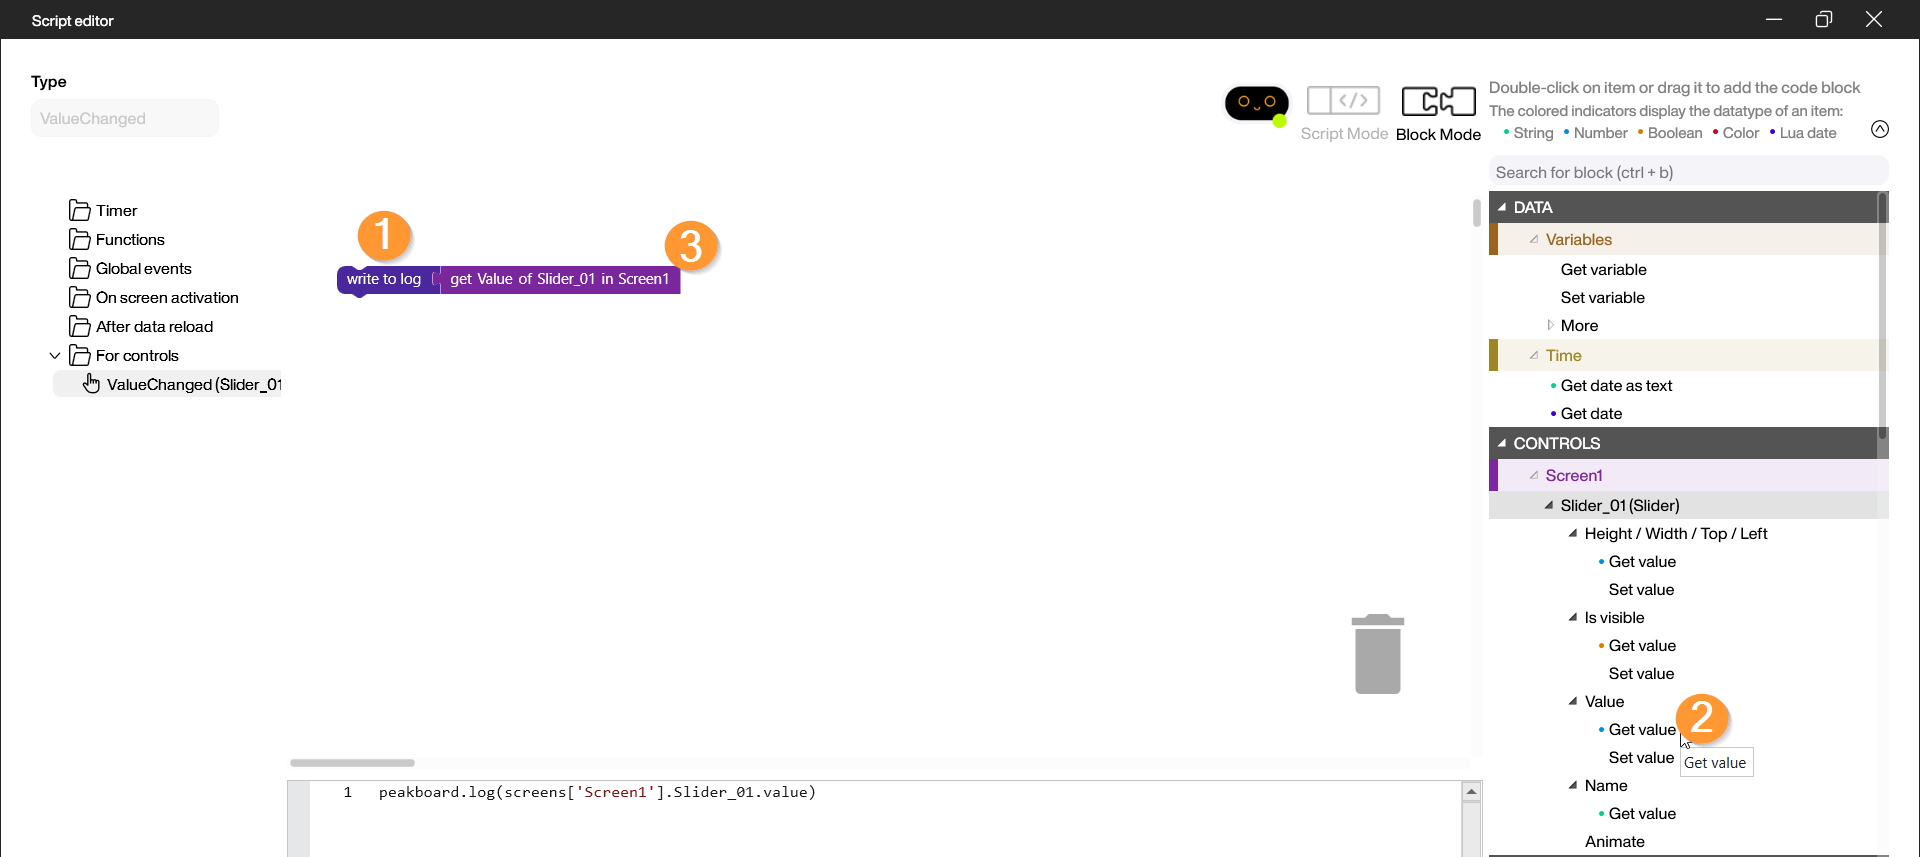
- Open the script editor under Logic and “ValueChanged”.
- Under Functions, select the “Write to log” block (1).
- Delete the default content, access your slider via the Controls category, and select the “Get value” block (2).
- Combine both blocks to see the value live in the preview (3).
- Save the script by clicking “Save and Close”.
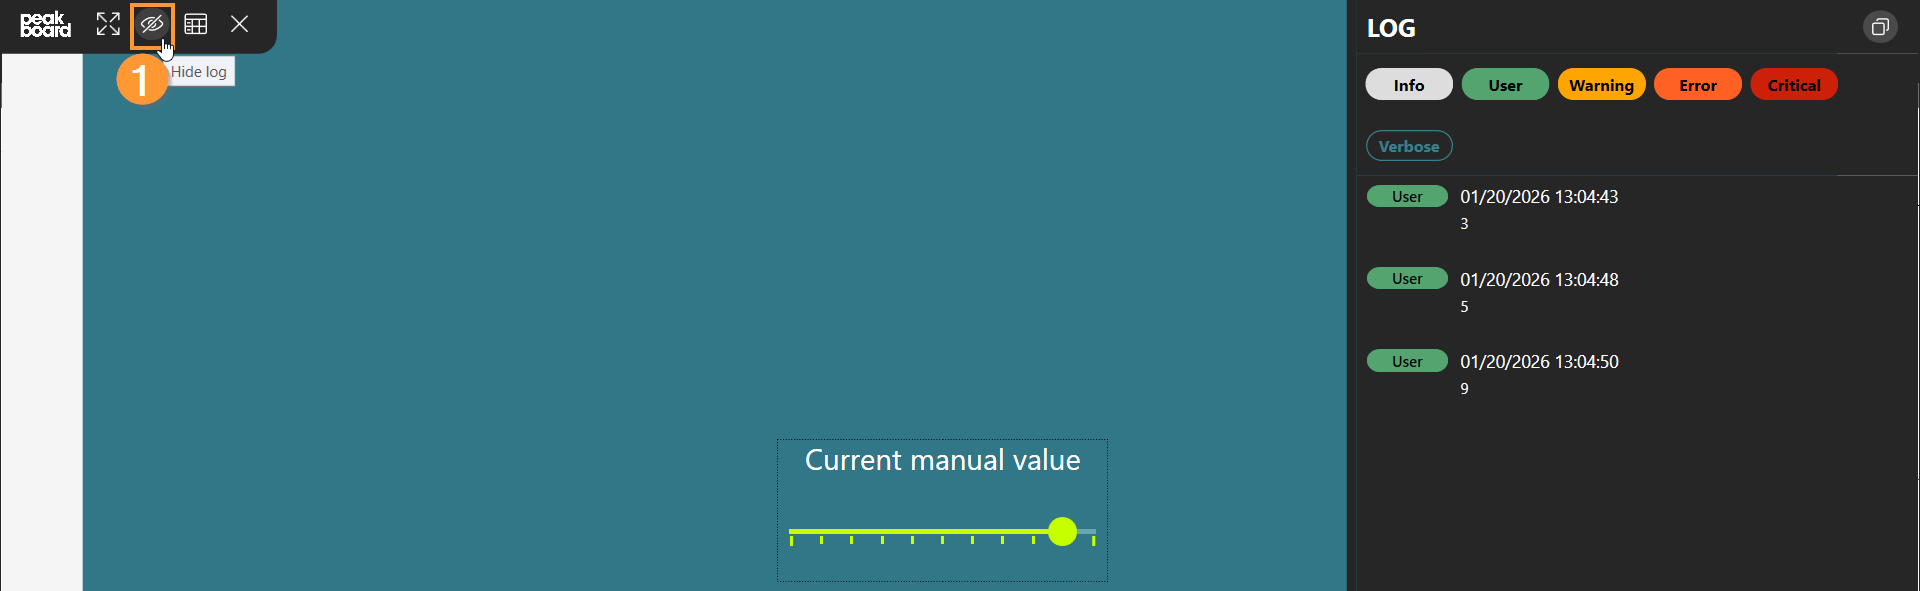
Start the preview and check the Log (1) to see if the return value is correctly displayed based on the selected slider value. Select different values to expand the log.
Example 2: Adjust value via text box
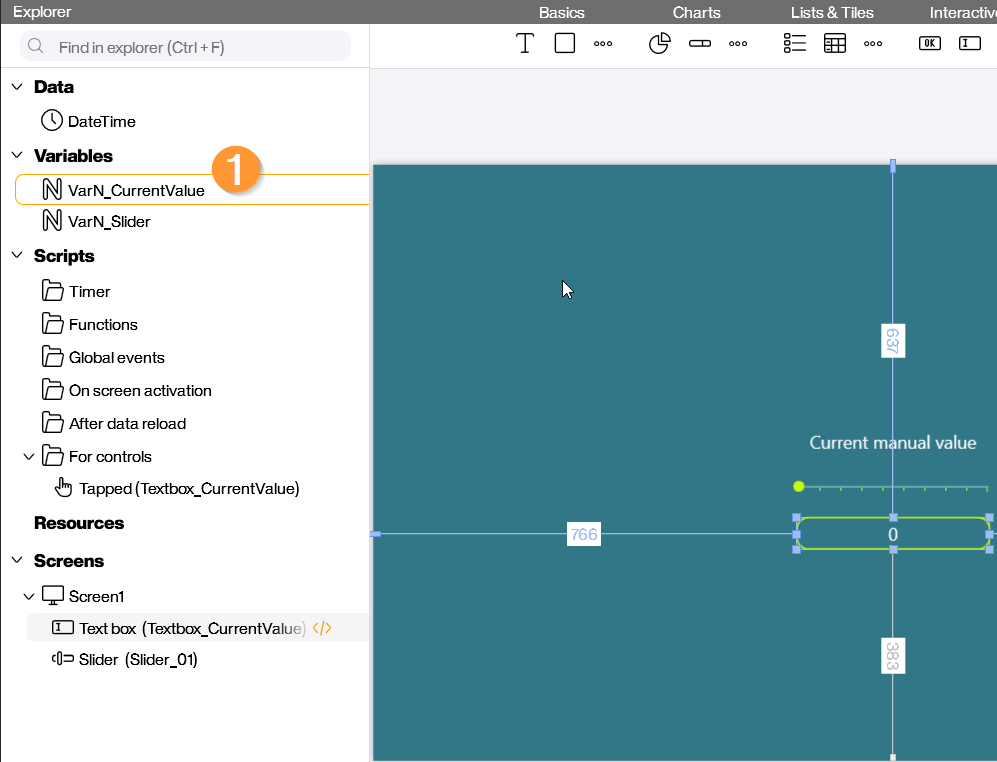
As an extension, you can insert a text box into the display area to adjust the slider’s value via this text box. Insert a text box anywhere in your designer and link it to a numerical variable (1).
Now, go to the script of the Text Box under “Tapped”:
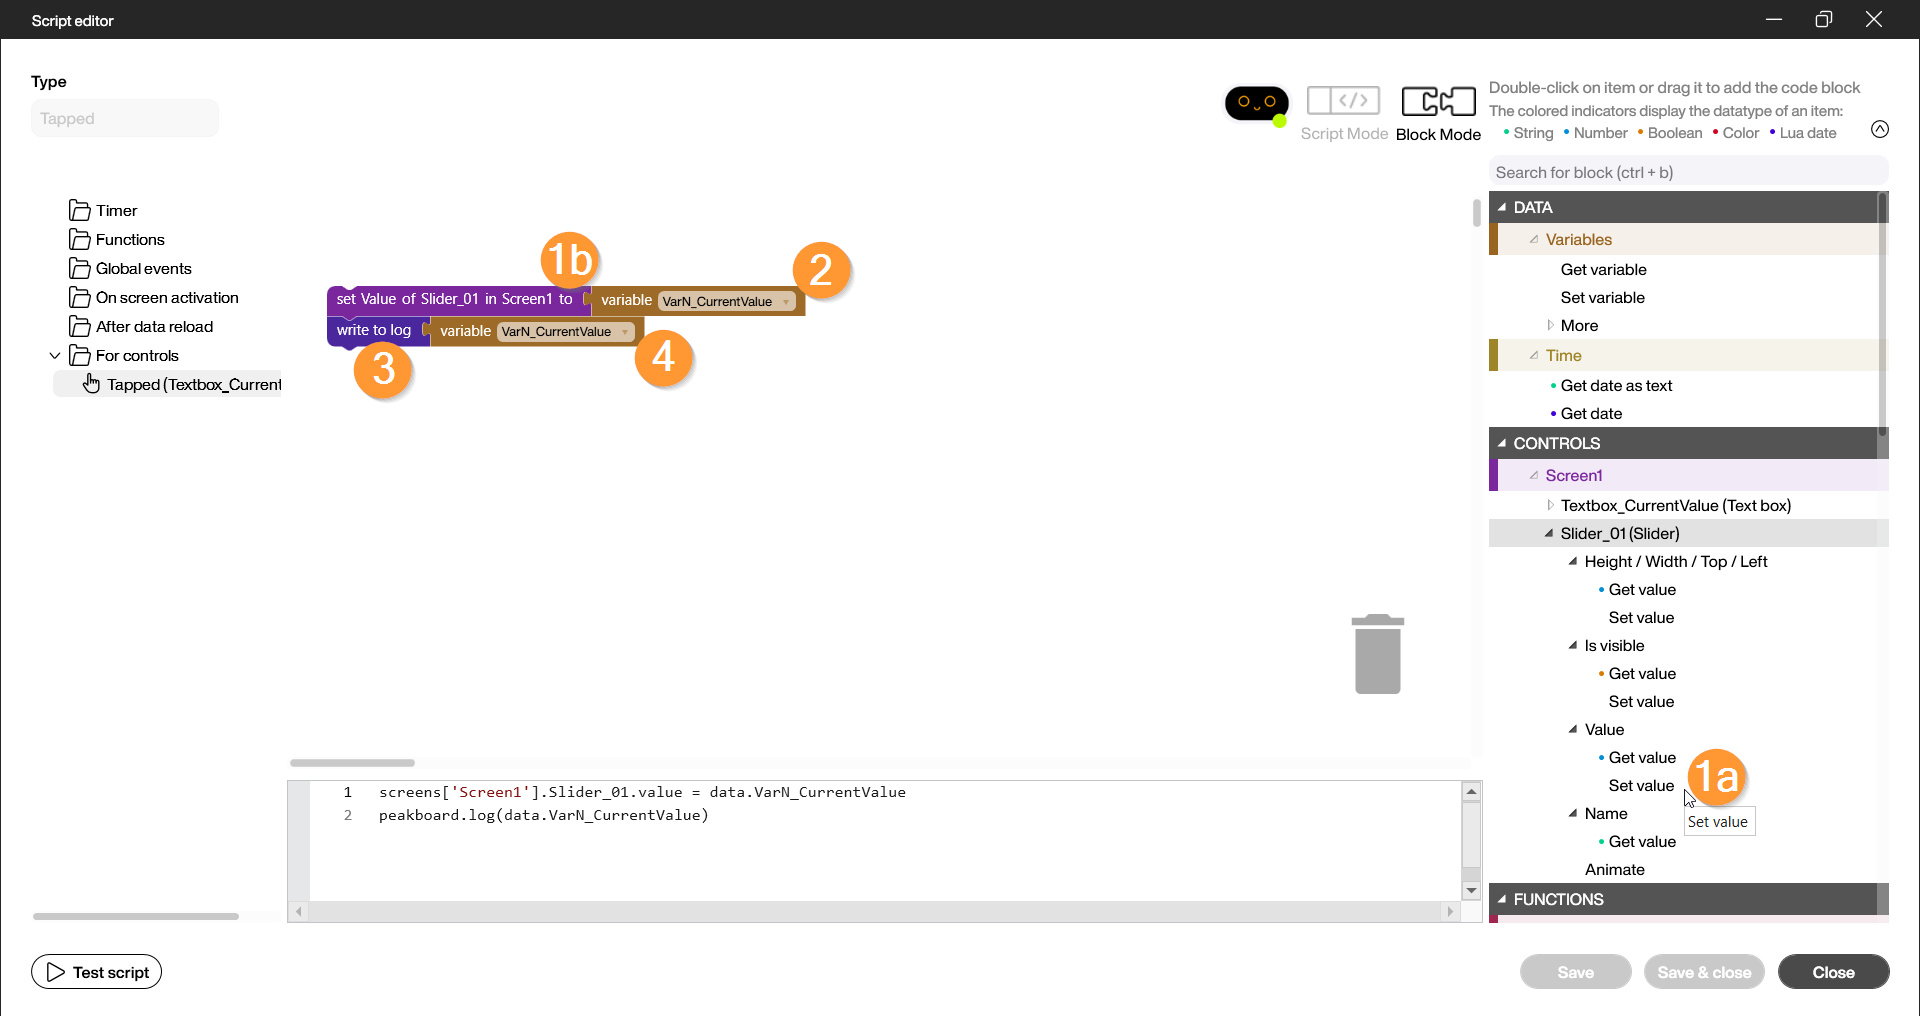
- Drag “Set value” from the Value section of the Slider control into the script editor (1a), (1b).
- Select the variable linked to the text box (2) and connect the two blocks.
- Under Functions, select the “Write to log” block (3) and again the text box variable, then link these blocks to each other and to the previous block (4).
- Save the script by clicking “Save and Close”.
Start the preview and check the slider and the Log (1) to see if the value is correctly displayed and returned based on the input in the text box. Enter different values to expand the log.

In this video, it is once again illustrated how the script for the first example is built and tested for successful functionality.