Data sources
The email data source lets you access an email mailbox via IMAP and send emails via SMTP. Typically, you use it to send or receive messages to or from a Peakboard Box in a very simple way. There are generally two ways to use the data source:
- The content of the mailbox is represented as a tabular data source. Each row corresponds to one email.
- Each incoming email triggers an event into which you can integrate Lua script code.
Which strategy works best depends on your use case and your programming skills. For a general introduction on how to configure external data sources and bind them to controls, see the tutorial on external data sources.
Add the data source
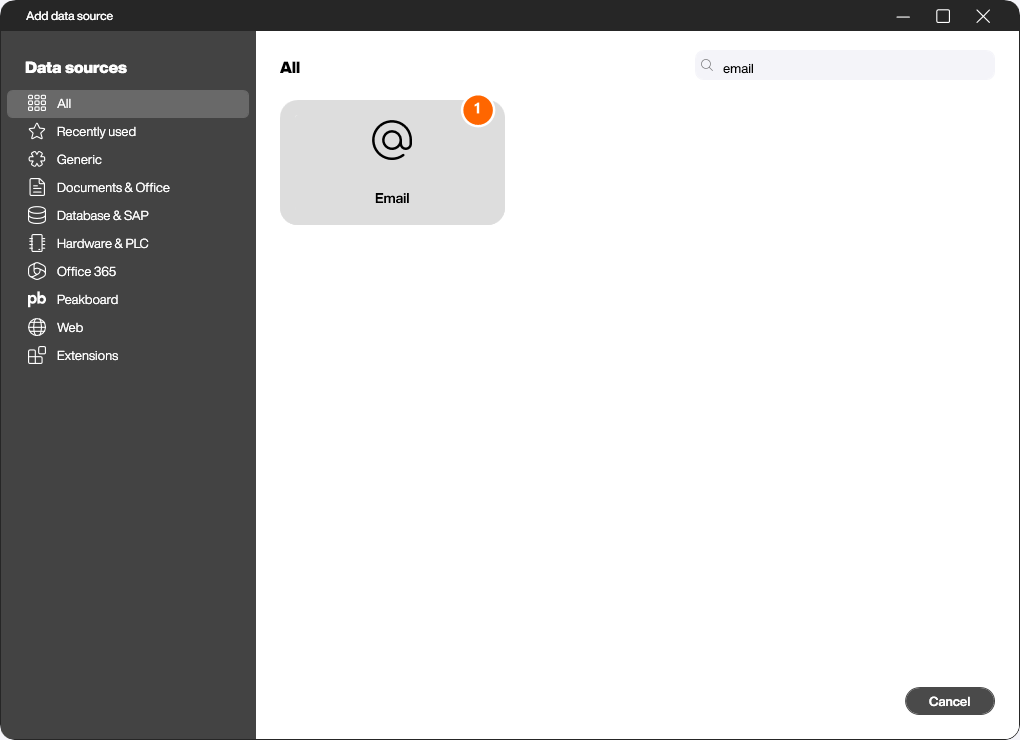
To connect the email data source, right-click [Data] and choose [Add data source]. In the following dialog, search for [Email] and select the data source (1).
Configure the connection
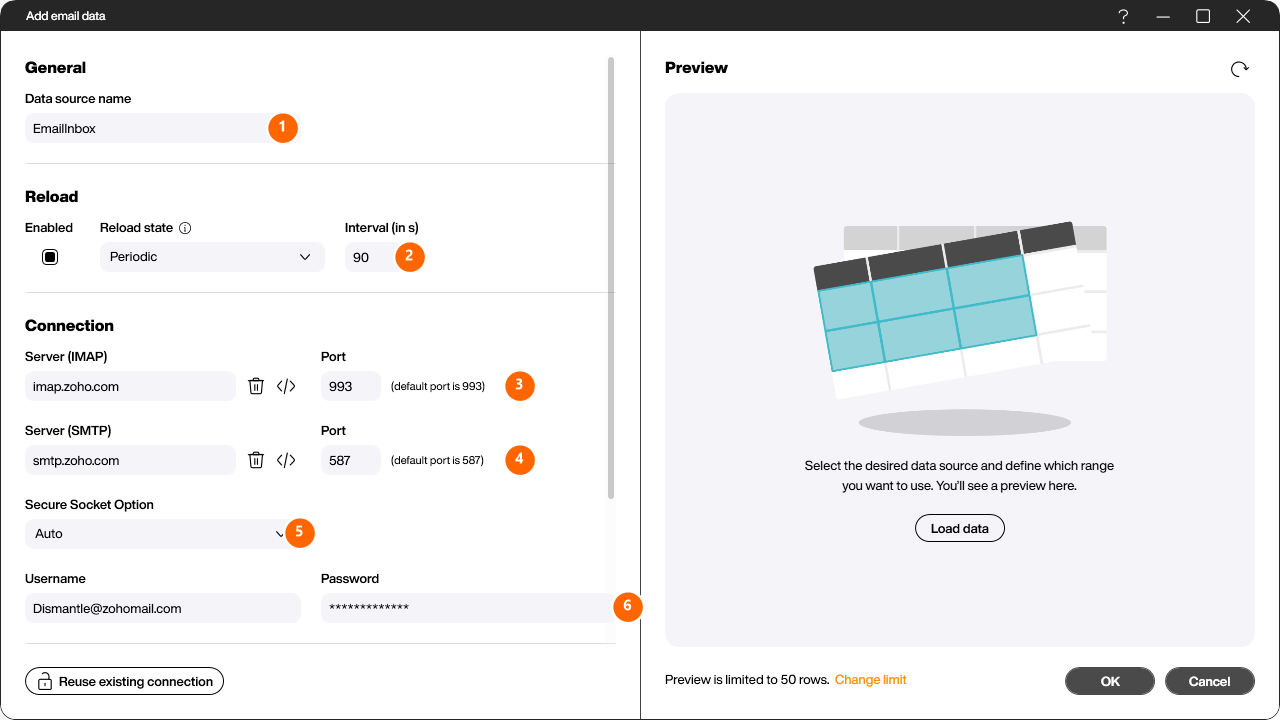
In the [General] section, first give the data source a name (1).
In the [Reload] section (2), you define whether and at which interval (in seconds) the mailbox is read again automatically.
In the [Connection] section, enter the connection details of your email account:
- Server (IMAP) and Port (3): network address and port of the server for receiving emails (default port
993). - Server (SMTP) and Port (4): network address and port of the server for sending emails (default port
587). - Secure Socket Option (5): the encryption method of the connection. With
Auto, Peakboard picks the matching option automatically based on the port;StartTls,SslOnConnectandNoneare also available. - Username and Password (6): the email address and the matching password of the account.
Specify the details
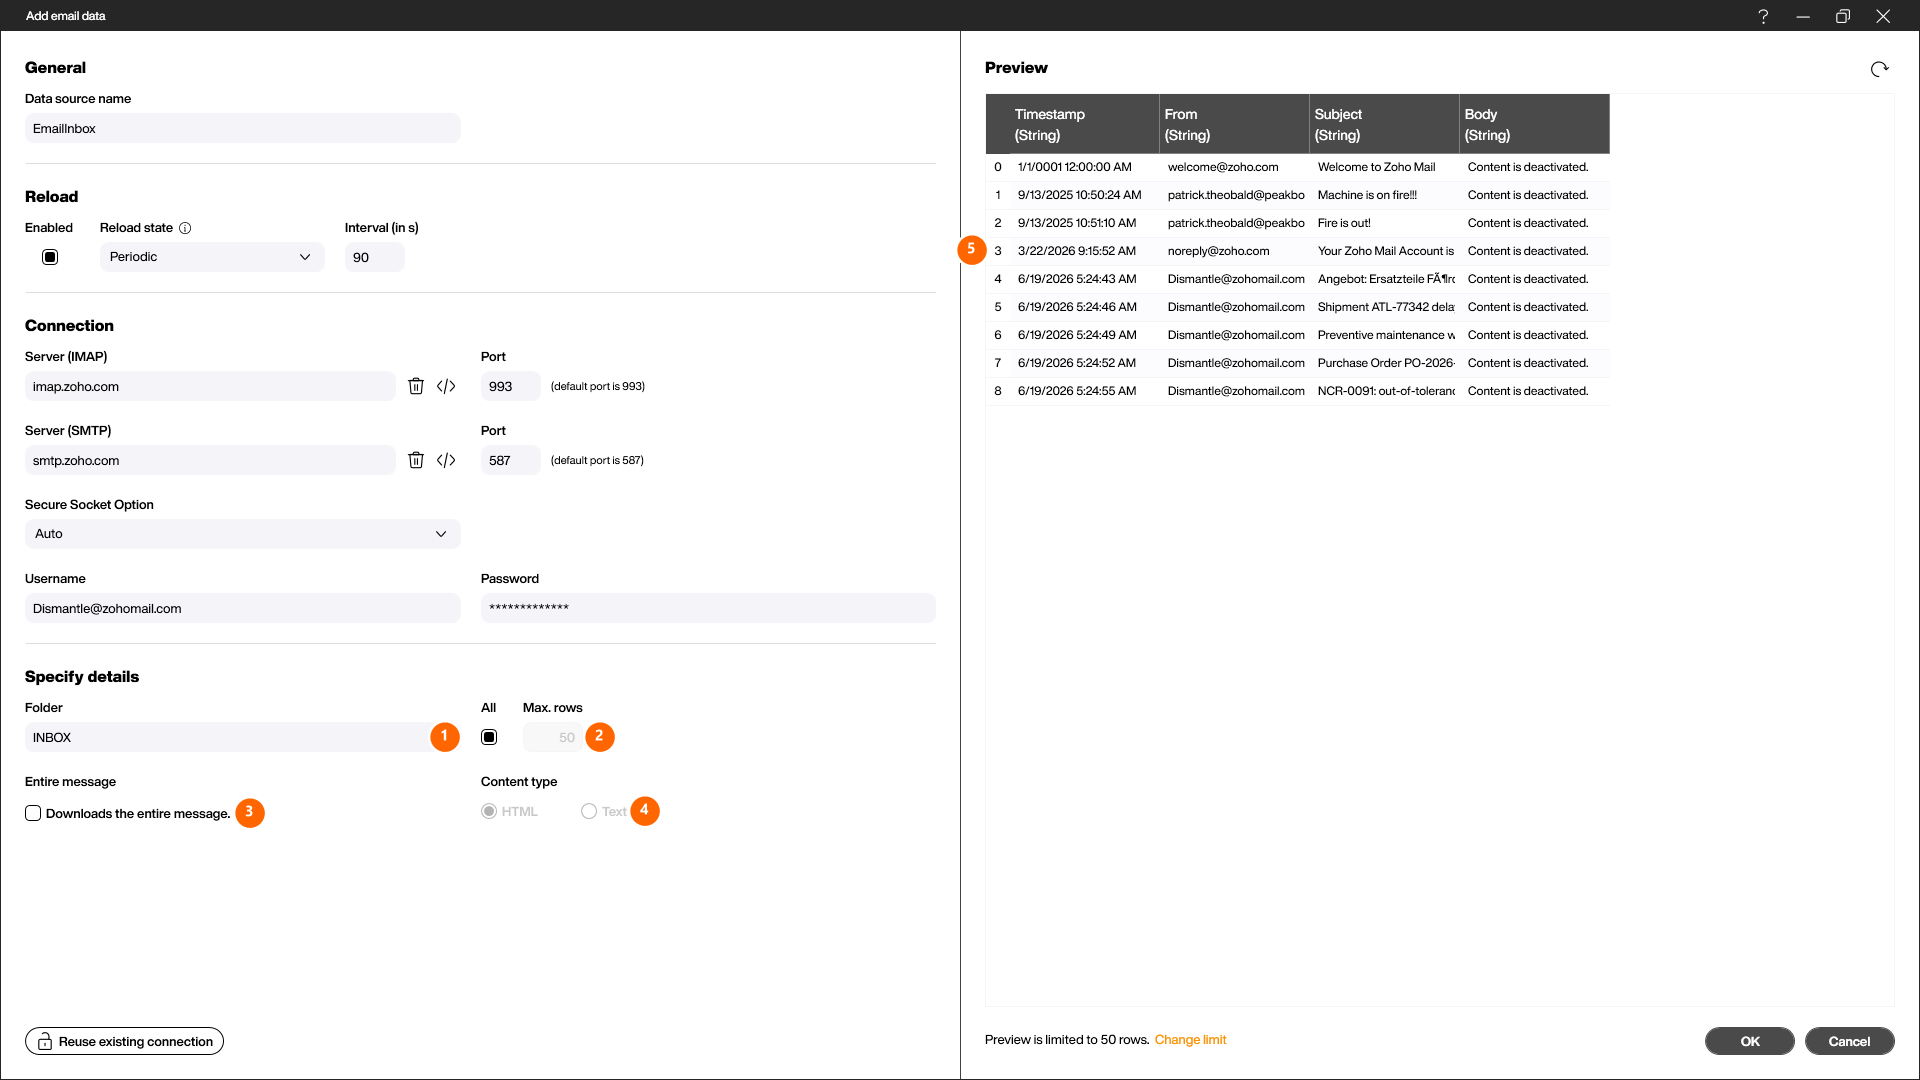
In the [Specify details] section, you control which messages and which content are read:
- Folder (1): the subfolder of the mailbox to read – usually
INBOX. - All / Max. rows (2): by default, all messages are loaded. If you clear [All], you can use [Max. rows] to limit the number of emails that are read.
- Entire message (3): when enabled, the complete message including its content is downloaded. Otherwise, only the header data such as subject and sender is loaded.
- Content type (4): defines whether the message content is delivered as plain text or as HTML. This option only becomes available once [Entire message] is enabled.
Click [Load data] to generate a preview (5). For each email you get one row with the columns Timestamp, From, Subject and Body, so you can immediately check whether the connection works.