Data sources
Dynamic Queries
In a constantly changing data landscape, it is essential to design queries dynamically in order to adapt them to different user contexts. This is particularly relevant if end users are to intervene in the data query using interactive elements such as text fields or sliders. This article shows you an example of how you can design such a dynamic query. You need an SQL data source for the example.
Example: Using a slider to dynamically set the number of rows displayed
In the following example, the worker can use a slider to specify how many rows of the queried data source should be displayed in the application. As an alternative to a slider, an input field for a date or another variable could also form the basis for the dynamic query, depending on the use case.
Create variable and slider
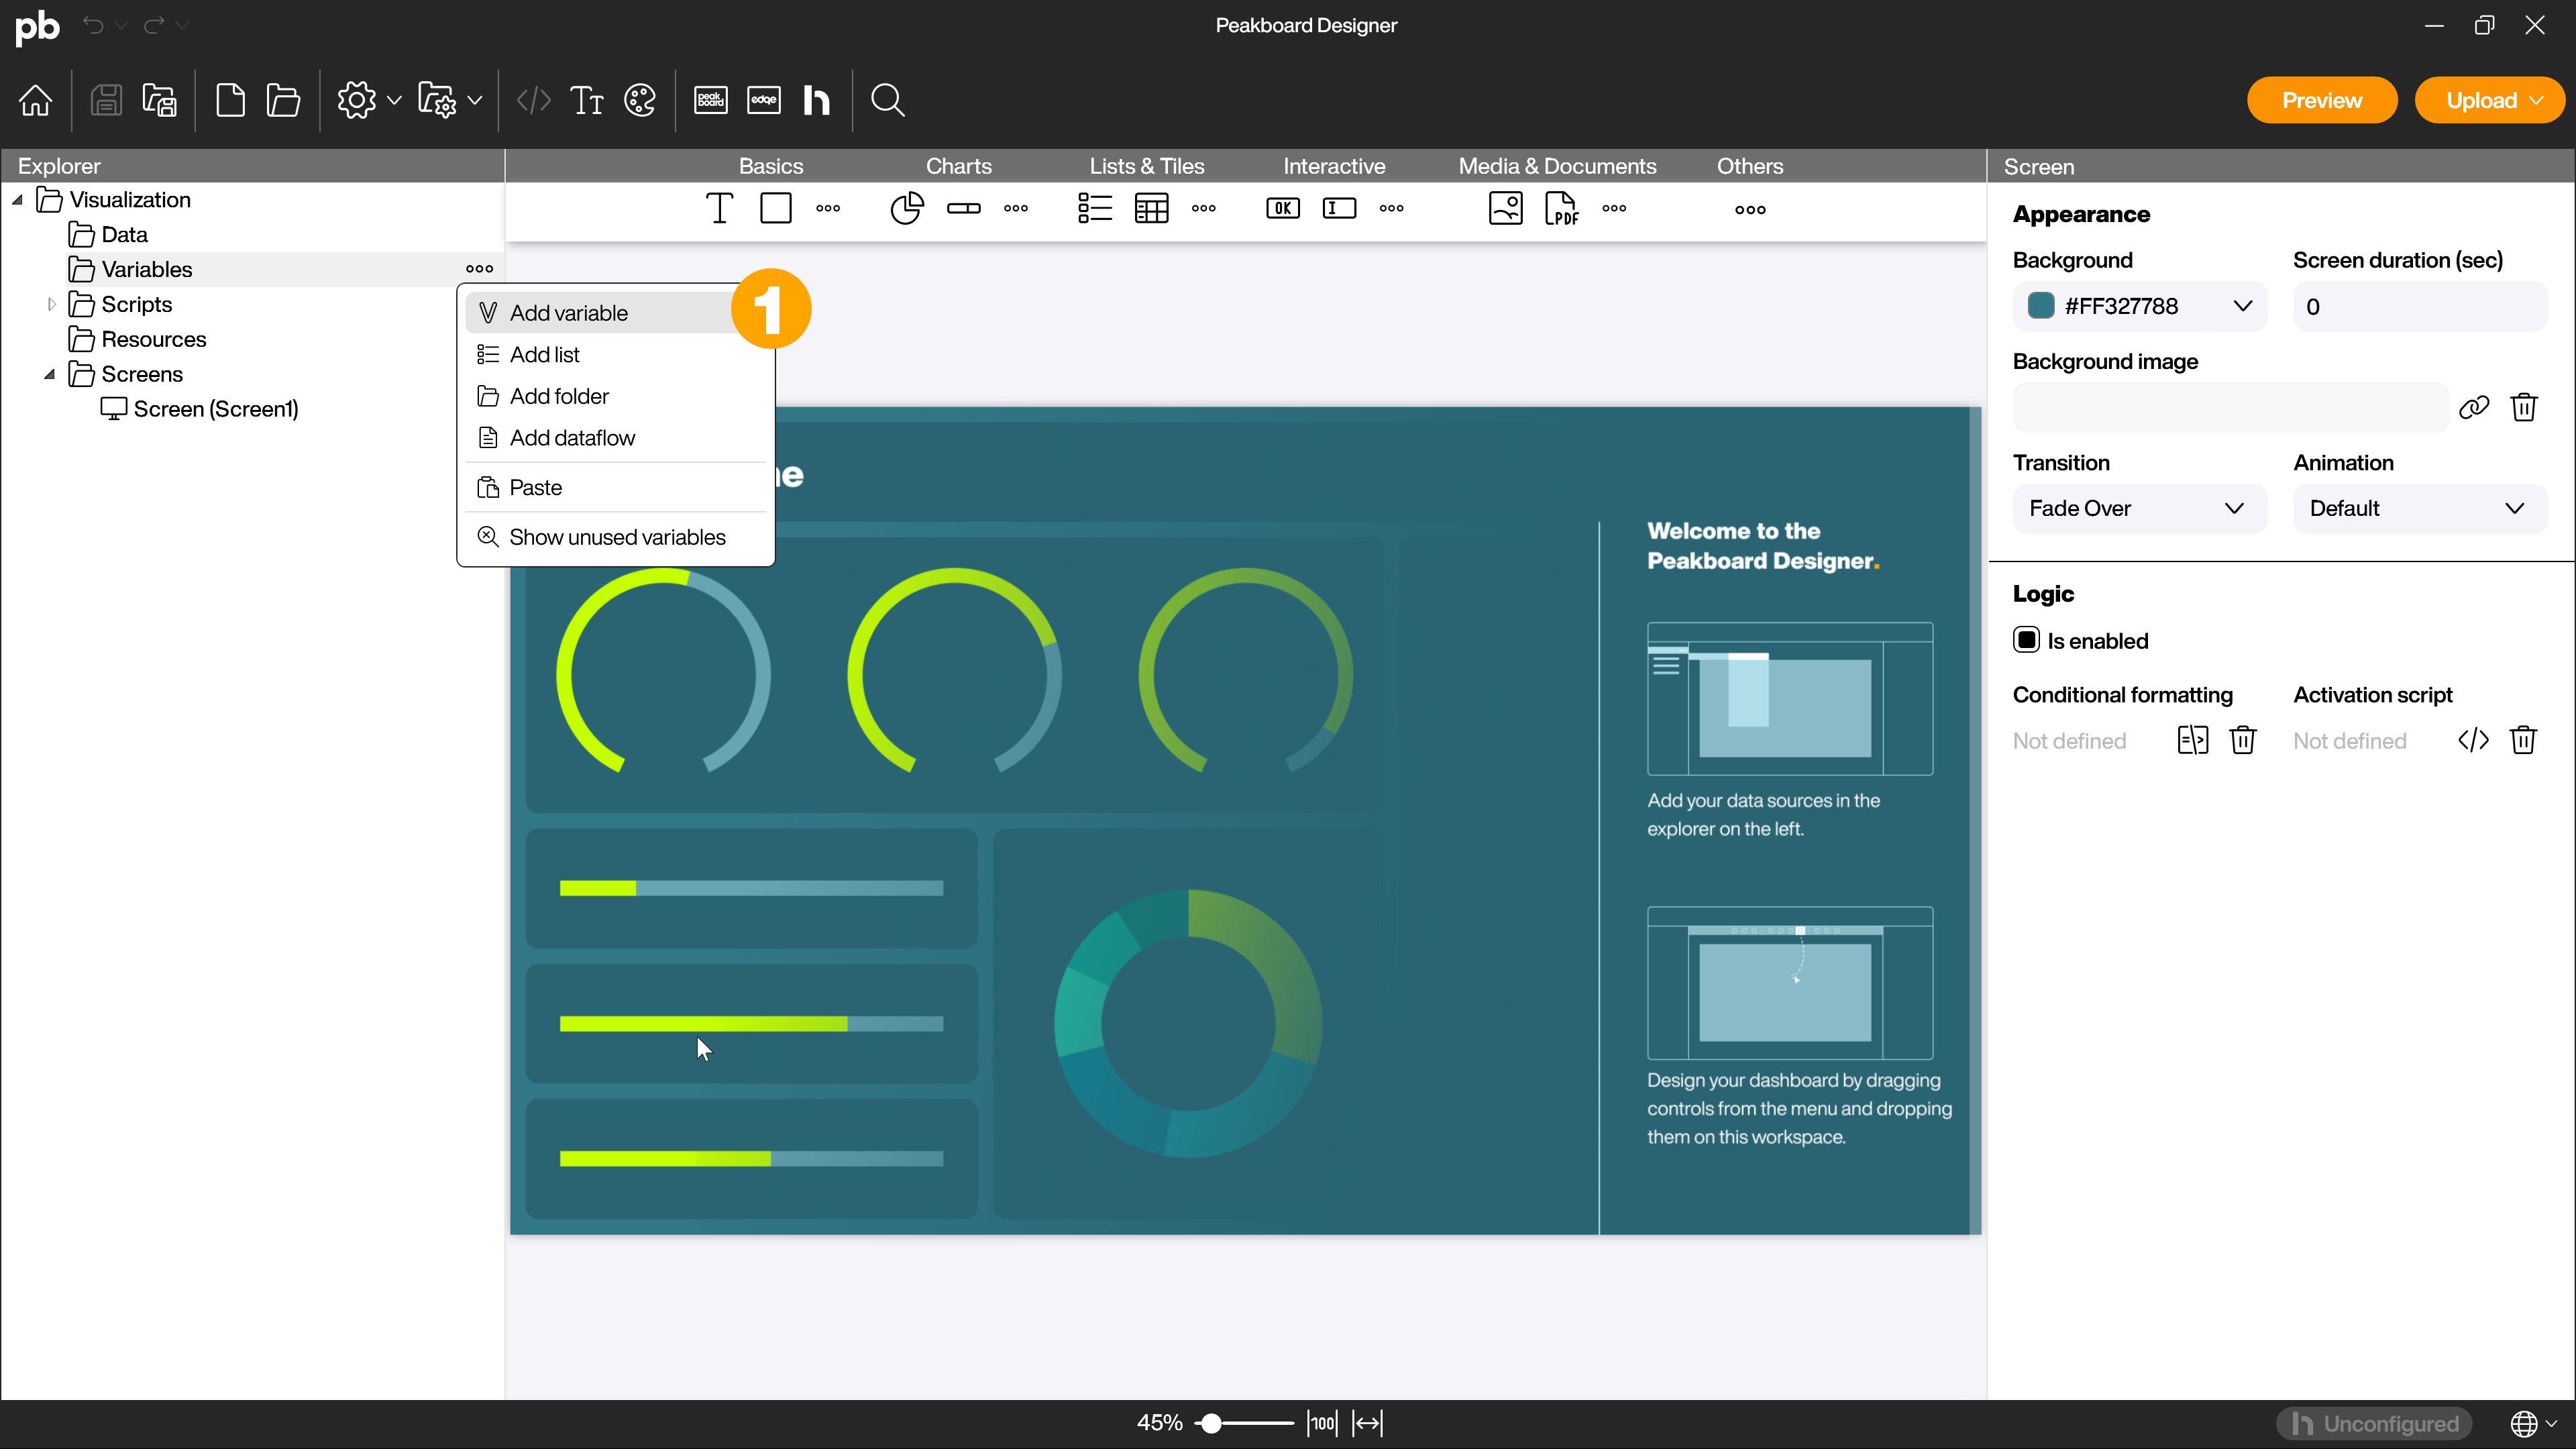
Right-click on [Variables] and [Add variable] (1) to add a variable of the type Number. Give the variable a name. The variable is used in the XQL statement in the data source to enable the dynamic query.
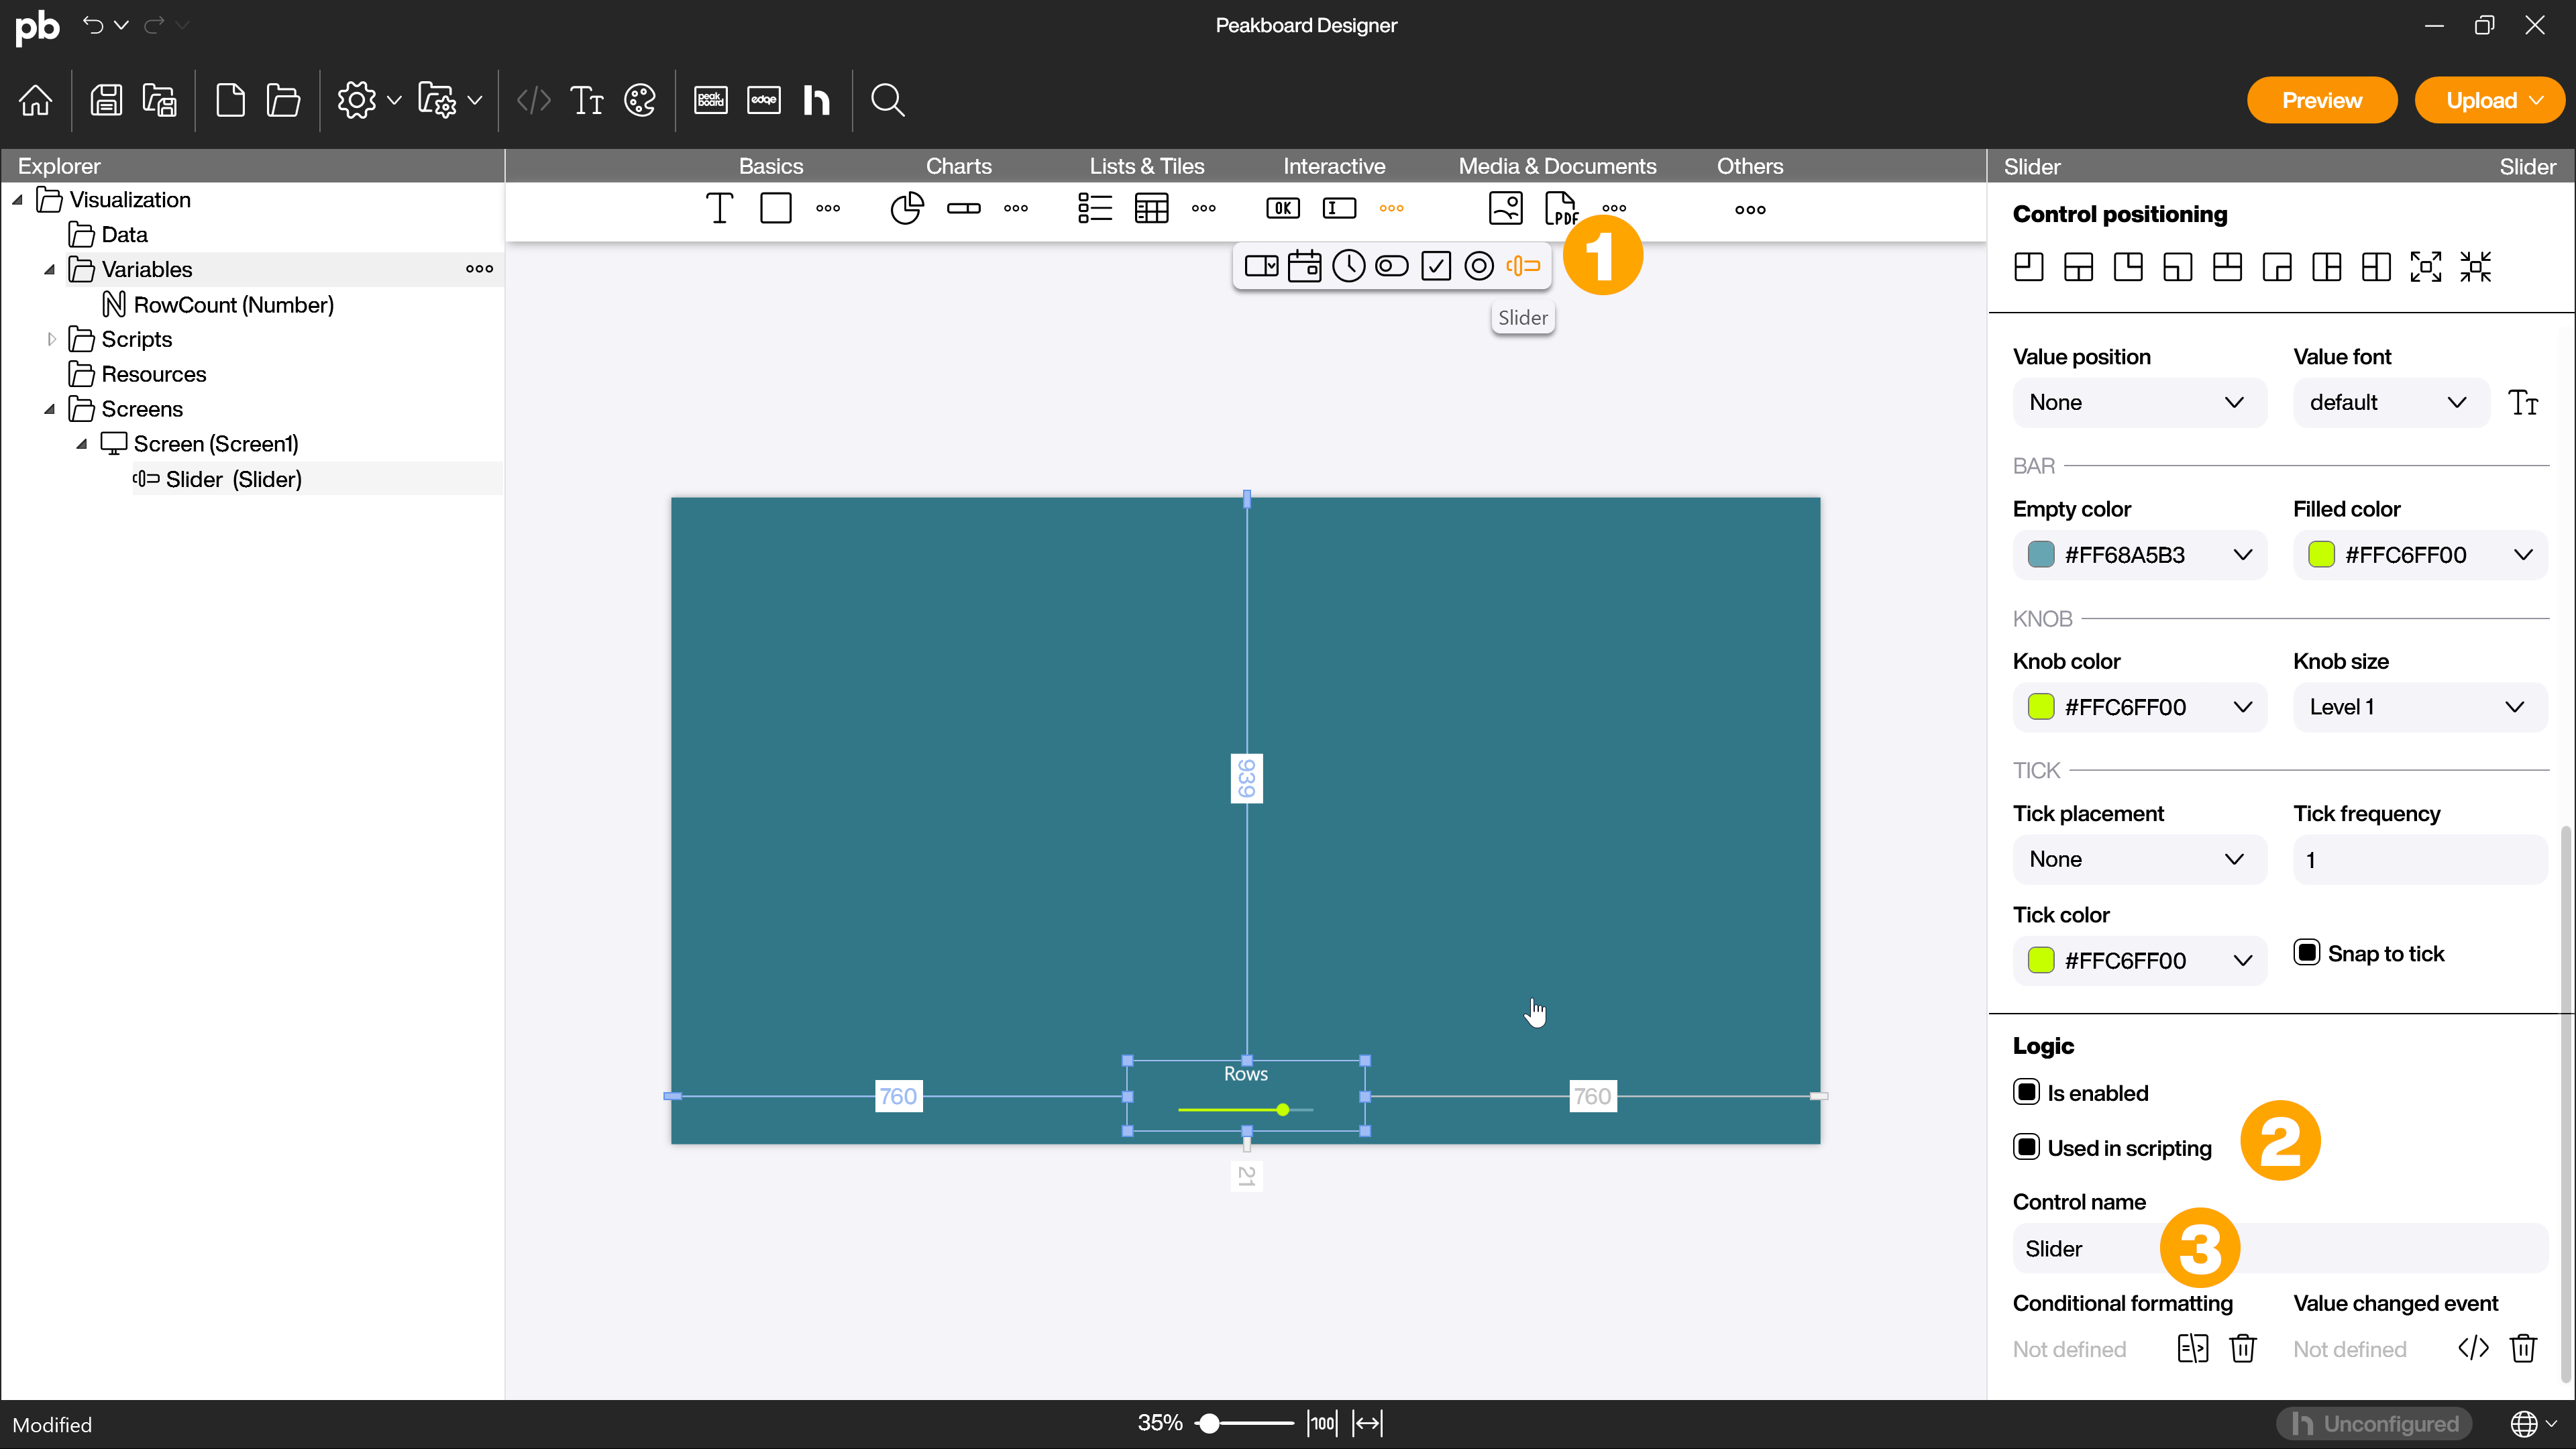
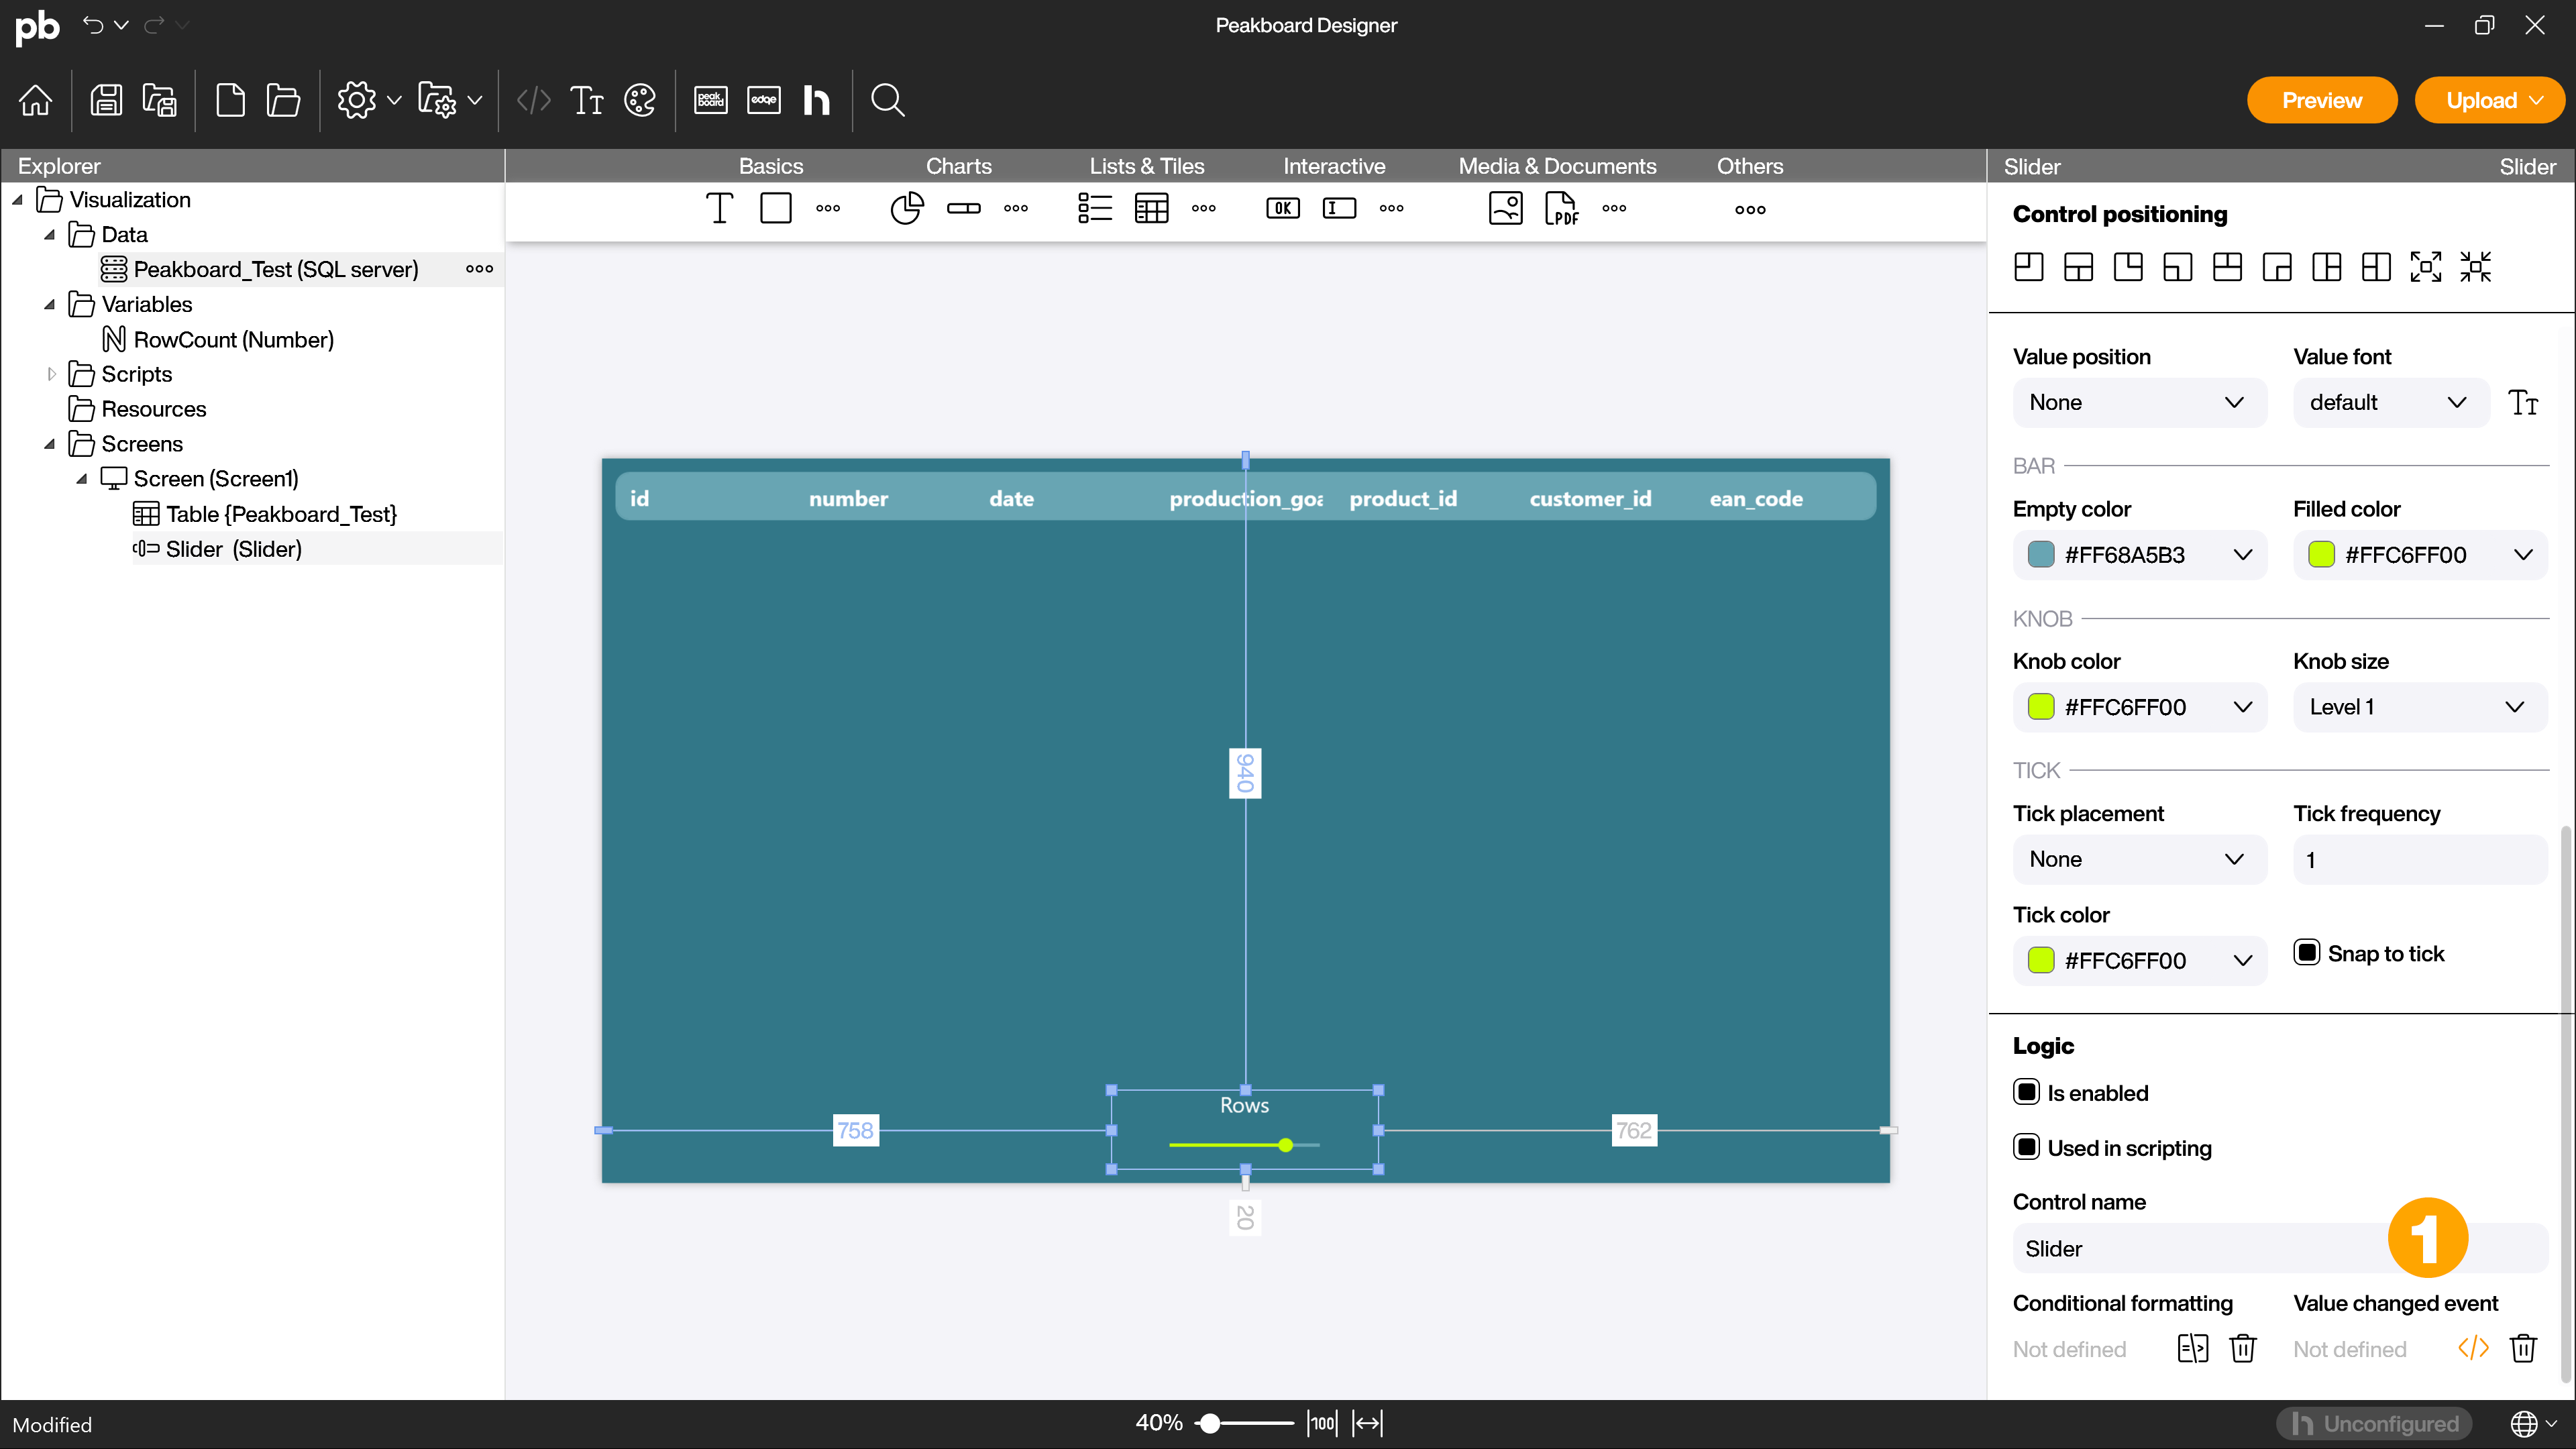
Then drag and drop a slider control (1) onto the workspace and customize the attributes to your liking. To ensure that the variable is filled with the value of the slider, activate the [Used in scripts] checkbox (2) in the [Logic] area and give the slider a name (3).
Create data source with SQL statement
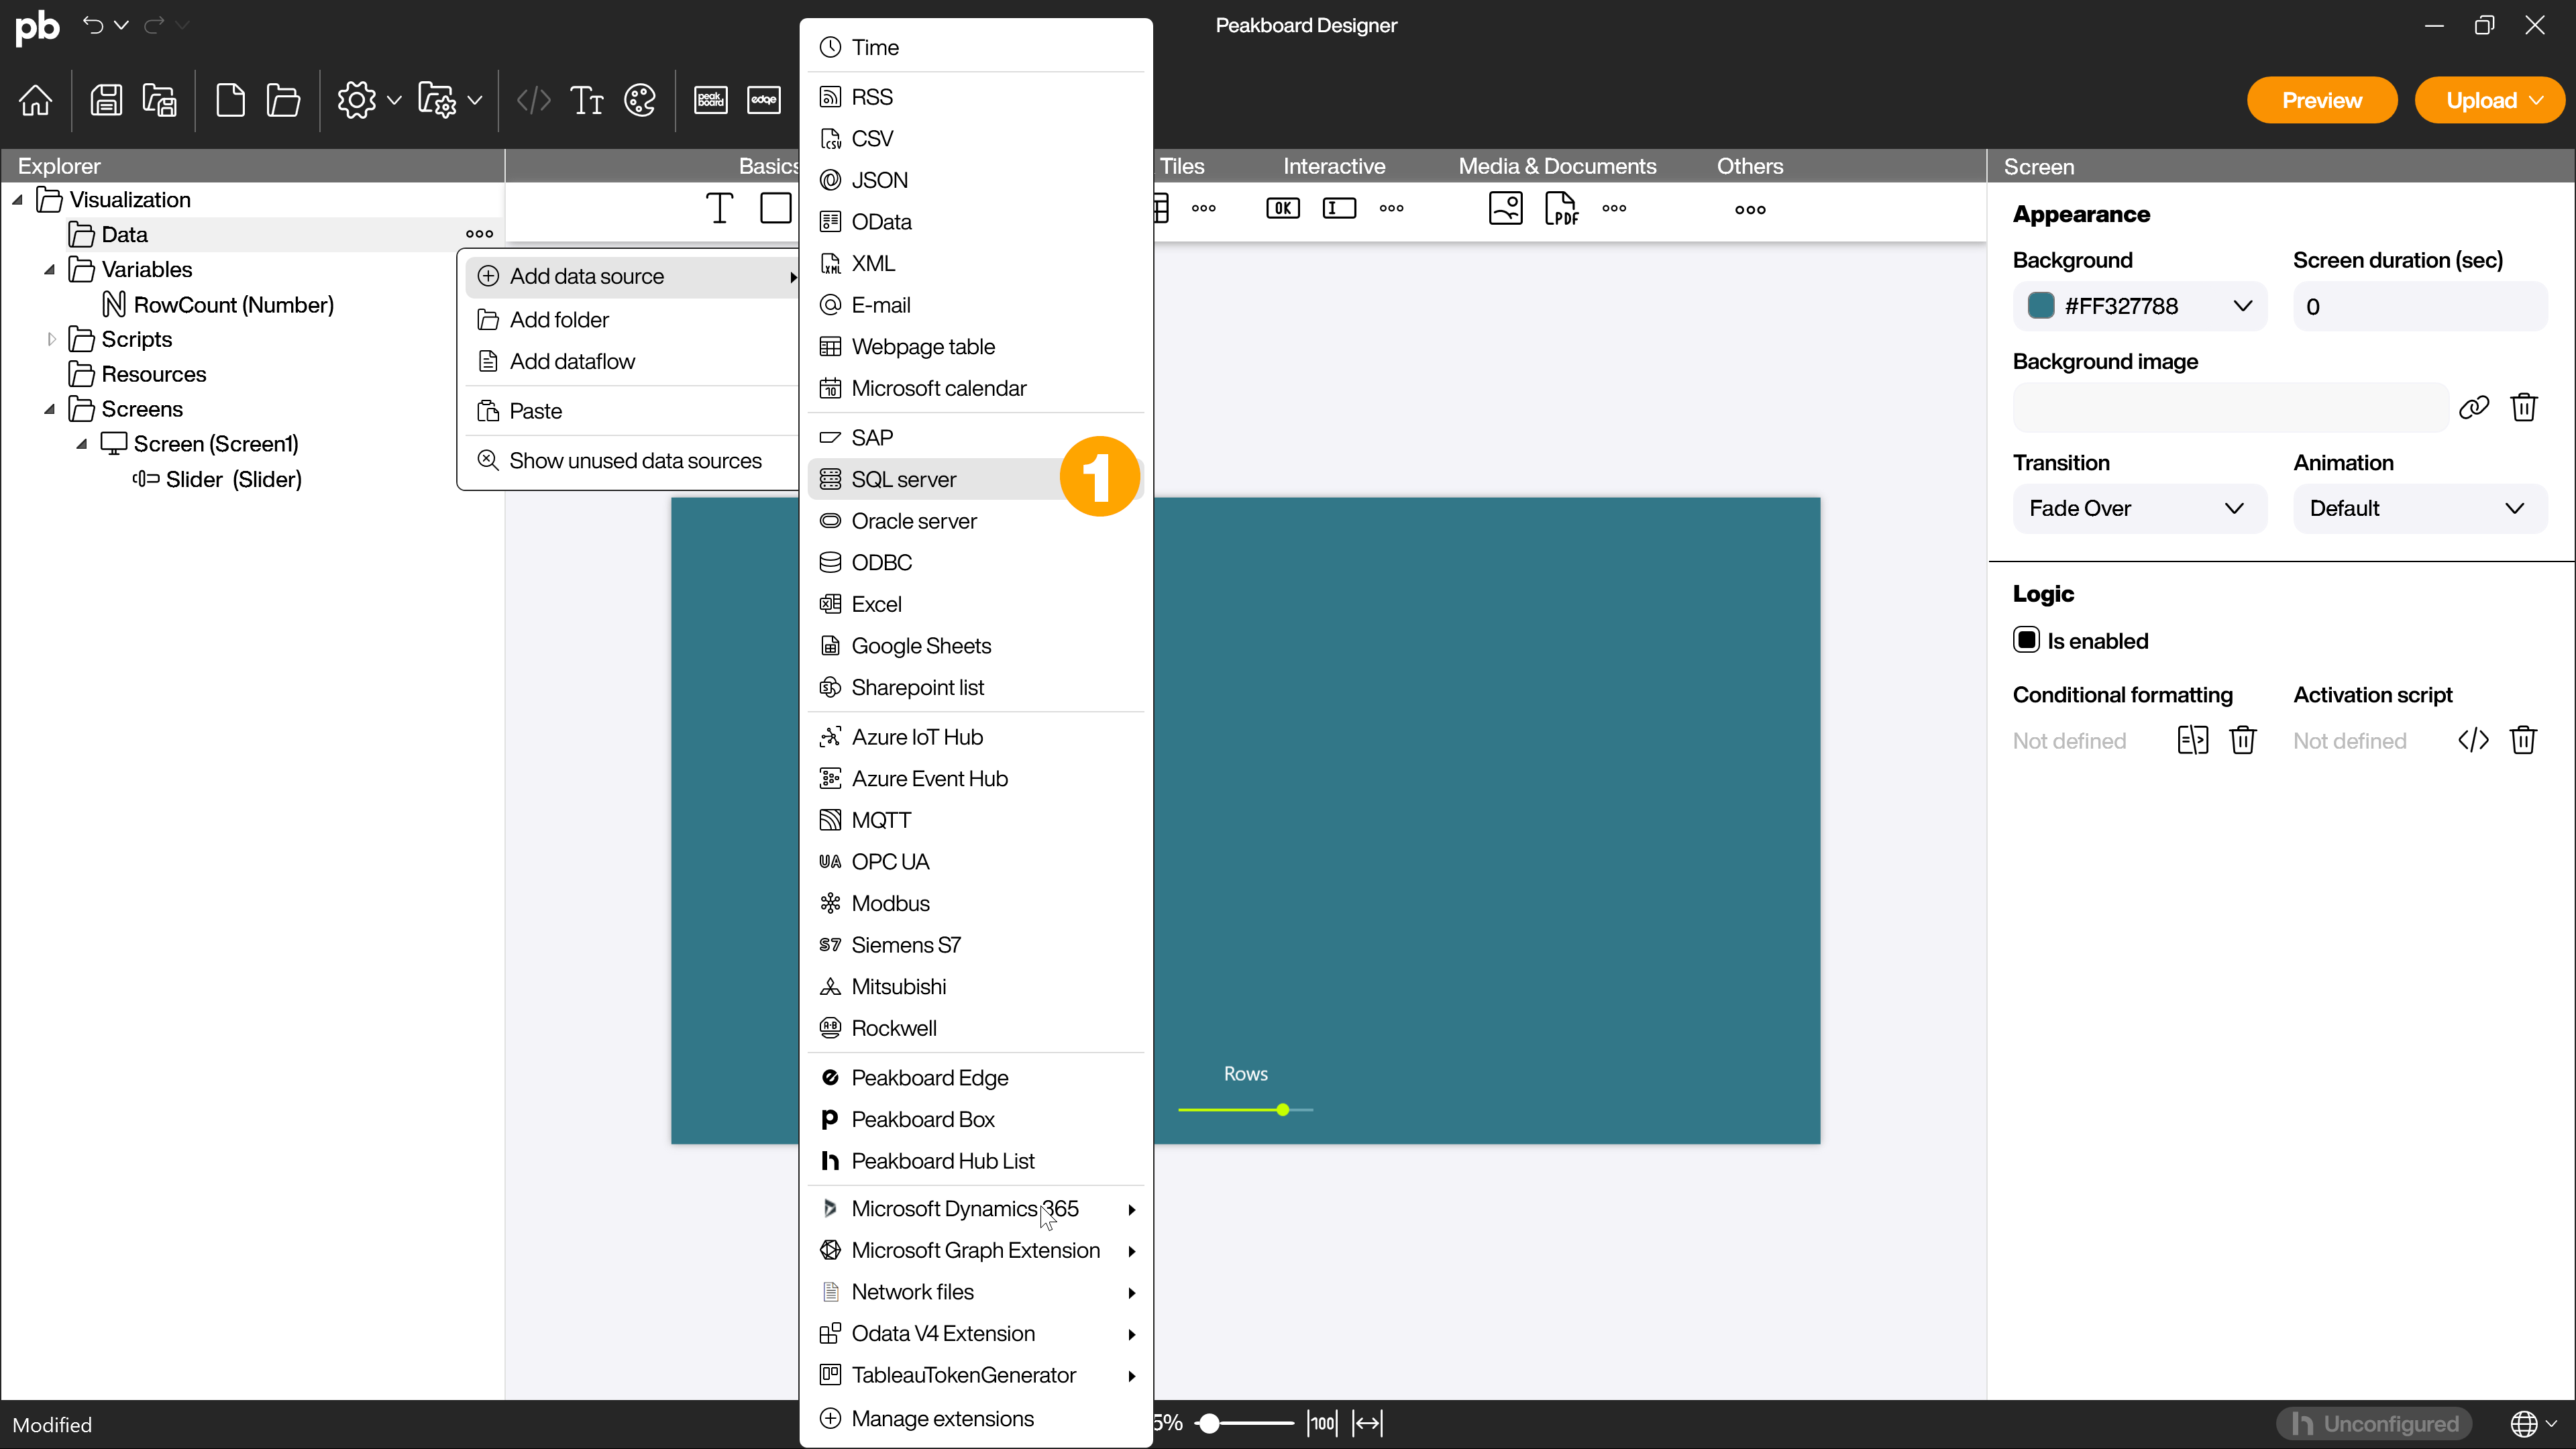
Right-click on [Data], [Add data source] and [SQL Server] (1) to create an SQL data source.
Give the data source a name (1), enter the data of the connection (2) and then insert the following XQL statement in the [Command] area (3):
SELECT TOP #[RowCount]# * FROM Orders;
Click on [Load data] (4) and confirm the creation of the data source with [OK] (5).
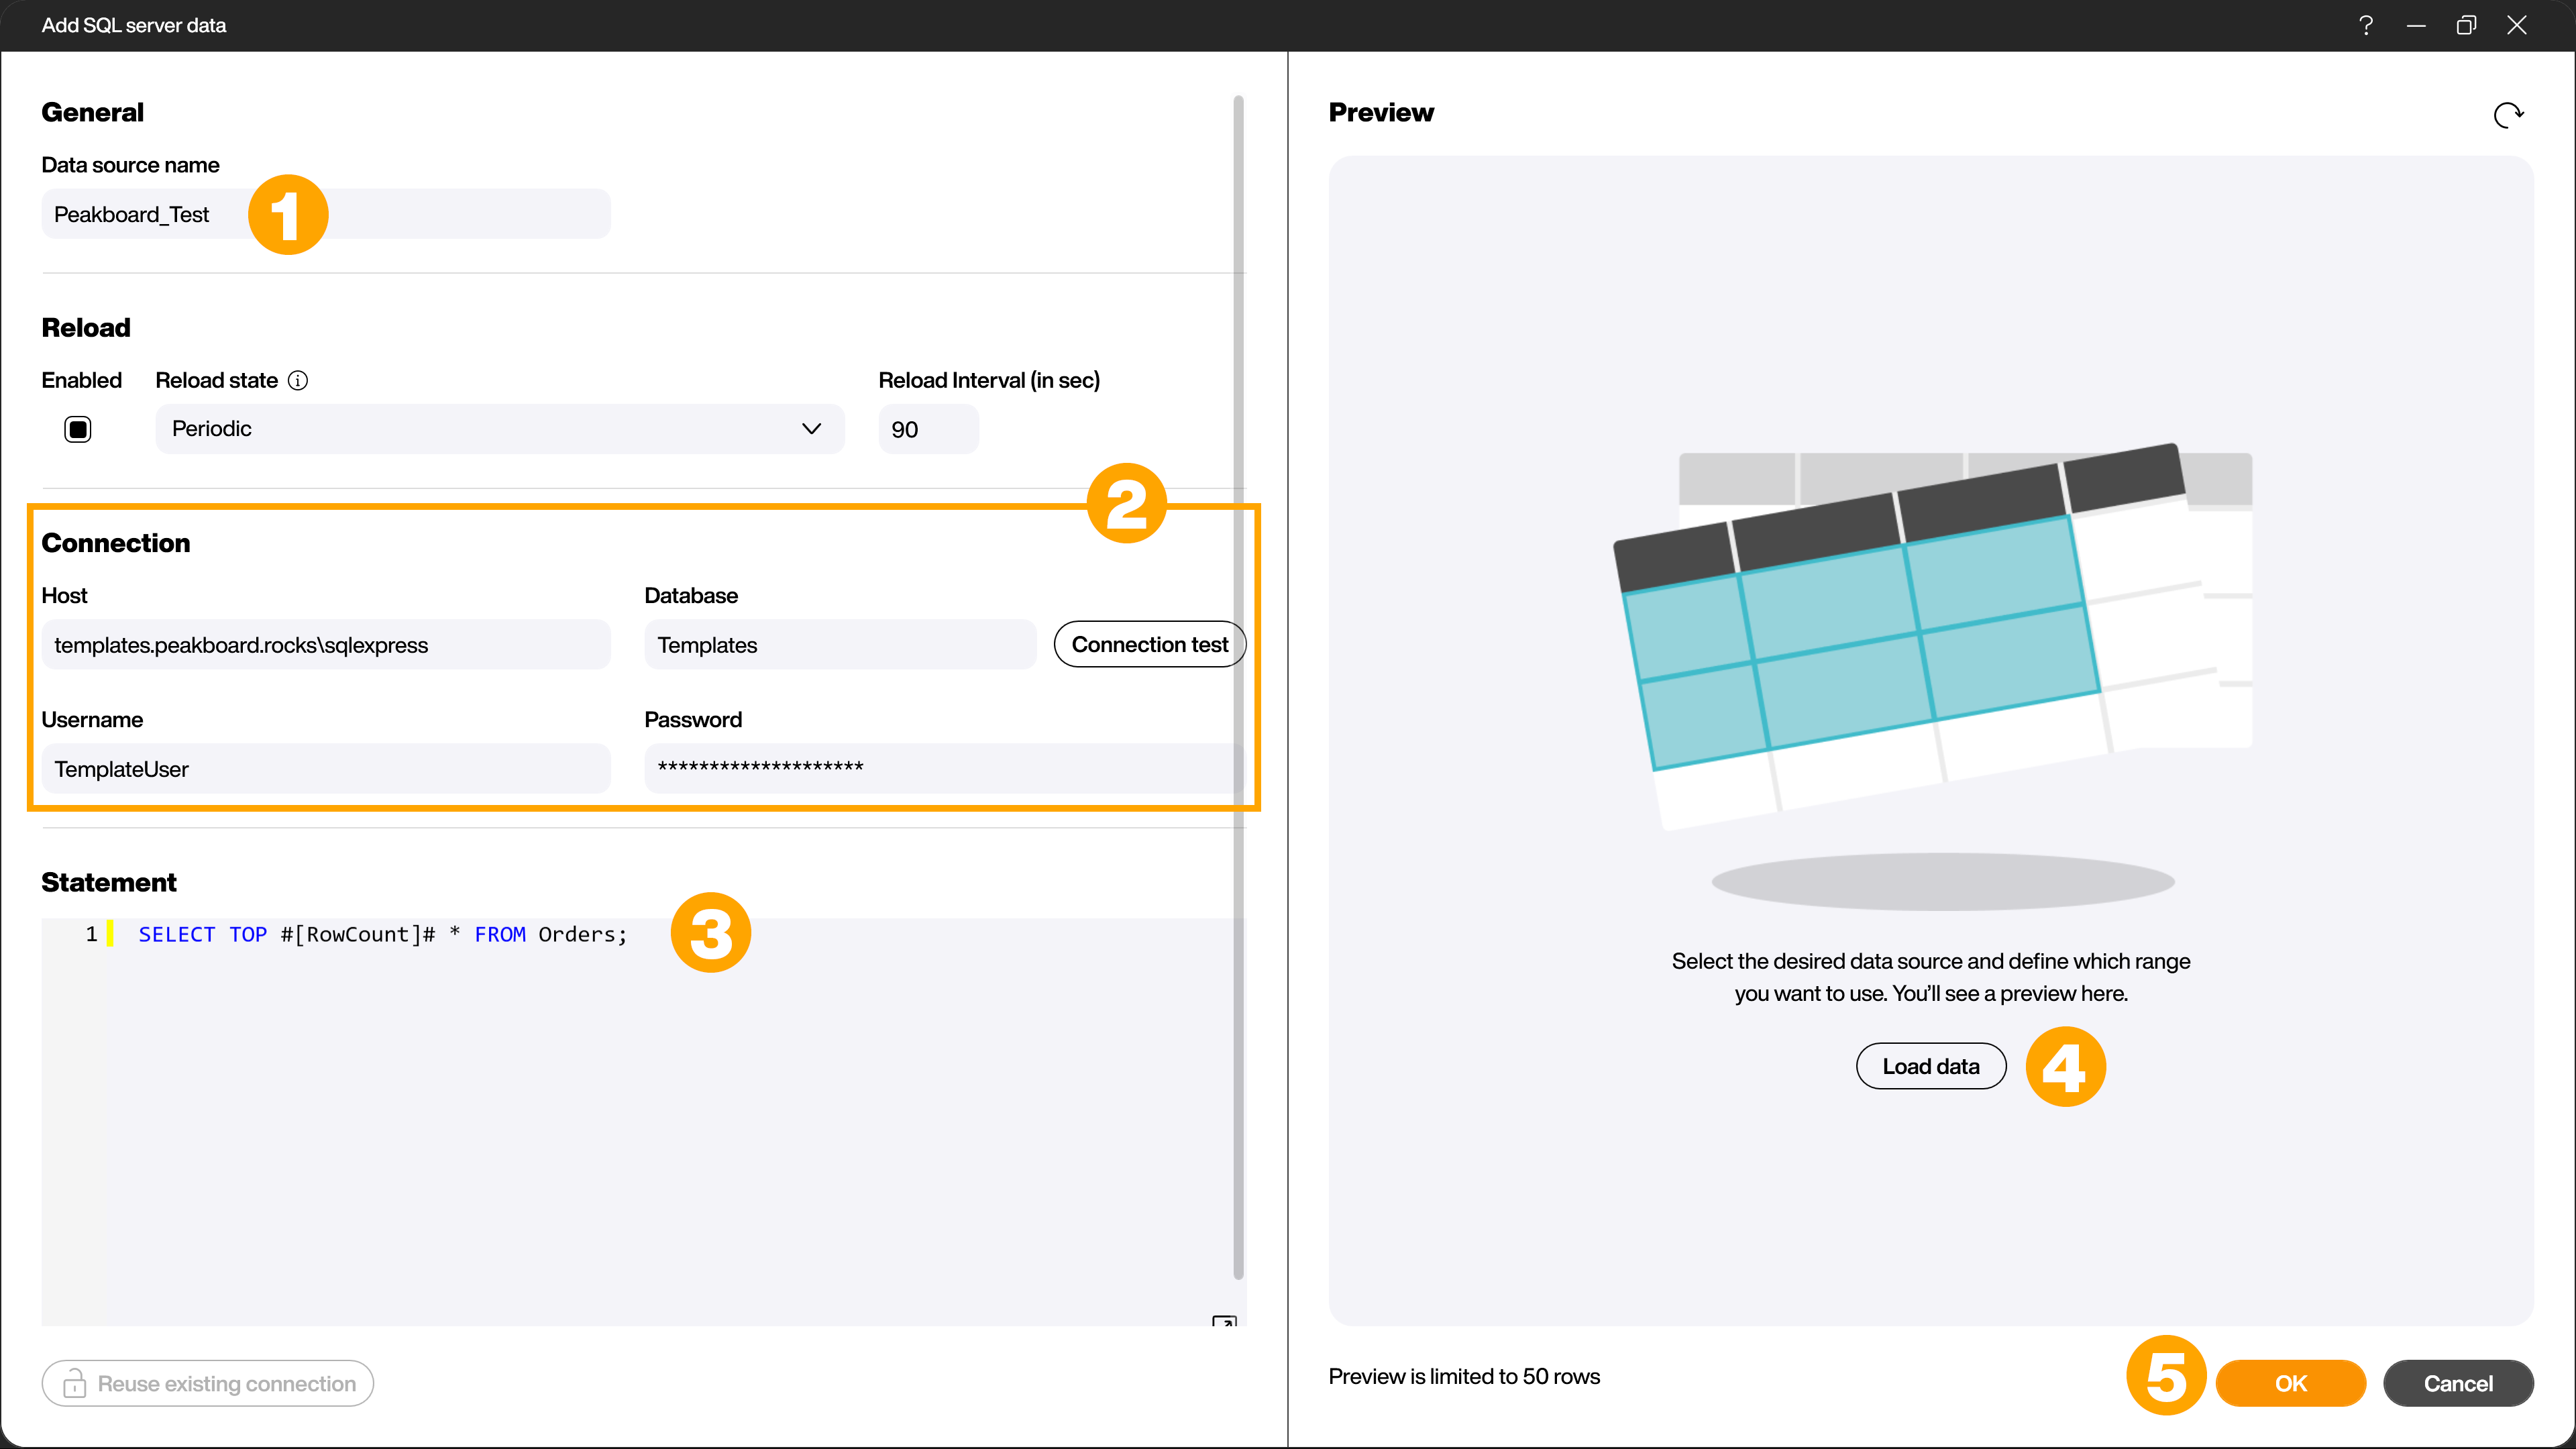
The statement selects the specified rows of the [Orders] table. You must therefore replace [Orders] with the name of your table.
The statement also contains a placeholder that takes the value from the variable that you created in the last step. The placeholder works according to the principle #[MyVariable]#.
At this point, you can of course also use another statement that contains the variable and is better suited to your use case.
Drag and drop the data source onto the workspace and select [Table] to display the data on the workspace.
Create value change event script of the slider
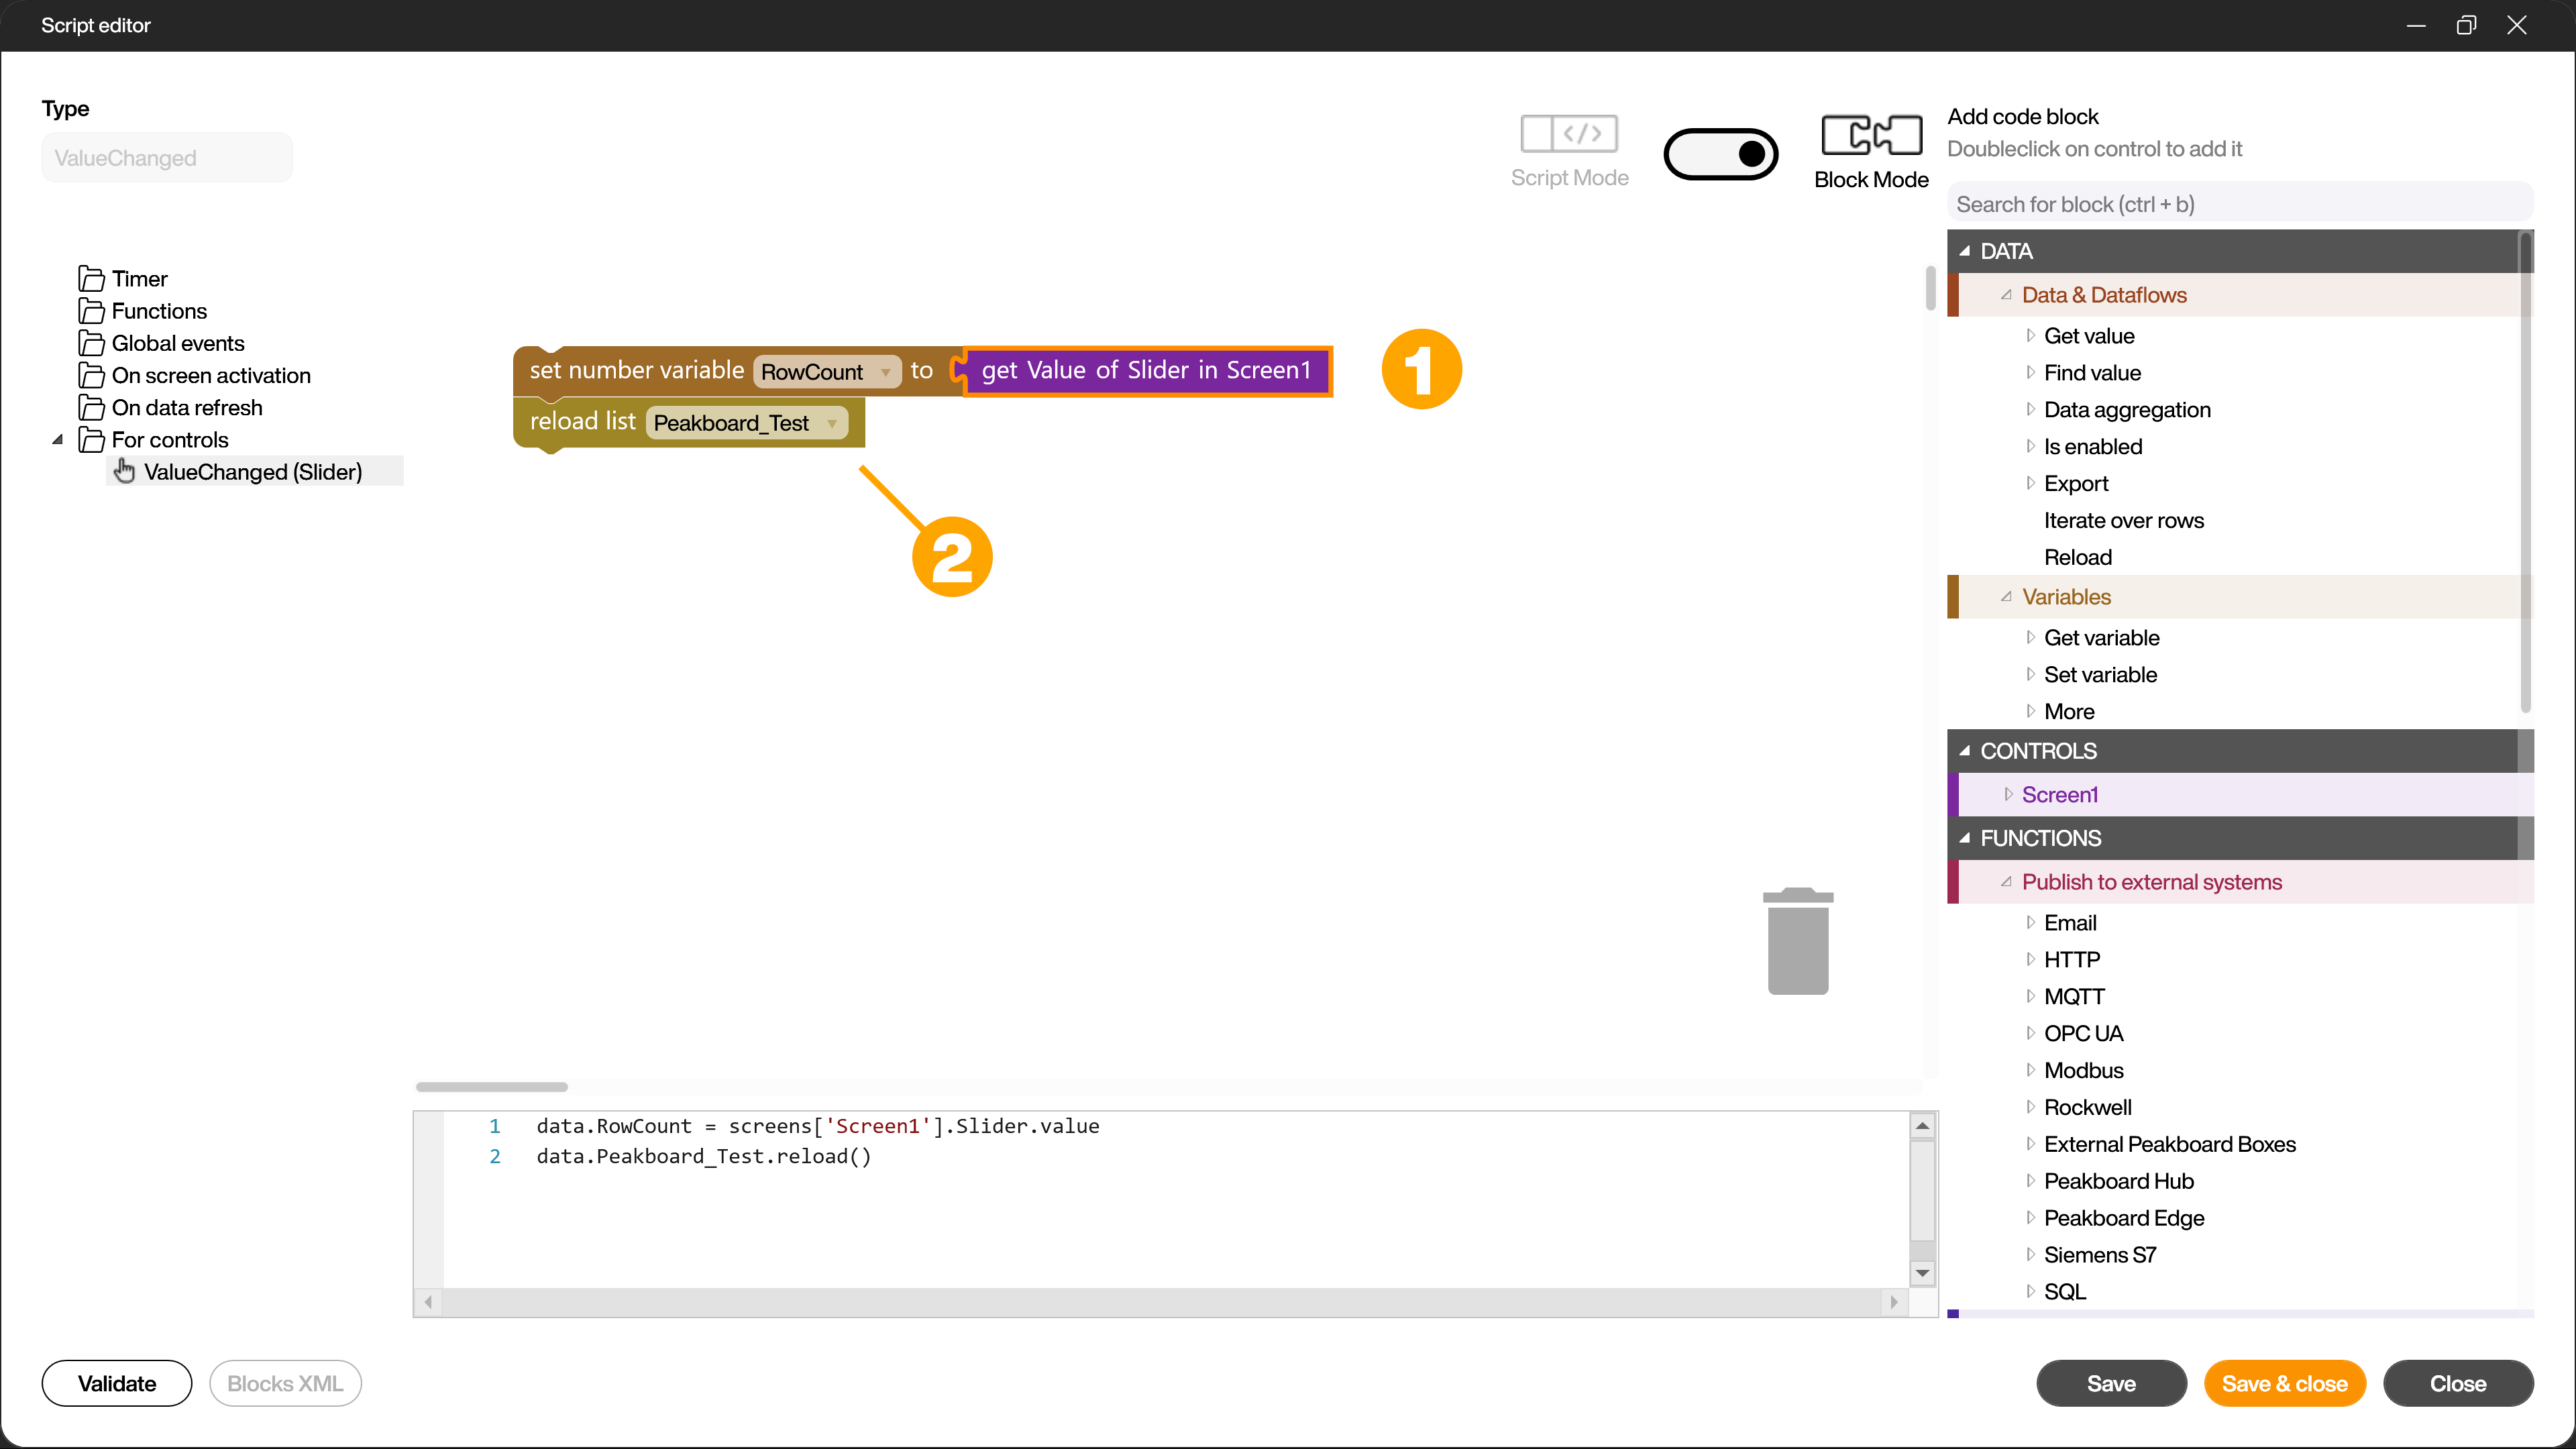
Open the script editor for the [Value change event] (1) to enter the script.
The script sets the variable to the value of the slider (1) and then reloads the data source (2).
data.RowCount = screens['Screen1'].Slider.value
data.Peakboard_Test.reload()
[RowCount] is the name of the variable you have created, [Slider] is the name of the slider and [Peakboard_Test] is the name of the data source.
Test the application in the preview
Click on [Preview] to start it. Now move the slider to see the changes to the displayed lines live.