Controls
Conditional formatting
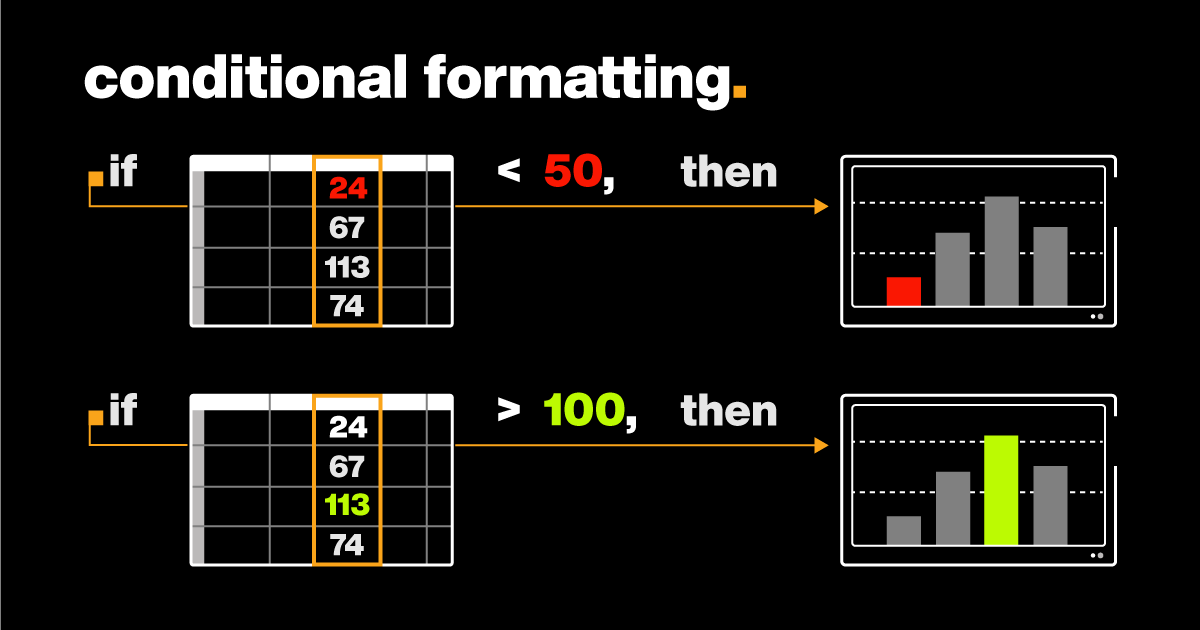
Conditional formatting allows you to change different properties of a control based on a defined event without having to resort to complex scripts.
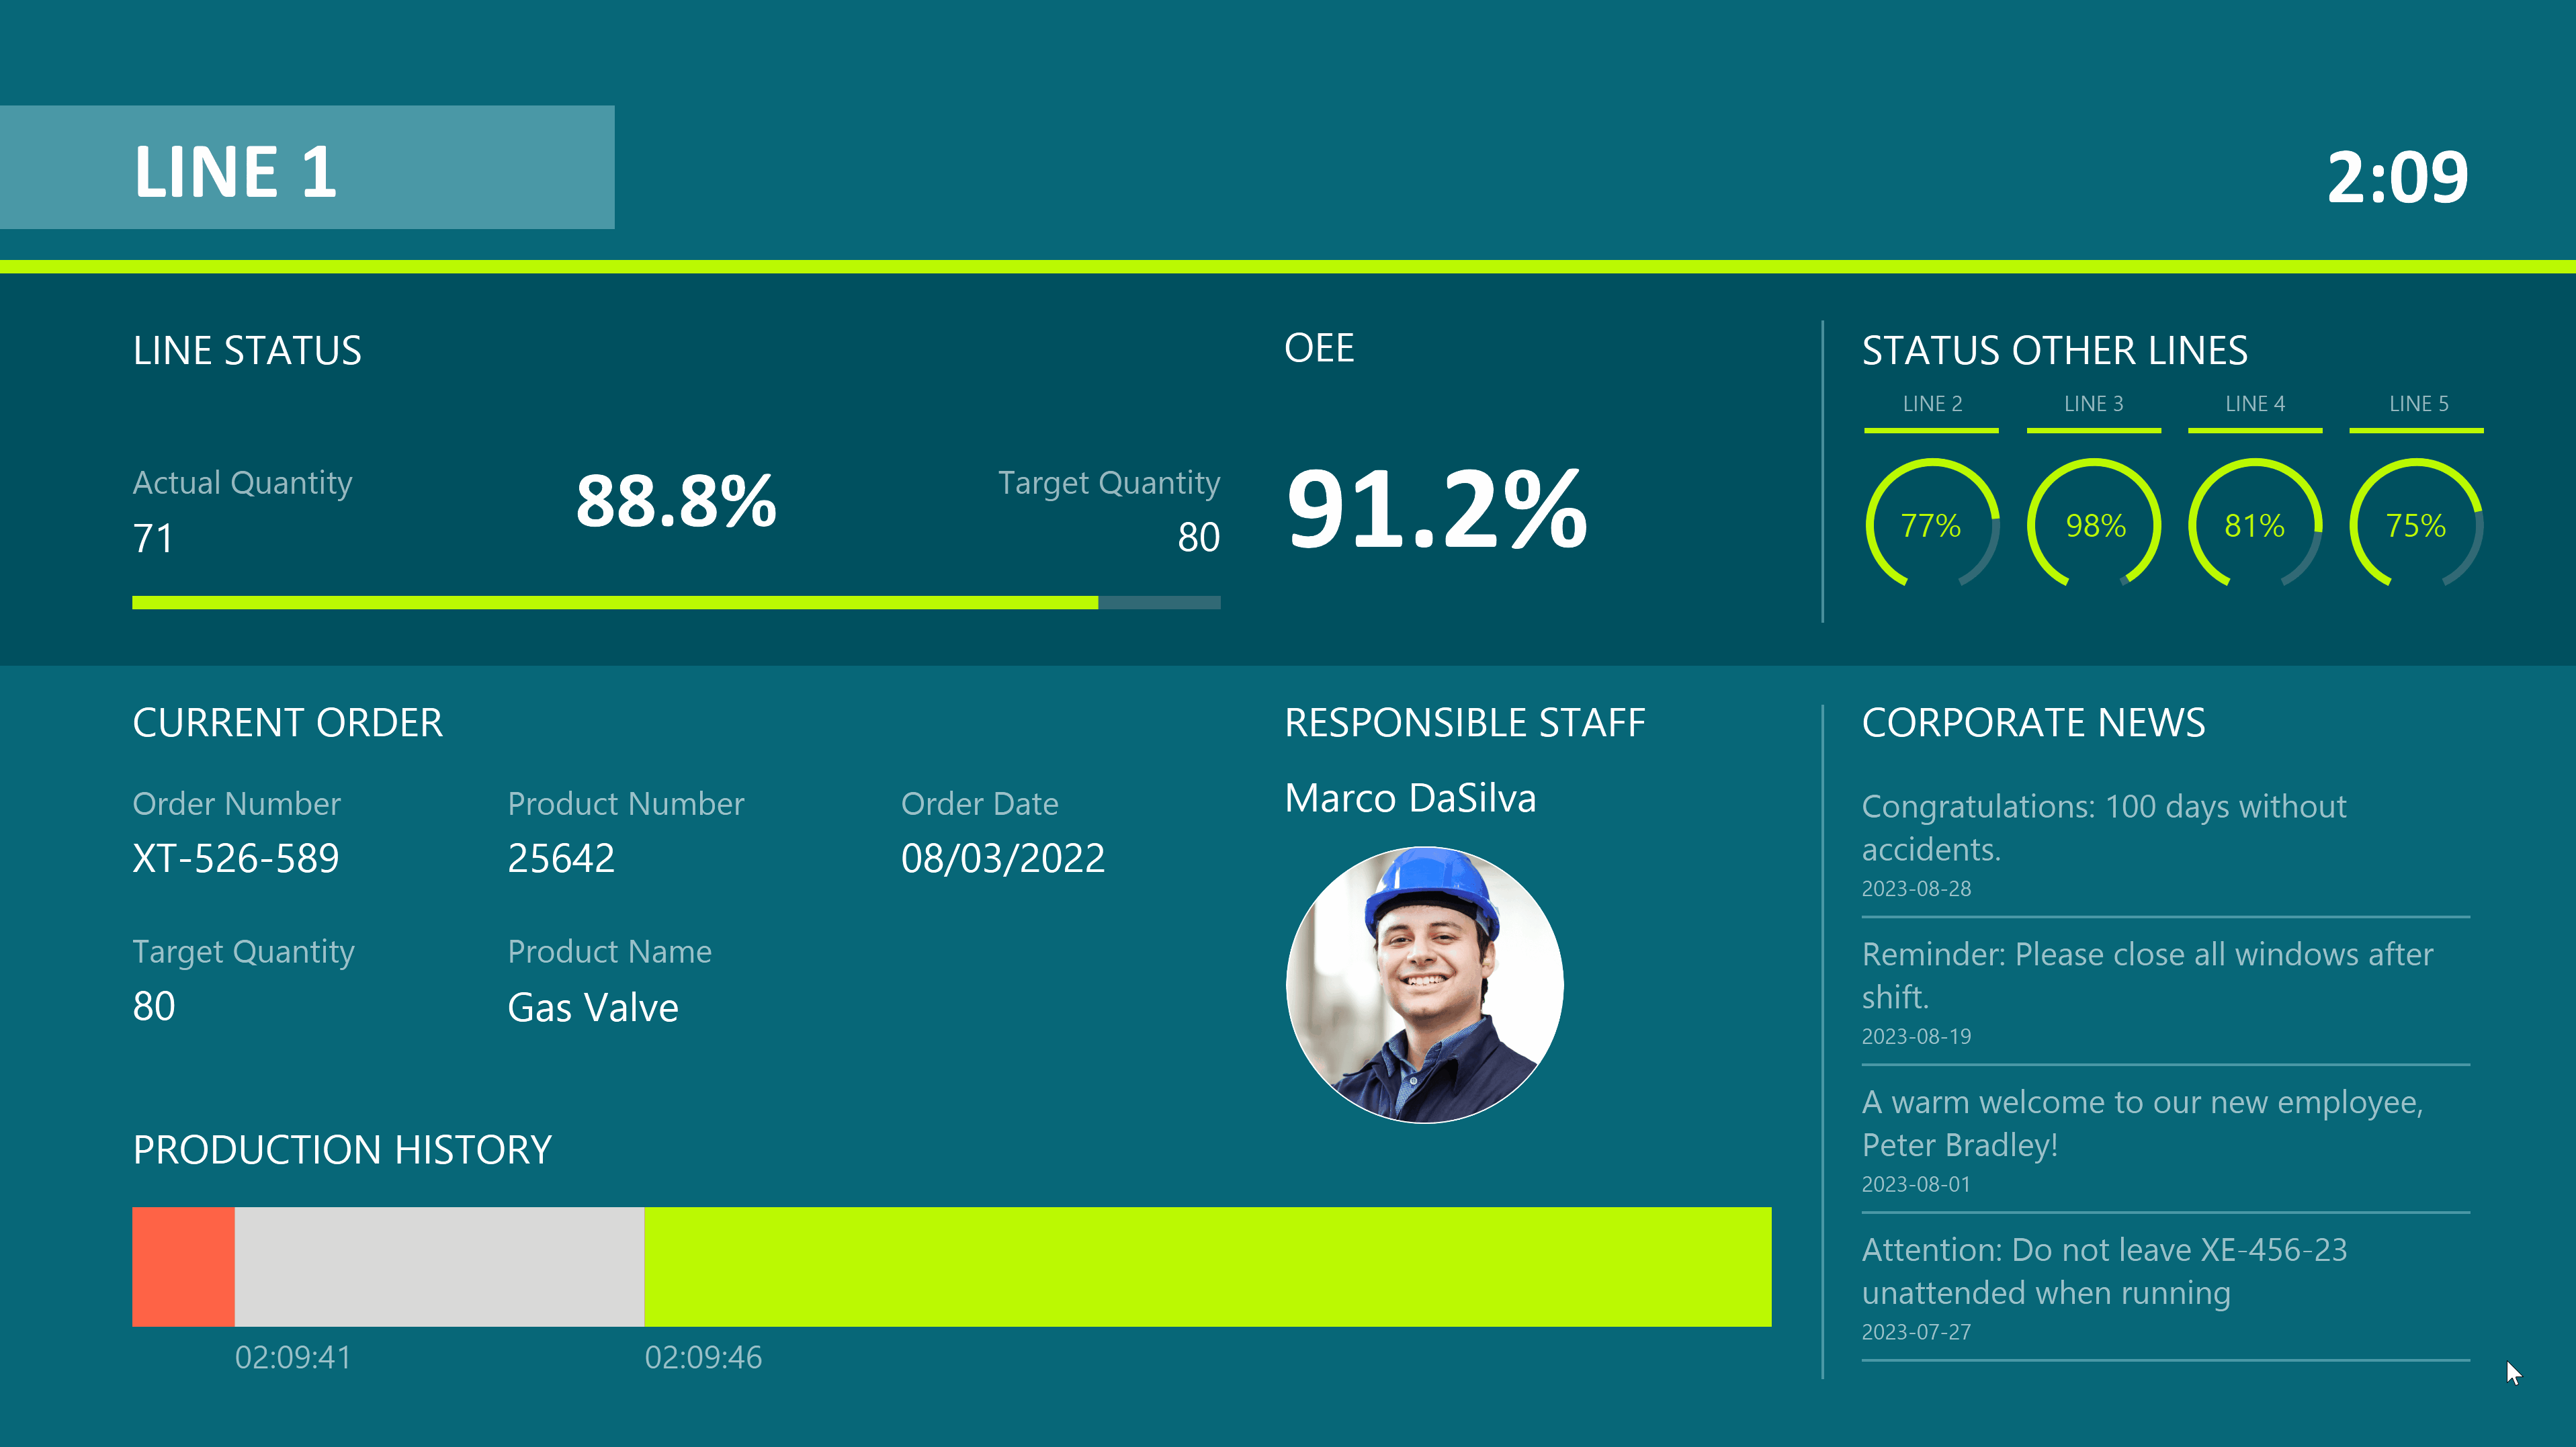
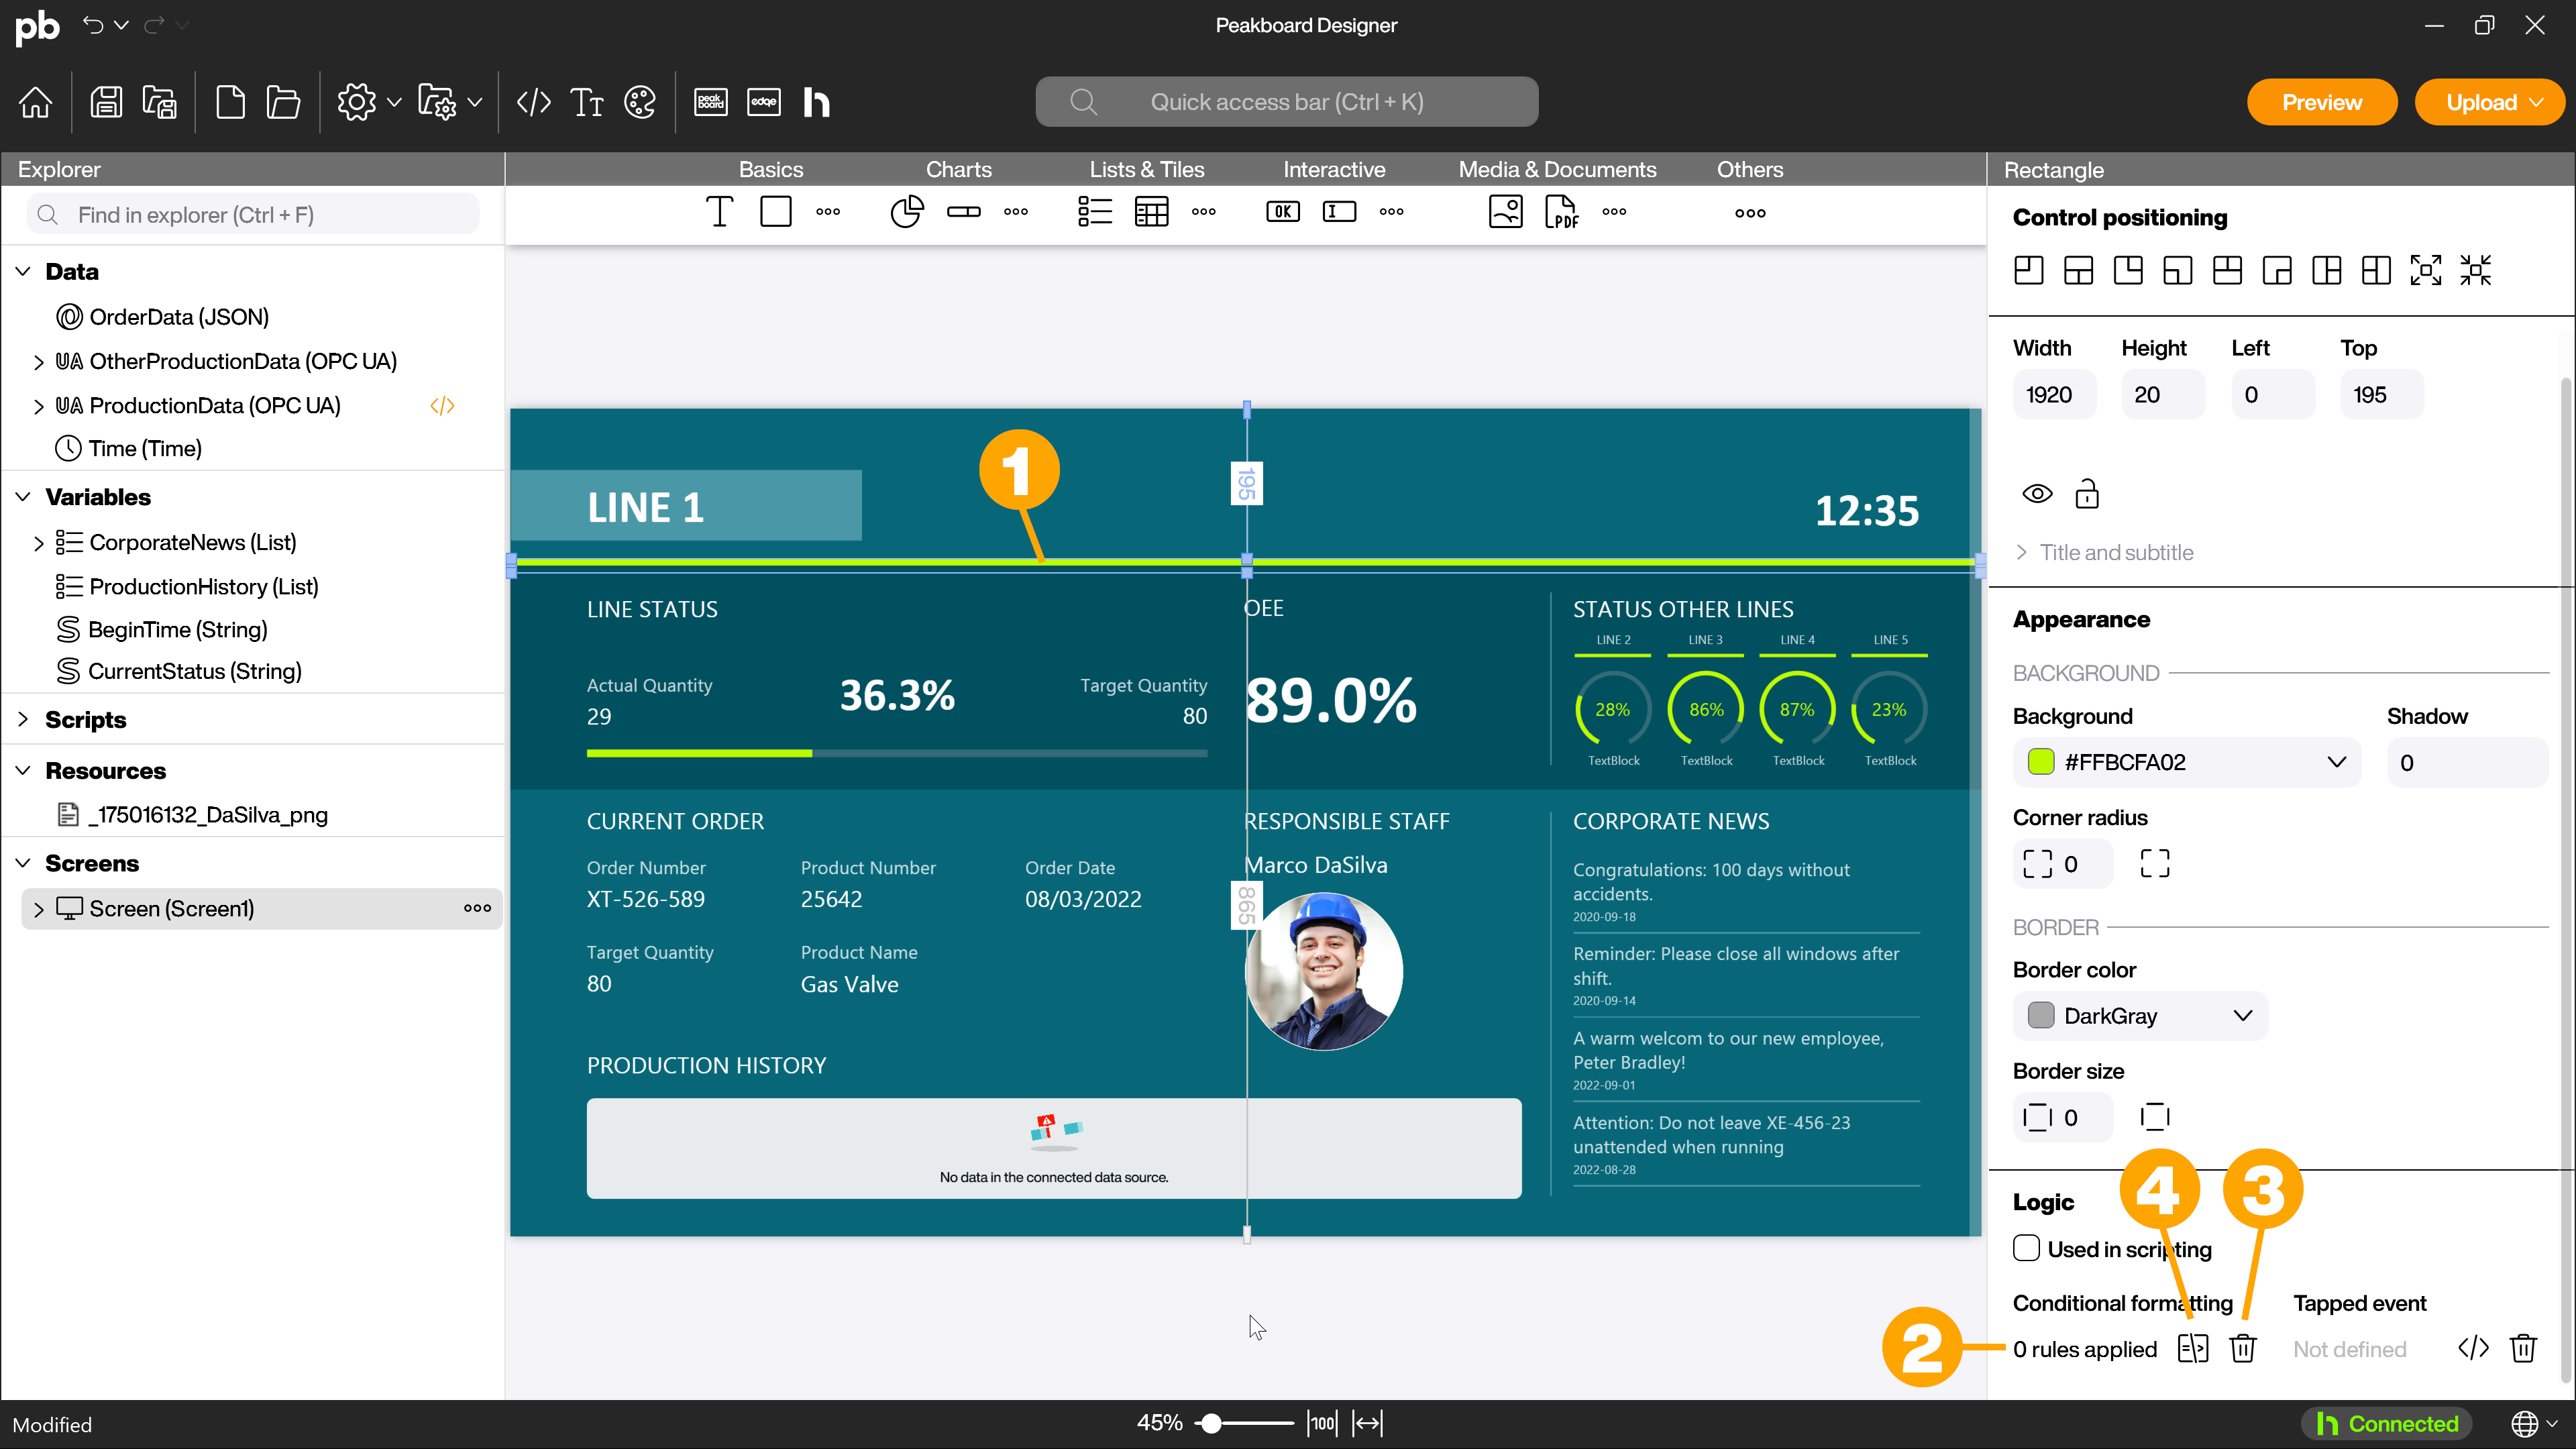
To define conditional formatting for a control, first drag the desired control onto the workspace and select it (1). In the example shown, the bar in the upper area of the template should display the status of the production line. The default status is green. If there is an error on the production line, the bar should turn red. If the production line is idle, the line should be colored light blue.
In the attributes in the [Logic] area, you will find the [Conditional formatting] item. This essentially consists of three elements. The text field (2) shows whether and how many rules you have created for this control. The trash can (3) allows you to delete all rules. The last icon (4) opens the rule editor for conditional formatting.
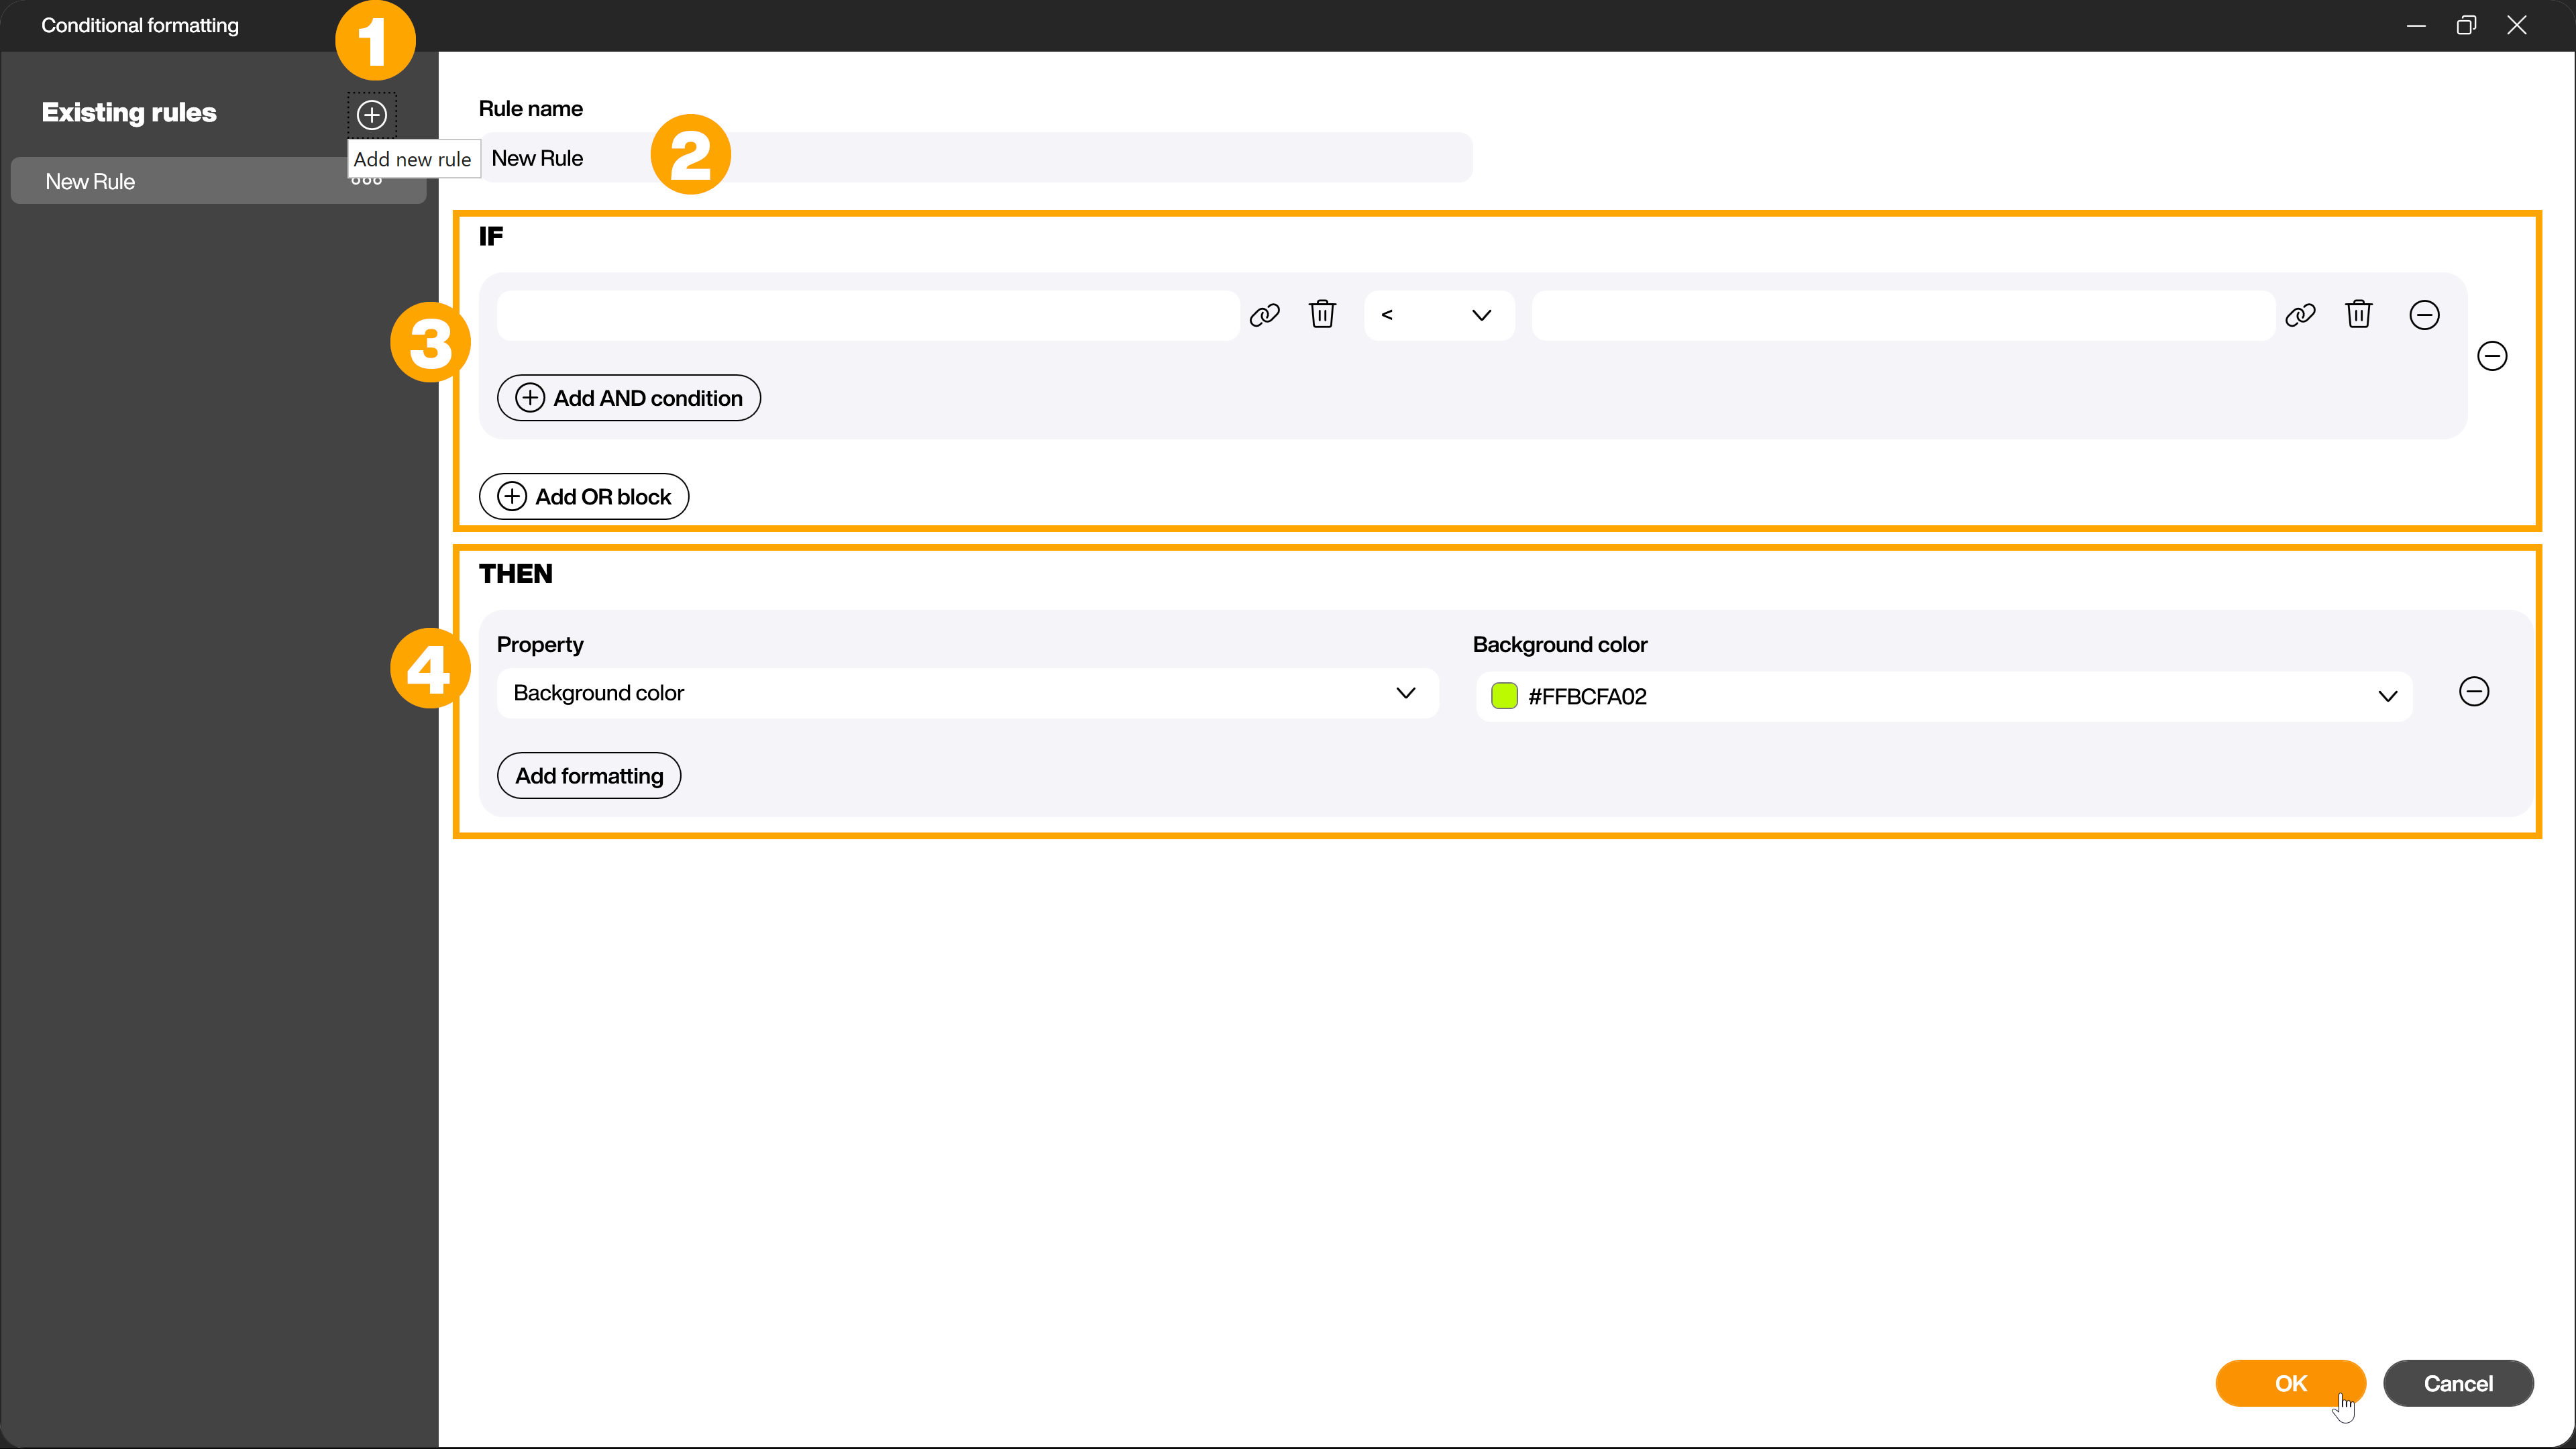
Use the [+] symbol (1) to create a new rule. Here you can first assign a name (2) to the rule for easier identification.
The rule editor itself is based on a simple if-then concept. In the IF statement, you define when the rule should be executed (2), while in the THEN statement you define the corresponding action (3). Depending on the control type, you can change control-specific properties.
Once you have created a rule, you can use the [+] symbol to define additional rules for the control.
In order to define a condition in the IF statement, you need a data source or variable that later triggers the THEN event. The [Status] column of the OPC UA data source [ProductionData_DF] is used for the states of the production line. The column has the three possible states [Running], [Error] and [Idle].
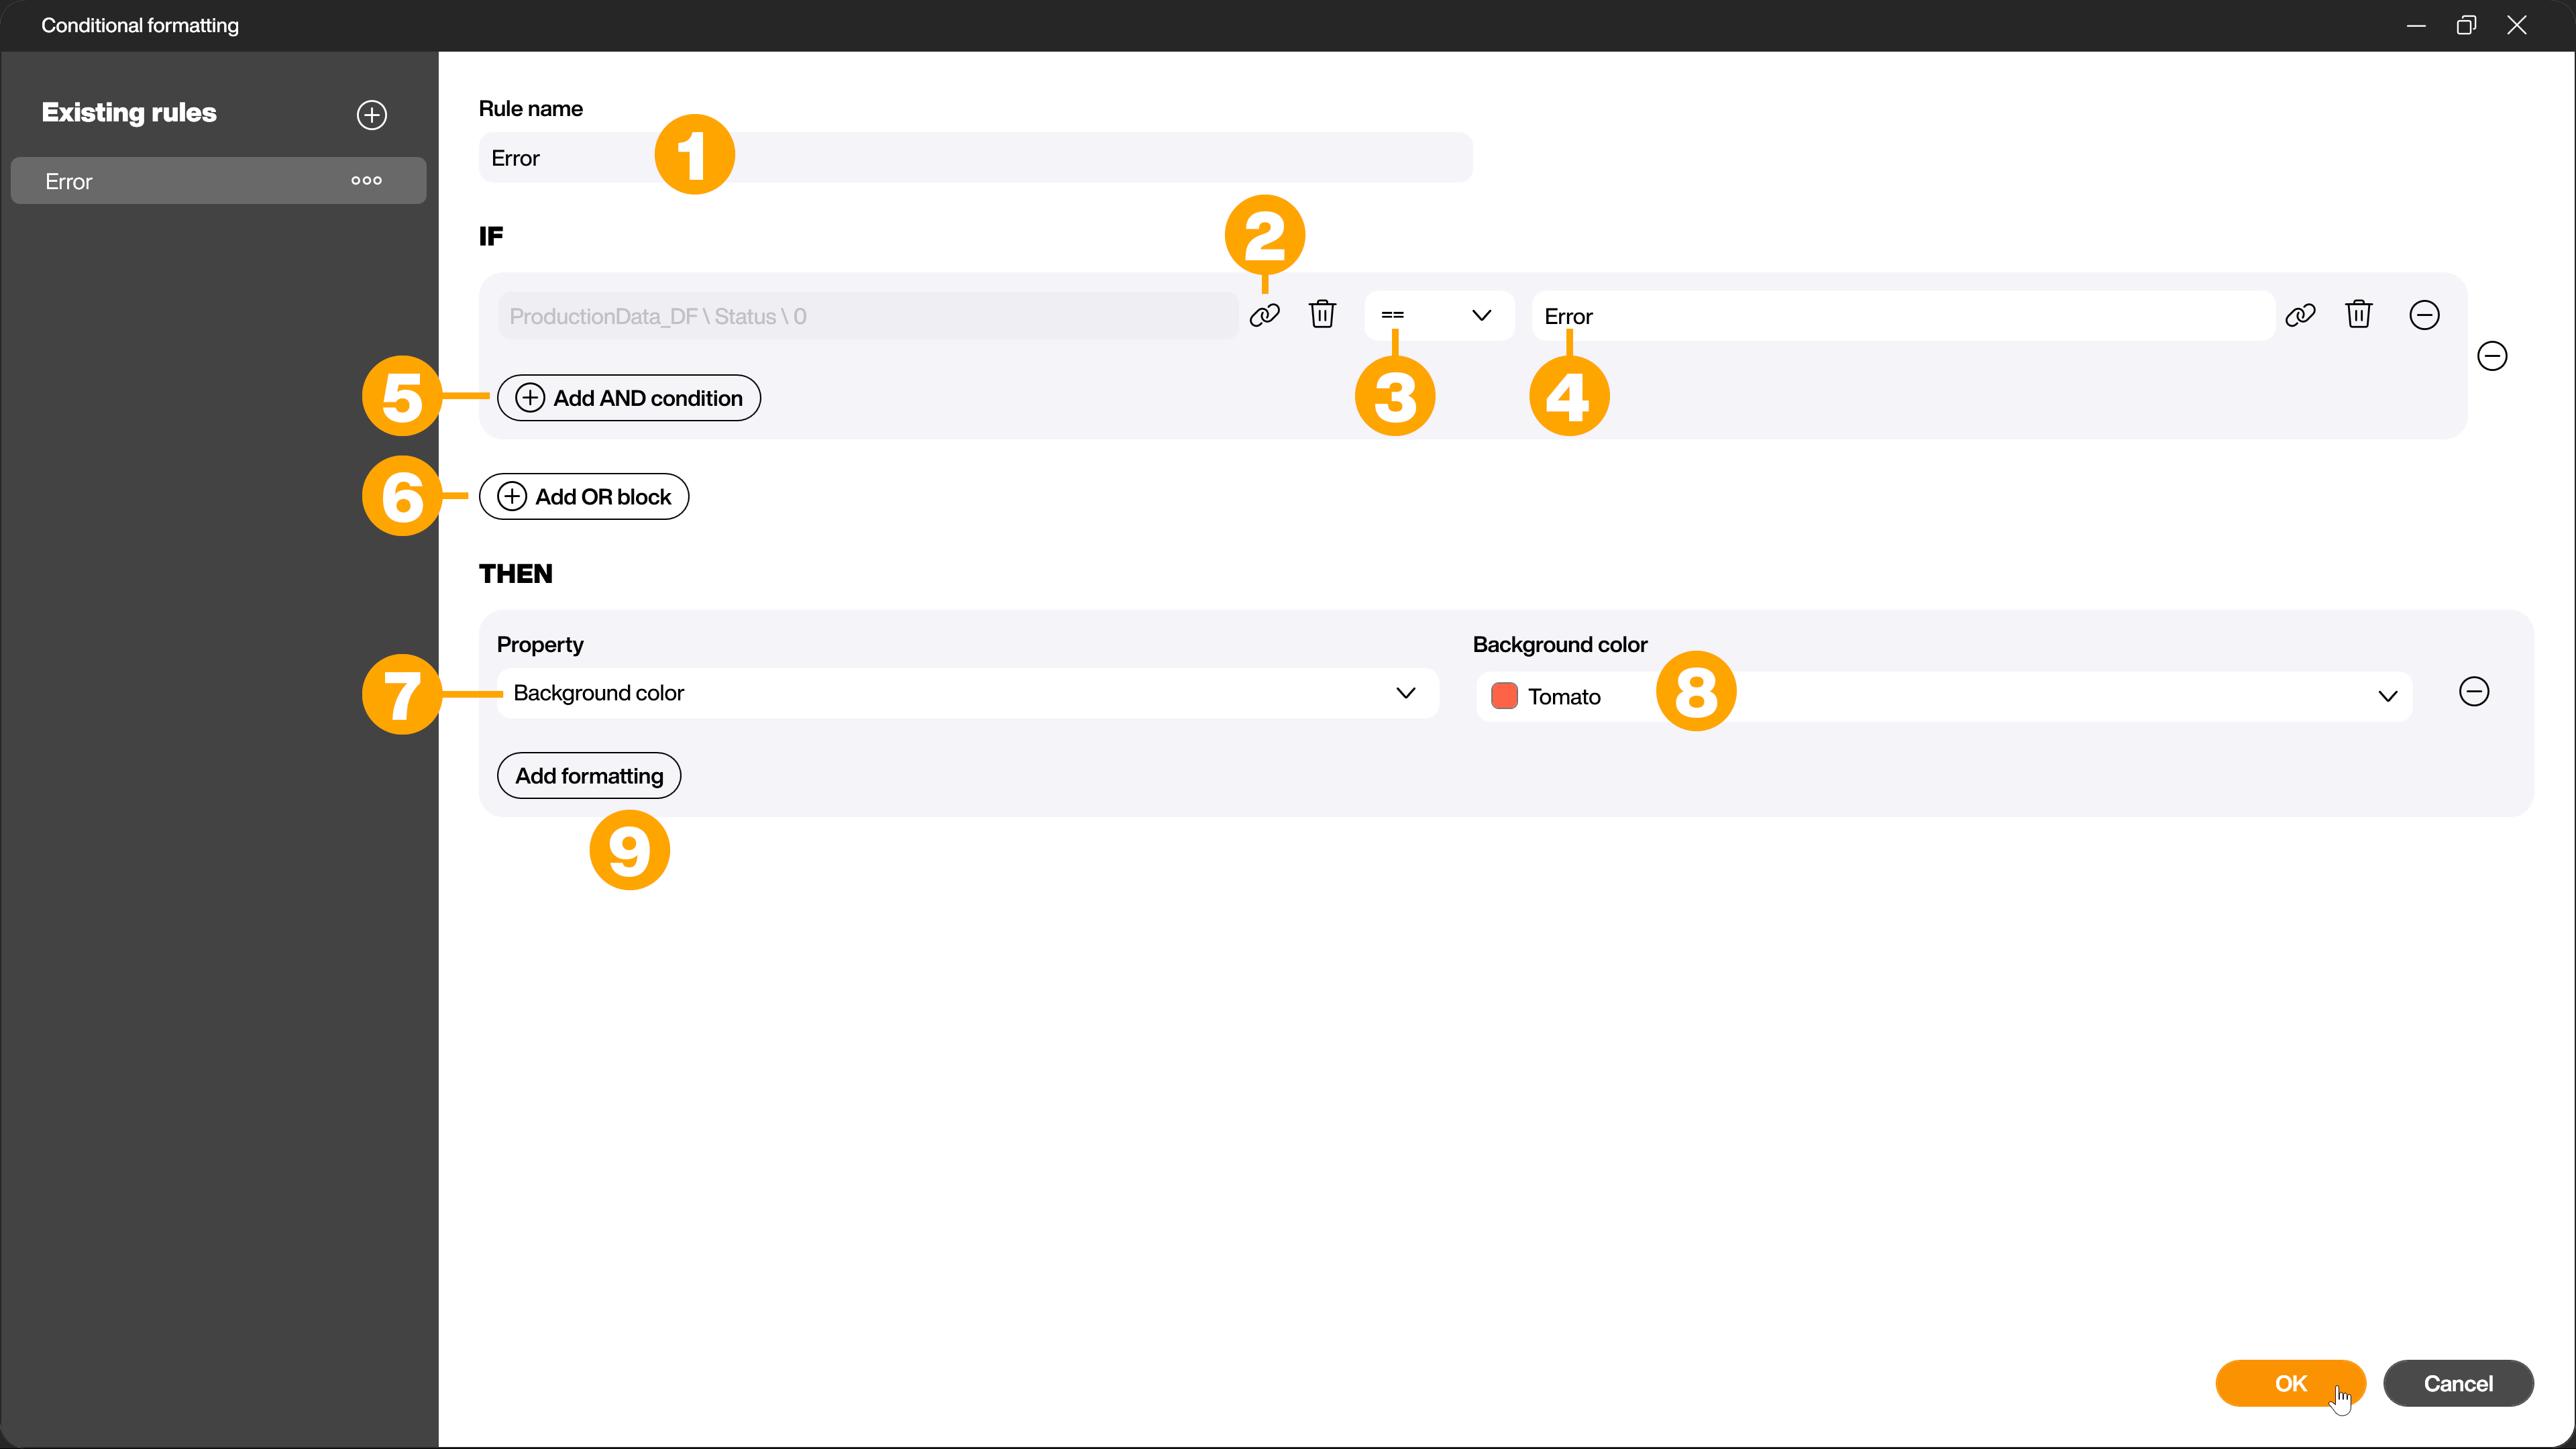
The rectangle control should be displayed in red if the [Status] column shows the [Error] state. For example, name your created rule [Error] (1). Then select the data source, the column and the row in the IF area by clicking on the bracket symbol (2). Then use the drop-down menu to select the desired operator, in this case [==] (3). Now enter the value to be compared in the third field (4). You can enter a fixed value here or also link a variable or data source. In this case, enter the string [Error]. Depending on the use case, you can add further AND conditions (5) or OR blocks (6) at this point.
In the THEN area, you now define the action that is to be executed when the IF area is fulfilled. To do this, select the property that you want to change (7) and define the new value (8). In this case, the background color should be changed to red. If required, you can use the [Add formatting] button (9) to define further actions that are also executed when the IF area is fulfilled.
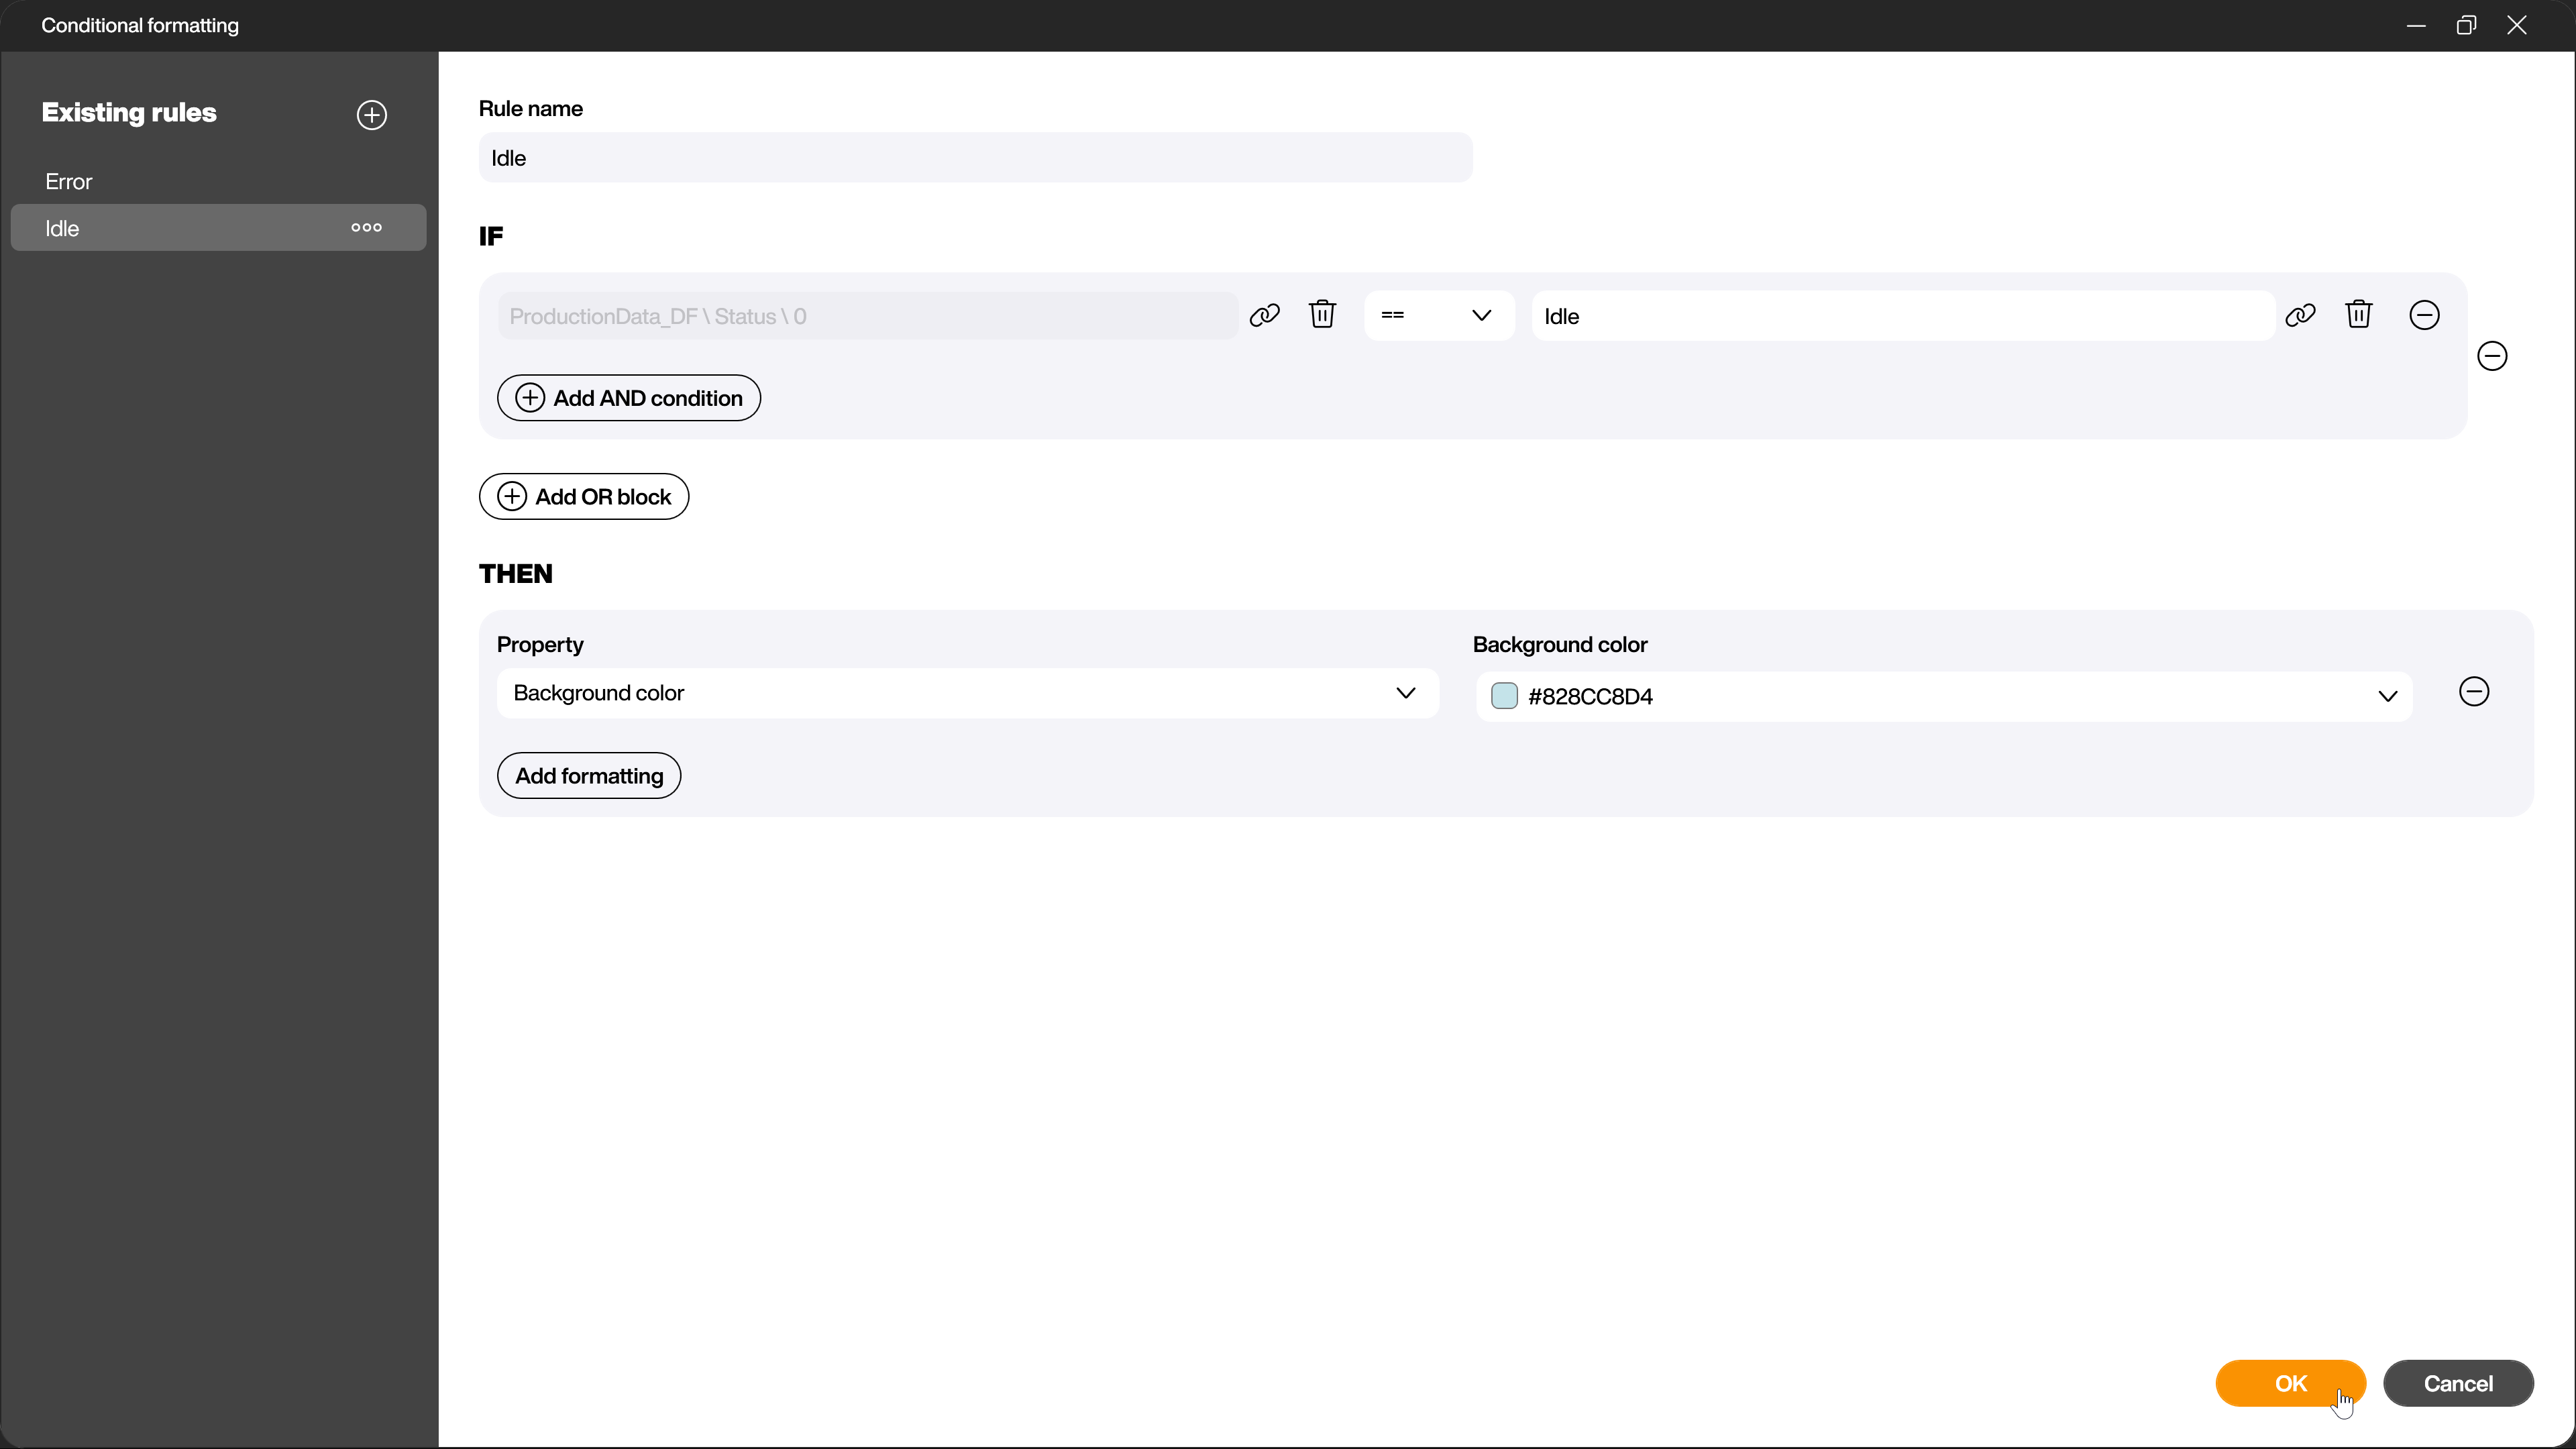
Now create another rule for the [Idle] state using the same scheme.
You can now view the result of the conditional formatting in the preview. The conditional formatting is only executed in the preview or on the Peakboard Box! There is no change on the workspace!