Data sources
XML
XML (Extensible Markup Language) is a widely used, hierarchical text format for exchanging structured data between systems. Peakboard reads an XML source – as a local file, from a network share, or over a URL – turns it into a table, and displays it on the dashboard. For background on the format itself, see for example the Wikipedia article on XML.
If you don’t have your own XML source at hand, you can use this public example – a small CD catalog: https://www.w3schools.com/xml/cd_catalog.xml
Add the data source
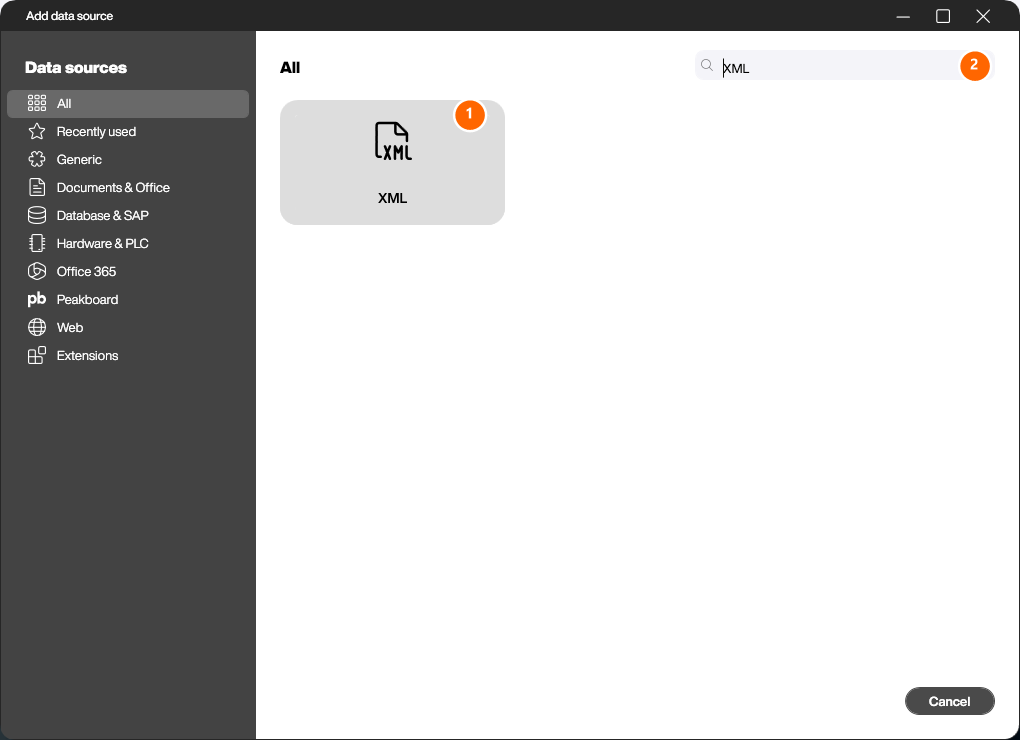
In the explorer, click the […] button under [Data], or right-click it and choose [Add data source]. Type “XML” into the search field (2) and open the [XML] data source (1) with a double click.
Configure the connection
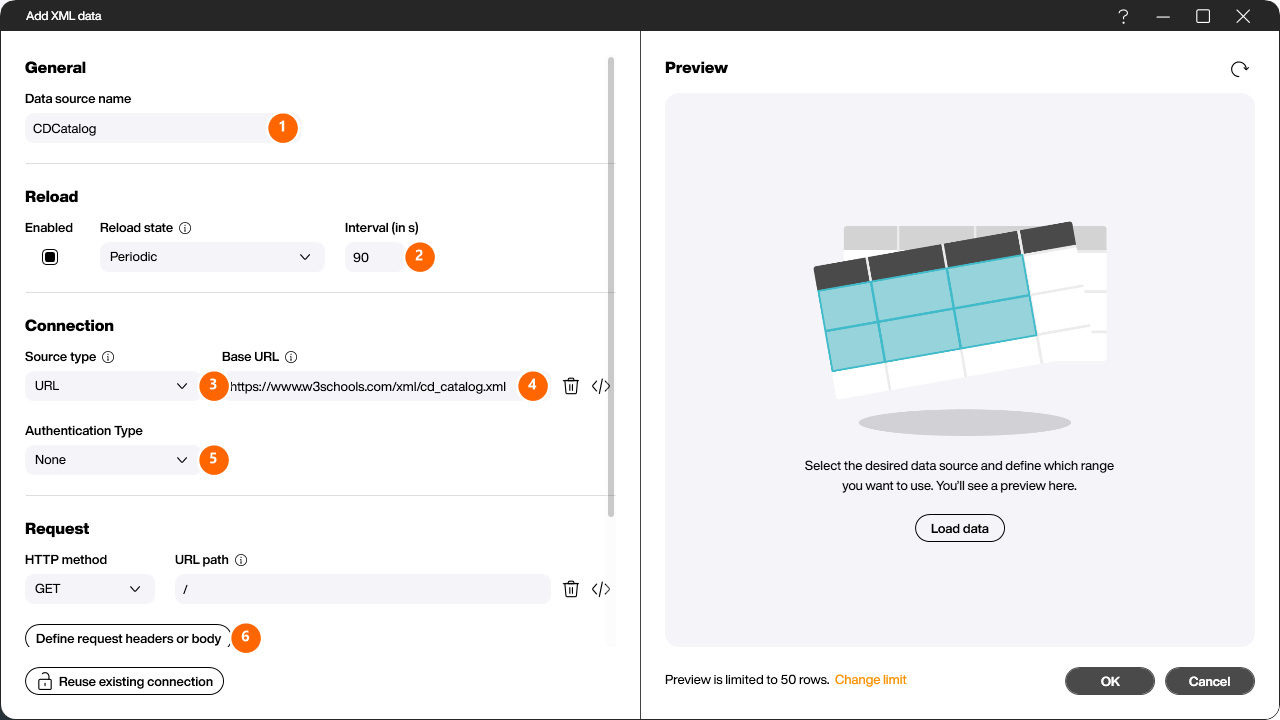
In the configuration dialog you define where the XML data comes from:
- Data source name (1) – a unique name for the data source (e.g.
CDCatalog). - Reload (2) – enable the cyclic refresh and set the interval in seconds if the data should be reloaded regularly.
- Source type (3) – where the XML source is located: via URL, in a network share, as a local file, in Microsoft 365 (OneDrive/SharePoint), or in the Peakboard Hub.
- Base URL (4) – the address of the XML source. For the example, paste the CD catalog URL here.
- Authentication Type (5) – if the source is protected, None, Basic, Bearer, and OAuth are available. For the public example, leave it on None.
- Request (6) – use [Define request headers or body] to adjust the HTTP method, headers, and – for POST/PUT requests – the body if needed.
Select the XML element
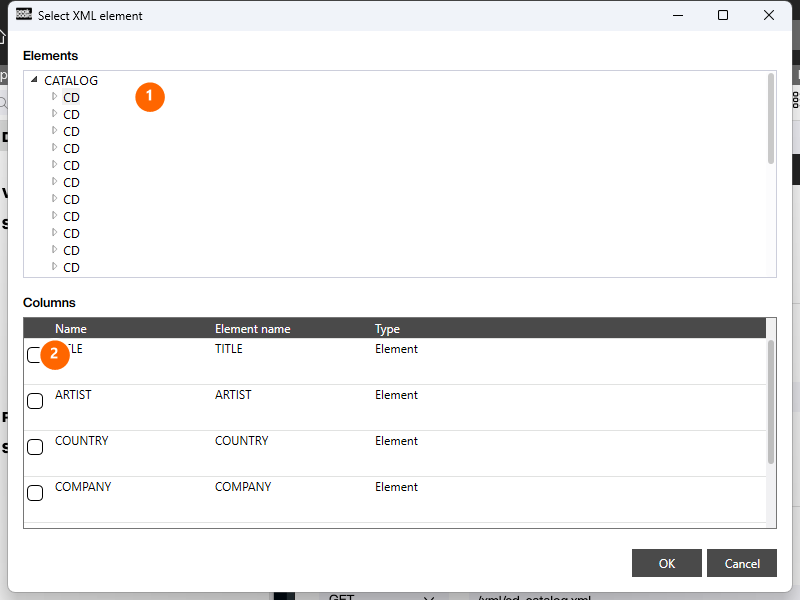
Because a Peakboard data source is always tabular, you have to define which part of the XML tree is used as the table. Click the […] button next to the [Path] field in the [Specify details] section. Peakboard loads the source and analyzes its structure.
In the tree on the left (1), pick the element that repeats and therefore forms the table rows (the CD node in the example). The resulting columns appear on the right (2). Tick only the columns you actually need – especially with large XML files it is good practice to leave out unused elements right from the start. Confirm with [OK].
Load the preview
Back in the main dialog, the resolved path is shown in the [Path] field (1) (./CATALOG/CD in the example). Click [Load data] to generate a preview (2), where you can check the plausibility of the data and the detected data types. Use [Max. rows] to limit the number of rows, or [All] to remove the limit.
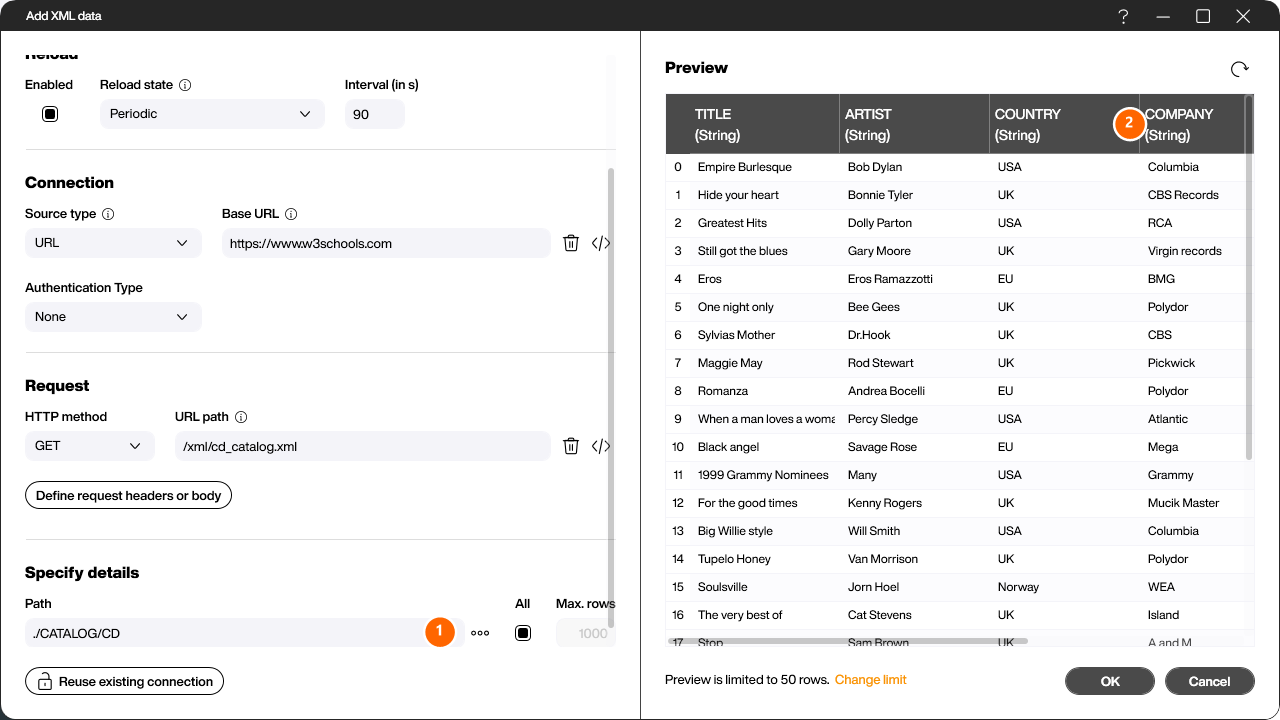
Click [OK] to create the data source. It then appears in the explorer under [Data] and can be bound to controls (table, chart, list, …) just like any other data source.