Peakboard hub
Create user group
In this article you will learn how to create and configure a new user group in Peakboard Hub.
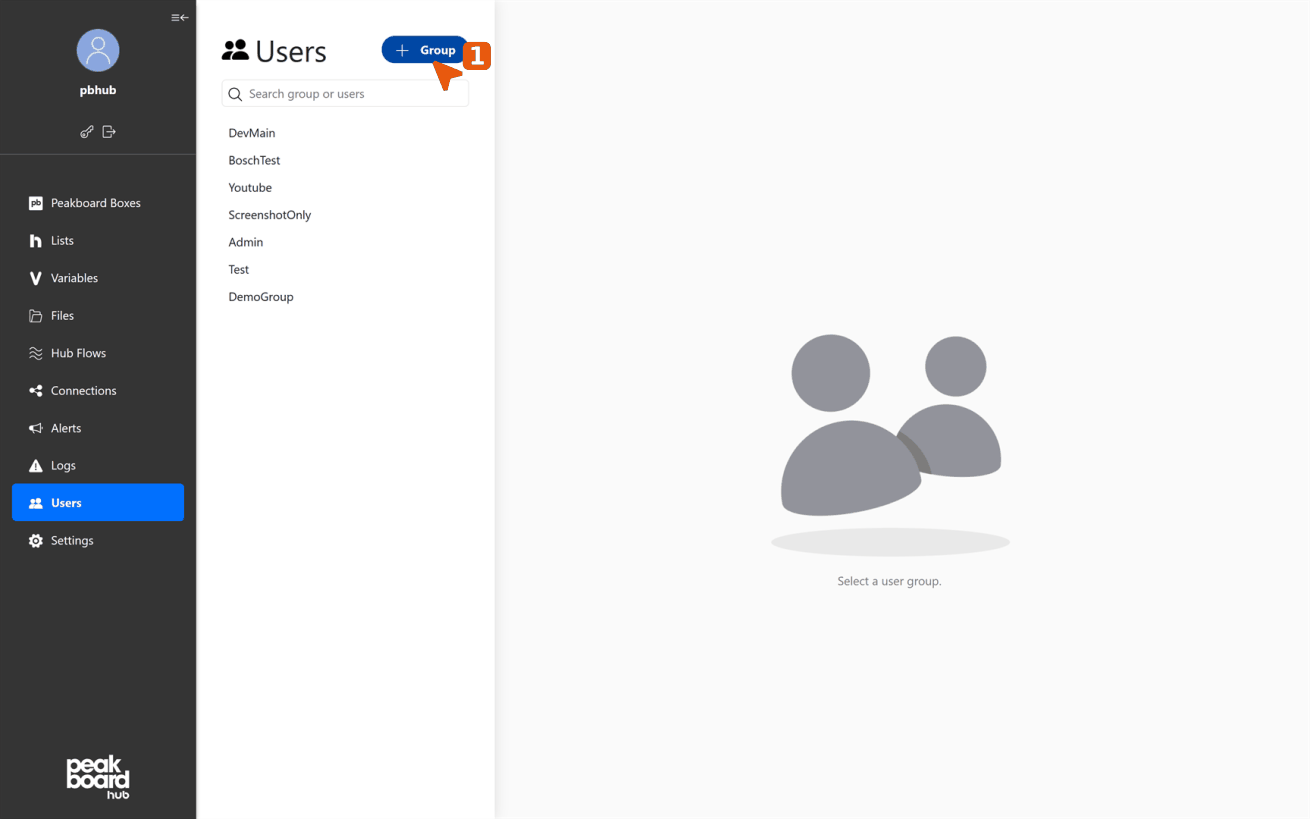
Create new group
- Click group button: Navigate to the [Users] section in the left sidebar and click the [+ Group] button in the upper right area.
- Enter group name: In the [Create User Group] dialog, enter a meaningful name in the [Name] field. The system automatically generates a User Group Key.
- Save group: Click the [Save] button to create the new group.
Configure group settings
- Select group: The newly created group appears in the list in the left sidebar. Click on the group to select it.
- Set access rights: In the [Access] section, configure the desired permissions. Use toggle switches to enable or disable access for different areas.
The new user group is now created and configured. You can make further adjustments to the group settings or add users to the group at any time.