Administration
User administration
With Peakboard, you can create a wide range of industrial applications, from pure data visualization to human-machine interfaces. The user groups that come into contact with the applications are just as versatile as the applications themselves.
With user management, Peakboard offers you the possibility to adjust the permissions of the different users to ensure a smooth process. Users are created and managed separately in the Peakboard Designer for each Peakboard Box added. The authorizations affect the use of the Peakboard Box itself and the connection to the Peakboard Designer. The Peakboard Designer itself can always be used with the full range of functions.
Default user PeakboardAdmin
When you add a new Peakboard Box in the Peakboard Designer, the user ‘PeakboardAdmin’ is automatically set as the default user. When connecting the Peakboard Box, enter ‘PeakboardAdmin’ as the user name and leave the password field empty. You will then be asked to set an initial password for this user. This procedure is identical for both Peakboard Box and Peakboard BYOD.
The PeakboardAdmin user has the role of administrator and has all available rights. With this user, the Peakboard Box can be used to its full extent. It is recommended to define separate users and roles for the different applications.
Users and roles
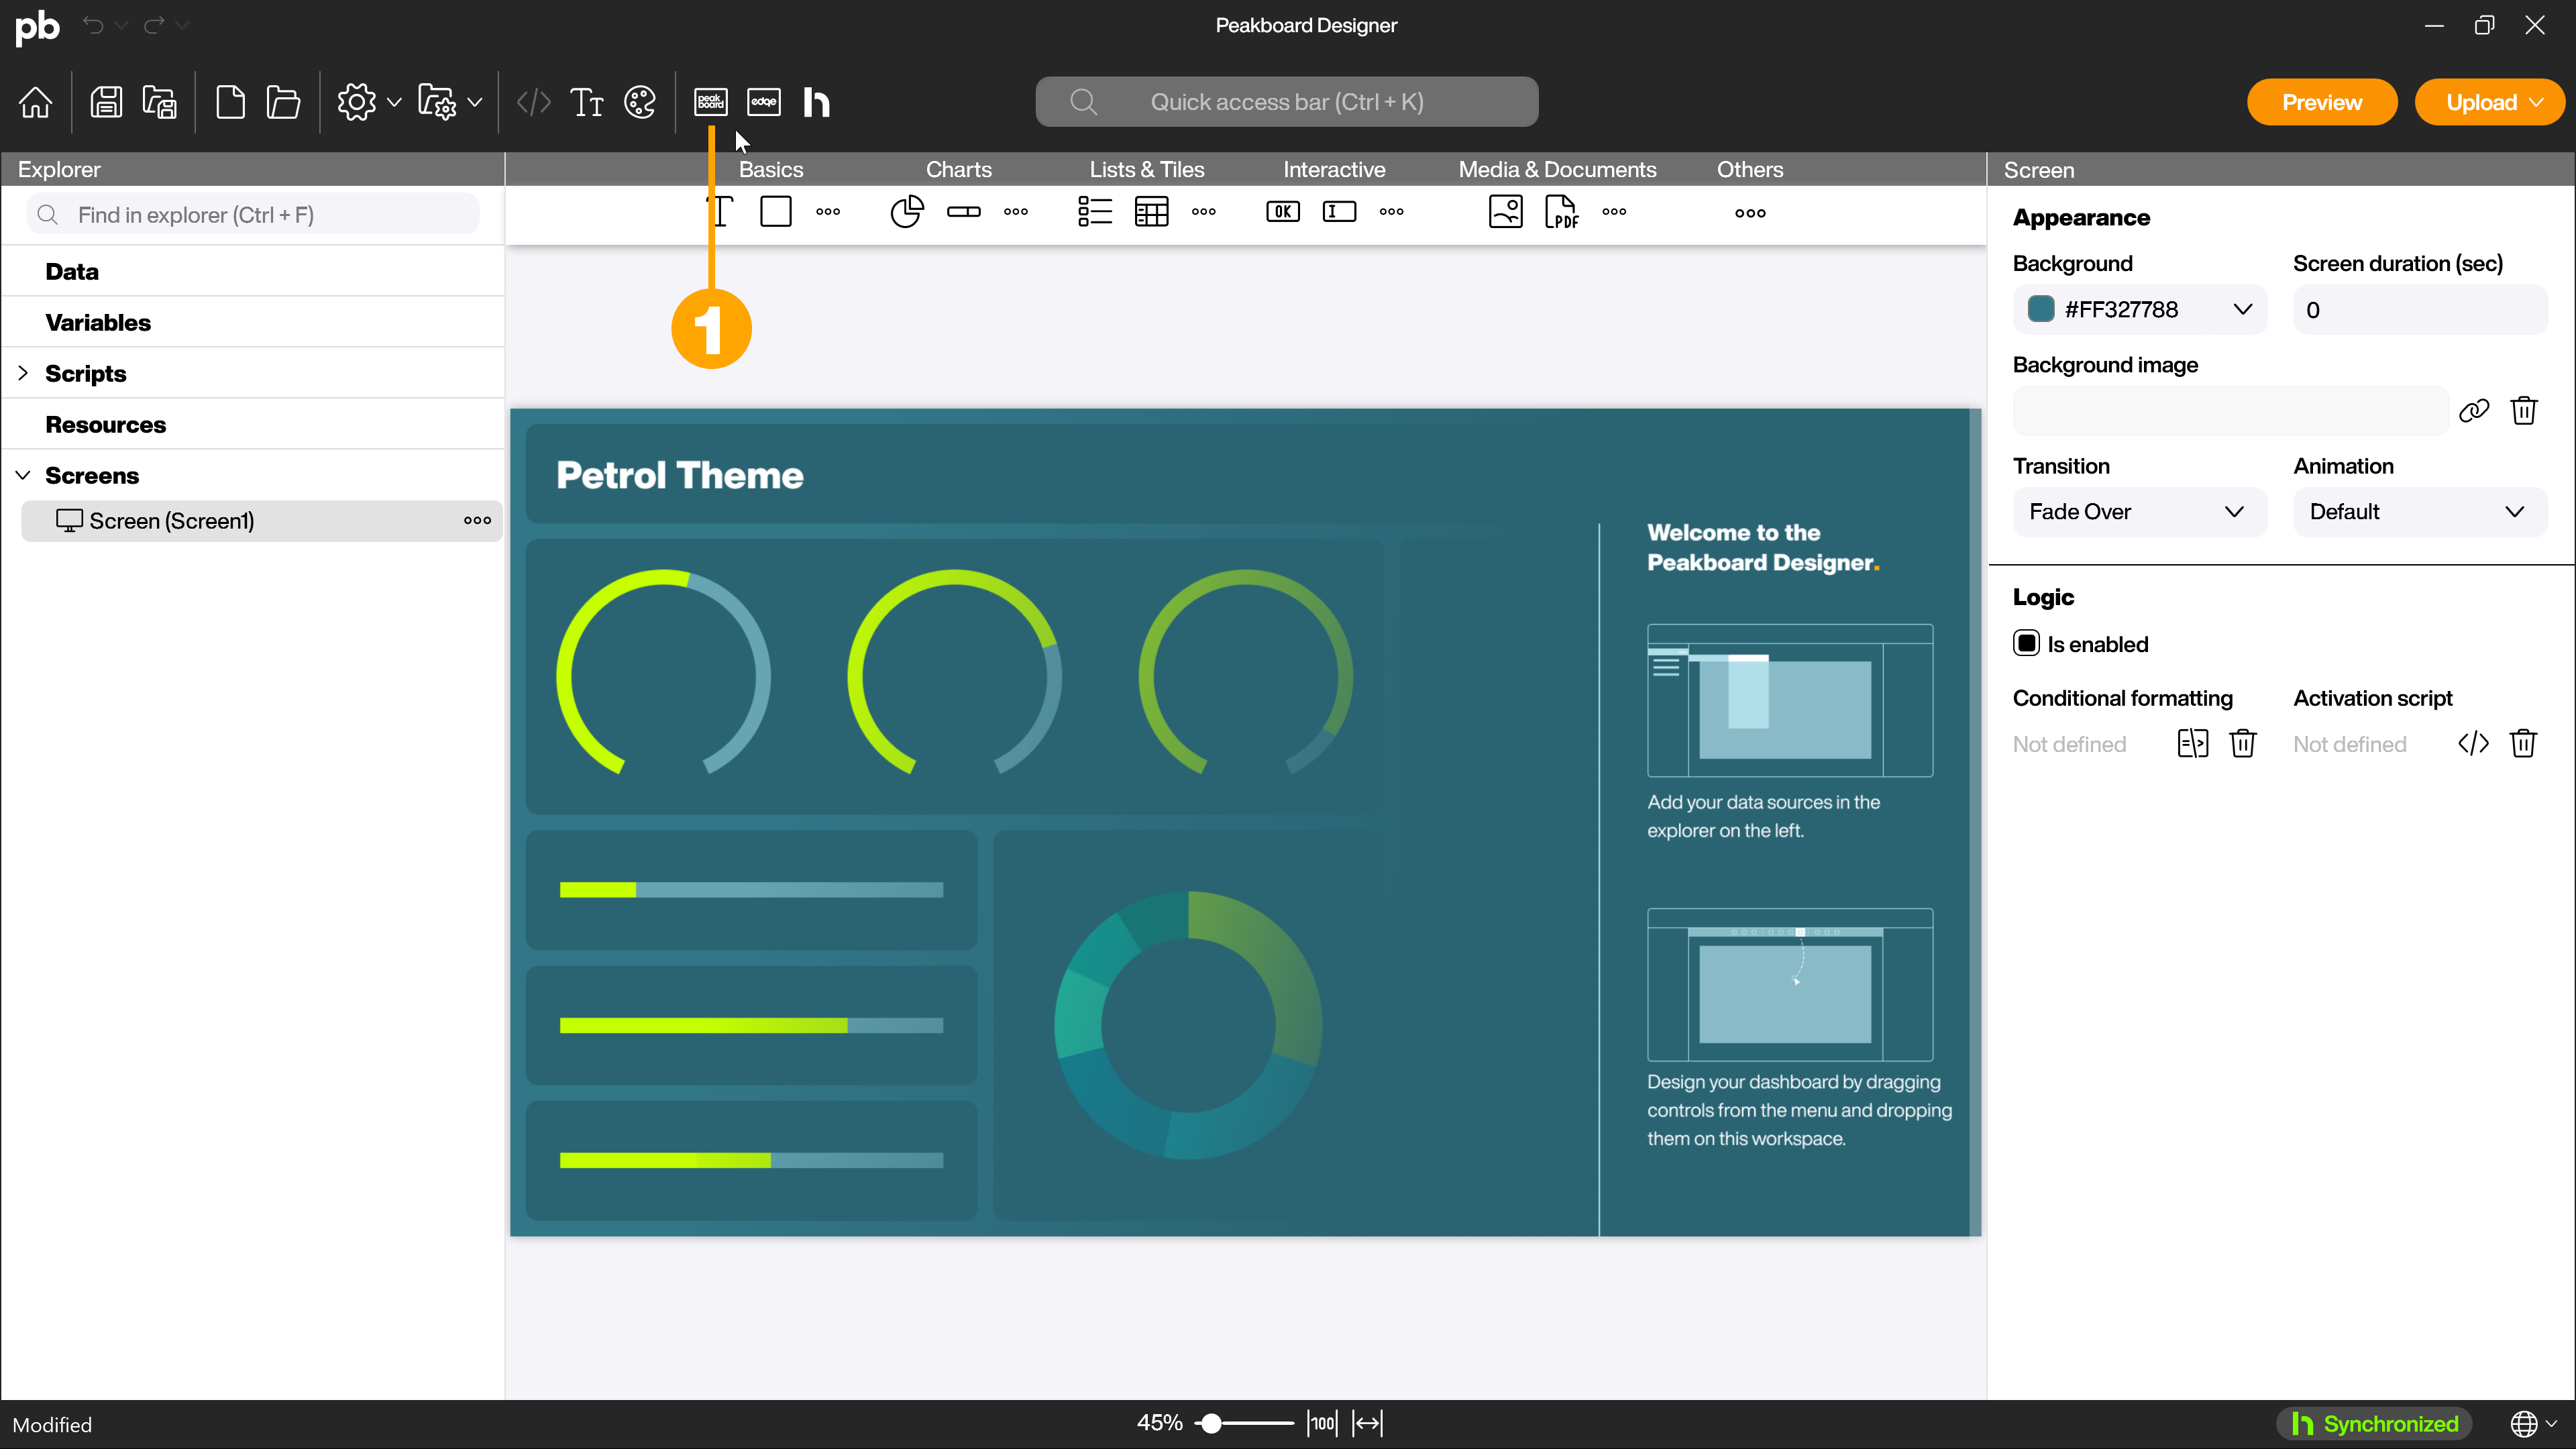
To access the user management, open the Peakboard Box settings in the Peakboard Designer by clicking on the Peakboard Box icon (1) in the menu bar.
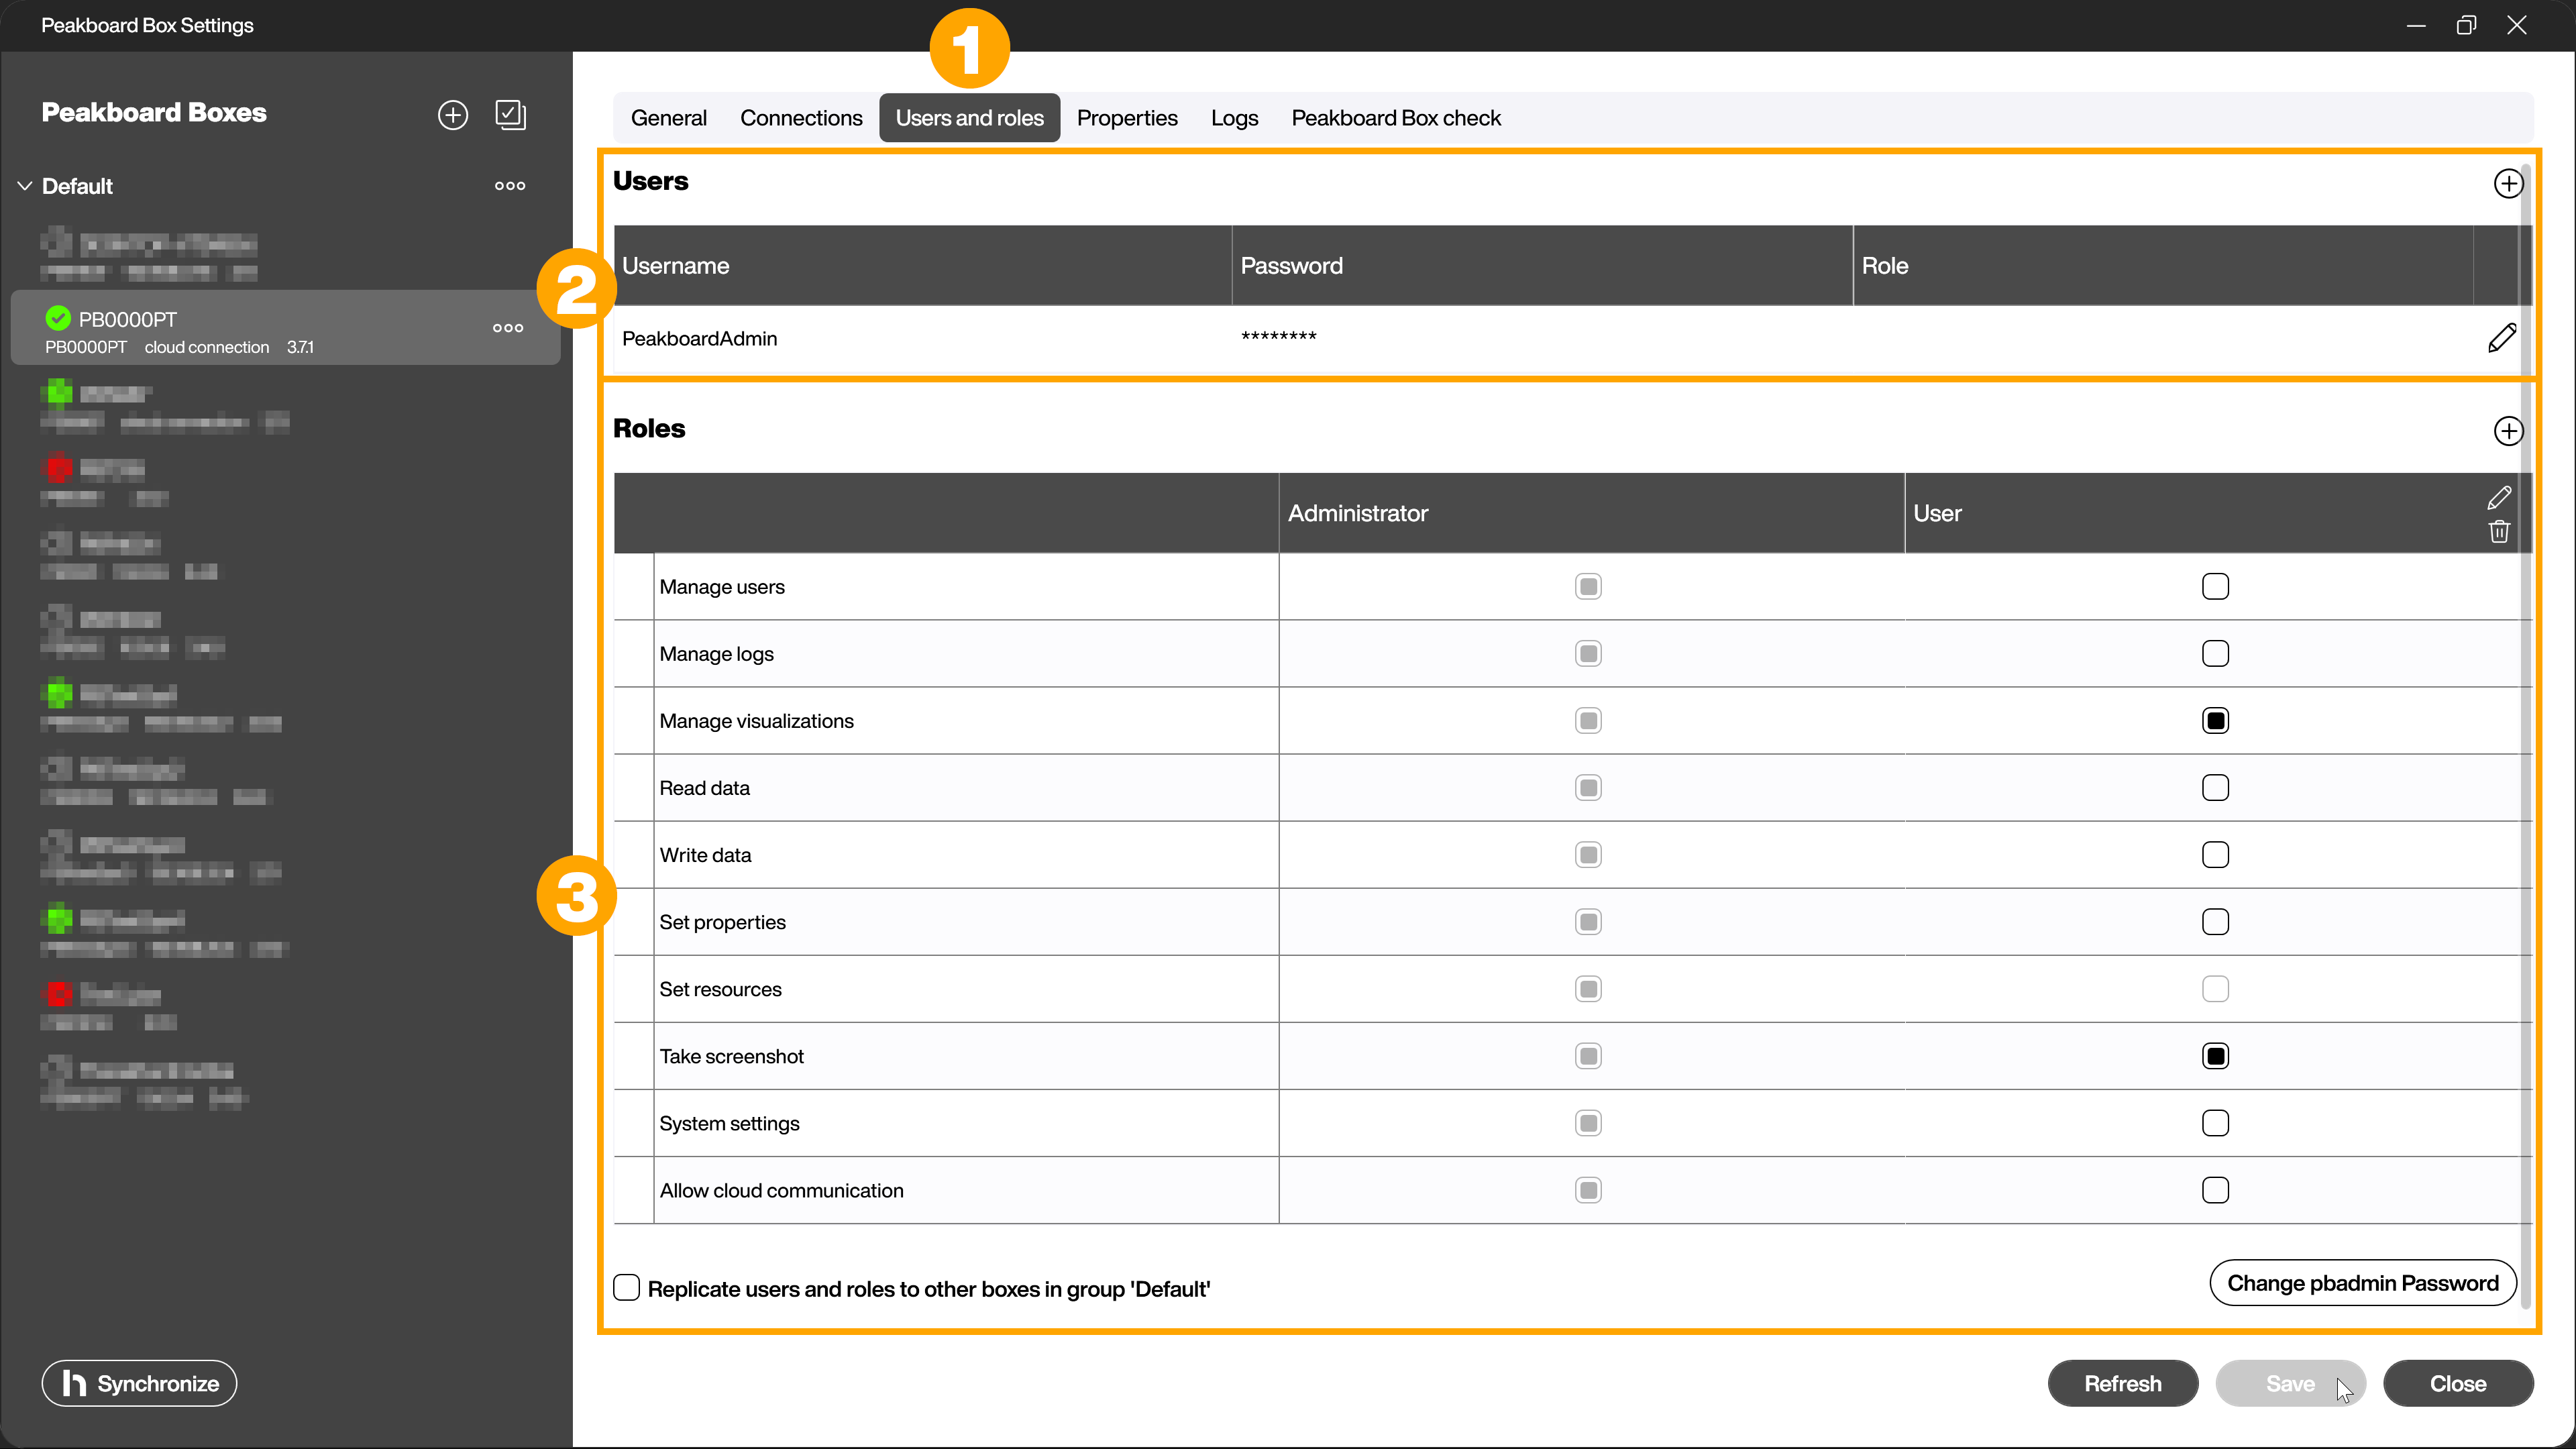
In the [Users and roles] tab (1), make the respective settings for the users (2) and roles (3).
Configuring the roles
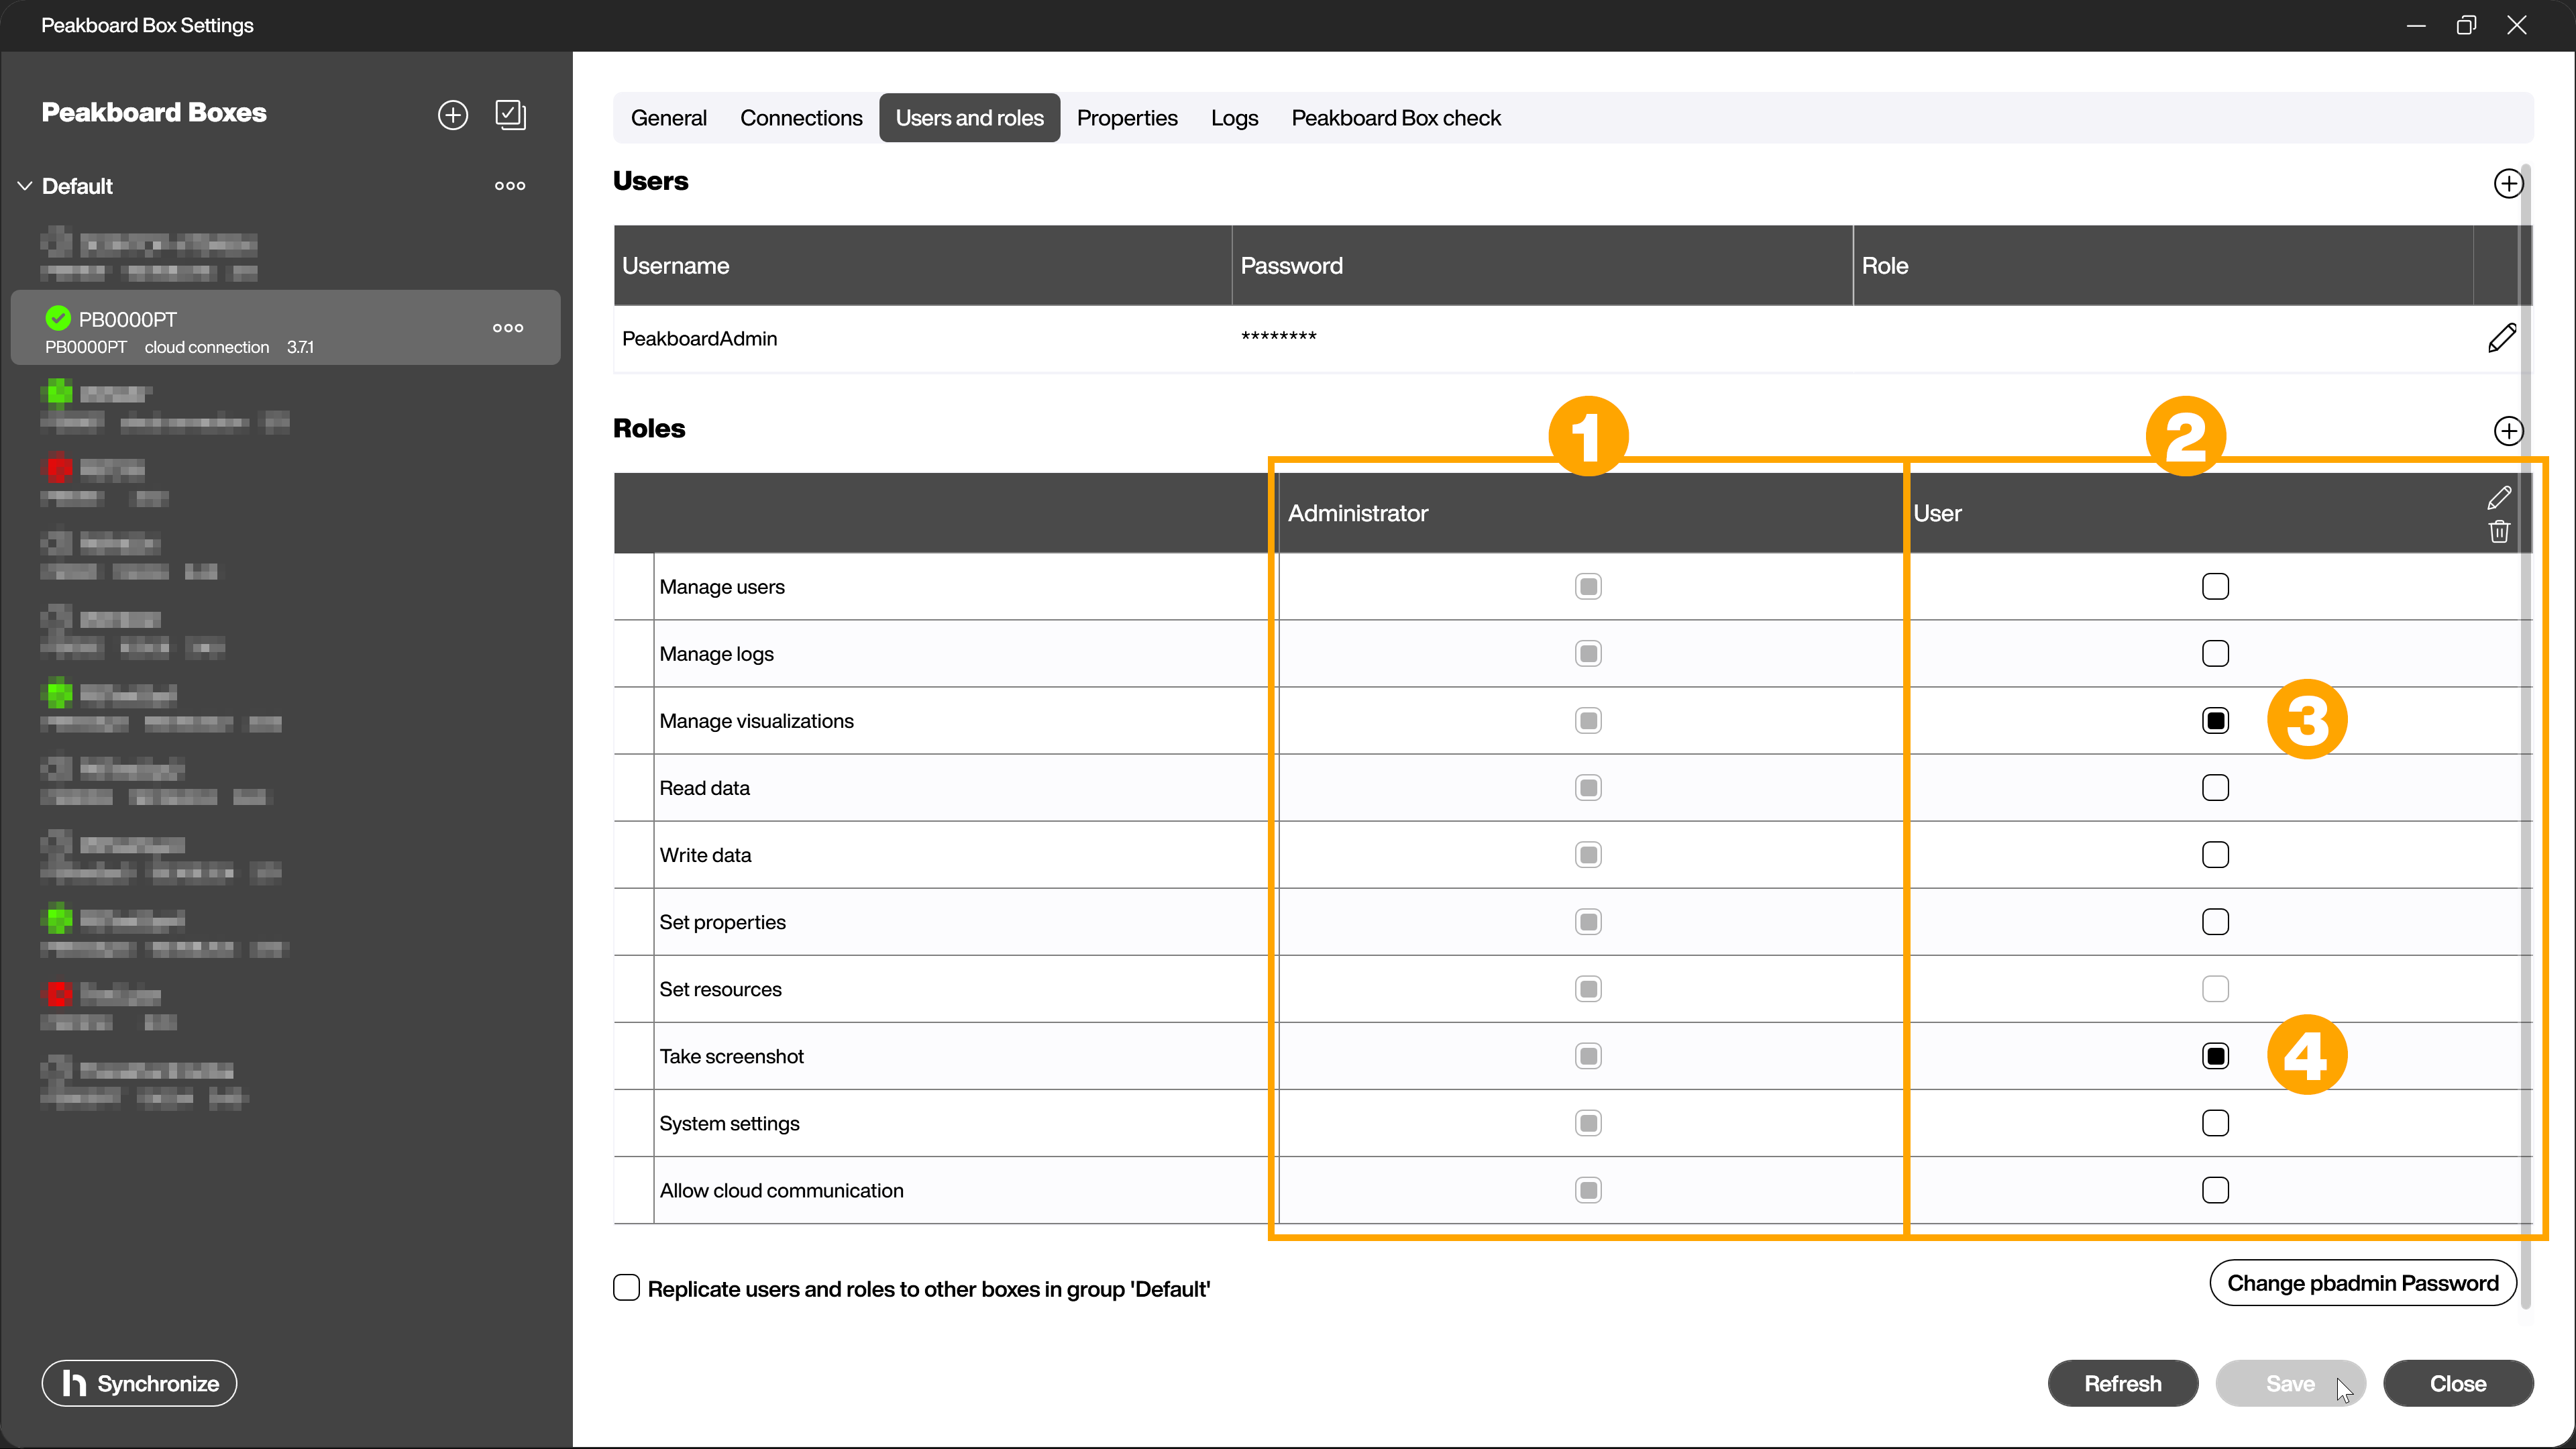
Two roles are predefined by default in the roles area. The [Administrator] (1) has all existing permissions. This role cannot be deleted or customized and is assigned to the standard user. The [User] role (2) is a proposal for a restricted basic user. If this user connects to the Peakboard Box via Peakboard Designer, they can only manage the applications (3), i.e. upload, change or delete them and take screenshots (4). However, they do not have access to user and role management, log management or license or cloud connection settings, for example.
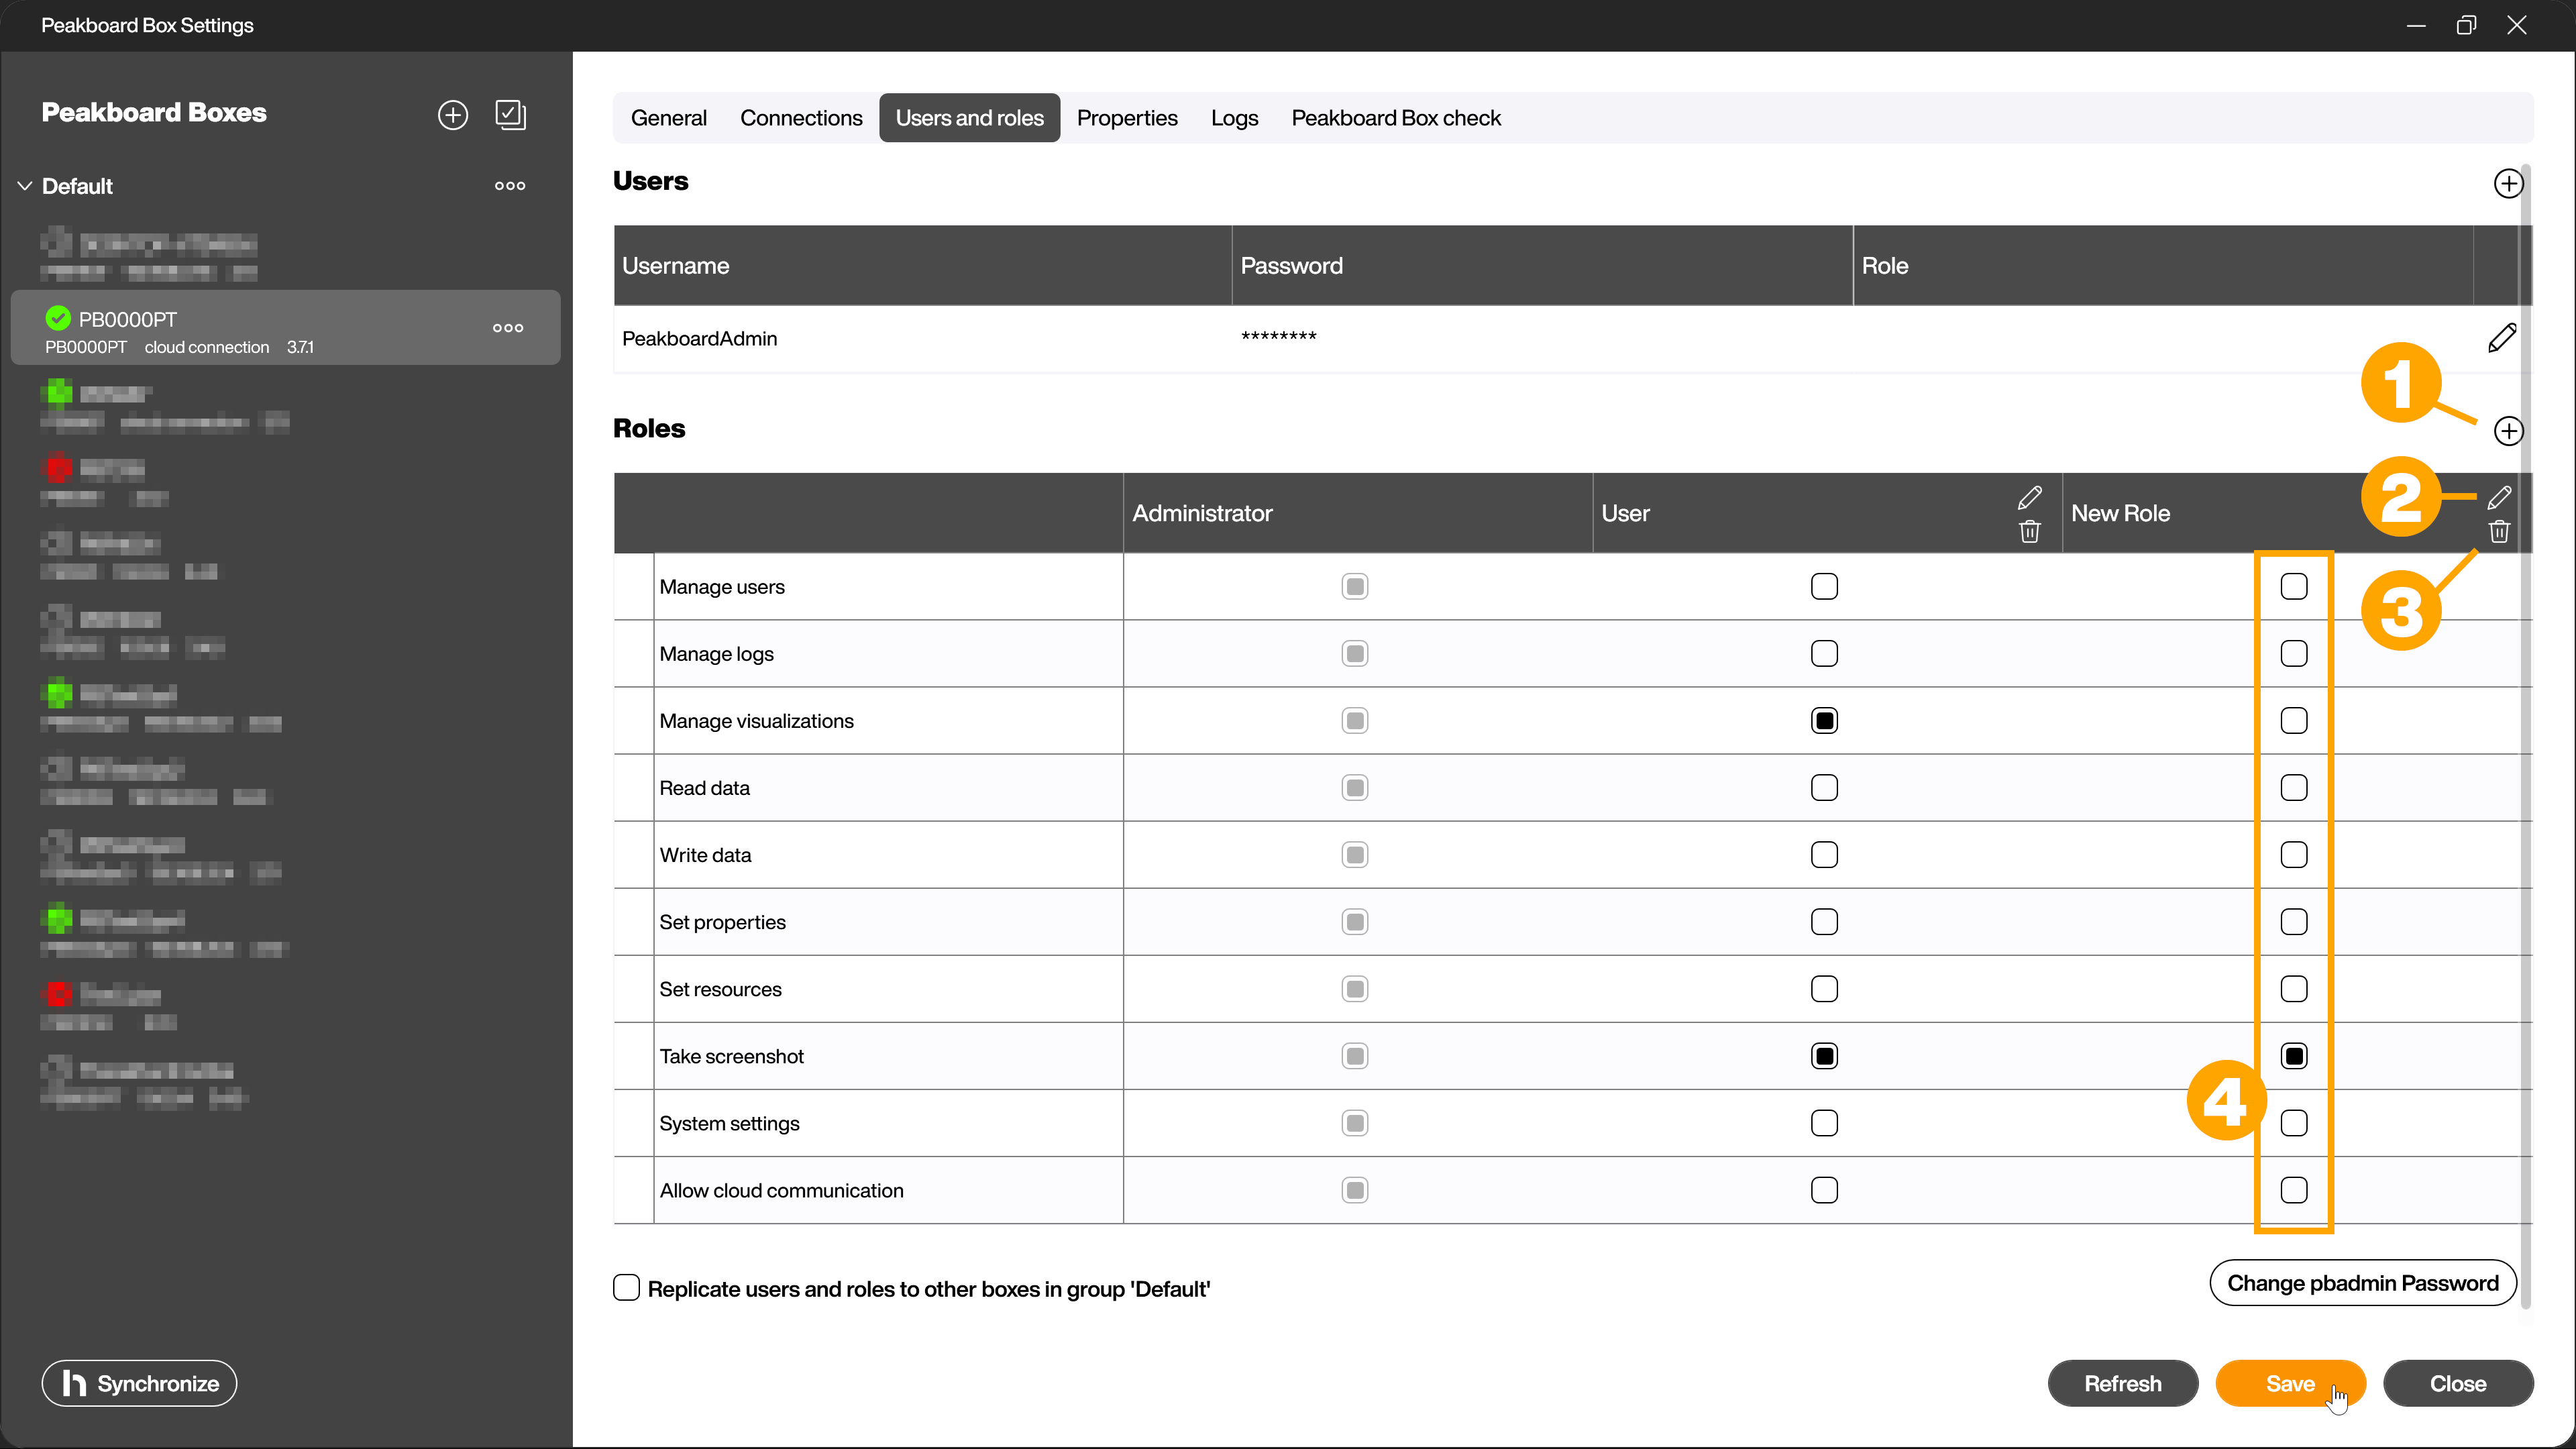
Add and edit a new role
Click on the [+] (1) and add a new role. The added role appears as a new column in the role overview and by default only has the permission to take screenshots. To rename the role, click on the pencil icon (2) next to the name of the new role. You can delete roles by clicking on the recycle bin icon (3). To adjust the permissions, select or deselect the checkboxes for the desired permissions (4).
The following permissions are available for selection.
| Permission | Description |
|---|---|
| Manage Users | Access to the administration of the Peakboard Box users. Users can be added and changed. |
| Manage logs | Access to the logs that are stored on the Peakboard Box. The logs can be read and deleted. |
| Manage applications | Activate, deactivate, upload and delete applications on the Peakboard Box in the Peakboard Designer and via web access. |
| Read data | Share and read variables, lists and global functions externally. |
| Write data | Share variables, lists and global functions externally and write them back. |
| Set properties | Add, change and delete values in the Properties tab in the Peakboard Box settings. These are properties that apply to the entire Peakboard Box. This also includes the license key. This option should therefore be reserved for administrators. |
| Define resources | Change and add existing resources via web access. |
| Take screenshot | Required for the screenshot in the Peakboard Box settings. Minimum requirement for using the Peakboard Hub online. |
| System settings | Change general system settings relating to the Peakboard Box, such as the Peakboard Box name, network connections and similar. |
| Allow cloud communication | Enable communication with the Peakboard Hub online. |
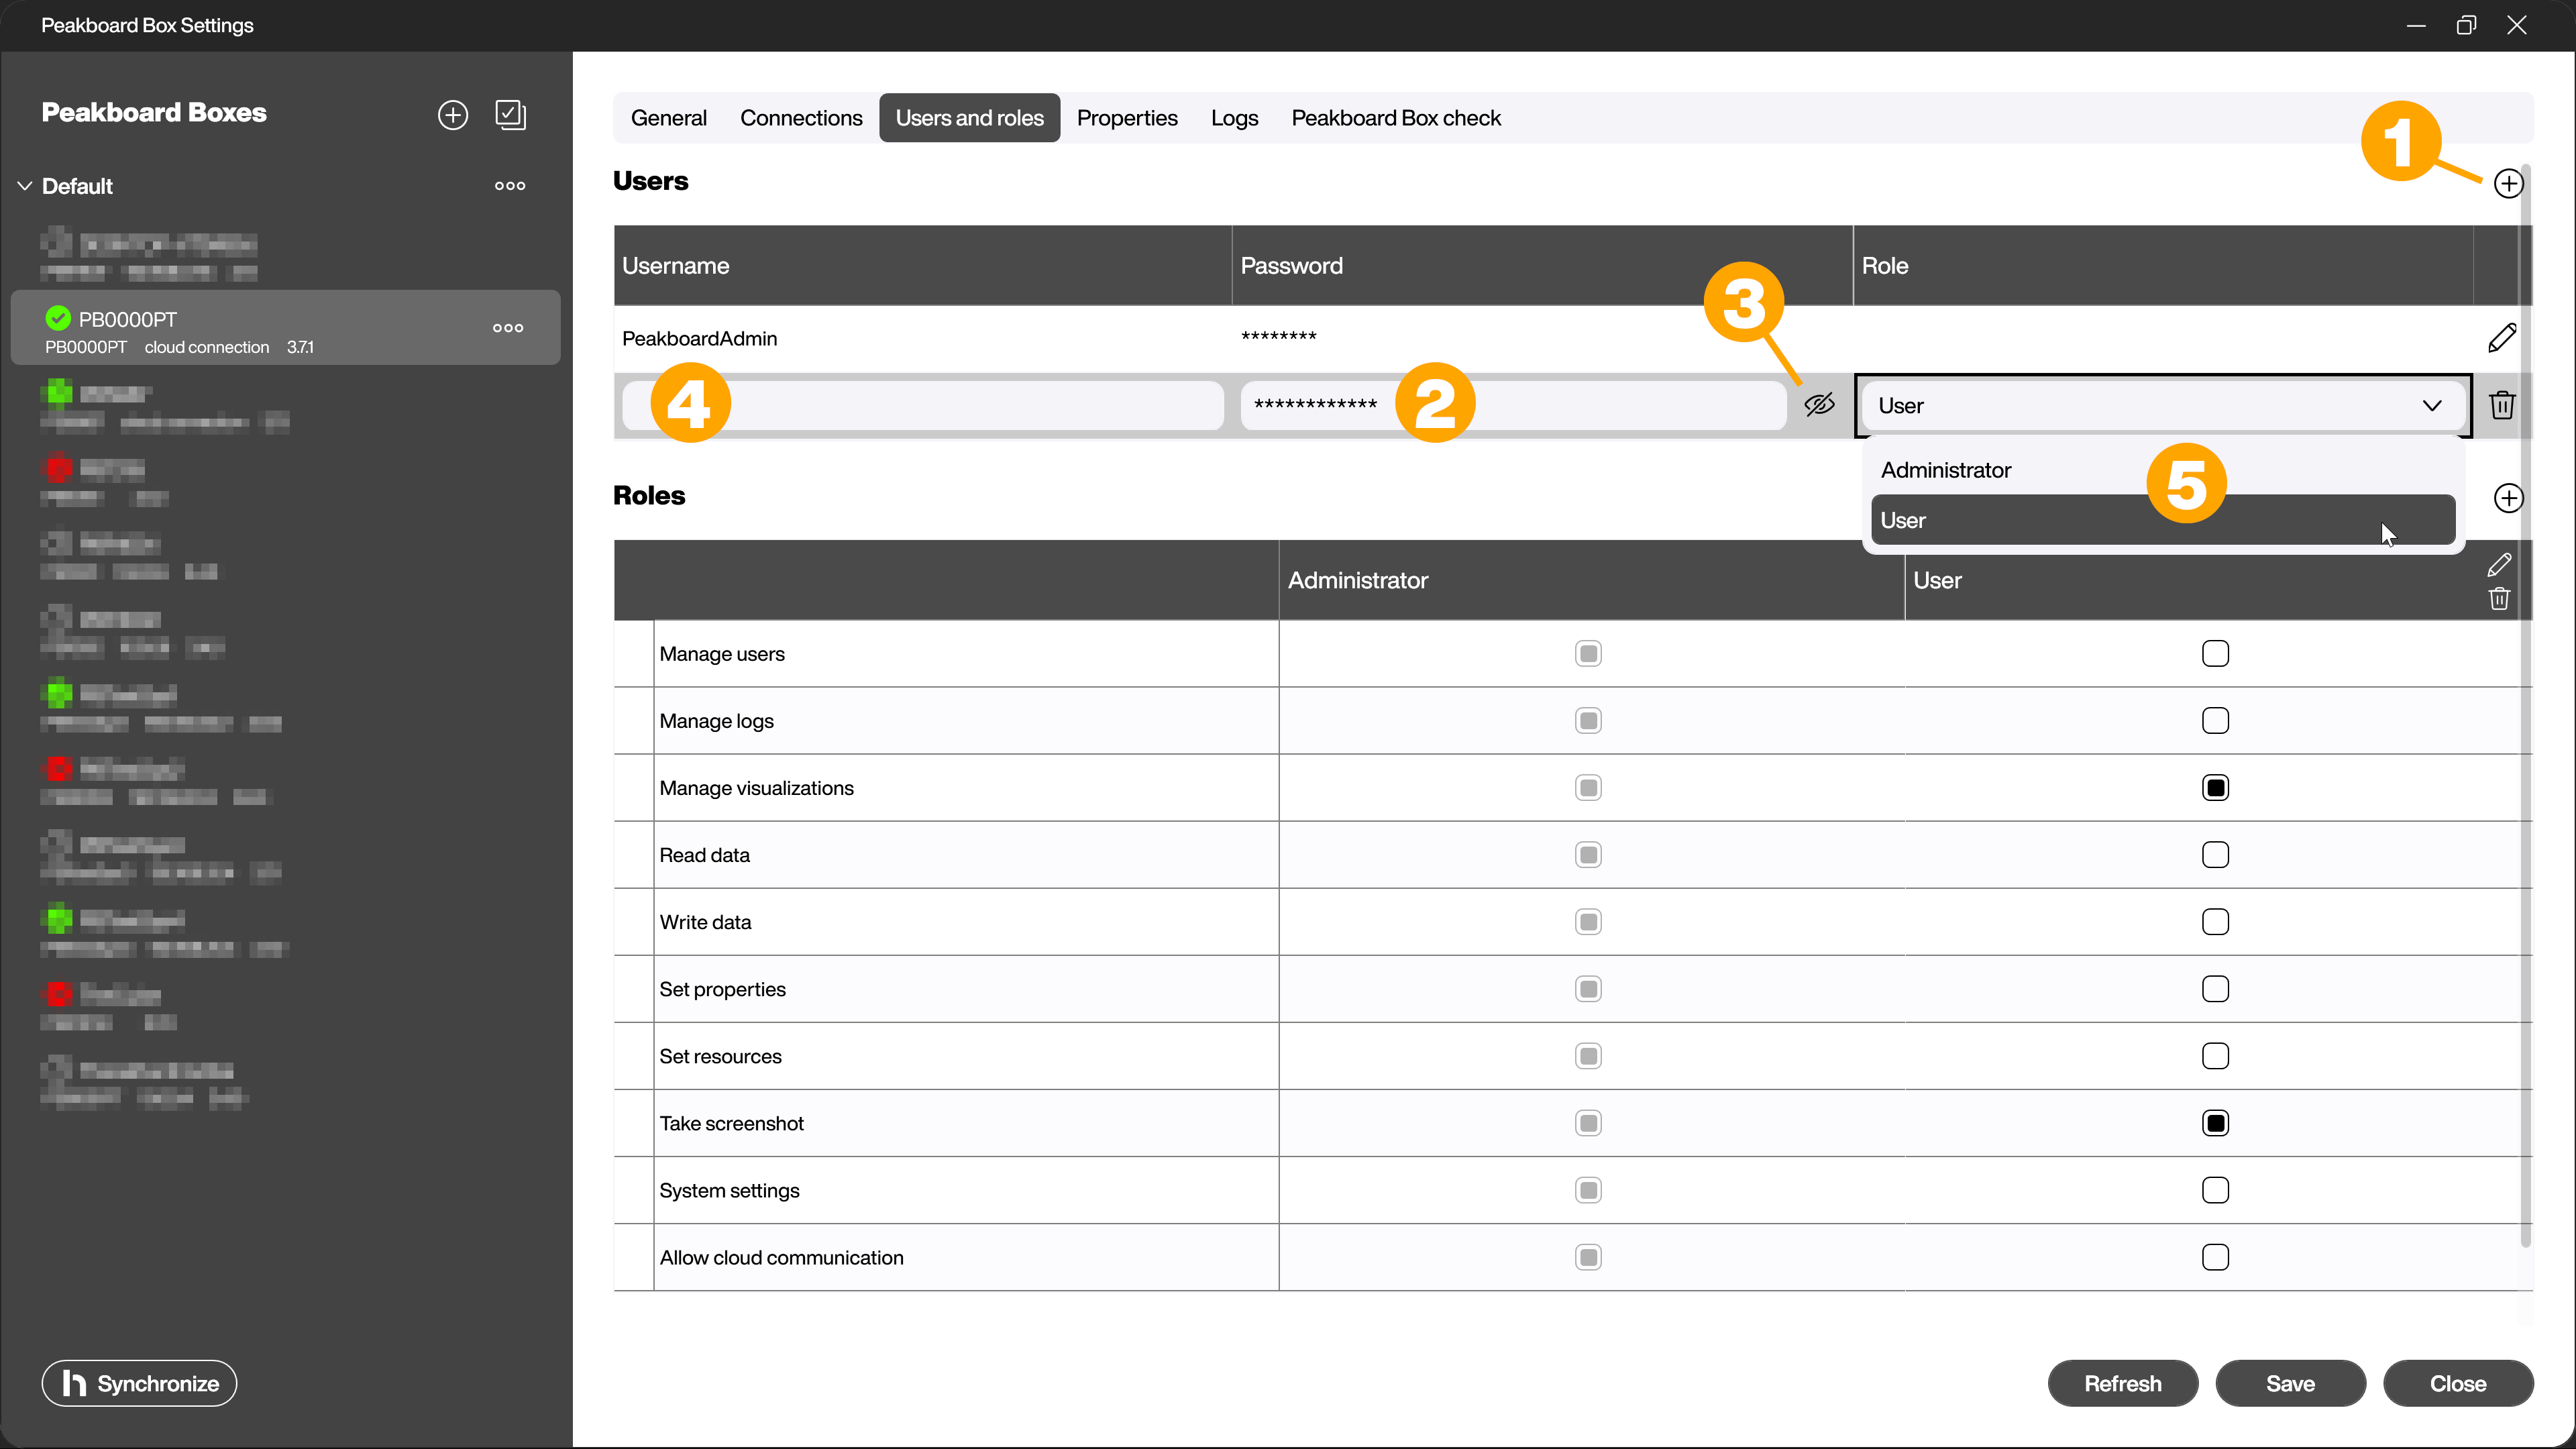
Configure the users
Once you have configured the roles, you can create all the required users and assign them the appropriate role. To add a new user, click on the [+] (1). A secure password is automatically generated for the new user (2). Click on the eye symbol (3) to display it in plain text. You can also change the password manually if required. Give the new user a name in the [User name] column (4). In the [Role] column (5), select the desired role for the user from the drop-down menu.
To reduce configuration effort, you can automatically apply the settings for users and roles to all Peakboard Boxes that are in the same group. To do this, activate the checkbox [Replicate users and roles to other Peakboard Boxes in the group ‘Name of current group’] (1).
Use Peakboard Box with user context
To use the Peakboard Box in the desired user context, the respective Peakboard Box with the corresponding user must be added to the Peakboard Designer. To do this, enter the respective user name and password when adding the Peakboard Box. Now only actions that match the permissions assigned to the user can be carried out.
Operating system administrator account pbadmin
Independent of the user management of the Peakboard Box in the Peakboard Designer, there is an administrator account for the Windows operating system in the background of the Peakboard Box. The default user here is pbadmin. You will receive the password by email when the Peakboard Box is shipped to you. You only need this user for administrative tasks in the background, not for your work with the Peakboard Box in the Peakboard Designer.
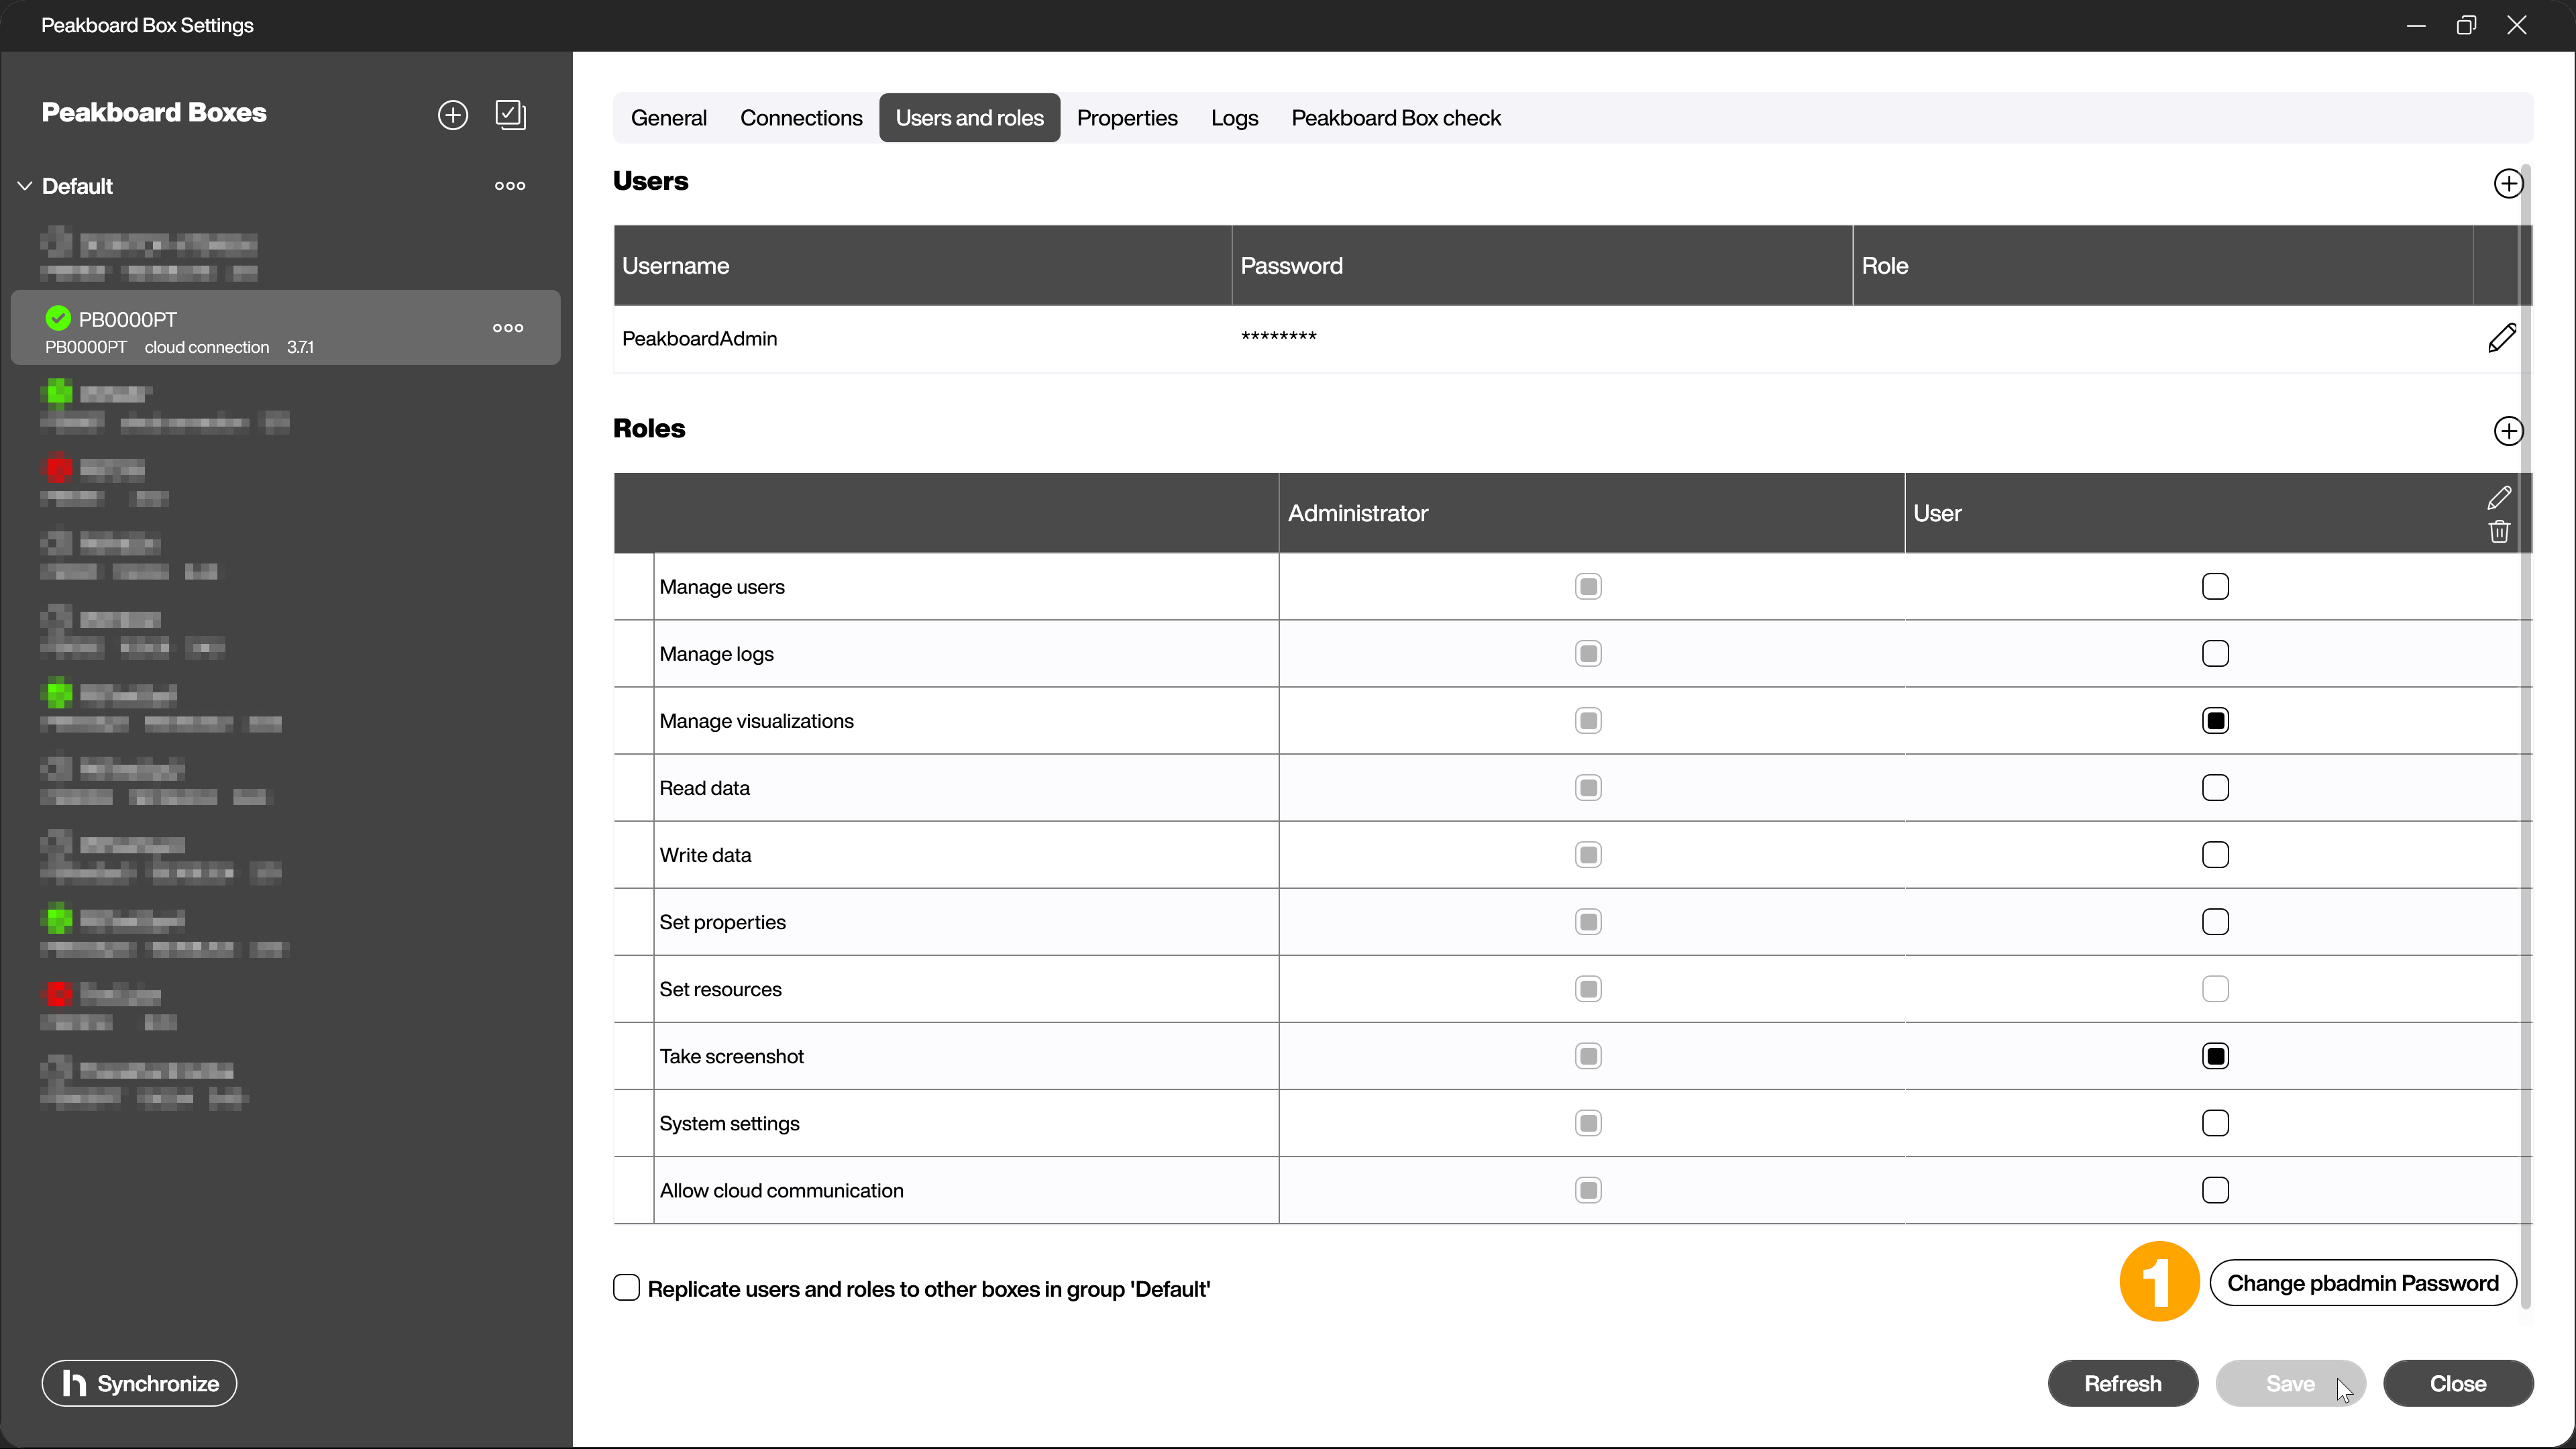
To change the password of the ‘pbadmin’, click on the [Change pbadmin Password] button (1) in the [Roles] area.